Fuel CMS is a flexible, user-friendly content management system built on the CodeIgniter framework. This guide will take you through the steps of installing Fuel CMS on an Ubuntu 22.04 server with Nginx and securing it with Let’s Encrypt SSL.
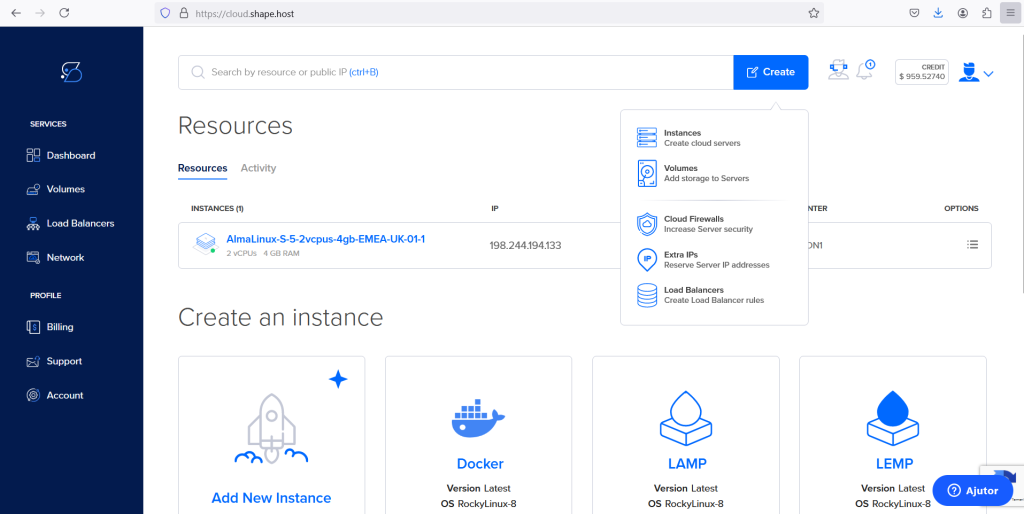
Step 1: Initiating Instance Creation
- Creating a New Instance
- To create a new instance, click on the blue “Create” button located in the top-right corner of the page.
- Select “Add New Instance” to begin setting up a new virtual machine.
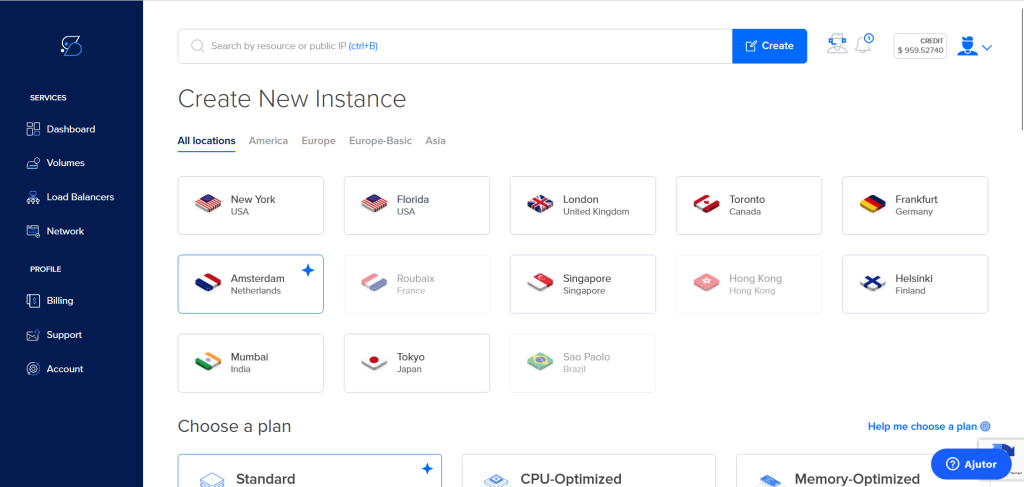
Step 2: Choosing a Location
- Select a Data Center
- On the “Create New Instance” page, choose your preferred data center location. For example, you might select “Amsterdam, Netherlands”.
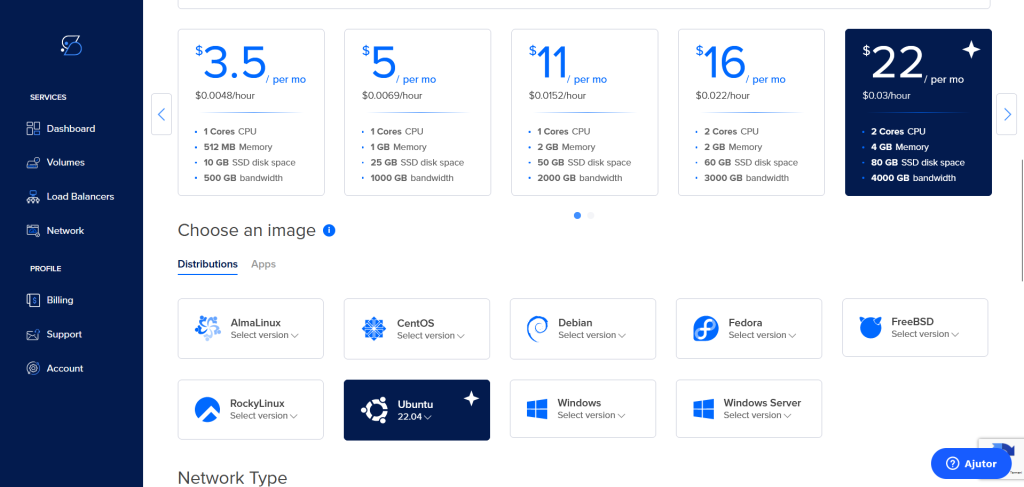
Step 3: Selecting a Plan
- Choose a Plan
- Pick a plan that meets your requirements. Options vary in specifications and price, from $3.5 to $22 per month, offering different CPU, memory, storage, and bandwidth.
- Choose an Operating System
- Scroll to the “Choose an image” section and select Ubuntu 22.04 from the list of available distributions.
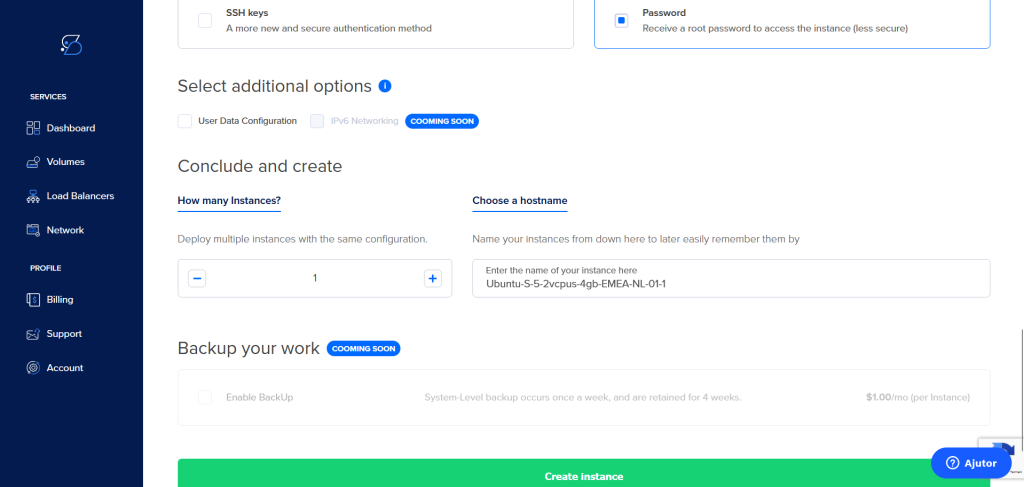
Step 4: Authentication Method
- Select an Authentication Method
- Choose between SSH keys (recommended for better security) or a password for root access. In this guide, we’ll proceed with the password option.
- Complete Instance Creation
- Click the “Create Instance” button at the bottom of the page to finalize the setup.
Step 5: Connecting to Your Instance
- Retrieve SSH Credentials
- Note the IP address of your newly created instance from the Shape.host dashboard.
- Connect via SSH
- Open a terminal on your local machine and use the following command to connect to your instance:
ssh root@your_instance_ip- Replace
your_instance_ipwith the actual IP address of your instance.
- A server running Ubuntu 22.04 with root access.
- A domain name pointing to your server.
- Basic knowledge of command-line operations.
Step 6: Update System Packages
First, update your system’s package index and upgrade installed packages:
apt update
apt upgrade -y
Step 7: Install Nginx, PHP, and Dependencies
Install Nginx, PHP, and necessary PHP extensions:
apt install nginx php-fpm php-mysql php-xml php-mbstring php-zip php-curl unzip -y
Step 8: Install MariaDB
Install MariaDB server:
apt install mariadb-server -y
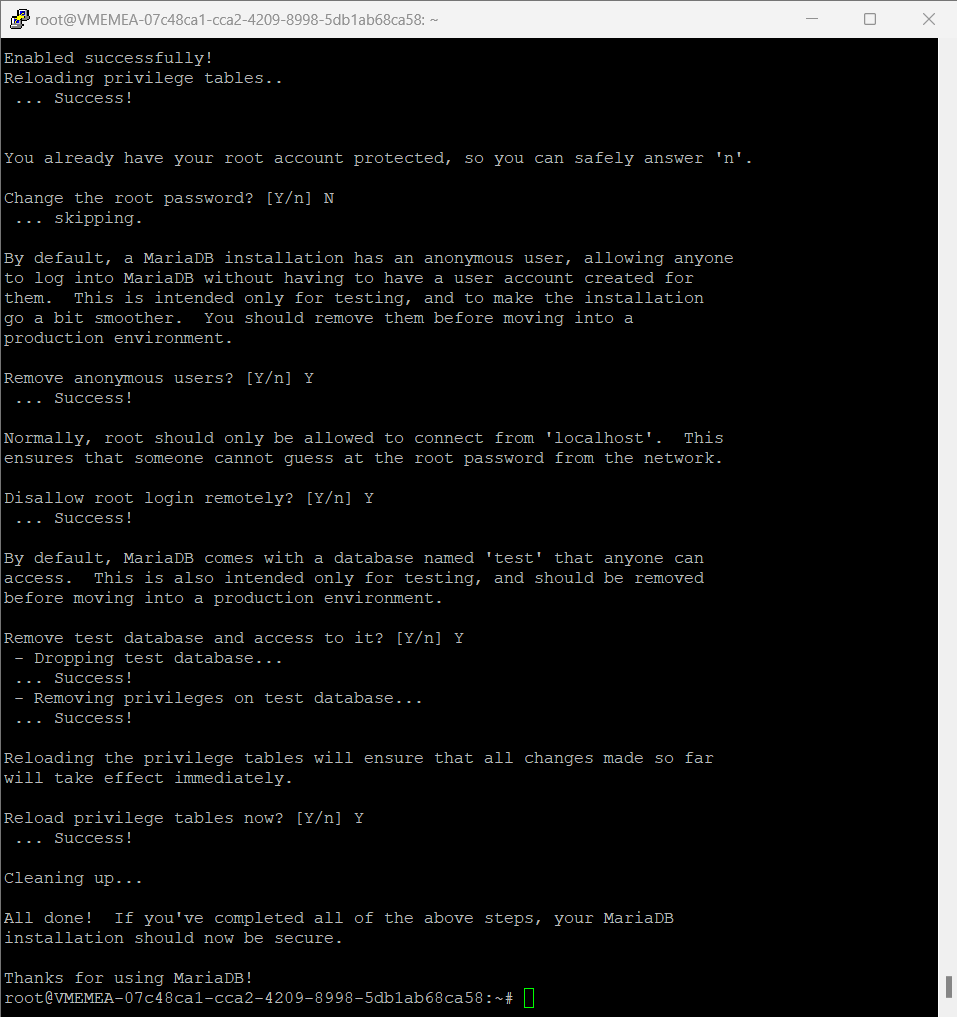
Secure MariaDB installation:
mysql_secure_installation
Follow the prompts to set the root password and secure your installation.
Step 9: Create a Database for Fuel CMS
Log in to the MariaDB shell:
mysql -u root -p
Create a new database and user for Fuel CMS:
CREATE DATABASE fuelcms;
CREATE USER 'fuelcmsuser'@'localhost' IDENTIFIED BY 'your_password';
GRANT ALL PRIVILEGES ON fuelcms.* TO 'fuelcmsuser'@'localhost';
FLUSH PRIVILEGES;
EXIT;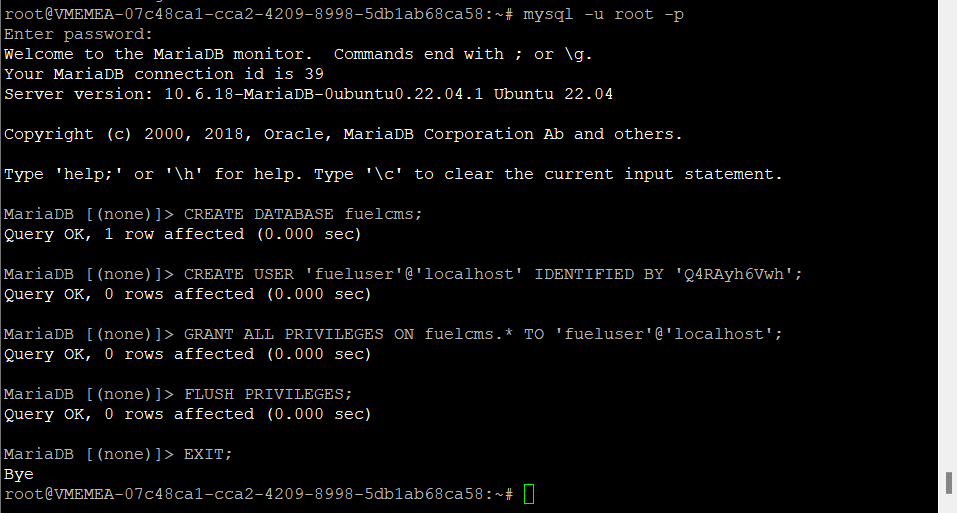
Replace your_password with a strong password of your choice.
Step 10: Download and Install Fuel CMS
Navigate to the web root directory and download Fuel CMS:
cd /var/www/html
wget https://github.com/daylightstudio/FUEL-CMS/archive/master.zip
unzip master.zip
mv FUEL-CMS-master fuelcms
cd fuelcms
Set the correct permissions:
chown -R www-data:www-data /var/www/html/fuelcms
chmod -R 755 /var/www/html/fuelcms
Step 11: Configure Nginx for Fuel CMS
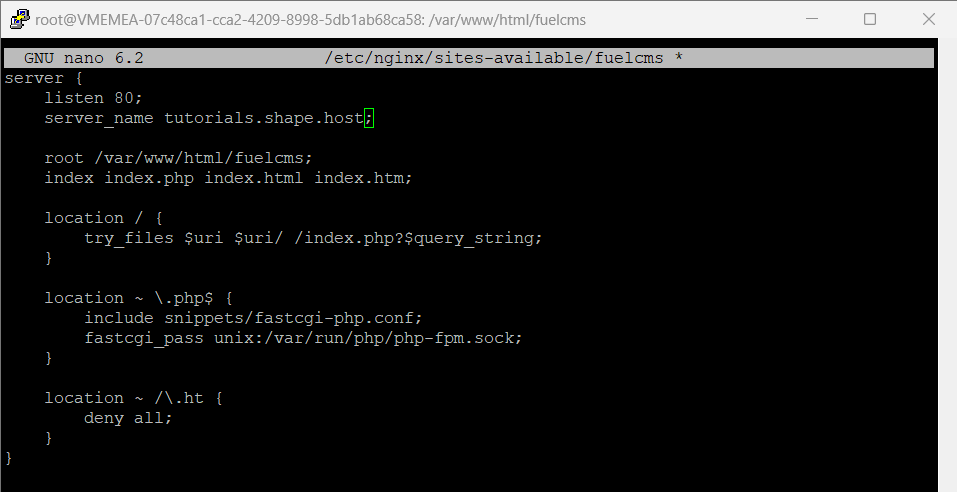
Create a new Nginx configuration file for Fuel CMS:
nano /etc/nginx/sites-available/fuelcms
Add the following configuration:
server {
    listen 80;
    server_name your_domain;

    root /var/www/html/fuelcms;
    index index.php index.html index.htm;

    location / {
        try_files $uri $uri/ /index.php?$query_string;
    }

    location ~ \.php$ {
        include snippets/fastcgi-php.conf;
        fastcgi_pass unix:/var/run/php/php-fpm.sock;
    }

    location ~ /\.ht {
        deny all;
    }
}
Enable the site configuration by creating a symlink:
ln -s /etc/nginx/sites-available/fuelcms /etc/nginx/sites-enabled/
Test the Nginx configuration:
nginx -t
Reload Nginx to apply the changes:
systemctl reload nginx
Step 12: Complete Fuel CMS Installation
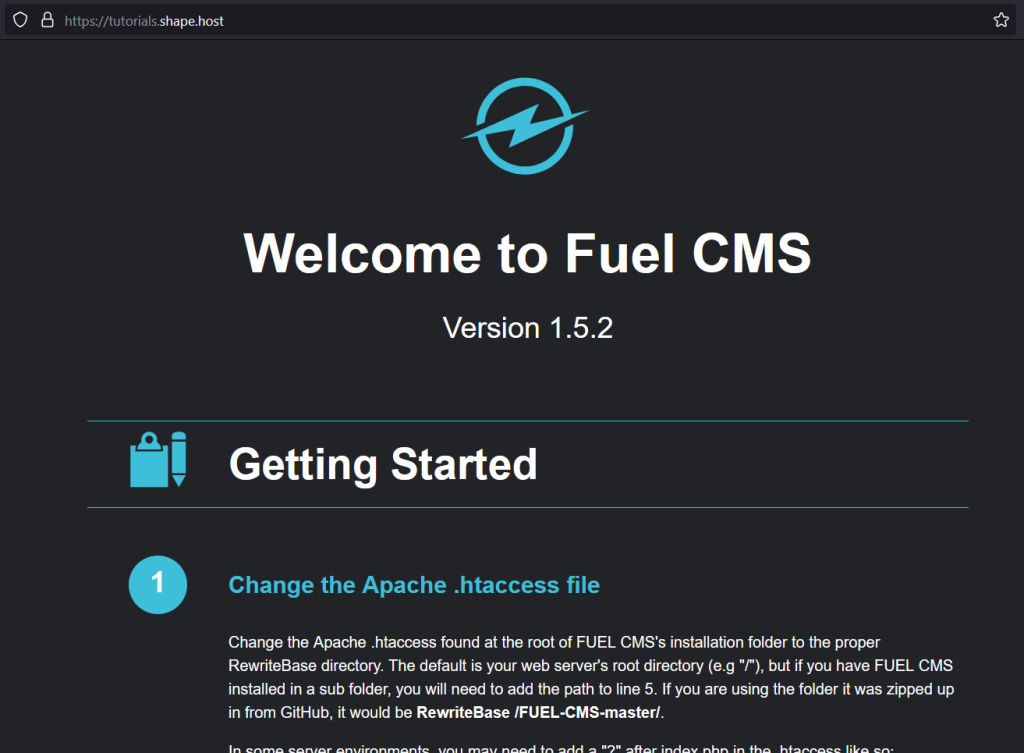
Open your web browser and navigate to http://your_domain. Follow the on-screen instructions to complete the Fuel CMS installation, providing the database details you configured earlier.
Step 13: Secure Fuel CMS with Let’s Encrypt SSL
Install Certbot and the Nginx plugin:
apt install certbot python3-certbot-nginx -y
Obtain an SSL certificate:
certbot --nginx -d your_domain -d www.your_domain
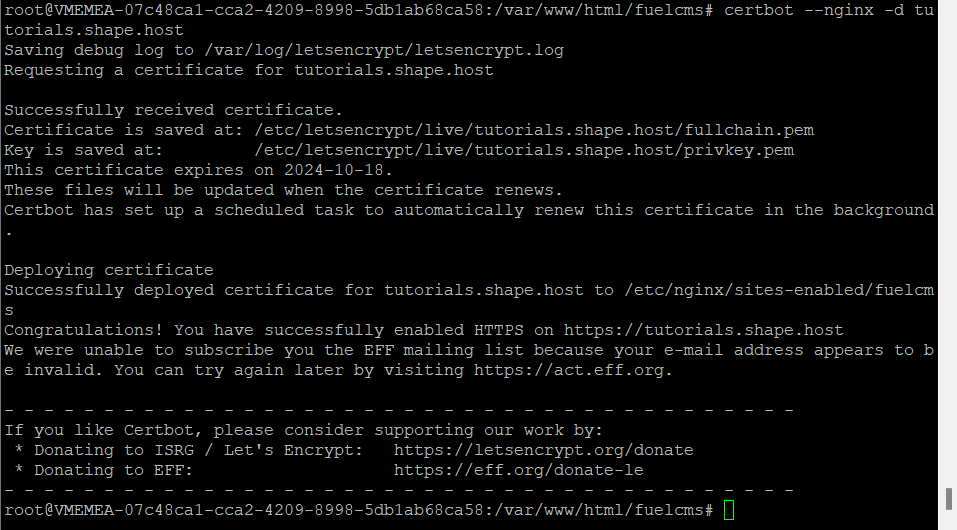
Certbot will automatically configure SSL for your Nginx site.
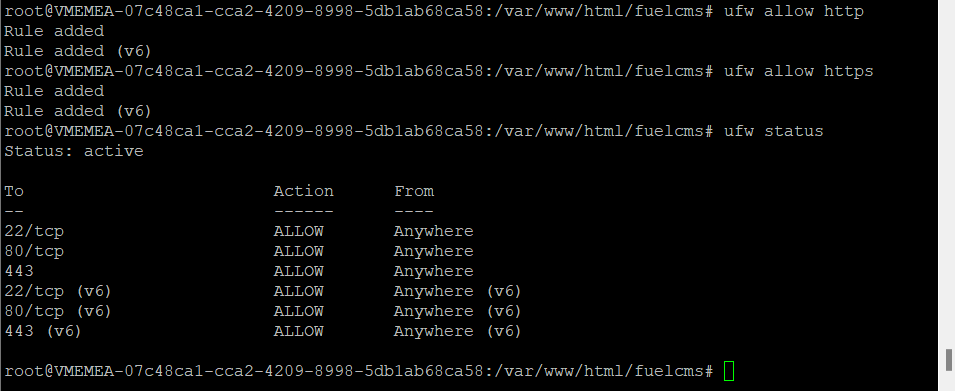
Step 14: Allow SSH in Firewall
To ensure you don’t lose access to your server, allow SSH through the firewall:
ufw allow ssh
ufw allow http
ufw allow https
ufw enable
For reliable and high-performance Linux SSD VPS hosting solutions, consider Shape.host. Their robust infrastructure and excellent support ensure that your Fuel CMS, Nginx, and SSL setup runs smoothly and securely. Explore Shape.host Cloud VPS options to efficiently scale your projects.