Setting up a local development environment on Ubuntu 22.04 with PHP 8.1, Nginx, and Composer is essential for web developers looking to build and test PHP applications efficiently. This comprehensive guide will walk you through installing PHP 8.1, configuring necessary extensions, setting up Nginx as the web server, installing Composer for managing dependencies, and creating a virtual host. Let’s get started!
Step 1: Deploying a Cloud Instance on Shape.host
- Log in to Shape.host Dashboard:
- Navigate to the Shape.host website and log in to your account.
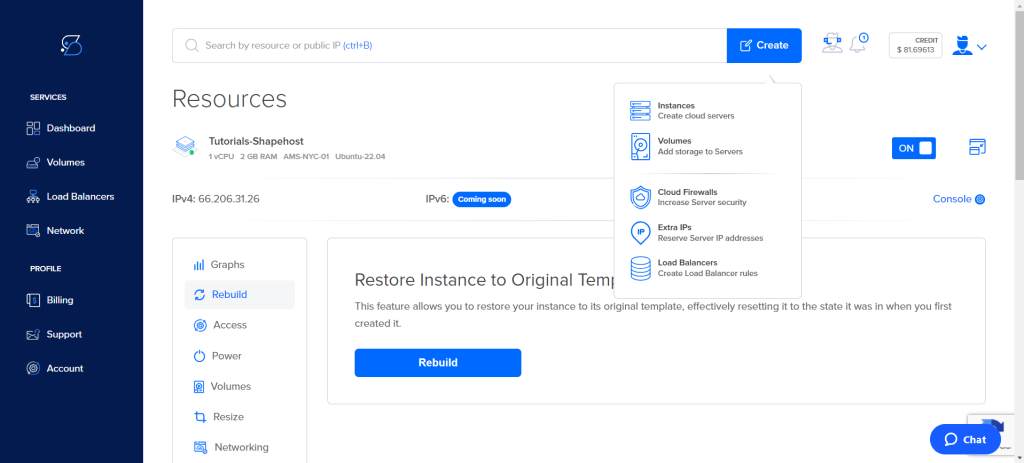
- Create a New Instance:
- Click on the “Create” button located at the top right corner of the dashboard.
- From the dropdown menu, select “Instances”.
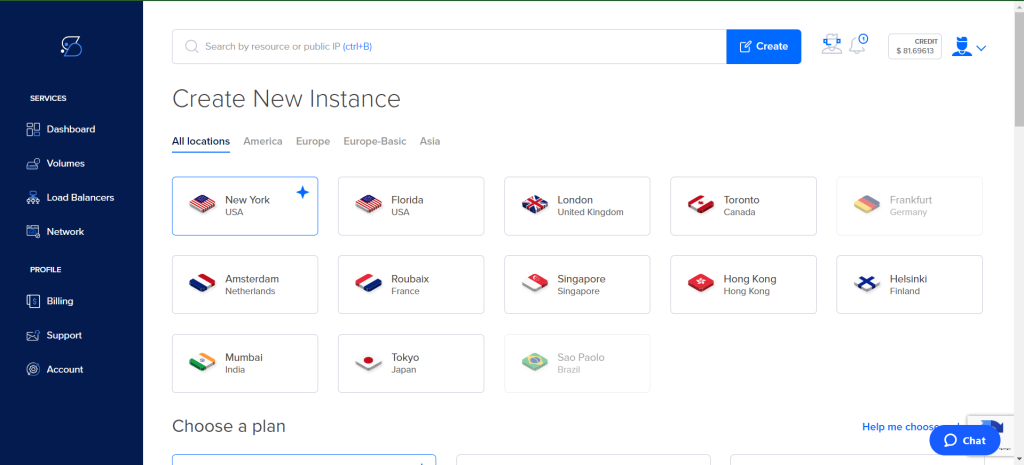
- Select Instance Location:
- Choose the desired location for your server. For this tutorial, we’ll select “New York, USA”.
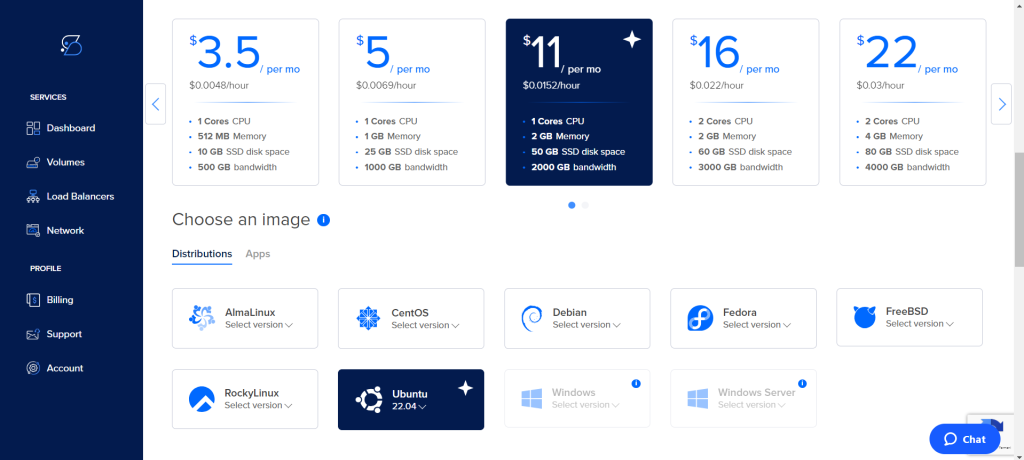
- Choose a Plan:
- Select a plan that fits your requirements. For example, you might choose a plan with 2 cores CPU, 2 GB Memory, and 50 GB SSD disk space.
- Select an Operating System:
- Scroll down to the “Choose an image” section and select “Ubuntu 22.04”.
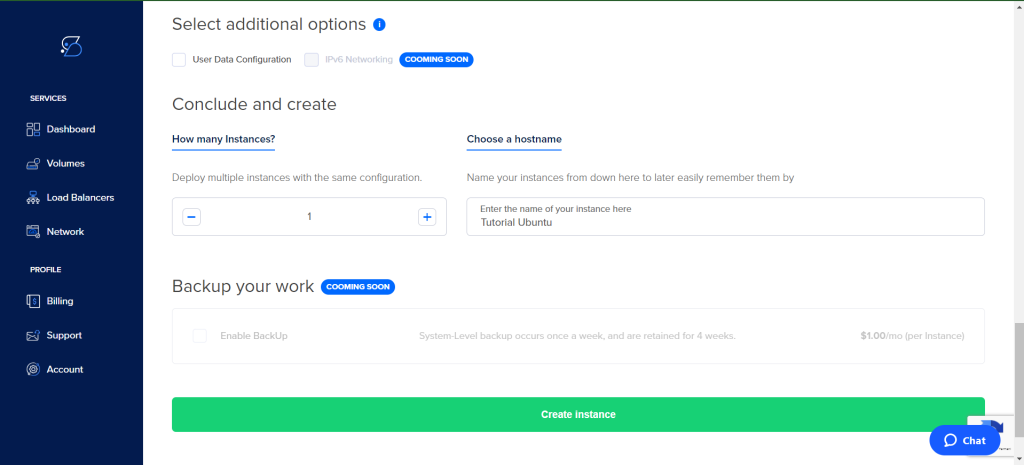
- Configure Additional Options:
- (Optional) You can configure additional options like User Data Configuration and IPv6 Networking.
- Enter a hostname for your instance, e.g., “Tutorial Ubuntu”.
- Click on the “Create instance” button to deploy the instance.
Step 2: Connecting to Your Instance
- Retrieve SSH Credentials:
- Note the IP address of your newly created instance from the Shape.host dashboard.
- Connect via SSH:
- Open a terminal on your local machine.
- Use the following command to connect to your instance:
ssh root@your_instance_ip - Replace
your_instance_ipwith the actual IP address of your instance.
Step 3: Update and Upgrade Your System
Ensure your system is up-to-date and all packages are upgraded to the latest versions:
apt update
apt upgrade -y
Step 4: Install Required Dependencies
Install essential packages needed for adding repositories and installing software:
apt install software-properties-common ca-certificates lsb-release apt-transport-https curl git -y
Step 5: Add the PHP Repository
Add the repository that contains PHP 8.1 packages:
add-apt-repository ppa:ondrej/php
apt update
Step 6: Install PHP 8.1 and Extensions
Install PHP 8.1 and the necessary PHP extensions:
apt install php8.1 php8.1-fpm php8.1-mysql php8.1-curl php8.1-mbstring php8.1-xml -y
Step 7: Install Composer
Composer is a dependency manager for PHP. Install Composer globally on your system:
curl -sS https://getcomposer.org/installer | php
mv composer.phar /usr/local/bin/composer
chmod +x /usr/local/bin/composer
Verify the installation by checking the Composer version:
composer --version
You should see output indicating the installed Composer version.
Step 8: Configure PHP-FPM
PHP-FPM (FastCGI Process Manager) is needed for PHP processing with Nginx. Configure PHP-FPM by editing its configuration file:
nano /etc/php/8.1/fpm/php.ini
Adjust settings as per your requirements, such as memory_limit and upload_max_filesize. Save and close the file.
Step 9: Install and Configure Nginx
Install Nginx web server:
apt install nginx -y
Start Nginx and enable it to start on boot:
systemctl start nginx
systemctl enable nginx
Step 10: Create Web Directory
Create the directory for your website:
mkdir -p /var/www/tutorials.shape.host
Set the ownership to the www-data user and group:
chown -R www-data:www-data /var/www/tutorials.shape.host
Set the appropriate permissions:
chmod -R 755 /var/www/tutorials.shape.host
Step 11: Configure Nginx for PHP
Create a new server block configuration file for your site:
nano /etc/nginx/sites-available/tutorials.shape.host
Add the following configuration, adjusting the server_name and root directives as needed:
server {
    listen 80;
    server_name tutorials.shape.host;
    root /var/www/tutorials.shape.host;

    index index.php index.html index.htm;

    location / {
        try_files $uri $uri/ /index.php?$query_string;
    }

    location ~ \.php$ {
        include fastcgi_params;
        fastcgi_pass unix:/run/php/php8.1-fpm.sock;
        fastcgi_param SCRIPT_FILENAME $document_root$fastcgi_script_name;
        fastcgi_param PATH_INFO $fastcgi_path_info;
    }

    location ~ /\.ht {
        deny all;
    }
}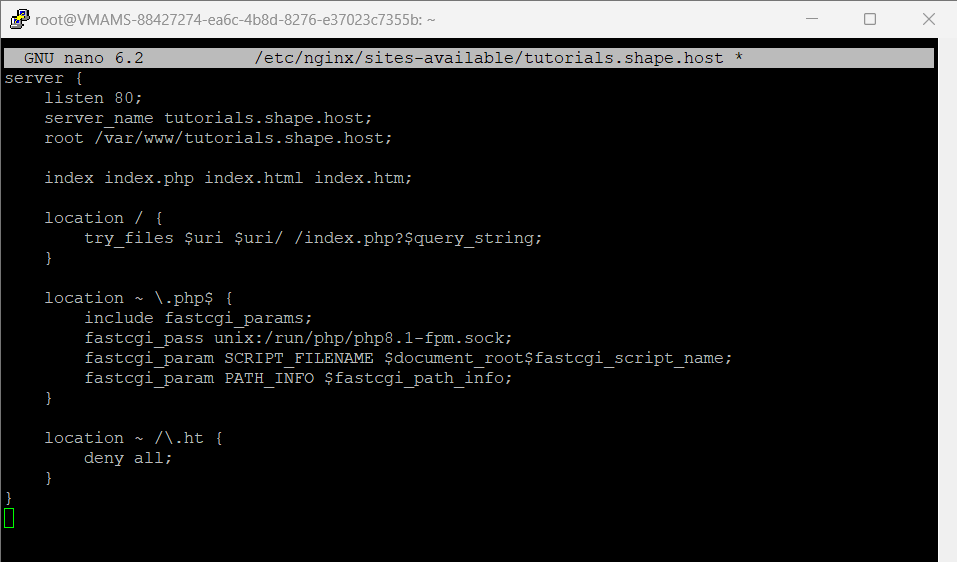
Save and close the file.
Step 12: Enable the Nginx Server Block
Enable the server block by creating a symbolic link from sites-available to sites-enabled:
ln -s /etc/nginx/sites-available/tutorials.shape.host /etc/nginx/sites-enabled/
Verify the Nginx configuration syntax:
nginx -t

If the syntax is OK, reload Nginx to apply the changes:
systemctl reload nginx
Step 13: Test Your Setup
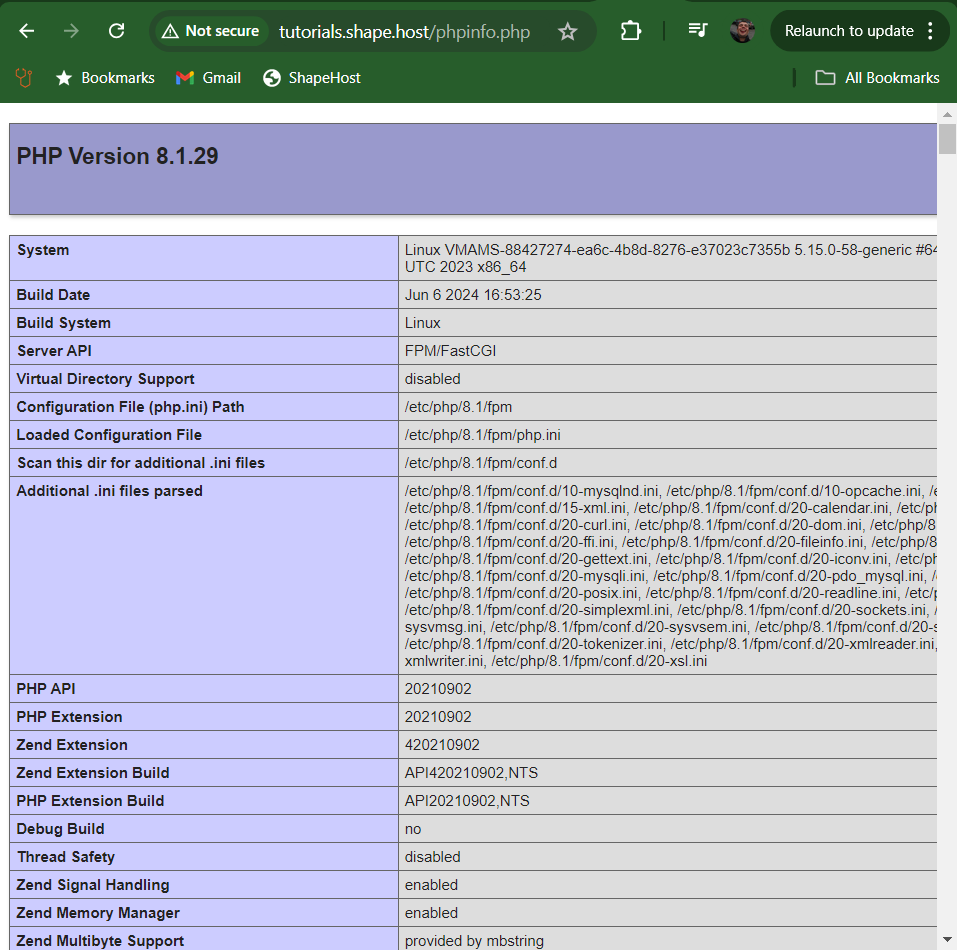
Create a phpinfo.php file in your web root to verify PHP and Nginx configuration:
nano /var/www/tutorials.shape.host/phpinfo.php
Add the following PHP code to the file:
<?php
phpinfo();
?>
Save and close the file. Then, access http://tutorials.shape.host/phpinfo.php in your web browser. You should see the PHP information page if everything is configured correctly.
For those seeking reliable and scalable hosting solutions, Shape.host offers a variety of Cloud VPS services. Whether you’re a developer needing a robust environment for your applications or a business looking for scalable solutions, Shape.host provides the infrastructure and support to meet your needs.