Portainer is a lightweight and powerful management UI that allows you to easily manage your Docker environments. Whether you are managing a single Docker instance or a full-scale production environment, Portainer provides a simple and intuitive interface that enhances your Docker experience. In this tutorial, we will guide you through the installation of Portainer on a Debian 11 server. By the end of this guide, you will have Portainer up and running, allowing you to manage your Docker containers, images, networks, and volumes with ease.
1. Prepare the Instance
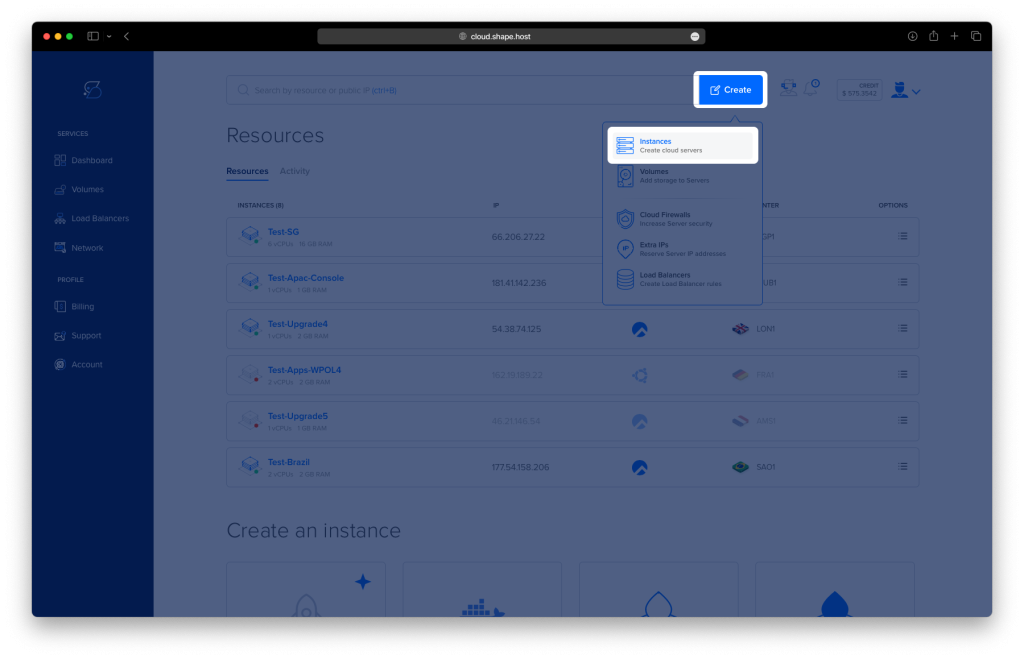
Access the Cloud Dashboard
Begin by logging into your cloud hosting account to access the main dashboard. From here, click on the “Create” button located in the top-right corner. A drop-down menu will appear; select “Instances” to initiate the process of creating a new cloud server instance.
Select Data Center Location
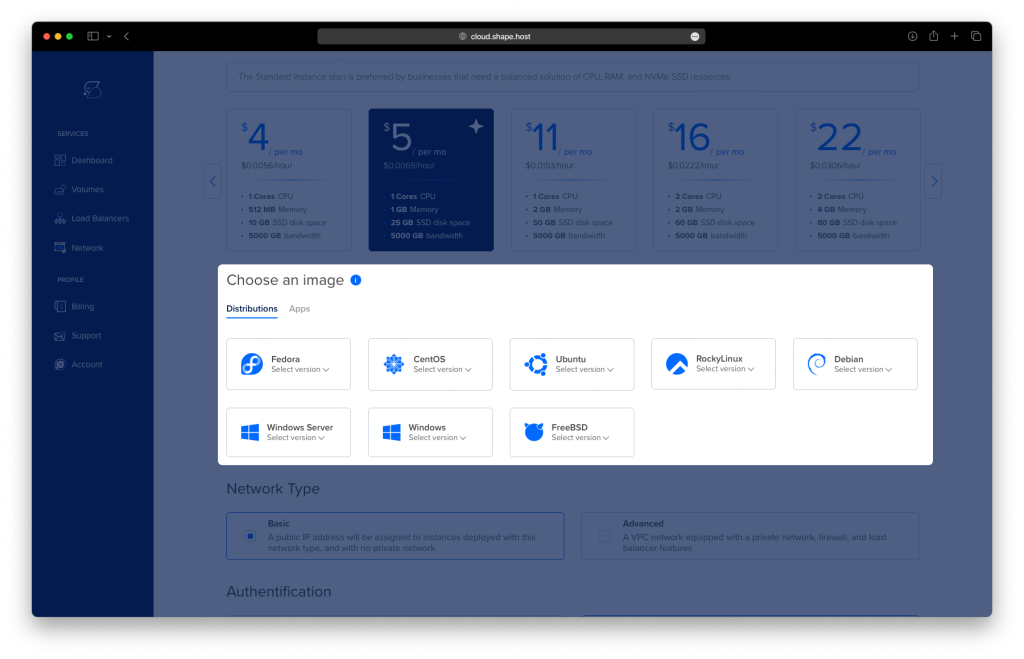
You will be redirected to the “Create New Instance” page, where you can choose the data center location. Select a location that is closest to your target audience or best suits your needs. Available options include locations like New York, Amsterdam, Singapore, and Helsinki.

Choose a Plan and Operating System
Next, select a hosting plan that matches your resource requirements. You can choose from options such as Standard, CPU-Optimized, or Memory-Optimized plans. For instance, you might select a plan with 2 Cores CPU, 4 GB Memory, and 80 GB SSD storage. After choosing a plan, scroll down to the “Choose an image” section and select “Debian 11” as the operating system.
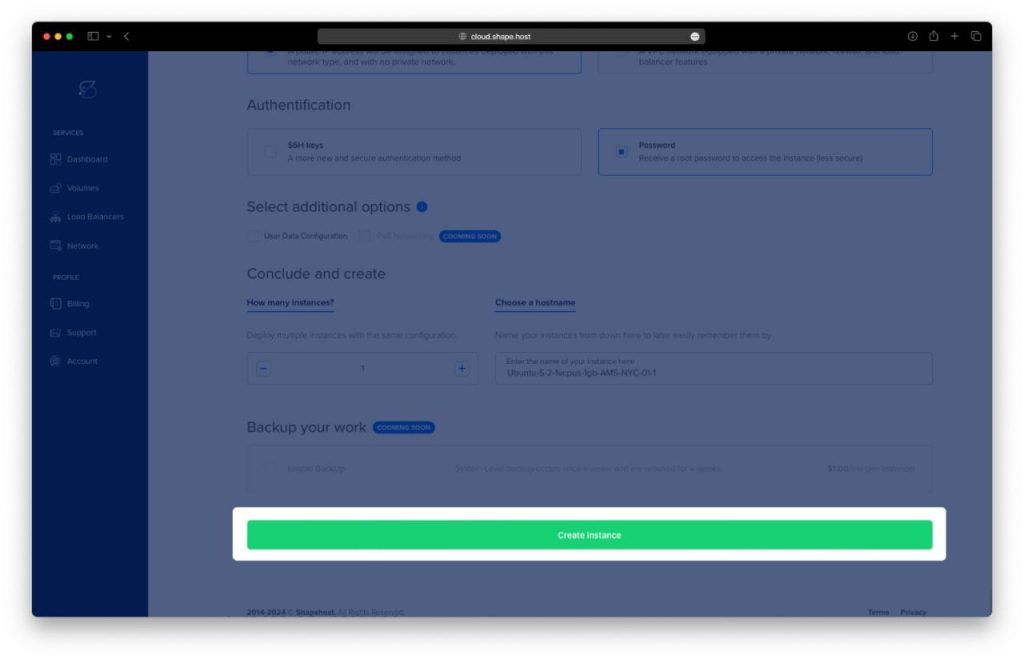
Configure Instance and Finalize Creation
In this step, you will configure additional options such as the number of instances, authentication method (SSH keys or password), and hostname. Once you’ve configured these settings, click on the “Create instance” button at the bottom of the page to finalize the creation of your server instance.
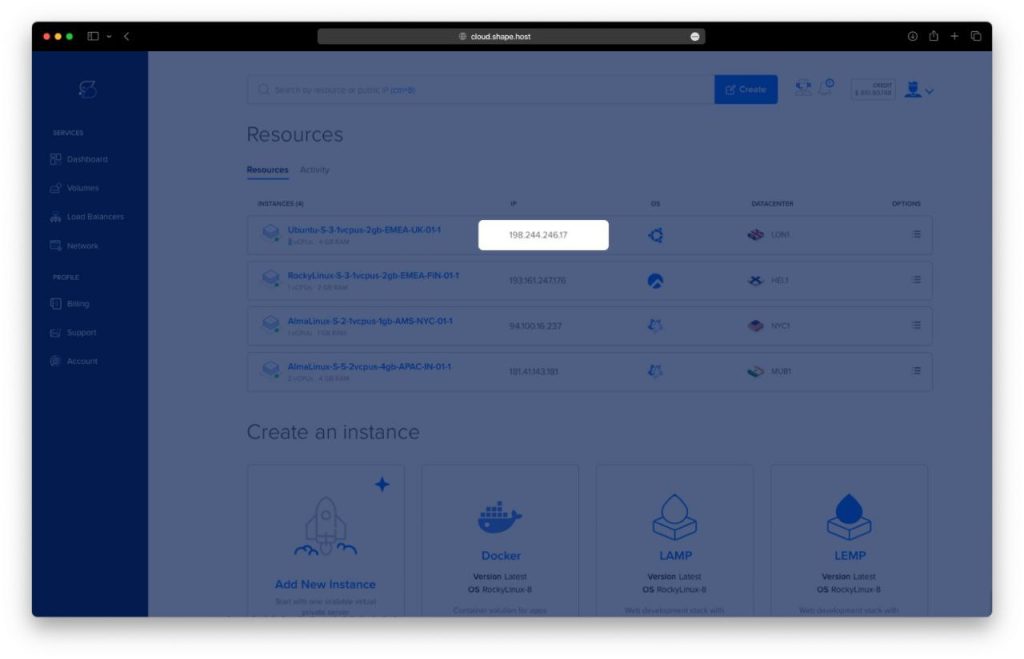
Find the IP Address of Your Instance
After your instance has been successfully created, navigate back to the dashboard to locate the IP address of your new server. This IP address will be crucial for connecting to your server via SSH and proceeding with the installation of Portainer.
2. Update and Upgrade the System
The first step is to ensure that your system is up-to-date. Run the following commands to update the package lists and upgrade all installed packages:
apt update -y
apt upgrade -y
3. Install Required Packages
Next, install the necessary packages that will be needed for Docker and Portainer installation:
apt install apt-transport-https ca-certificates curl gnupg2 software-properties-common -y

4. Add Docker’s Official GPG Key
Download Docker’s official GPG key and save it in a keyring for secure package installation:
curl -fsSL https://download.docker.com/linux/debian/gpg | gpg --dearmor -o /usr/share/keyrings/docker-archive-keyring.gpg5. Set Up the Docker Stable Repository
Set up the Docker repository for Debian by running the following command:
echo "deb [arch=$(dpkg --print-architecture) signed-by=/usr/share/keyrings/docker-archive-keyring.gpg] https://download.docker.com/linux/debian $(lsb_release -cs) stable" | tee /etc/apt/sources.list.d/docker.list > /dev/null
6. Update Package List Again
Update the package list again to include the Docker packages:
apt update -y7. Install Docker CE
Now, install Docker Community Edition (CE) by running the following command:
apt install docker-ce -y
8. Verify Docker Installation
After installing Docker, verify that Docker is installed and running by checking its version:
docker --version
9. Install Docker Compose
Download Docker Compose binary from GitHub:
wget https://github.com/docker/compose/releases/download/v2.15.1/docker-compose-linux-x86_64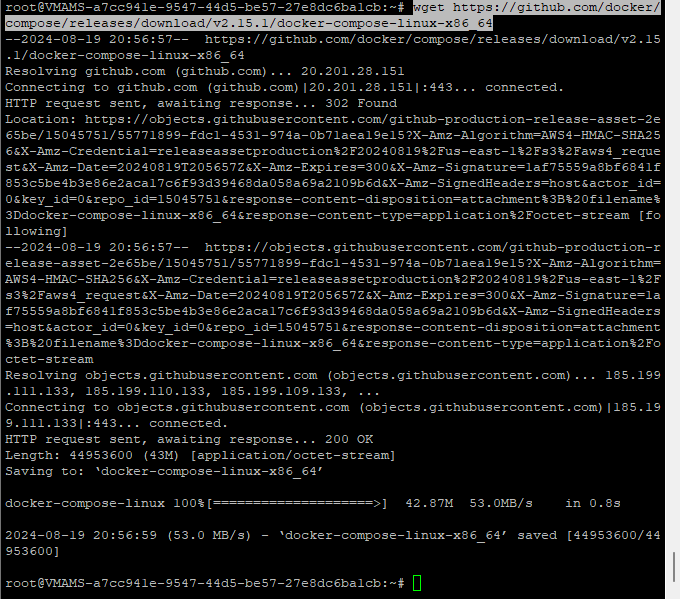
Move the downloaded binary to /usr/local/bin and make it executable:
cp docker-compose-linux-x86_64 /usr/local/bin/docker-compose
chmod +x /usr/local/bin/docker-compose

Verify the installation of Docker Compose:
docker-compose --version
10. Create a Docker Volume for Portainer
Create a Docker volume that Portainer will use to store its data:
docker volume create data
List the Docker volumes to ensure that it was created successfully:
docker volume ls
11. Deploy Portainer Using Docker
Run the following command to deploy Portainer using Docker:
docker run -d -p 8000:8000 -p 9000:9000 --name=portainer --restart=always -v /var/run/docker.sock:/var/run/docker.sock -v data:/data portainer/portainer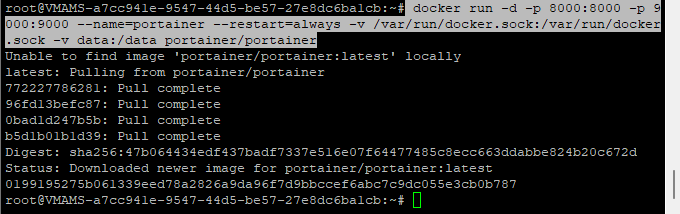
12. Verify Portainer Deployment
Check the running Docker containers to verify that Portainer is up and running:
docker ps
13. Access Portainer Web Interface
After successfully deploying Portainer, you can access its web interface by navigating to http://your_server_ip:9000 in your web browser. Replace your_server_ip with the actual IP address of your server.
You will be prompted to create an admin account upon your first login. After creating the account, you can start managing your Docker environment through the Portainer UI.
14. Setting Up Portainer from the Web Interface
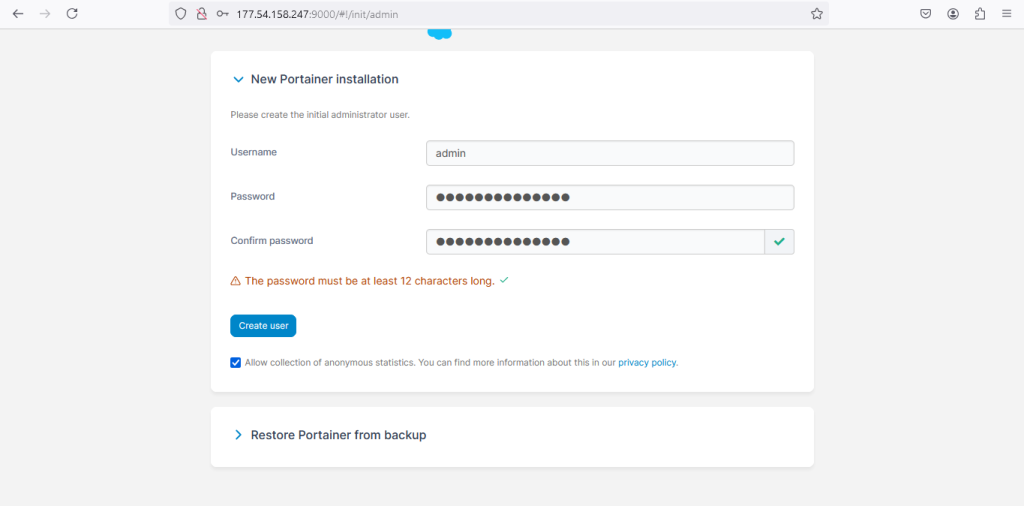
Step 1: Create the Initial Administrator User
After deploying Portainer and accessing the web interface at http://your_server_ip:9000, you will be prompted to create an initial administrator user. This account will be used to manage Portainer.
- Username: Enter a username for the admin account, such as
admin. - Password: Create a strong password. Note that the password must be at least 12 characters long.
- Confirm Password: Re-enter the password to confirm.
Once you have filled in the details, click on the Create user button to proceed.
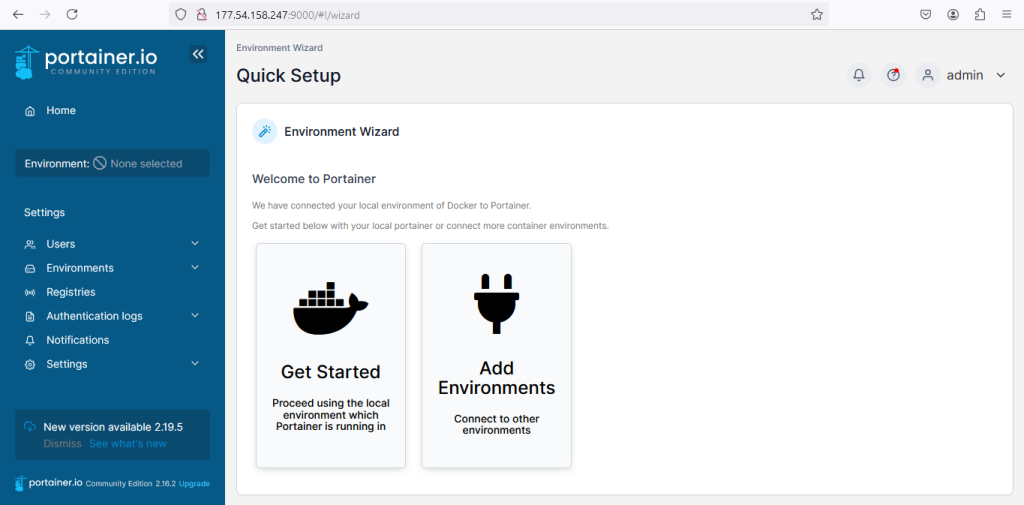
Step 2: Environment Quick Setup
After creating the admin user, you will be directed to the Environment Wizard for a quick setup. Portainer will automatically connect to the local Docker environment.
- Get Started: Click on the Get Started button to proceed with using the local Docker environment where Portainer is running. This will allow you to see the status of all local containers.
You can also add additional environments later, such as connecting to remote Docker hosts, Kubernetes clusters, or other container platforms.
Step 3: Accessing the Portainer Dashboard
Upon completing the setup, you will be directed to the Portainer dashboard. Here you will see an overview of your Docker environment:
- Environments: View and manage your connected environments.
- Containers, Images, Networks, Volumes: Use the dashboard to manage various aspects of your Docker environment, such as deploying and managing containers, images, networks, and volumes.
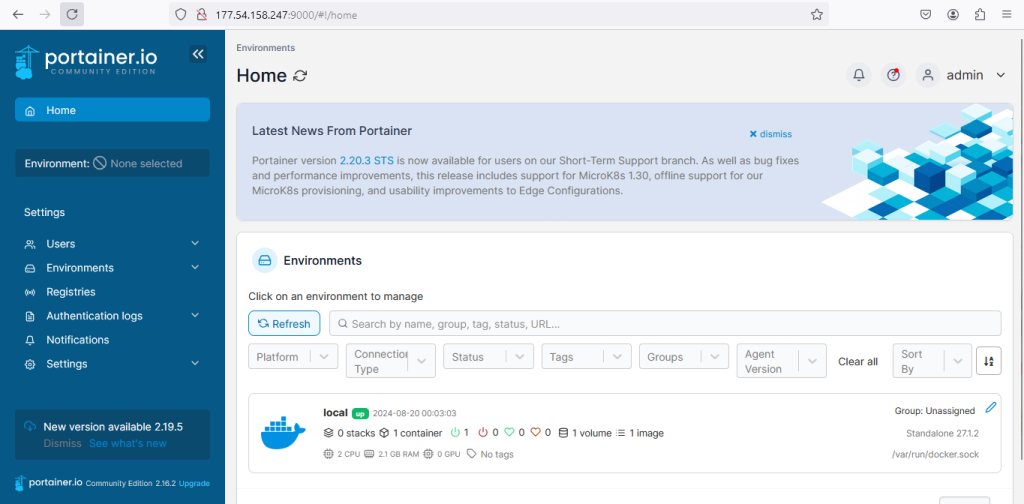
From this dashboard, you can now fully manage your Docker environment using Portainer’s intuitive interface.
If you’re looking for reliable cloud hosting solutions, consider using Shape.Host’s Cloud VPS services. Our cloud infrastructure offers high-performance virtual servers with various configurations tailored to your needs. With data centers located across the globe, you can deploy your instances in regions closest to your target audience, ensuring low latency and high availability.