Rancher is a powerful, open-source platform that provides a complete set of tools for deploying and managing Kubernetes clusters. In this guide, we will walk you through the process of installing the Rancher Kubernetes panel on an Ubuntu 22.04 system. This tutorial assumes you are operating as the root user, which simplifies some steps. Let’s dive in!
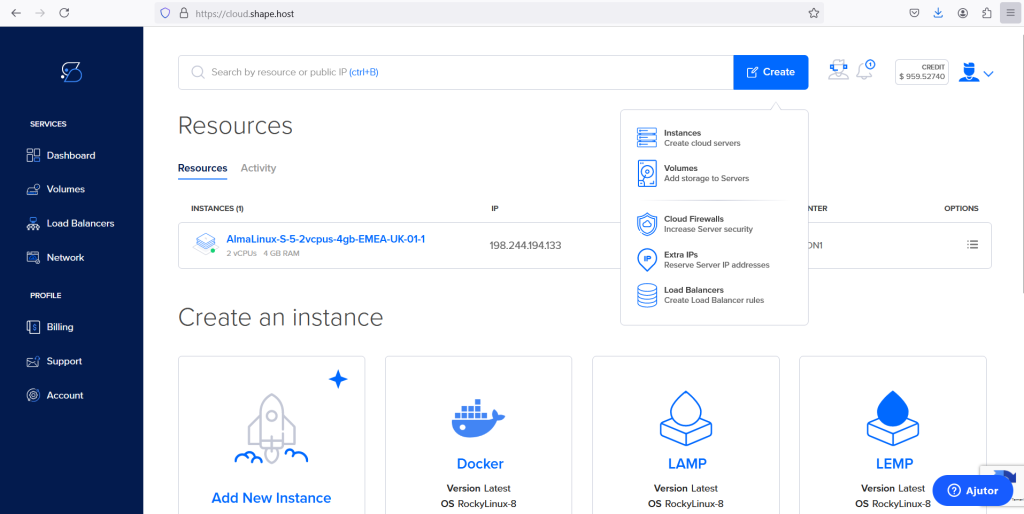
Step 1: Initiating Instance Creation
- Creating a New Instance
- To create a new instance, click on the blue “Create” button located in the top-right corner of the page.
- Select “Add New Instance” to begin setting up a new virtual machine.
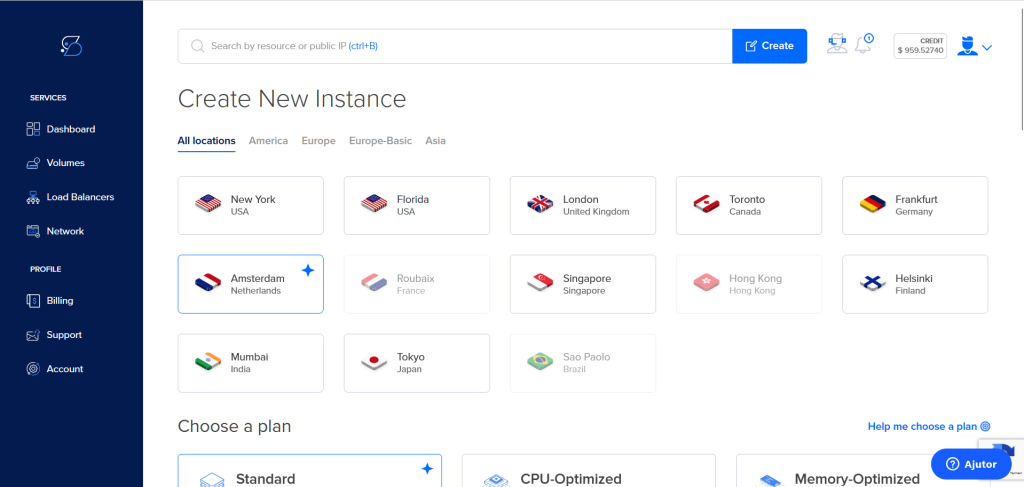
Step 2: Choosing a Location
- Select a Data Center
- On the “Create New Instance” page, choose your preferred data center location. For example, you might select “Amsterdam, Netherlands”.
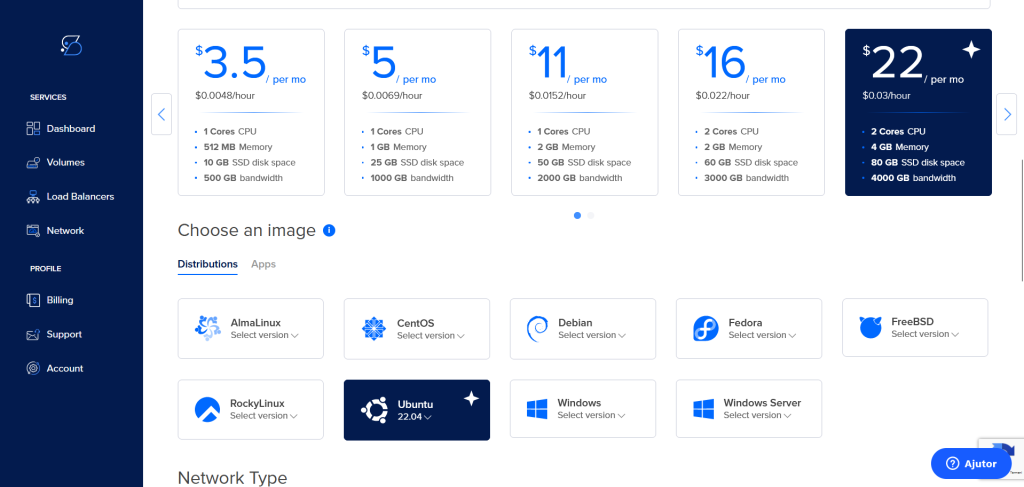
Step 3: Selecting a Plan
- Choose a Plan
- Pick a plan that meets your requirements. Options vary in specifications and price, from $3.5 to $22 per month, offering different CPU, memory, storage, and bandwidth.
- Choose an Operating System
- Scroll to the “Choose an image” section and select Ubuntu 22.04 from the list of available distributions.
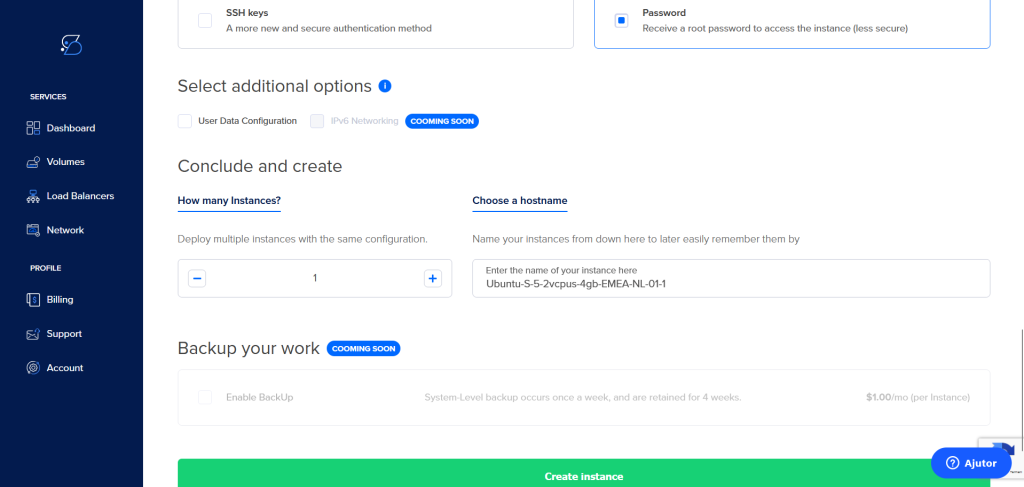
Step 4: Authentication Method
- Select an Authentication Method
- Choose between SSH keys (recommended for better security) or a password for root access. In this guide, we’ll proceed with the password option.
- Complete Instance Creation
- Click the “Create Instance” button at the bottom of the page to finalize the setup.
Step 5: Connecting to Your Instance
- Retrieve SSH Credentials
- Note the IP address of your newly created instance from the Shape.host dashboard.
- Connect via SSH
- Open a terminal on your local machine and use the following command to connect to your instance:
ssh root@your_instance_ipReplace your_instance_ip with the actual IP address of your instance.
Before we begin, ensure you have the following prerequisites:
- A fresh installation of Ubuntu 22.04.
- Root access to your system.
- A stable internet connection.
Step 6: Update Your System
apt update
apt upgrade -y
Step 7: Install Docker
Step 2.1: Install necessary packages
apt install -y apt-transport-https ca-certificates curl software-properties-common
Step 2.2: Add Docker’s official GPG key
curl -fsSL https://download.docker.com/linux/ubuntu/gpg | sudo gpg --dearmor -o /usr/share/keyrings/docker-archive-keyring.gpg
Step 2.3: Set up the Docker stable repository
echo "deb [arch=amd64 signed-by=/usr/share/keyrings/docker-archive-keyring.gpg] https://download.docker.com/linux/ubuntu $(lsb_release -cs) stable" | sudo tee /etc/apt/sources.list.d/docker.list > /dev/null
Step 2.4: Update the package list
apt update
Step 2.5: Install Docker
apt install -y docker-ce docker-ce-cli containerd.io
Step 2.6: Start and enable Docker
systemctl start docker
systemctl enable docker
Step 2.7: Verify Docker installation
docker --version
Step 8: Install Rancher
docker run -d --name=rancher-server --restart=unless-stopped -p 80:80 -p 443:443 --privileged rancher/rancher:v2.4.18
This command fetches the most recent Rancher server image and executes it within a Docker container.
You can view the downloaded Rancher image from the Docker Hub registry by using the following command:
docker images
Step 9: Access Rancher UI
Open a web browser and navigate to:
https://<your-server-ip>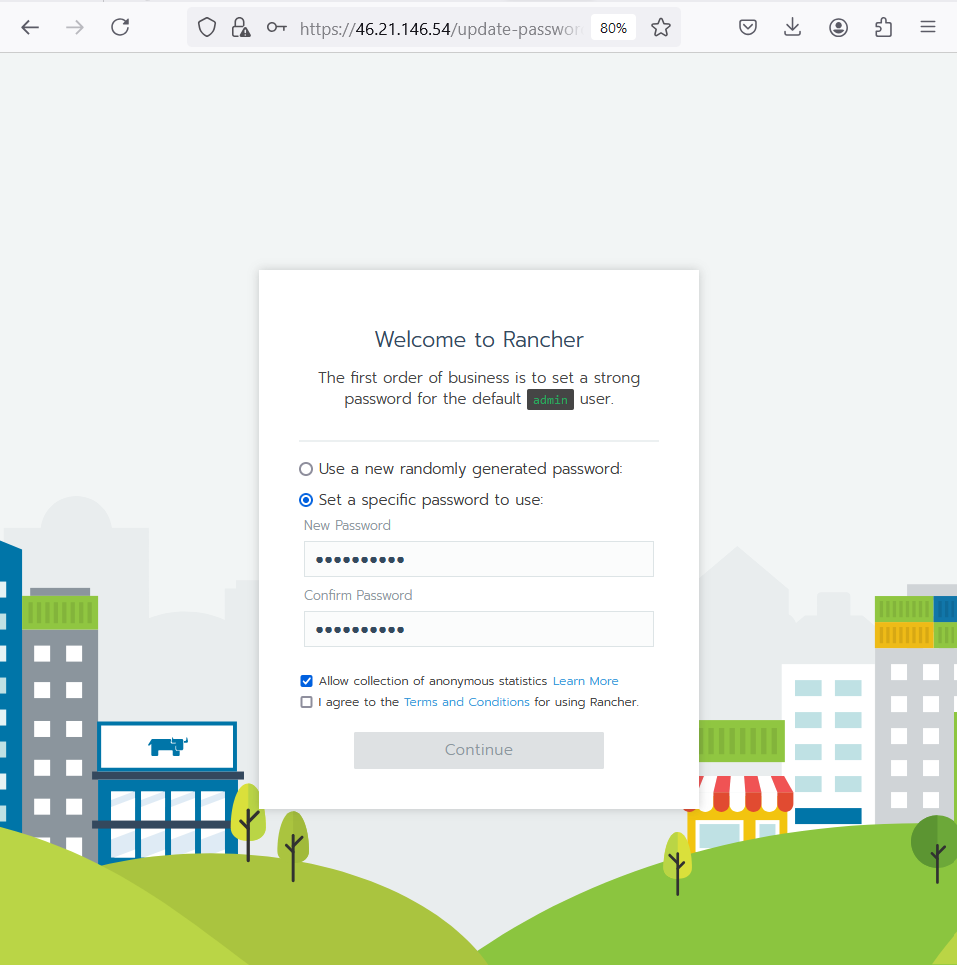
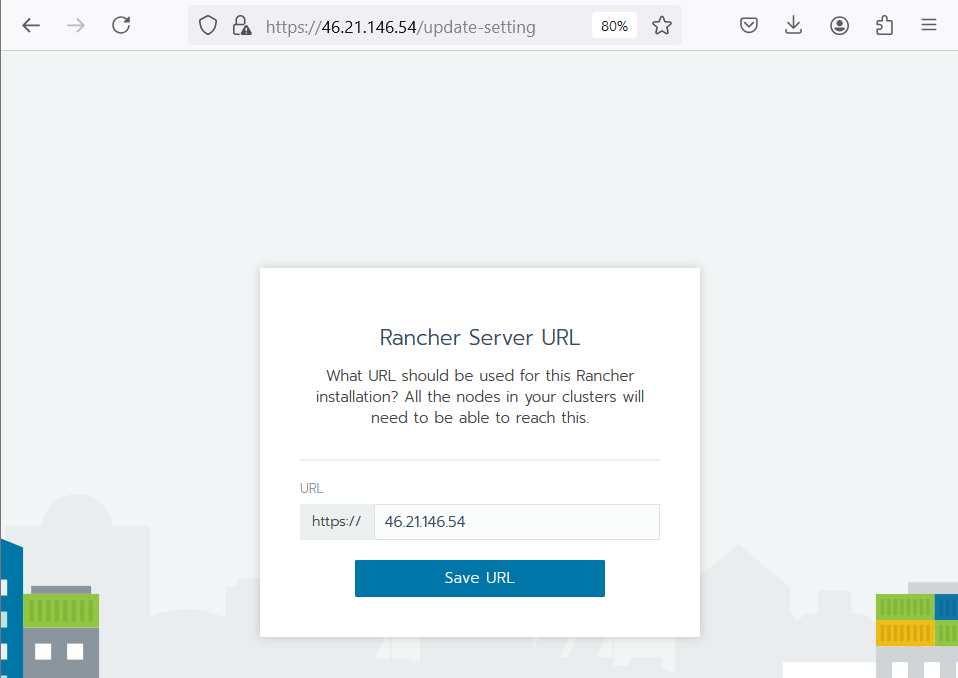
Follow the on-screen instructions to set up your Rancher account and configure the Rancher server.
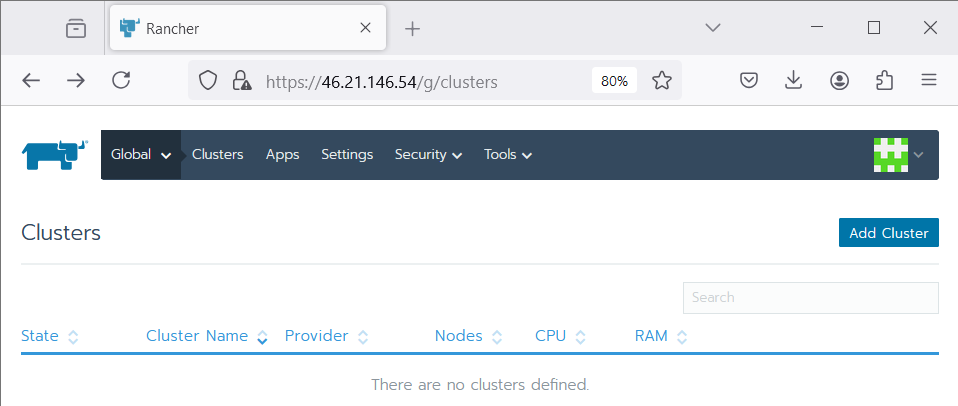
Step 10: Configure Rancher
- Add a Cluster: Create and manage Kubernetes clusters.
- Manage Projects and Namespaces: Organize Kubernetes resources.
- Deploy Applications: Use the Rancher UI to deploy applications, manage workloads, and monitor your clusters.
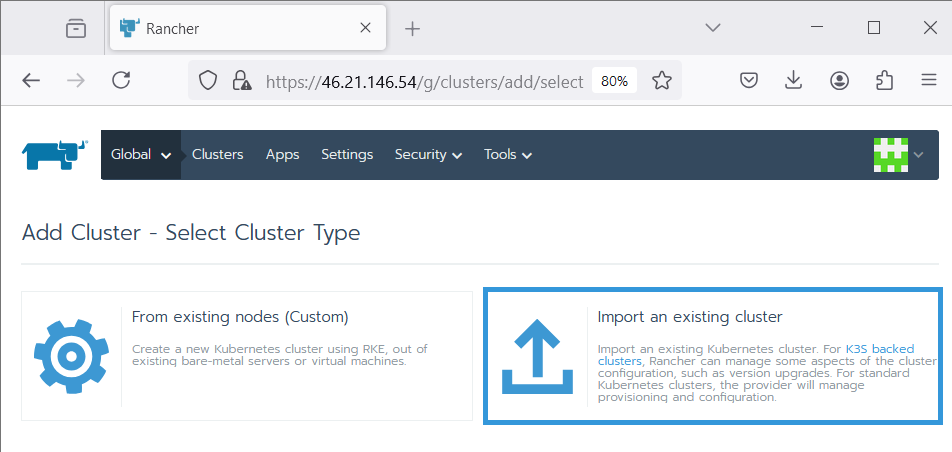
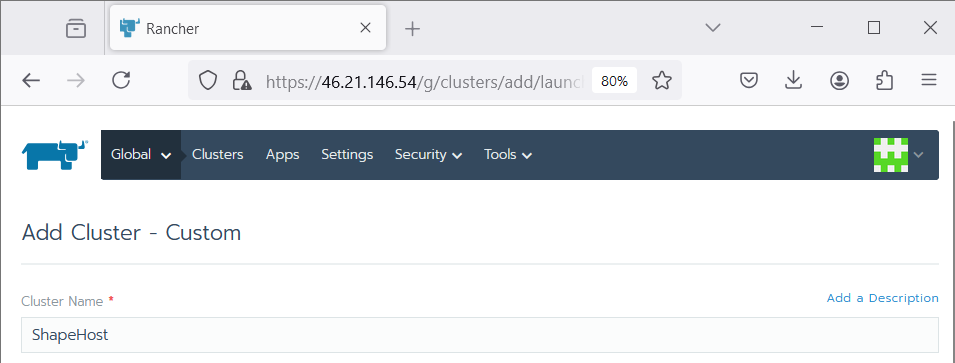
Real Example: Creating a Kubernetes Cluster
- Click on “Add Cluster”.
- Select the “Custom” option.
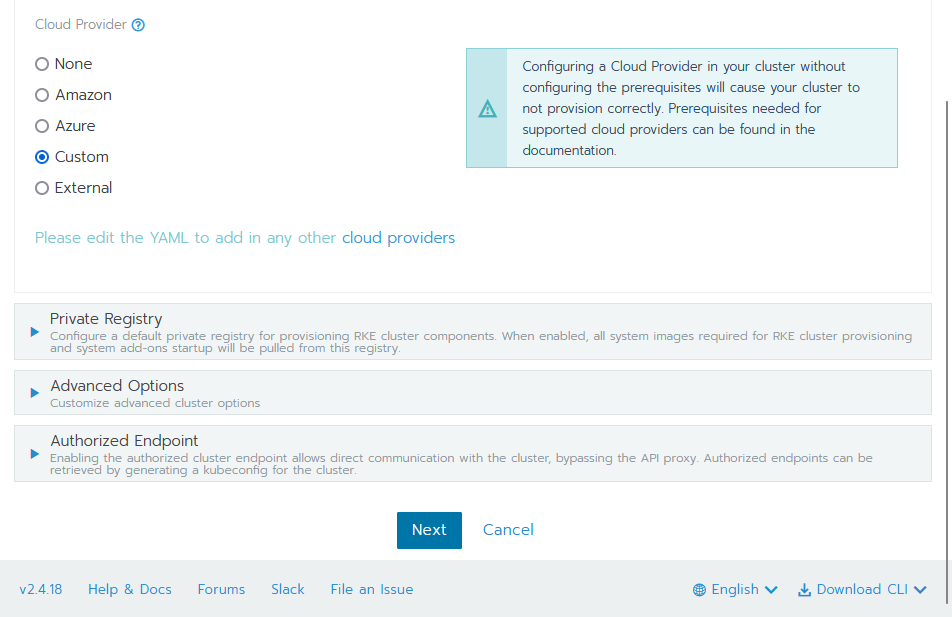
- Provide a name for your cluster and configure the necessary options.
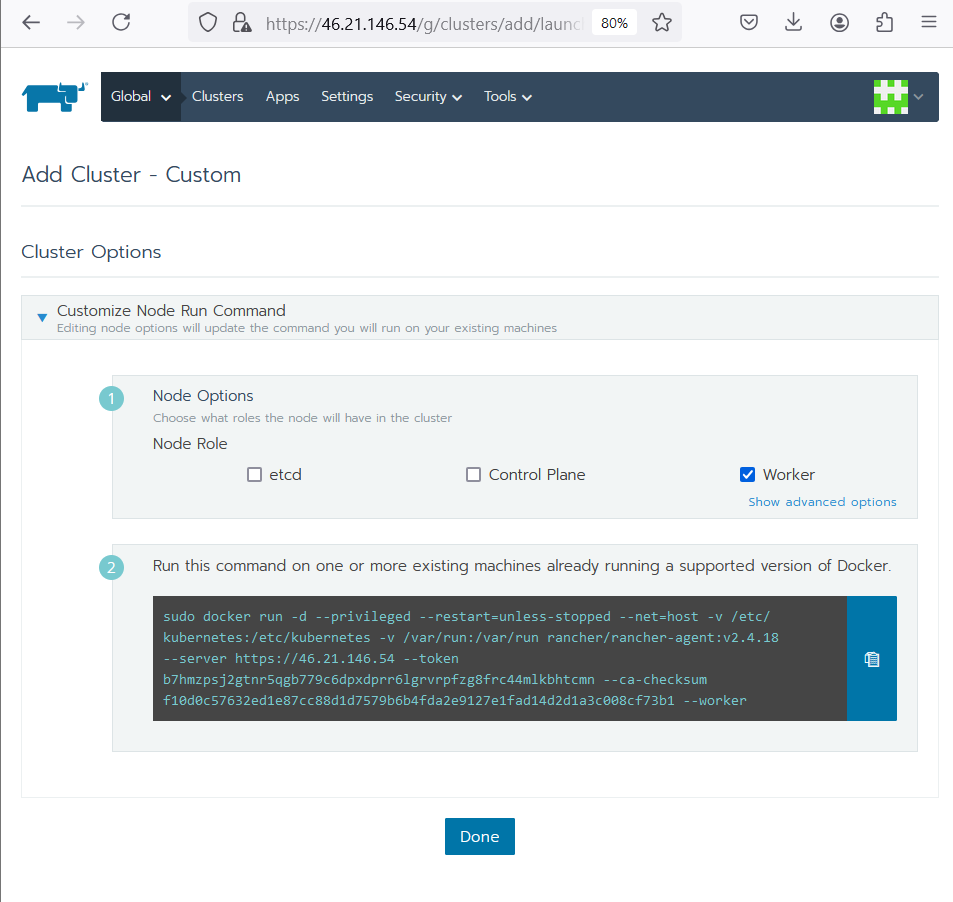
- Click “Next” and follow the instructions to add nodes to your cluster.
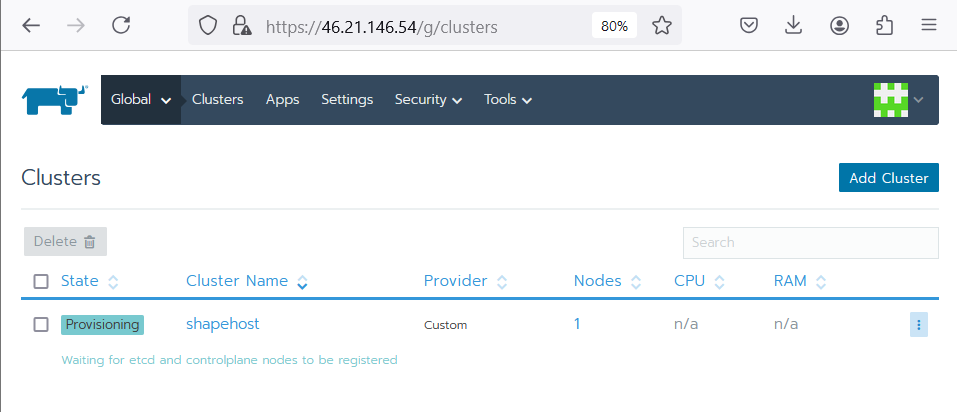
Run the provided command on each node to join them to the cluster.

For those looking for reliable Linux SSD VPS services to host their Kubernetes clusters, consider Shape.host. Shape.host offers a range of Cloud VPS services designed for high performance and reliability, making it an excellent choice for your Kubernetes hosting needs. Check out Shape.host for more information on their offerings.