Rancher is an open-source enterprise Kubernetes management platform that allows users to deploy, manage, and scale Kubernetes clusters across a variety of environments—on-premises, public clouds, and edge locations. It provides a centralized control panel for Kubernetes cluster administration, making it easier to oversee multi-cluster environments.
Key Features of Rancher
- Multi-Cluster Management: Rancher provides a single interface to create, import, and manage multiple Kubernetes clusters, regardless of the hosting environment. This simplifies managing clusters in a hybrid or multi-cloud setup.
- Authentication and Access Control: Rancher integrates with identity providers like LDAP, Active Directory, and OAuth. It helps set up Role-Based Access Control (RBAC) across clusters, ensuring consistent access management and enhanced security.
- Built-In Monitoring and Alerts: Rancher includes built-in tools for monitoring Kubernetes cluster health and performance. It allows you to set up alerts for proactive monitoring, enabling administrators to address potential issues before they escalate.
- Application Catalog: Rancher includes a Helm-based application catalog, which allows users to deploy pre-configured applications easily. This feature is particularly useful for quickly deploying common applications and managing them across clusters.
- Multi-Environment Kubernetes Support: Rancher is compatible with various Kubernetes distributions such as RKE, RKE2, and K3s. This flexibility allows users to select the Kubernetes solution that best fits their environment—whether lightweight or more full-featured.
- Centralized Management: Rancher provides a consistent management layer that supports different Kubernetes versions and environments, whether they are hosted on-premises or in the cloud. This centralized management reduces complexity, especially for organizations operating at scale.
- Security and Compliance: Rancher enhances security by providing centralized policy management, compliance monitoring, and the ability to enforce network security rules. This helps ensure that all clusters conform to the organization’s security requirements.
Use Cases for Rancher
- Multi-Cloud and Hybrid Cloud: Rancher is ideal for organizations that need to manage Kubernetes clusters across multiple cloud providers or on-premises data centers.
- DevOps: Rancher makes it easier for DevOps teams to deploy applications consistently, perform updates, and manage workloads across clusters.
- Edge Computing: The lightweight Kubernetes distribution (K3s) managed by Rancher is particularly useful for edge deployments, where resources are limited but centralized management is still required.
Getting Started with Rancher
To start using Rancher, it can be deployed as a Docker container or using Helm charts in Kubernetes. Once installed, Rancher’s intuitive UI can be accessed via a web browser. From there, users can create and import clusters, manage workloads, and set up RBAC for secure multi-user environments.
Rancher is a powerful tool for organizations looking to unify the management of their Kubernetes environments, providing consistency, scalability, and simplified control across all types of deployments.
Step 1: Create an Instance
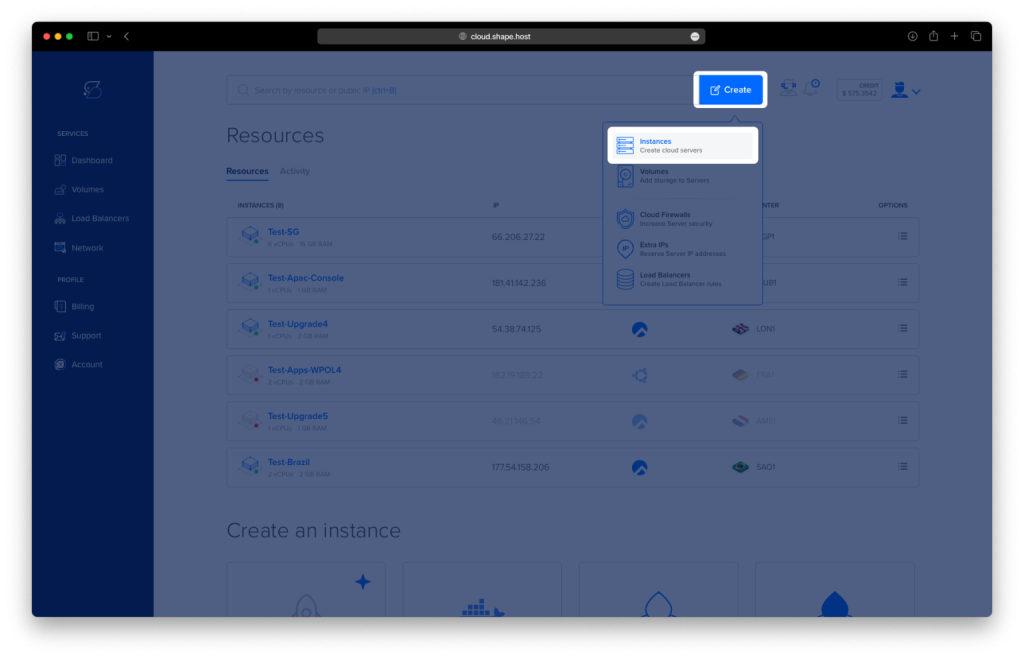
- Access the Dashboard: Log in to your Shape.Host account and navigate to your Dashboard.
- Click Create: Click on the “Create” button located in the top-right corner.
- Select Instances: From the dropdown menu, choose “Instances” to begin creating a new cloud server.
- Select Location: Choose a data center location for your instance closest to your target audience for optimal performance.
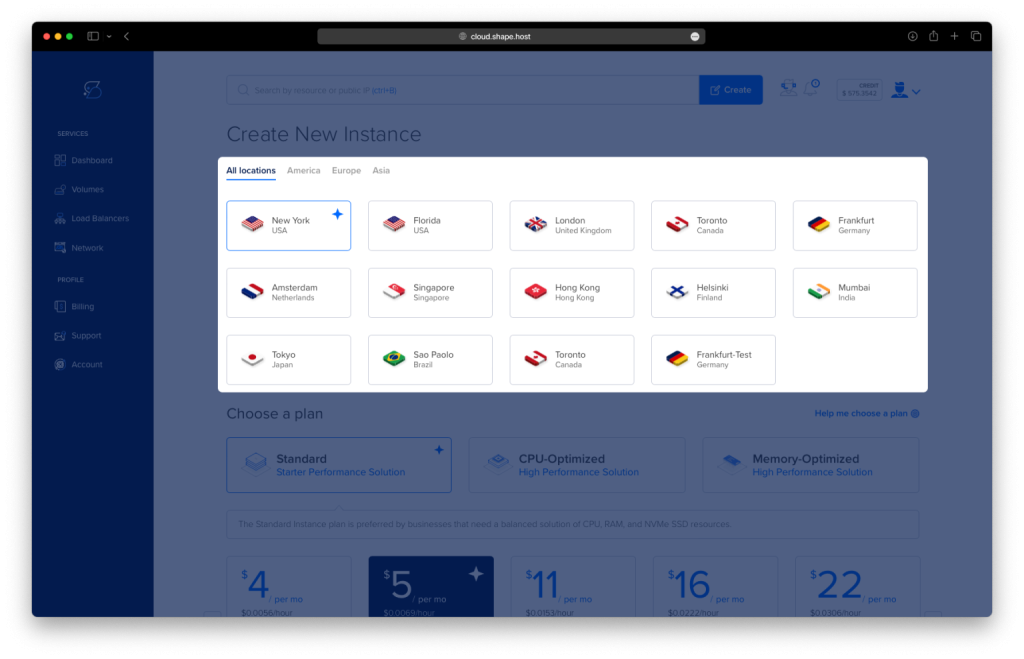
- Choose a Plan: Scroll through the available pricing plans. Select a plan based on your project requirements, such as Standard, CPU-Optimized, or Memory-Optimized.
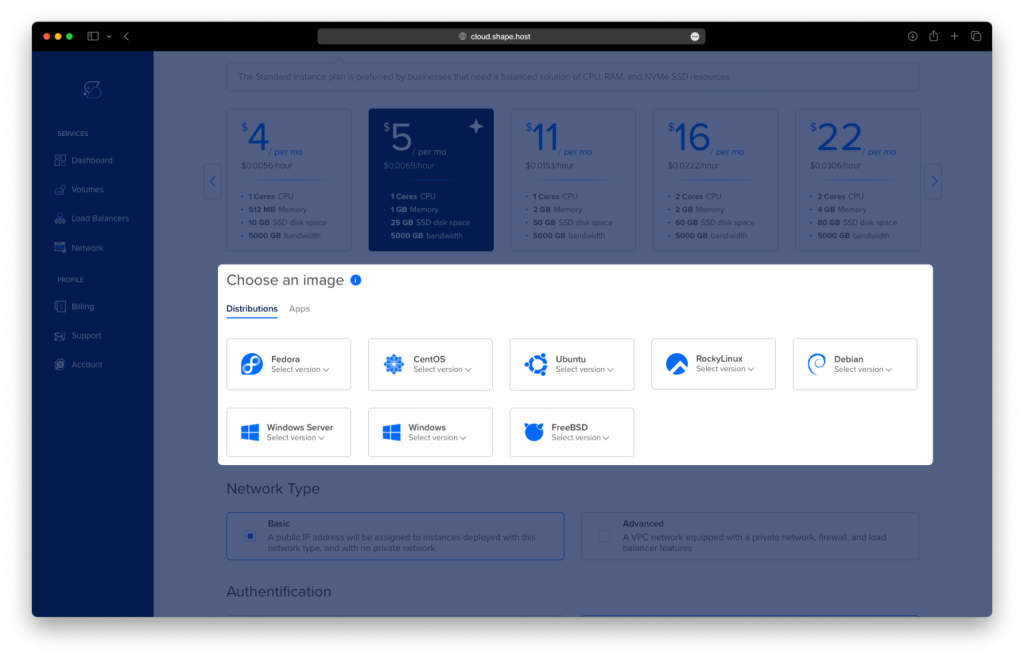
- Choose an Image: Select Ubuntu 24.04 as the operating system for your instance.
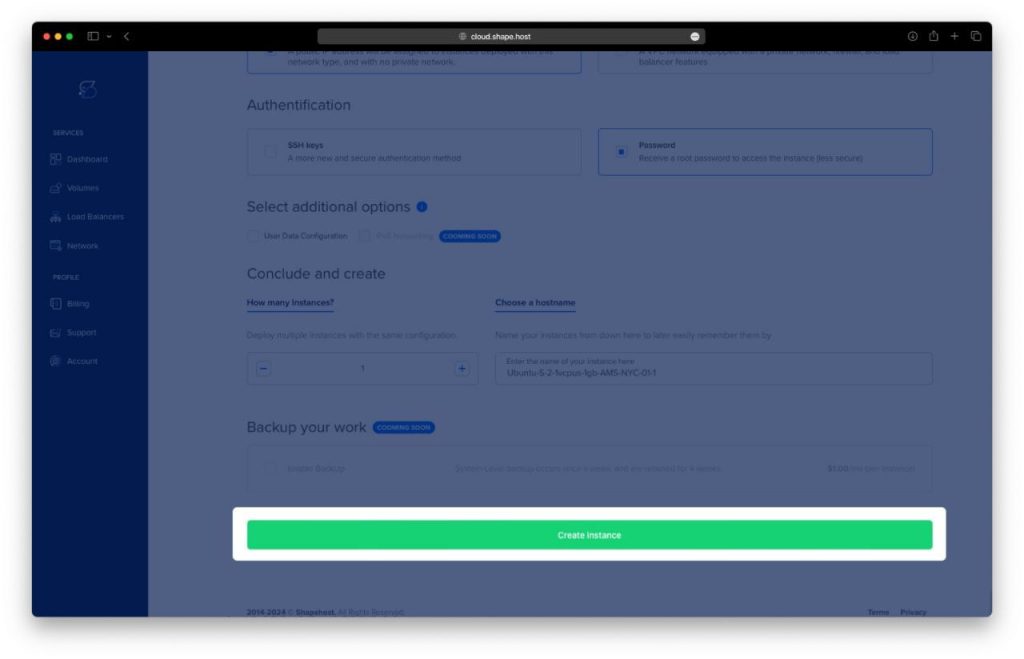
- Authentication and Finalize: Choose your authentication method, either via SSH keys or password. Once done, click Create Instance to launch your server.
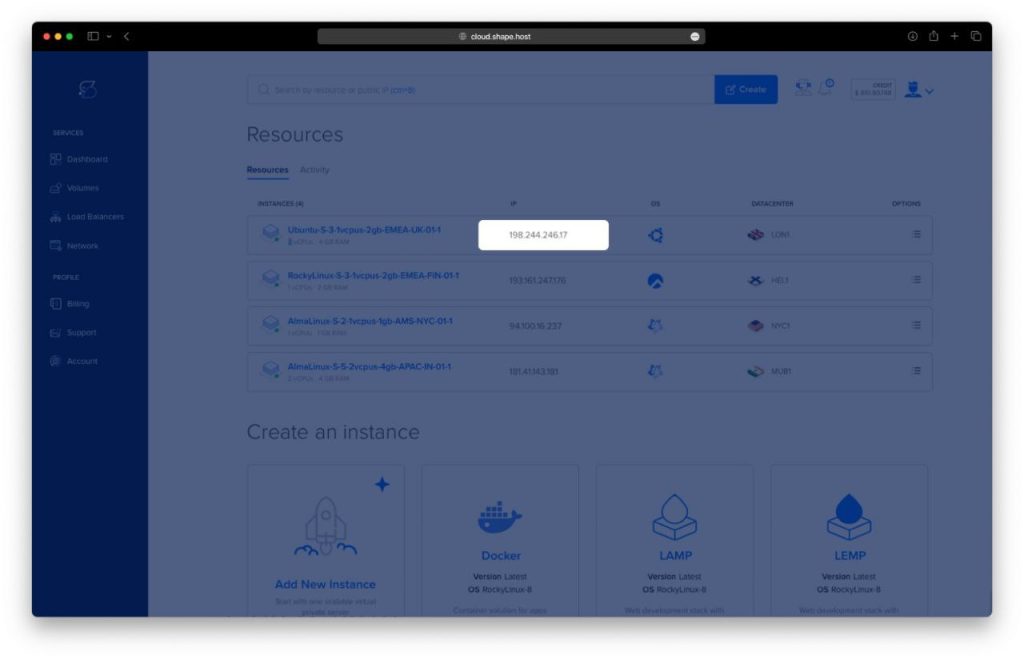
Obtain IP Address
- Once your instance is created, return to the dashboard.
- Find your instance’s IP address under the Resources section and use it to access your server.
Step 2: Connect to Your Instance
To connect to your instance on Shape.Host, follow these steps:
- Get the Instance IP: After creating your instance, find the public IP address in the Shape.Host dashboard under Resources.
- Open SSH Client: Use an SSH client like Terminal (Linux/macOS) or PuTTY (Windows).
- SSH into the Instance: Run the following command in your terminal:
ssh root@<your-instance-ip>Replace <your-instance-ip> with your actual instance IP address.
- Enter the Password: If prompted, enter your instance’s root password or use your SSH key if configured.
You are now connected to your instance!
Step 3: Update and Upgrade System Packages
Update your package list and upgrade all system packages to the latest versions:
apt update && apt upgrade -y
Step 4: Install Required Dependencies
Install dependencies required to add Docker’s official repository:
apt install -y apt-transport-https ca-certificates curl software-properties-common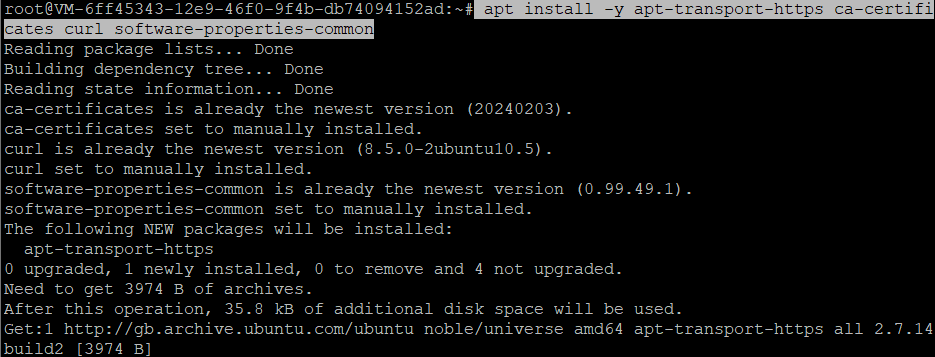
Step 5: Add Docker’s GPG Key and Repository
Add Docker’s GPG key and repository to your system:
curl -fsSL https://download.docker.com/linux/ubuntu/gpg | gpg --dearmor -o /usr/share/keyrings/docker-archive-keyring.gpgAdd Docker’s official repository:
echo "deb [arch=amd64 signed-by=/usr/share/keyrings/docker-archive-keyring.gpg] https://download.docker.com/linux/ubuntu $(lsb_release -cs) stable" | tee /etc/apt/sources.list.d/docker.list > /dev/null
Step 6: Update the Package List
Update the package list again to include Docker’s repository:
apt update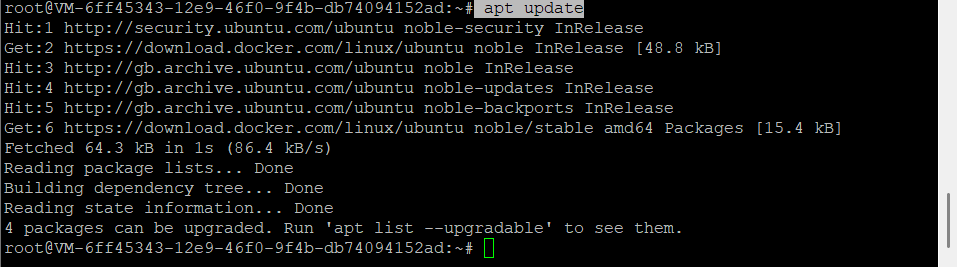
Step 7: Install Docker
Install Docker using the following command:
apt install -y docker-ce docker-ce-cli containerd.io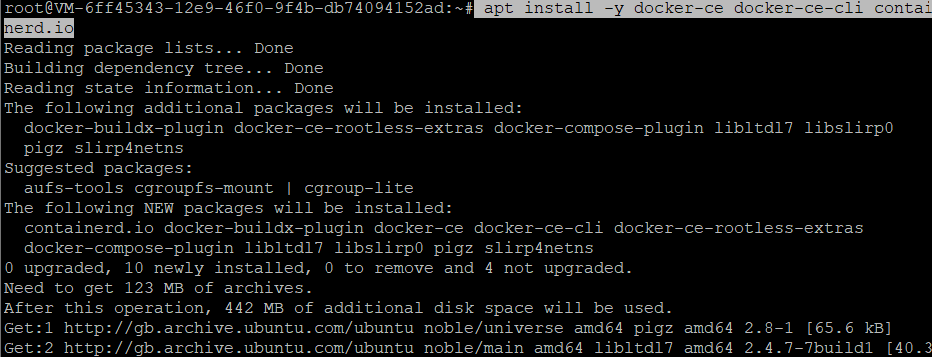
Start and enable the Docker service:
systemctl start docker
systemctl enable docker
Step 8: Verify Docker Installation
Verify that Docker is installed correctly by checking its version:
docker --version
Step 9: Run the Rancher Container
Run the Rancher server using Docker:
docker run -d --name=rancher-server --restart=unless-stopped -p 80:80 -p 443:443 --privileged rancher/rancher:v2.4.18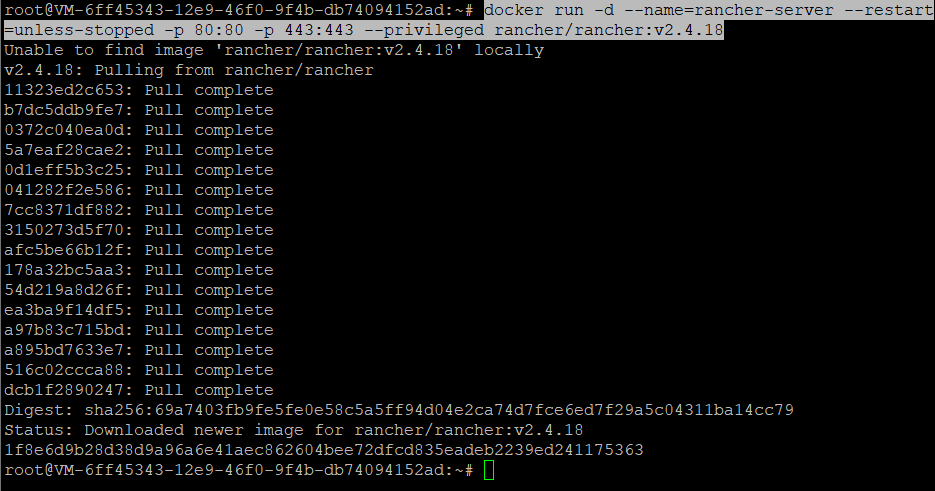
Step 10: Verify Rancher Container
Check the running Docker containers to verify that Rancher is running:
docker psYou should see the Rancher container listed with the ports 80 and 443 exposed.

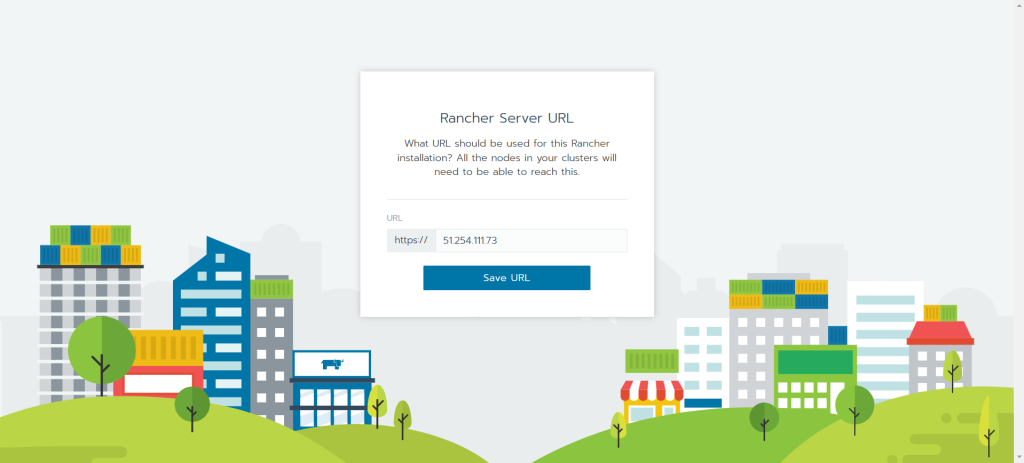
Access Rancher UI
Navigate to https://<your-server-ip>.
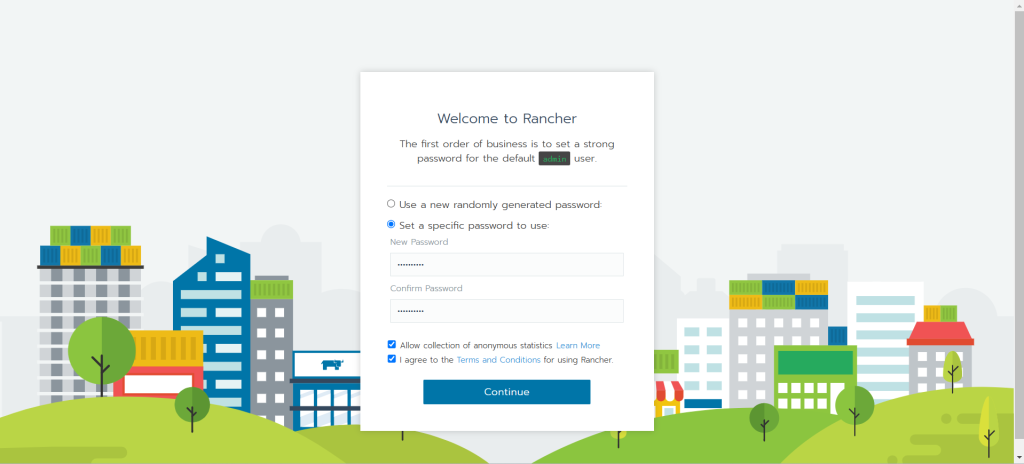
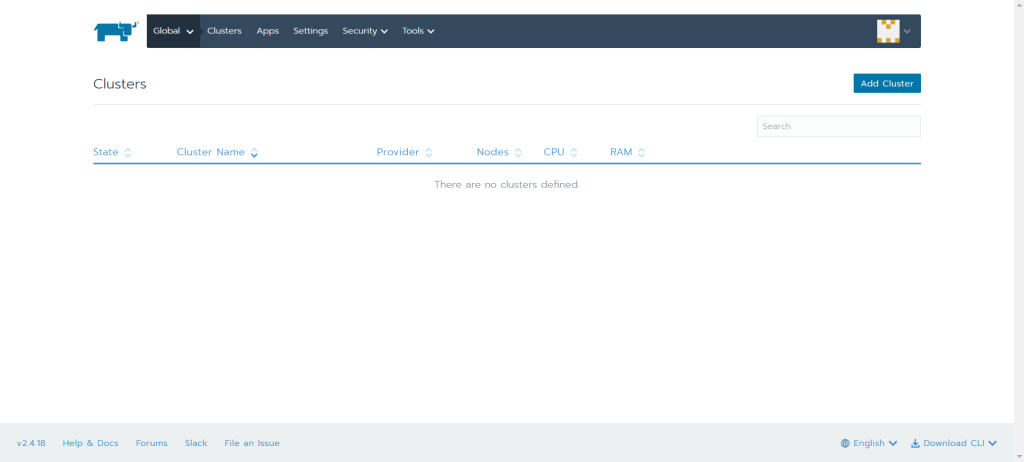
Follow the on-screen instructions to set up your Rancher account and configure the Rancher server.
For those looking for reliable Linux SSD VPS services to host their Kubernetes clusters, consider Shape.host. Shape.host offers a range of Cloud VPS services designed for high performance and reliability, making it an excellent choice for your Kubernetes hosting needs. Check out Shape.host for more information on their offerings.