Wiki.js on Debian 12 – A Modern Wiki Engine on a Stable Linux Platform
Wiki.js is a powerful, open-source, modern wiki software built on Node.js and backed by a PostgreSQL database. It combines a sleek, intuitive interface with extensive customization capabilities, making it ideal for internal documentation, developer wikis, knowledge bases, and collaborative workspaces.
Running Wiki.js on Debian 12 provides a robust, secure, and low-maintenance environment, especially suited for long-term deployments where stability and minimal system overhead are priorities.
Why Choose Wiki.js?
Wiki.js is designed to be lightweight, fast, and fully configurable. It offers:
- A responsive Markdown-first editor with support for WYSIWYG, raw HTML, and visual editing
- Built-in versioning for all content
- Fine-grained access control, LDAP/OAuth integration
- Modular architecture with over 30 integrations (Git, Google Drive, S3, etc.)
- Real-time search, custom themes, and multi-language support
- A single binary backend written in Node.js, with PostgreSQL for storage
Its frontend is written in Vue.js, making it lightweight yet highly interactive.
Why Debian 12 for Wiki.js?
Debian 12 provides a minimal, stable, and security-focused foundation for hosting production services like Wiki.js. Advantages include:
| Feature | Benefit for Wiki.js Hosting |
|---|---|
| Linux Kernel 6.1 LTS | Excellent hardware support and performance tuning |
| Stable APT ecosystem | Predictable behavior across upgrades |
| Minimal base system | Reduced attack surface and memory usage |
| Security defaults | AppArmor, strong file permissions, no snap/flatpak |
| Excellent PostgreSQL support | First-class performance and compatibility |
| Systemd integration | Robust service management for automatic restarts |
For sysadmins who prefer control and transparency, Debian is ideal compared to heavier alternatives like Ubuntu Server or CentOS Stream.
Architecture of Wiki.js on Debian 12
| Component | Technology | Purpose |
|---|---|---|
| Backend | Node.js | Serves the core logic and API |
| Frontend | Vue.js (via Nuxt) | Handles client-side rendering and UI |
| Database | PostgreSQL | Stores pages, users, permissions, history |
| Reverse Proxy | NGINX or Apache | TLS termination, domain routing, compression |
| Optional Auth | LDAP, OAuth2, SAML | Enterprise-grade identity integration |
This stack integrates cleanly with Debian’s native package and service structure.
Key Use Cases
Wiki.js on Debian 12 is ideal for:
- Internal IT documentation for DevOps, SRE, and sysadmin teams
- Developer wikis integrated with Git repositories
- Academic or research teams collaborating on multi-author projects
- Customer-facing knowledge bases with branding and access control
- Project documentation with CI/CD or Git sync integrations
Thanks to its modular design and LDAP/SAML support, it’s also suitable for enterprise documentation systems.
Features Enhanced by Debian’s Stability
| Wiki.js Feature | Debian 12 Advantage |
|---|---|
| PostgreSQL backend | Native Debian support for long-term PostgreSQL versions |
| Git integration | Stable git-core, OpenSSH, and filesystem support |
| TLS/HTTPS setup | Easily configured with NGINX and Let’s Encrypt |
| Systemd service files | Full control of process behavior (e.g., restart on crash) |
| Node.js runtime isolation | Use of nvm, asdf, or LTS builds ensures compatibility |
| LDAP/SAML integration | Supported by stable Debian packages (e.g., libpam-ldap) |
Debian’s release cycle favors stability over bleeding-edge updates, making it suitable for production-ready wiki hosting.
Performance and Resource Efficiency
Wiki.js is a memory-efficient application, with a typical server consuming:
- ~300 MB RAM for the Node.js process
- < 200 MB for PostgreSQL under low to moderate usage
- Minimal CPU except during full-text indexing or batch operations
On Debian 12, it performs well even on modest VPSes or edge compute nodes, especially when combined with:
systemdprocess limitstmpfsusage for cachingpg_cronfor scheduled PostgreSQL maintenance- Reverse proxy caching via NGINX or Varnish
Security and Maintenance
Debian 12’s conservative and security-focused design pairs well with Wiki.js’s secure-by-default configuration:
- Built-in token-based auth with optional MFA
- Encrypted config storage using secrets and key files
- Systemd watchdogs to monitor availability
- SSL offloading via NGINX with HTTP/2 and HSTS
- Frequent security patches via
unattended-upgradesor manual APT workflows
Additionally, content can be regularly backed up via Git, PostgreSQL dumps, or external sync tools like rsync or Rclone.
Comparison: Wiki.js vs Other Wiki Platforms on Debian 12
| Feature / Platform | Wiki.js | MediaWiki | BookStack | DokuWiki |
|---|---|---|---|---|
| Backend | Node.js + PostgreSQL | PHP + MySQL | PHP + MySQL | PHP + flat files |
| UI/UX | Modern (Vue.js) | Outdated without skins | Simple, clean | Basic |
| Authentication | OAuth2, SAML, LDAP | LDAP (extensions) | OAuth, LDAP | Basic auth |
| Git Integration | Yes (sync/commit) | No | No | Plugins available |
| Realtime Collaboration | Partial (WIP) | No | No | No |
| Content Format | Markdown | Wiki syntax | WYSIWYG/Markdown | Plain text |
Wiki.js is a modern alternative to traditional PHP-based wikis, combining frontend flexibility with Git-native workflows.
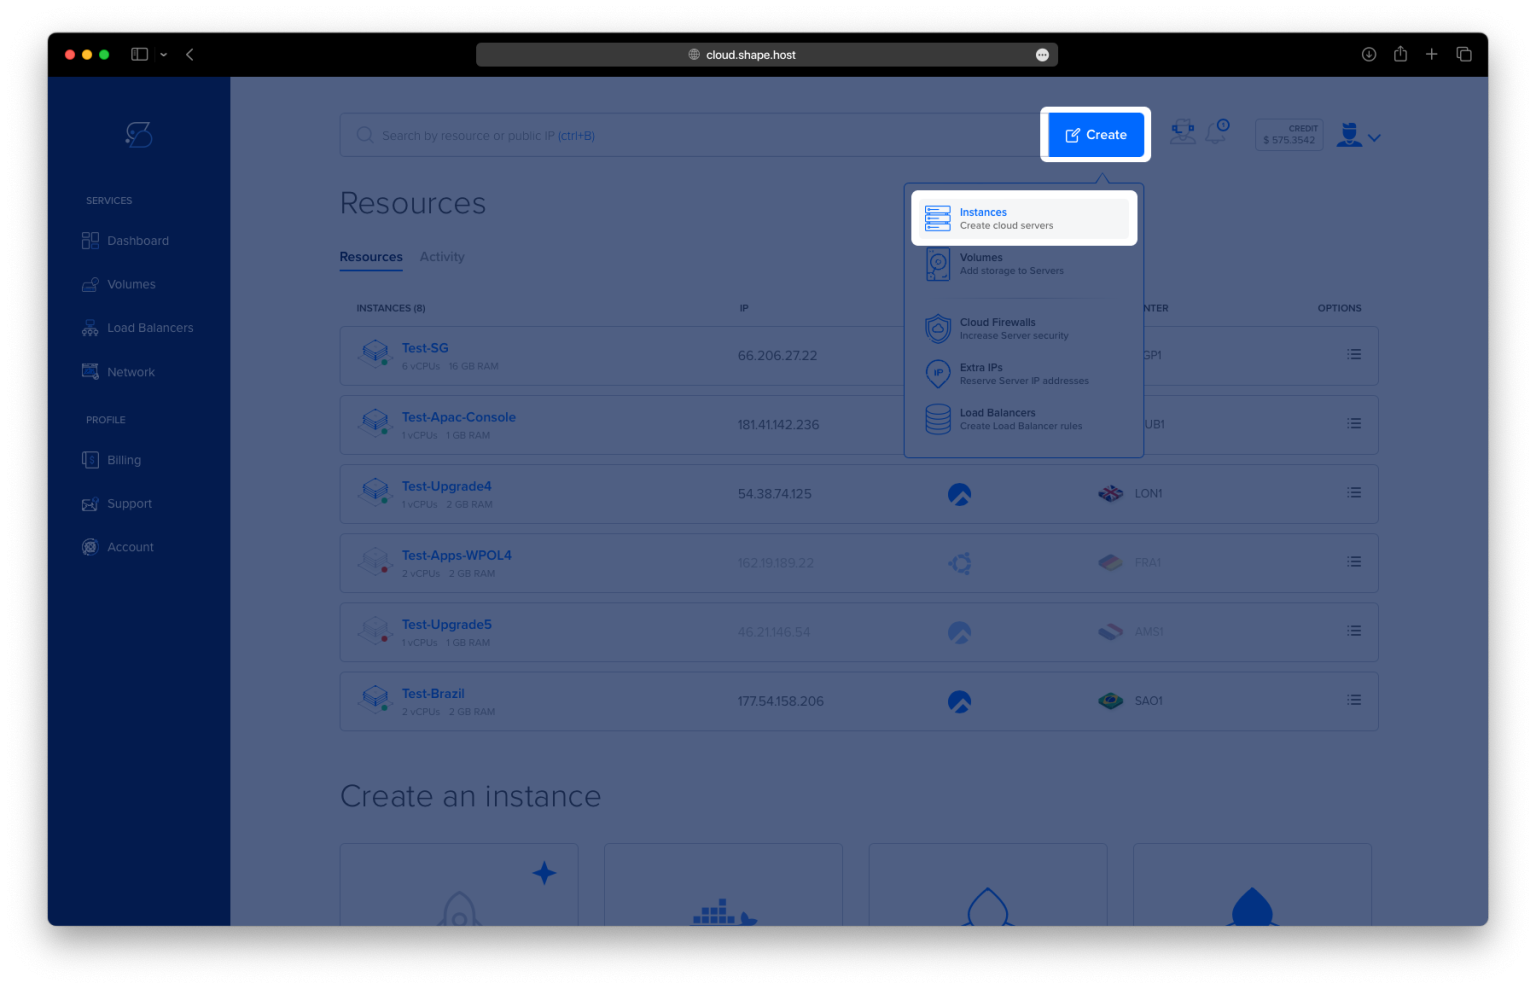
Step 1: Create a VPS instance on Shape.Host
Go to https://shape.host and log in.
Click Create → Instance.

Choose a server location closest to your audience.

Select Debian 12 (64-bit) as the operating system.
Choose a plan with at least 2 CPUs, 2 GB RAM, and 20 GB SSD.

Click Create Instance.

Copy the IP address from the “Resources” section once the instance is ready.

Step 2: Connect to your VPS
Linux or macOS:
Open a terminal and run:
ssh root@your_server_ip
Replace your_server_ip with your actual server IP.
Windows:
- Download and install PuTTY: https://www.putty.org
- Open PuTTY and enter your server IP in the “Host Name” field.
- Leave the port as 22 and connection type as SSH.
- Click Open.
- Log in as
rootand enter the server password.
Step 3: Update your server
apt update

Step 4: Install required packages
apt install -y curl gnupg2 ca-certificates apt-transport-https gnupg software-properties-common unzip wget nginx nodejs npm postgresql

Step 5: Create PostgreSQL user and database
su - postgres -c "psql -c \"CREATE USER wikijs WITH PASSWORD 'StrongPasswordHere';\""
su - postgres -c "psql -c \"CREATE DATABASE wikijs OWNER wikijs;\""

Step 6: Create Wiki.js system user
useradd -r -m -d /opt/wikijs -s /usr/sbin/nologin wikijs
Step 7: Download and extract Wiki.js
mkdir -p /opt/wikijs
cd /opt/wikijs
wget https://github.com/Requarks/wiki/releases/latest/download/wiki-js.tar.gz
tar -xzf wiki-js.tar.gz
chown -R wikijs:wikijs /opt/wikijs


Step 8: Configure Wiki.js
cp config.sample.yml config.yml
nano config.yml

Update the db section:
db:
  type: postgres
  host: localhost
  port: 5432
  user: wikijs
  pass: StrongPasswordHere
  db: wikijs
  ssl: false

Step 9: Create a systemd service for Wiki.js
nano /etc/systemd/system/wikijs.service
Paste:
[Unit]
Description=Wiki.js
After=network.target postgresql.service

[Service]
Type=simple
User=wikijs
WorkingDirectory=/opt/wikijs
ExecStart=/usr/bin/node server
Restart=always
Environment=NODE_ENV=production

[Install]
WantedBy=multi-user.target

Step 10: Enable and start Wiki.js
systemctl daemon-reexec
systemctl daemon-reload
systemctl enable --now wikijs
systemctl status wikijs


Step 11: Configure Nginx reverse proxy
nano /etc/nginx/sites-available/wikijs
Paste:
server {
    listen 80;
    server_name wiki.example.com;

    location / {
        proxy_pass http://127.0.0.1:3000;
        proxy_set_header Host $host;
        proxy_set_header X-Real-IP $remote_addr;
        proxy_set_header X-Forwarded-For $proxy_add_x_forwarded_for;
        proxy_set_header X-Forwarded-Proto $scheme;
    }
}

Then run:
ln -s /etc/nginx/sites-available/wikijs /etc/nginx/sites-enabled/
nginx -t && systemctl restart nginx

Step 12: Secure your site with HTTPS
apt install certbot python3-certbot-nginx
certbot --nginx -d wiki.example.com --redirect --agree-tos --email your-email@example.com


Step 13: Access Wiki.js
Open your browser and visit:
http://your_server_ip:3000(if not using Nginx)http://wiki.example.com(with Nginx)https://wiki.example.com(with Certbot HTTPS)
Now create the administrator user for Wiki.js and input your email address and password. Then, click INSTALL to confirm the installation.

Once the installation is finished, you should be redirected to your Wiki.js login page. Input your admin email address and password, then click LOGIN.

If your installation is successful, you should see the welcome page of Wiki.js. From here, you can create a new home page or access the Wiki.js administration dashboard.

If you click the ADMINISTRATION, you should see the Wiki.js administration page like this:

Need fast and reliable VPS hosting?
This tutorial was tested on a Linux SSD VPS from Shape.Host — affordable, fast, and easy to deploy.
➡️ Try Shape.Host now and launch your Wiki.js instance in minutes!