Cockpit on Rocky Linux 9
Cockpit is a lightweight, web-based interface that allows system administrators to manage servers via a browser. On Rocky Linux 9, it provides an accessible and efficient way to monitor, configure, and troubleshoot the system without requiring command-line expertise. It’s particularly well-suited for managing single nodes or small server fleets.
Key Features
| Feature | Description |
|---|---|
| Web Dashboard | Offers a real-time graphical overview of system performance and status |
| Service Management | Control systemd services (start, stop, enable, disable) |
| Resource Monitoring | Live charts for CPU, memory, network, and disk usage |
| Log Access | Integrated access to journald system logs |
| User Management | Add, delete, or modify local users and groups |
| Terminal Access | Built-in shell access from the browser |
| Network Configuration | Manage interfaces, firewall settings, and network services |
| Package Updates | Review and install available system updates graphically |
| Storage Management | Manage disks, partitions, RAID, and LVM volumes |
| Modular Architecture | Easily extendable with packages such as cockpit-podman or cockpit-storaged |
Benefits of Using Cockpit on Rocky Linux 9
- Preinstalled and enabled by default: Cockpit is included in Rocky Linux 9 minimal and server editions, making setup quick.
- Secure Access: Uses HTTPS and Linux PAM authentication; supports SELinux policies.
- Live Sync with CLI: Cockpit reflects real-time changes done via terminal.
- Minimal Resource Footprint: Suitable even for resource-constrained environments.
- Multi-Server Management: Connect and administer other servers from the same Cockpit interface.
Default Access
- Cockpit listens on port 9090
- Access URL:
https://your-server-ip:9090 - Log in with an existing system user account with administrative privileges
Real-World Use Cases
- DevOps Teams: Monitor and manage development or test servers easily
- Small Businesses: Handle infrastructure with minimal sysadmin expertise
- Home Labs: Convenient for homelab enthusiasts managing VMs or containers
- Remote Admin: Use Cockpit as a frontend to your headless Rocky Linux 9 server
Comparison with Other Server Management Tools
| Tool | Web Interface | Resource Usage | Scope |
|---|---|---|---|
| Cockpit | Yes | Low | General system and network management |
| Webmin | Yes | Medium | Very broad, including email and DNS setup |
| SSH Terminal | No | Minimal | Most flexible, requires expertise |
| Ansible AWX | Yes | High | Configuration automation and orchestration |
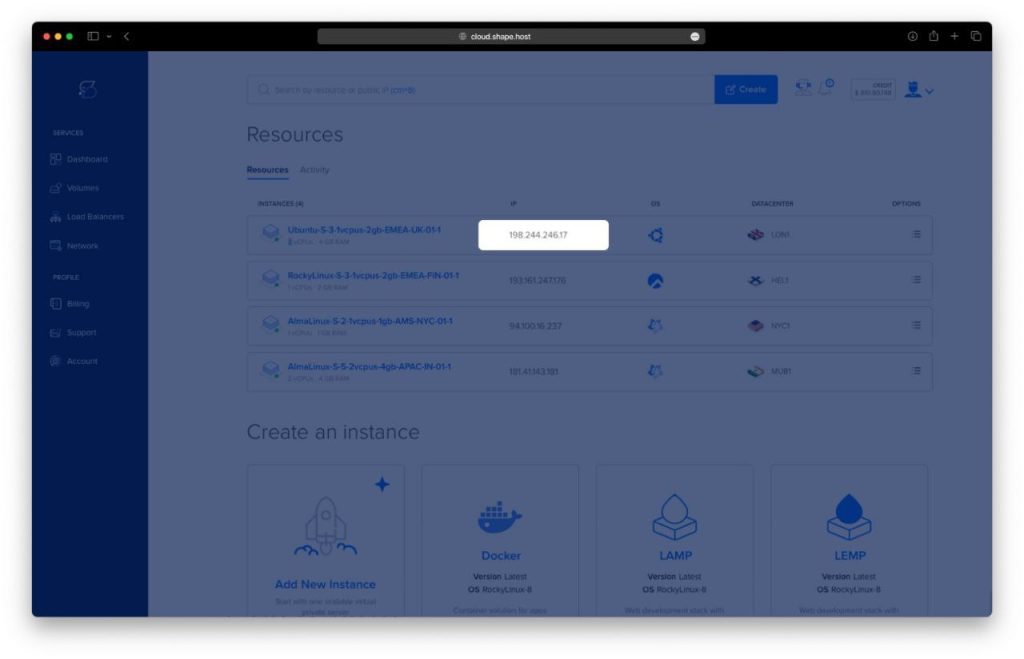
Create a VPS Instance on Shape.Host
Start by provisioning a Rocky Linux 9 VPS:
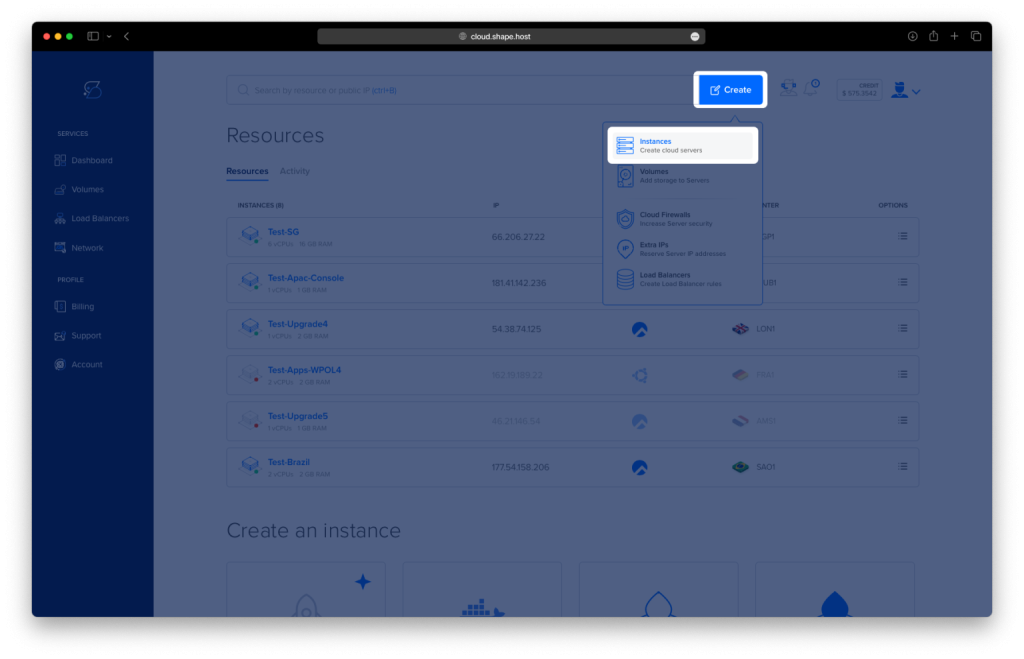
Go to https://shape.host and log in.
Click “Create”, then select “Instance”.
Set:
Location: Choose your preferred region.
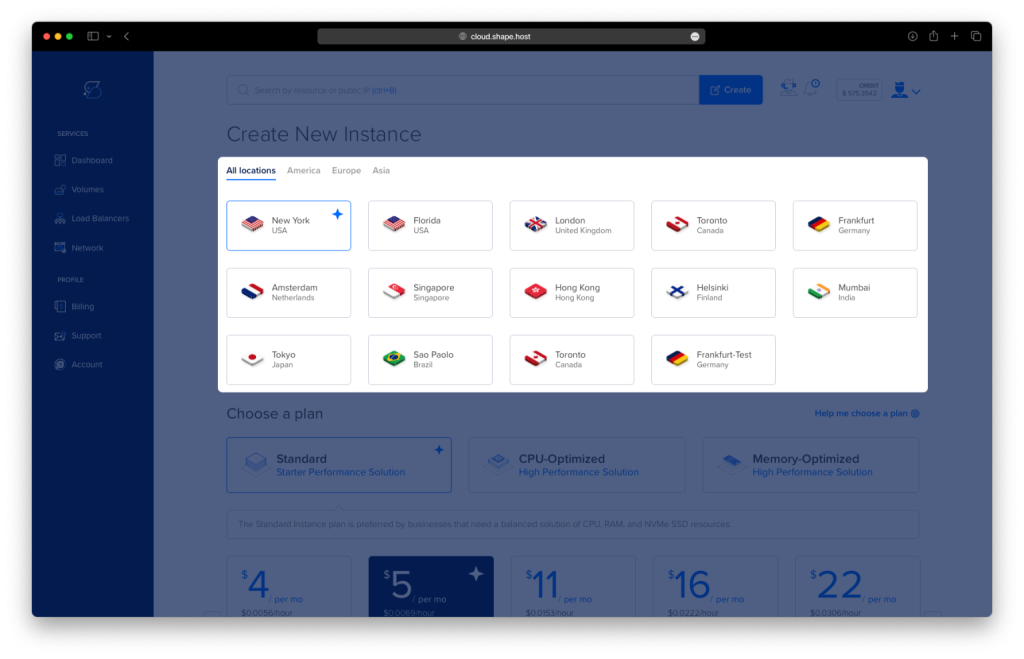
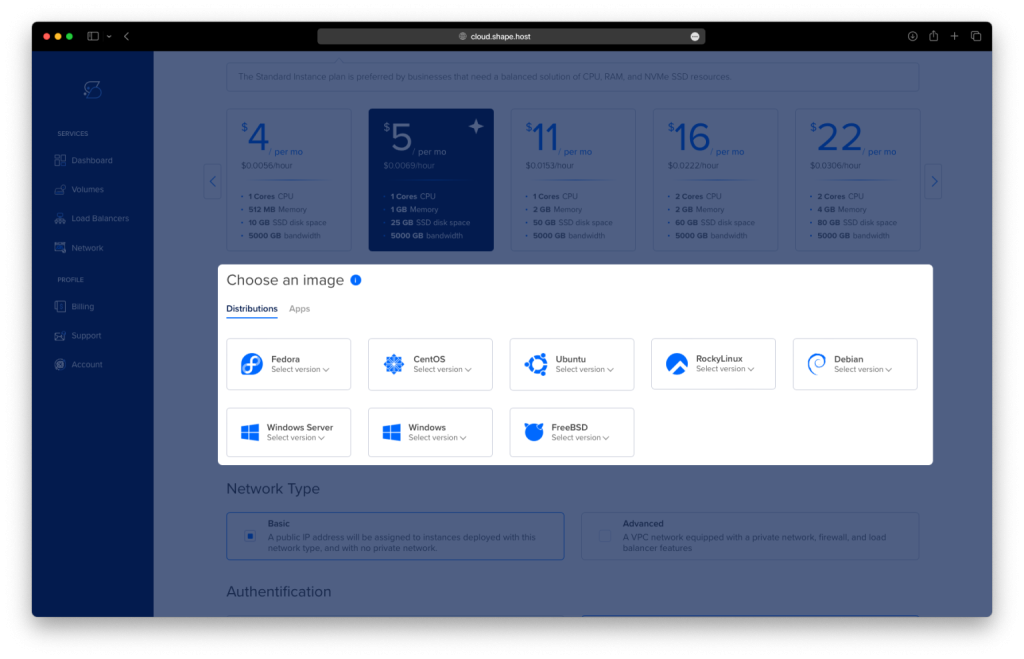
OS: Select Rocky Linux 9 (64-bit)
Resources: Minimum 1 CPU, 1 GB RAM, 10 GB SSD
Click “Create Instance” and wait for deployment.
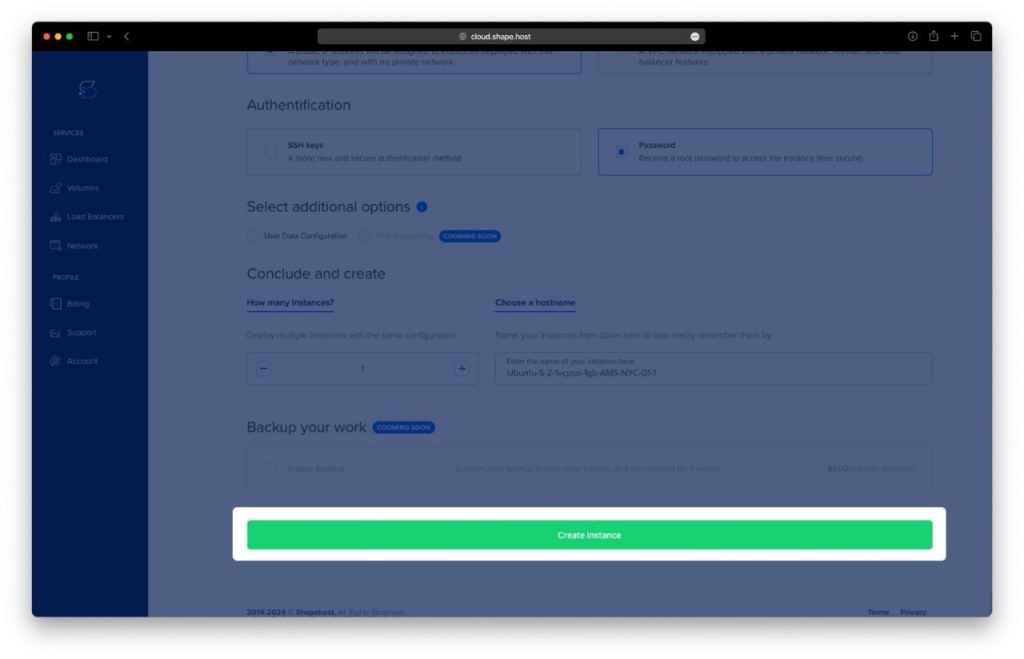
Note the IP address of your server for SSH access and web UI access.
Connect via SSH:
ssh root@your-server-ipOn Windows, use PuTTY.
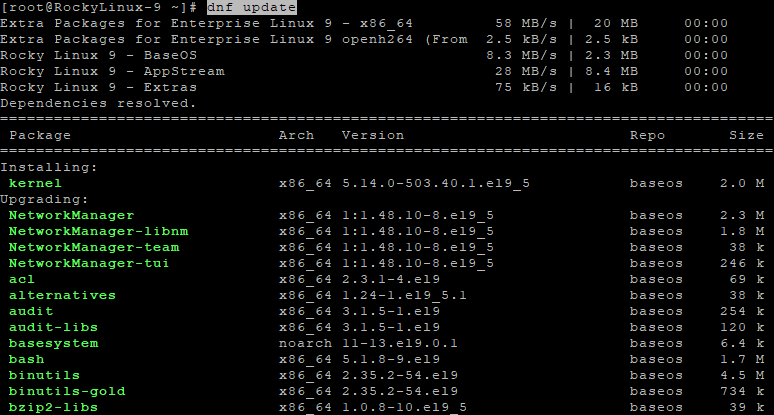
Step 1: Update System Packages
dnf update
🔹 Refreshes your system’s package list and installs the latest available updates.
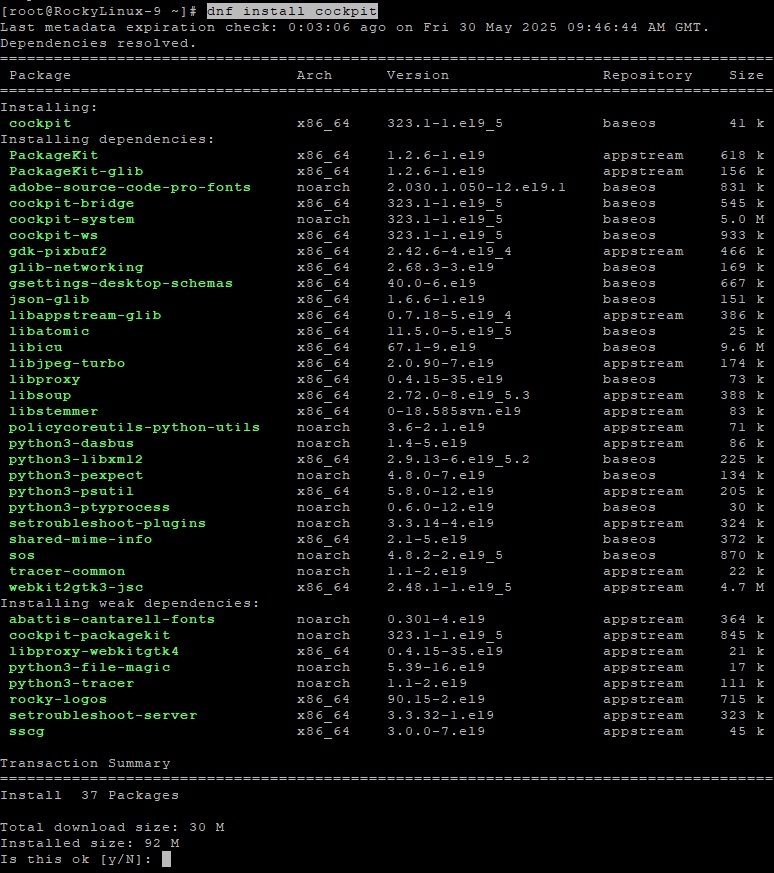
Step 2: Install Cockpit
dnf install cockpit
🔹 Installs the core Cockpit package which provides the web interface and service framework.
Step 3: Enable and Start Cockpit
systemctl enable --now cockpit.socket
🔹 Enables the Cockpit service to start at boot and activates it immediately.
Step 4: Verify Cockpit is Running
systemctl status cockpit.socket
🔹 Confirms that Cockpit is active and listening on port 9090.

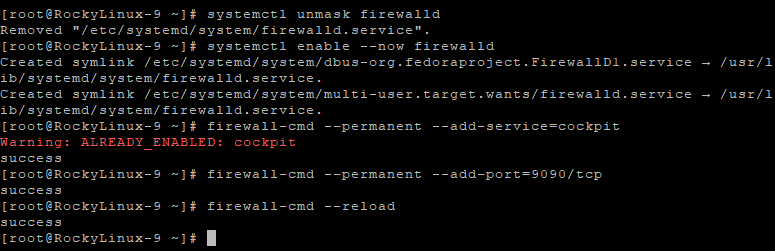
Step 5: Enable and Start the Firewall
systemctl unmask firewalld
🔹 Unmasks the firewall service if it was previously disabled or masked.
systemctl enable --now firewalld
🔹 Enables and starts the firewall service immediately.
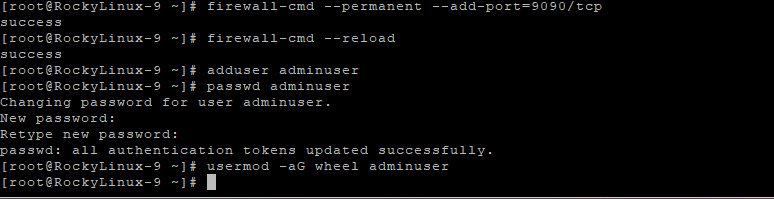
Step 6: Configure Firewall for Cockpit
firewall-cmd --permanent --add-service=cockpit
🔹 Allows predefined Cockpit service access (port 9090) through the firewall.
firewall-cmd --permanent --add-port=9090/tcp
🔹 Explicitly opens port 9090 just in case the cockpit service definition is unavailable.
firewall-cmd --reload
🔹 Applies all new firewall rules.
Step 7: Create a Cockpit Admin User
adduser adminuser
🔹 Creates a new user named adminuser.
passwd adminuser
🔹 Sets a secure password for the new user.
usermod -aG wheel adminuser
🔹 Adds the user to the wheel group, granting them administrative (sudo) privileges required for Cockpit tasks.
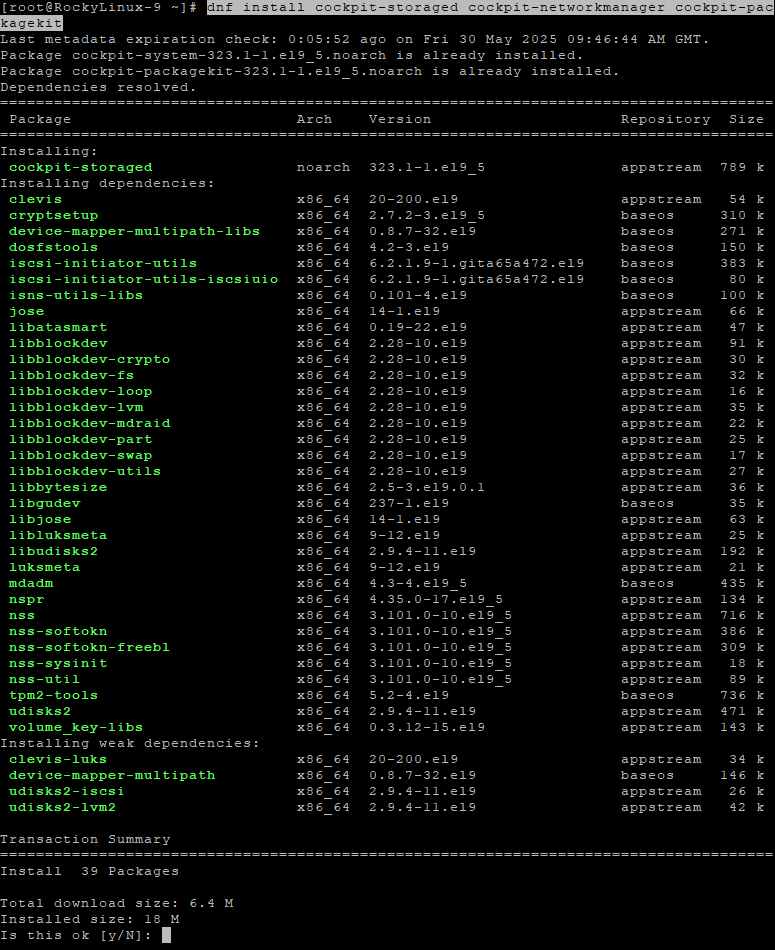
Step 8: Install Cockpit Modules (Optional)
dnf install cockpit-storaged cockpit-networkmanager cockpit-packagekit
🔹 Adds Cockpit extensions for managing:
- Storage (disks, partitions, LVM)
- Networking (interfaces, bridges, bonds)
- Package updates (via GUI)
These enhance the default Cockpit dashboard with more tools.
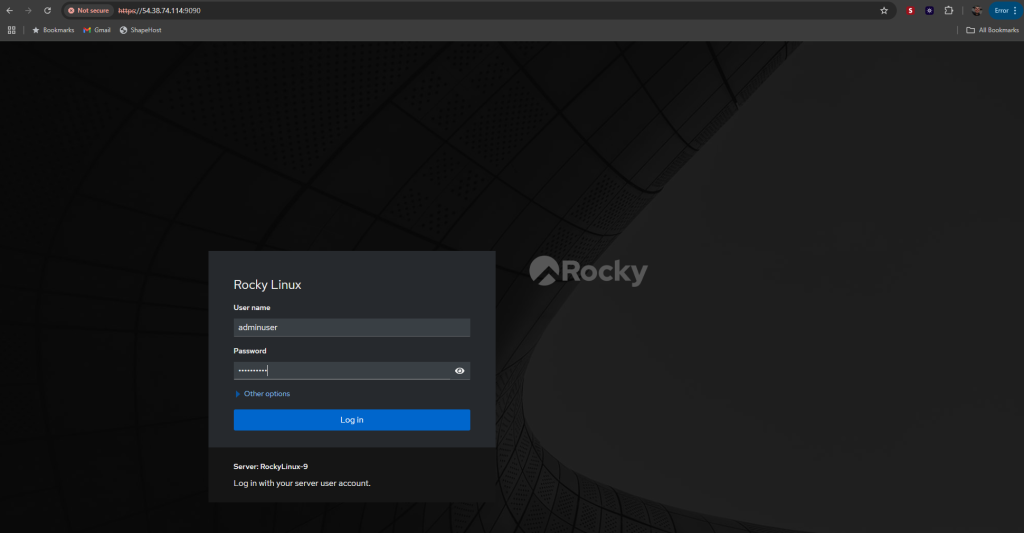
Step 9: Access the Cockpit Web Interface
Open your browser and visit:
https://YOUR_SERVER_IP:9090
Log in with the adminuser credentials.
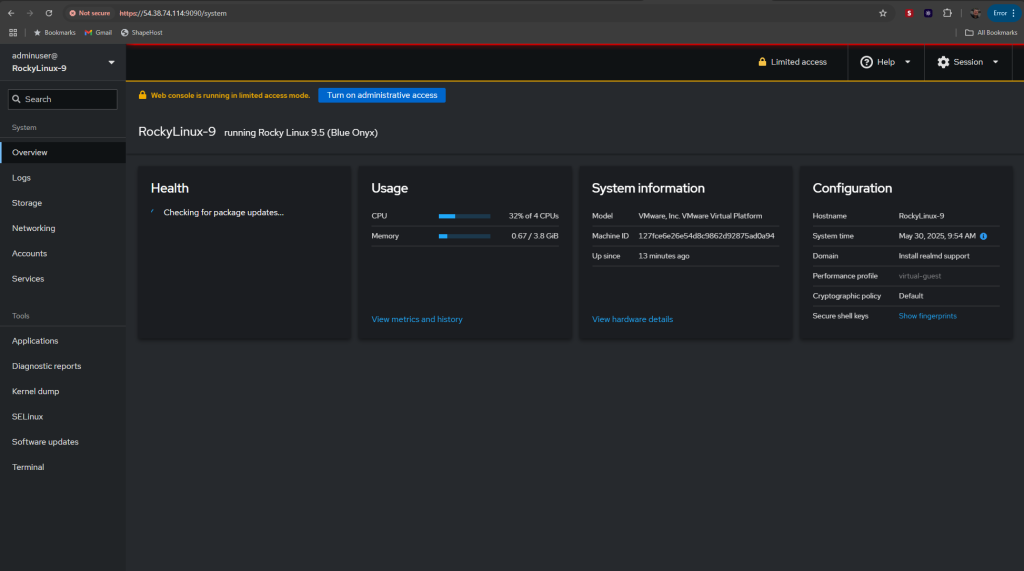
You’ll be redirected to a secure dashboard where you can manage services, monitor resources, update packages, and more.
Running Cockpit on Shape.Host Linux SSD VPS gives you:
Fast provisioning
SSD performance and full root access
Scalable plans for any workload
Support for Rocky Linux 9, Ubuntu, Debian, and more
Start managing your infrastructure smarter — deploy on Shape.Host today.