GlitchTip (Sentry Alternative) on Ubuntu 24.04 (Docker Compose + Nginx + SSL)
GlitchTip is a fully open-source error tracking, performance monitoring, and application observability platform, serving as a modern alternative to Sentry. It supports frontend and backend SDKs, error grouping, release tracking, user feedback, and real-time alerts — all without relying on proprietary cloud services.
Running GlitchTip on Ubuntu 24.04 LTS (Noble Numbat) provides a secure, stable, and high-performance foundation for your monitoring stack. Ubuntu 24.04 ships with systemd 255, OpenSSL 3, and up-to-date Docker packages, making it ideal for deploying GlitchTip with Docker Compose, PostgreSQL, Redis, Nginx, and SSL encryption for production use.
Architecture Overview
| Layer | Component | Role |
|---|---|---|
| OS | Ubuntu 24.04 LTS | Stable, long-term supported Linux base for server environments |
| Container Runtime | Docker Engine + Compose | Orchestrates GlitchTip and its dependencies |
| Application | GlitchTip (Django) | Core web application handling event ingestion and user dashboard |
| Database | PostgreSQL 15/16 | Stores user data, issues, events, and metadata |
| Cache/Queue | Redis | Manages background jobs and async task queues |
| Reverse Proxy | Nginx | Handles HTTPS termination, compression, and routing |
| TLS | Let’s Encrypt / PKI | Secures the dashboard and API endpoints with HTTPS |
Why Use GlitchTip?
- Open-source alternative to Sentry – same core functionality without cloud lock-in.
- Privacy-friendly – fully self-hosted, with no external data sharing.
- Compatible SDKs – supports existing Sentry client libraries.
- Modern stack – powered by Django, PostgreSQL, and Redis.
- Team management – invite users, assign roles, and organize multiple projects.
- Performance tracking – measure slow transactions and frontend errors.
- Email notifications – built-in support for SMTP alerts.
GlitchTip vs Other Error Tracking Tools
| Feature/Capability | GlitchTip (Self-hosted) | Sentry (Cloud/Self-hosted) | LogRocket | Elastic APM |
|---|---|---|---|---|
| Hosting | Self-hosted / Cloud | Cloud or on-premise | Cloud only | Self-hosted / Cloud |
| Database | PostgreSQL | PostgreSQL | Proprietary | Elasticsearch |
| Source available | 100% open-source | Partially open | No | Yes |
| SDK compatibility | Sentry SDKs supported | Native | No | Partial |
| Cost | Free, open-source | Paid tiers | Subscription | Depends on license |
| Best for | SMBs / DevOps teams | Enterprises | Frontend apps | Large infra monitoring |
GlitchTip offers Sentry-level observability at zero cost, making it a top choice for development teams who want error visibility and performance analytics without sacrificing data ownership.
Security & Best Practices
- Deploy GlitchTip behind Nginx with HTTPS enabled.
- Store database passwords and keys securely in
.envfiles or Docker secrets. - Use separate PostgreSQL and Redis containers for modular scaling.
- Configure SMTP credentials for email notifications and alerts.
- Restrict ports using UFW or nftables, exposing only 80 and 443.
- Keep Docker images and Ubuntu packages regularly updated.
- Automate SSL renewal with Certbot or Traefik’s ACME integration.
- Enable fail2ban or rate limiting on login endpoints.
Typical Use Cases
- Error monitoring for web, mobile, and backend applications.
- Frontend JS crash tracking using Sentry-compatible SDKs.
- Performance analytics for slow API requests or database queries.
- Infrastructure observability for internal microservices.
- Private Sentry alternative for teams requiring GDPR or HIPAA compliance.
Deploying GlitchTip on Ubuntu 24.04 with Docker Compose gives you a fully self-hosted, Sentry-compatible error monitoring solution that combines the power of open-source software with modern observability — ideal for developers, startups, and DevOps teams seeking privacy, scalability, and insight.
Step 1: Create a Shape.Host Cloud VPS Instance
Go to Shape.Host and log in.
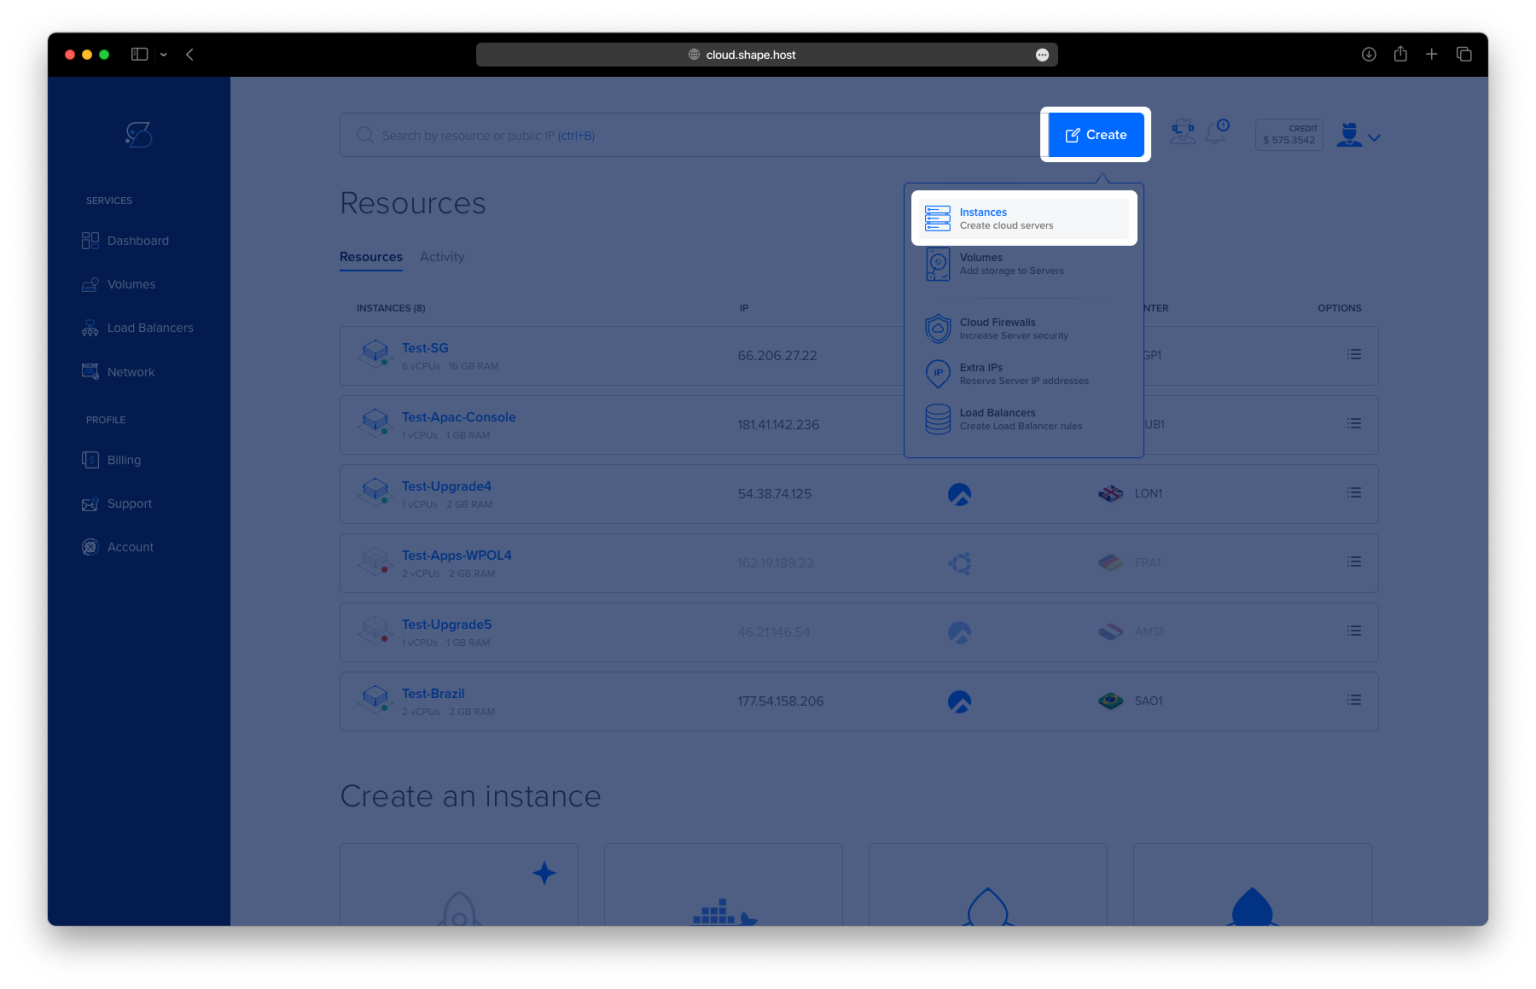
Click Create → Instance.

Choose your preferred data center location.

Select a plan with at least 2 CPUs, 4 GB RAM, and 20 GB SSD.
Choose Ubuntu 24.04 (64-bit) as the operating system.

Click Create Instance.

Once ready, copy your public IP address from the “Resources” tab.

Step 2: Connect to Your Server
SSH into your instance using:
ssh root@your_server_ip
Step 3: Update the System
Keep your system packages up to date:
apt update

Step 4: Install Docker and Dependencies
Install essential tools:
apt install ca-certificates curl gnupg

Create a directory for Docker’s GPG key:
install -m 0755 -d /etc/apt/keyrings
Download and store Docker’s official GPG key:
curl -fsSL https://download.docker.com/linux/ubuntu/gpg -o /etc/apt/keyrings/docker.asc
Set permissions for the key file:
chmod a+r /etc/apt/keyrings/docker.asc
Add Docker’s official repository:
echo "deb [arch=$(dpkg --print-architecture) signed-by=/etc/apt/keyrings/docker.asc] \
https://download.docker.com/linux/ubuntu noble stable" > /etc/apt/sources.list.d/docker.list
Update repositories:
apt update

Install Docker Engine, CLI, and Compose plugin:
apt install docker-ce docker-ce-cli containerd.io docker-buildx-plugin docker-compose-plugin

Check Docker versions:
docker --version
docker compose version
Step 5: Create a Directory for GlitchTip
Create the installation directory and navigate into it:
mkdir -p /opt/glitchtip
cd /opt/glitchtip

Step 6: Create the Docker Compose Configuration
Open the configuration file:
nano docker-compose.yml
Paste the following configuration:
version: '3.8'

services:
  postgres:
    image: postgres:15
    container_name: glitchtip_postgres
    restart: always
    environment:
      POSTGRES_DB: glitchtip
      POSTGRES_USER: glitchtip
      POSTGRES_PASSWORD: strongpassword
    volumes:
      - ./postgres-data:/var/lib/postgresql/data

  redis:
    image: redis:7
    container_name: glitchtip_redis
    restart: always

  glitchtip:
    image: glitchtip/glitchtip:latest
    container_name: glitchtip_app
    depends_on:
      - postgres
      - redis
    environment:
      DATABASE_URL: postgres://glitchtip:strongpassword@postgres:5432/glitchtip
      SECRET_KEY: changethiskeytoarandomstring
      EMAIL_URL: smtp://smtp.example.com:587
      DEFAULT_FROM_EMAIL: noreply@example.com
      CELERY_BROKER_URL: redis://redis:6379/0
      ENABLE_SIGNUPS: "True"
      GLITCHTIP_DOMAIN: glitchtip.example.com
    ports:
      - "8000:8080"
    volumes:
      - ./uploads:/app/uploads
    restart: always

volumes:
  postgres-data:
  uploads:
⚙️ Replace:
strongpassword→ your preferred PostgreSQL passwordchangethiskeytoarandomstring→ a secure random string (useopenssl rand -hex 32)smtp.example.com→ your SMTP mail serverglitchtip.example.com→ your actual domain name
Save and exit (CTRL + O, ENTER, CTRL + X).

Step 7: Start GlitchTip
Pull and start the containers:
docker compose up -d

Check if all containers are running:
docker ps

Step 8: Initialize the Database
Run database migrations:
docker compose exec glitchtip python3 manage.py migrate

Create an admin user:
docker compose exec glitchtip python3 manage.py createsuperuser
Follow the prompts to set an email, username, and password.

Step 9: Install and Configure Nginx
Install Nginx:
apt install nginx

Create a configuration file:
nano /etc/nginx/sites-available/glitchtip.conf
Paste this configuration:
server {
    listen 80;
    server_name glitchtip.example.com;

    location / {
        proxy_pass http://127.0.0.1:8000;
        proxy_http_version 1.1;
        proxy_set_header Host $host;
        proxy_set_header X-Real-IP $remote_addr;
        proxy_set_header X-Forwarded-For $proxy_add_x_forwarded_for;
        proxy_set_header X-Forwarded-Proto $scheme;
        proxy_buffering off;
    }
}

Enable the configuration:
ln -s /etc/nginx/sites-available/glitchtip.conf /etc/nginx/sites-enabled/
Test and reload Nginx:
nginx -t
systemctl reload nginx

Step 10: Enable SSL with Certbot
Install Certbot and Nginx plugin:
apt install certbot python3-certbot-nginx

Request and apply an SSL certificate:
certbot --nginx -d ubuntu-tutorials.shape.host --email contact@shape.host --agree-tos --non-interactive

Reload Nginx:
systemctl reload nginx
Step 11: Final Database Sync (Optional)
If you modify configurations, re-run the migration commands:
docker compose exec glitchtip python3 manage.py migrate
docker compose exec glitchtip python3 manage.py createsuperuser


Step 12: Access GlitchTip
Visit your domain in the browser:
https://glitchtip.example.com
You’ll be greeted by the GlitchTip web interface, where you can log in with your admin credentials.


You installed GlitchTip on Ubuntu 24.04 using Docker Compose, Nginx, and SSL encryption.
GlitchTip provides a robust, open-source alternative to Sentry — ideal for monitoring applications without third-party dependencies.
Deploy it on a Shape.Host Linux SSD VPS for reliable uptime, scalable performance, and complete data ownership.