Plane.so on AlmaLinux 9 (Docker Compose + PostgreSQL + Redis + SSL)
Plane.so is an open-source project management and issue tracking platform designed for modern software teams. It offers a clean, developer-focused interface for managing sprints, issues, roadmaps, and releases, similar to tools like Jira, Linear, and ClickUp — but with one key advantage: it’s self-hosted, giving you complete control over your data, privacy, and infrastructure.
Running Plane on AlmaLinux 9, a RHEL-compatible enterprise Linux distribution, ensures a stable, secure, and long-term supported foundation for production environments. With SELinux enforcement, systemd 252, OpenSSL 3, and modern Docker support, AlmaLinux 9 is an excellent choice for deploying Plane using Docker Compose, with integrated SSL and reverse proxy capabilities.
Architecture Overview
| Layer | Component | Role |
|---|---|---|
| OS | AlmaLinux 9 | Enterprise-grade RHEL-compatible base with SELinux enabled |
| Container Runtime | Docker Engine + Compose | Orchestrates Plane and its dependent services |
| Database | PostgreSQL 15 | Stores issues, projects, users, and configuration data |
| Cache Queue | Redis | Handles caching, real-time updates, and background tasks |
| Backend | Django (Python) | Powers API, business logic, and authentication |
| Frontend | Next.js (React) | Provides the user-facing web interface for managing projects |
| Reverse Proxy | Nginx (optional) | TLS termination, request routing, and compression |
| TLS | Let’s Encrypt / PKI | Provides secure HTTPS for all user traffic |
Why Use Plane.so?
- Self-hosted alternative to Jira, Linear, or ClickUp.
- Full data ownership – no SaaS dependency or vendor lock-in.
- Agile-ready features – sprints, epics, roadmaps, and issue tracking.
- Modern tech stack – built with React, Django, and PostgreSQL.
- Free and open-source – perfect for startups, agencies, and enterprises.
Plane.so vs Other Project Management Tools
| Feature/Capability | Plane.so (Self-hosted) | Jira (Cloud) | Linear (Cloud) | ClickUp (Cloud) |
|---|---|---|---|---|
| Hosting | Self-hosted (Docker) | SaaS only | SaaS only | SaaS only |
| Cost | Free, open-source | Subscription-based | Subscription-based | Subscription-based |
| Database | PostgreSQL | Proprietary | Proprietary | Proprietary |
| Real-time updates | Yes (Redis backend) | Yes | Yes | Yes |
| Customization | High (source access) | Limited | Moderate | Limited |
Plane is perfect for teams that need enterprise-grade project management without relying on cloud platforms or expensive licensing.
Security & Best Practices
- Deploy behind Nginx with HTTPS enabled.
- Use Docker secrets or environment variables to store credentials securely.
- Restrict PostgreSQL and Redis to the internal Docker network.
- Run Plane under a dedicated non-root system user.
- Apply SELinux policies and AlmaLinux firewall rules for hardening.
- Schedule automatic PostgreSQL backups for data protection.
- Keep Docker images and AlmaLinux packages updated regularly.
Typical Use Cases
- Software teams managing tasks, issues, and releases.
- Startups replacing Jira or Linear with a free, self-hosted solution.
- Agencies coordinating projects across multiple clients.
- Enterprises deploying project management tools under compliance frameworks.
- Open-source projects managing bugs, milestones, and contributions.
Deploying Plane.so on AlmaLinux 9 with Docker Compose gives you a secure, enterprise-grade, self-hosted project management platform — powerful, scalable, and built entirely on open-source technologies.
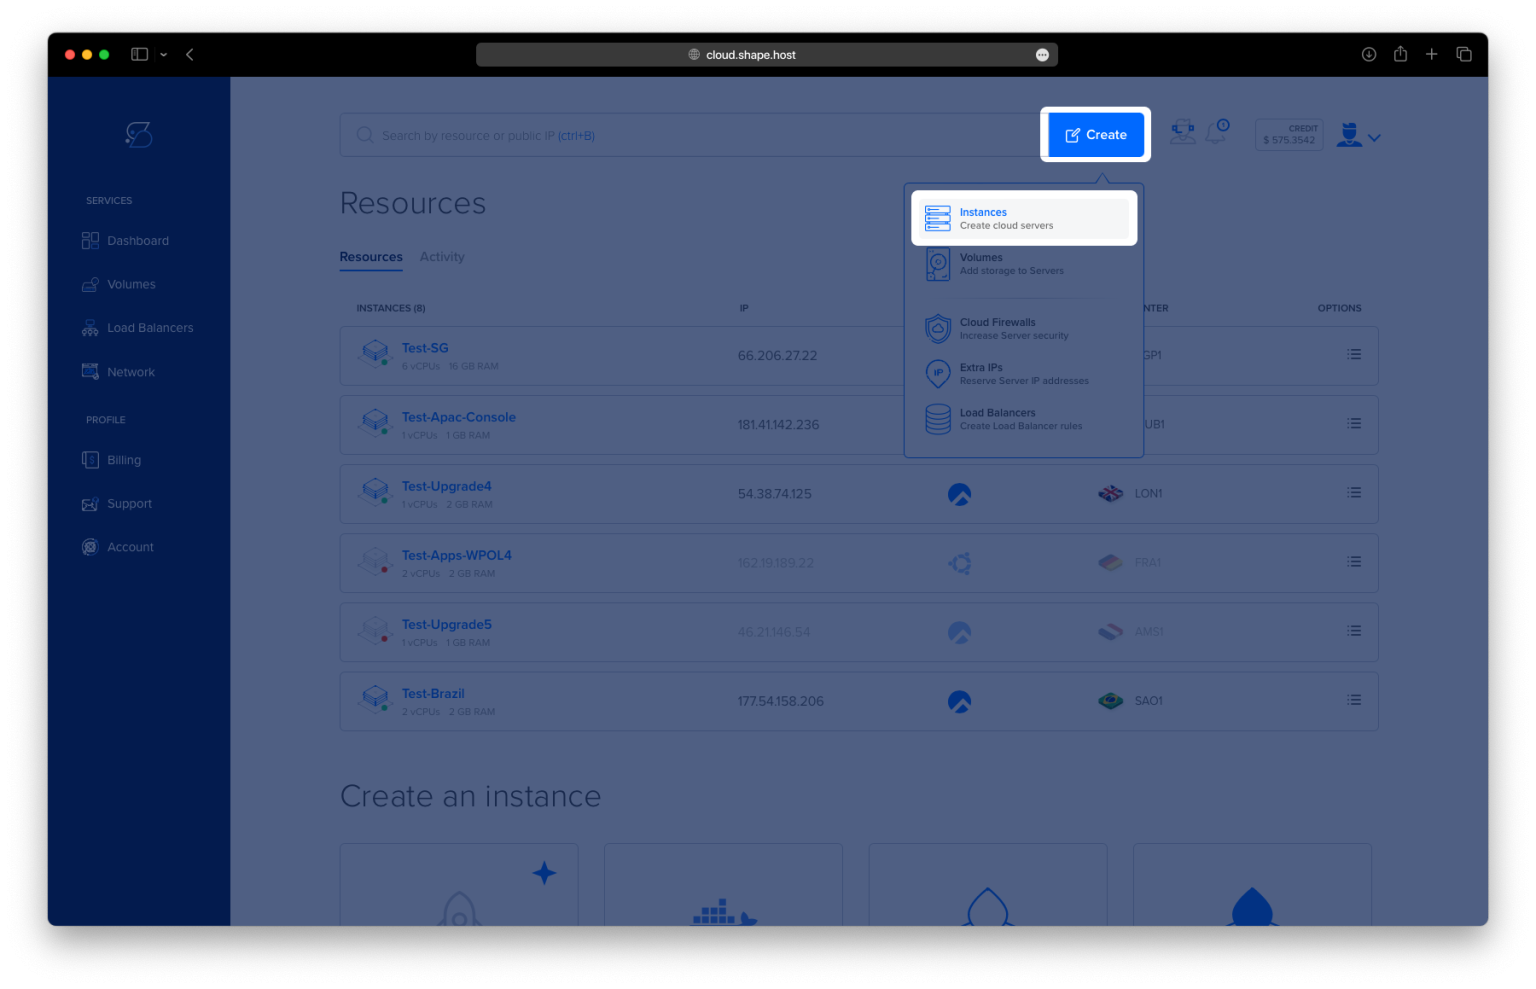
Step 1: Create a Server Instance on Shape.Host
Before beginning, set up your AlmaLinux server:
Log in to your Shape.Host dashboard.
Click Create → Instance.

Choose your preferred data center location.

Select a plan with at least 4 CPUs, 8 GB RAM, and 40 GB SSD (recommended for Plane).
Pick AlmaLinux 9 (64-bit) as your operating system.

Click Create Instance.

Copy your instance’s IP address from the Resources section once it’s active.

Step 2: Connect to Your Server
- Linux/macOS:
ssh root@your_server_ip - Windows (PuTTY):
- Open PuTTY.
- Enter your server’s IP address.
- Select SSH, click Open, and log in with your Shape.Host credentials.
Step 3: Install Docker and Docker Compose
Update your packages:
dnf update

Install required dependencies:
dnf install ca-certificates curl gnupg lsb-release

Add Docker’s official GPG key:
curl -fsSL https://download.docker.com/linux/centos/gpg | gpg --dearmor -o /etc/pki/rpm-gpg/docker.gpg
Add Docker’s stable repository:
tee /etc/yum.repos.d/docker.repo > /dev/null <<EOF
[docker-ce-stable]
name=Docker CE Stable - \$basearch
baseurl=https://download.docker.com/linux/centos/\$releasever/\$basearch/stable
enabled=1
gpgcheck=1
gpgkey=file:///etc/pki/rpm-gpg/docker.gpg
EOF
Update repository cache and install Docker Engine with Compose plugin:
dnf update
dnf install docker-ce docker-ce-cli containerd.io docker-compose-plugin

Enable and start Docker:
systemctl enable --now docker
Verify that Docker Compose is installed:
docker compose version
If you see version details, Docker Compose is ready.

Step 4: Install Plane.so Using the Official Installer
Download and run the Plane installer script:
curl -fsSL https://prime.plane.so/install/ | sh -
This script automatically downloads Plane’s Docker Compose configuration, required images, and supporting services such as PostgreSQL, Redis, and the Plane backend/frontend containers.

Step 5: Complete the Interactive Setup
During installation, you’ll be prompted for a few configuration details:
- Domain name: Enter your domain (e.g.,
plane.example.com). - Installation type:
- Choose Express for quick local testing.
- Choose Advanced for production environments, which allows more customization.
Once you confirm, the installer will automatically:
- Pull all necessary Docker images.
- Configure the environment.
- Start the Plane services using Docker Compose.


Step 6: Access the Plane.so Dashboard
After installation, open your browser and visit:
https://YOUR_DOMAIN
You’ll see the Plane setup interface, where you can create your first workspace and account.


You’ve successfully installed Plane.so on AlmaLinux 9 using Docker Compose. Your self-hosted Plane instance is now up and running, ready for collaborative project management and issue tracking.
For maximum performance and uptime, host your Plane installation on Shape.Host Cloud VPS — optimized for Docker-based applications and high-availability workloads.