Swap memory (or swap space) is a dedicated portion of disk storage used by Debian 12 when physical RAM (Random Access Memory) is fully utilized. It acts as a virtual memory extension, allowing the system to continue running smoothly by moving inactive processes from RAM to disk.
Key Features of Swap Memory on Debian 12
- Extends System Memory
- Provides additional memory when RAM is exhausted, preventing system crashes.
- Supports System Stability
- Ensures smooth performance when running multiple applications by offloading inactive processes.
- Enables Hibernation
- Required for suspend-to-disk (hibernation), where the system saves its current state to swap.
- Configurable as a Partition or File
- Swap space can be created as either a swap partition or a swap file on Debian 12.
- Kernel-Managed Memory Allocation
- Debian’s Linux kernel automatically manages swap usage based on system needs.
- Adjustable Swappiness Value
- The
swappinessparameter controls how frequently the system moves data from RAM to swap, balancing performance and disk wear.
- The
Advantages of Swap Memory on Debian 12
- Prevents Out-of-Memory Errors: Helps avoid crashes when RAM is full.
- Supports Multitasking: Allows running more applications on limited RAM.
- Enhances Server Stability: Useful for handling spikes in memory demand on Debian-based servers.
- Optimizes Memory Usage: Moves inactive processes to swap, freeing up RAM for active tasks.
Disadvantages of Swap Memory
- Slower Than RAM: Since swap relies on disk storage, it is significantly slower than physical RAM.
- May Cause Performance Issues: Excessive swapping (thrashing) can slow down the system.
- Can Wear Out SSDs: Continuous swap usage on SSD drives can reduce their lifespan over time.
What You Can Do with Swap Memory on Debian 12
- Improve Performance on Low-RAM Systems
- Ideal for Debian 12 installations on machines with limited RAM.
- Enable Hibernation Support
- Required for hibernating the system and resuming the session later.
- Manage Memory Usage for Servers
- Helps prevent crashes and improves stability on Debian-based VPS and dedicated servers.
- Customize Swap Behavior
- Adjust
swappinesssettings to control how aggressively the system uses swap.
- Adjust
Swap Memory vs. RAM
| Feature | Swap Memory | RAM (Physical Memory) |
|---|---|---|
| Speed | Slow (disk-based) | Fast (direct CPU access) |
| Persistence | Data remains until overwritten | Cleared on reboot |
| Cost | Uses disk space | Requires physical hardware |
| Use Case | Backup memory, hibernation | Active processes, caching |
Why Swap Memory is Important on Debian 12
Swap memory plays a vital role in system stability and performance optimization, especially for low-RAM devices, servers, and cloud instances. While it is not a substitute for RAM, properly configured swap space can help prevent performance bottlenecks and system failures.
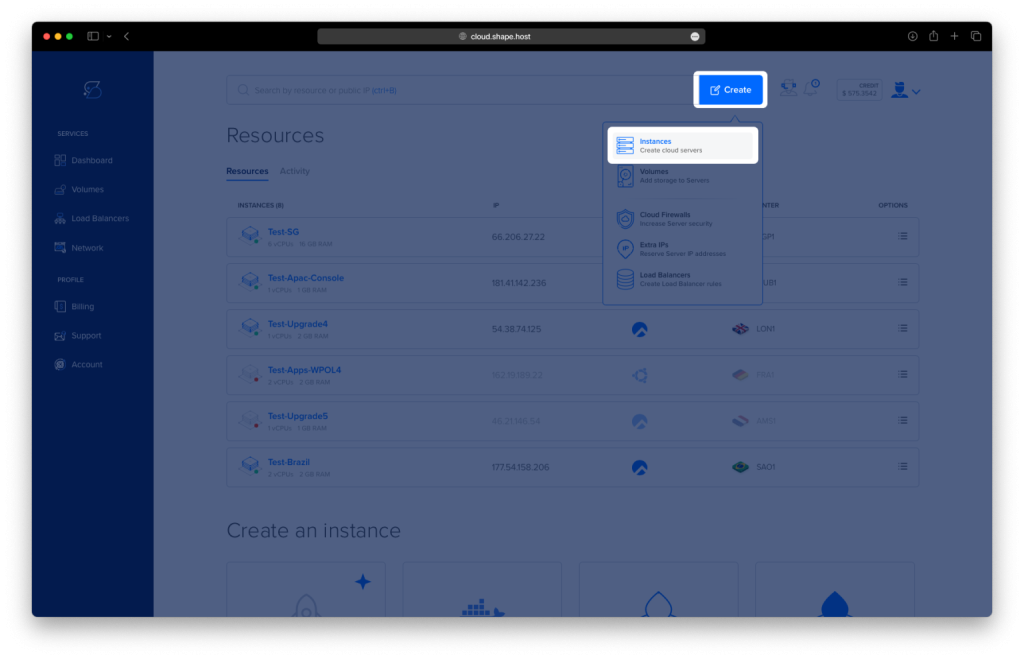
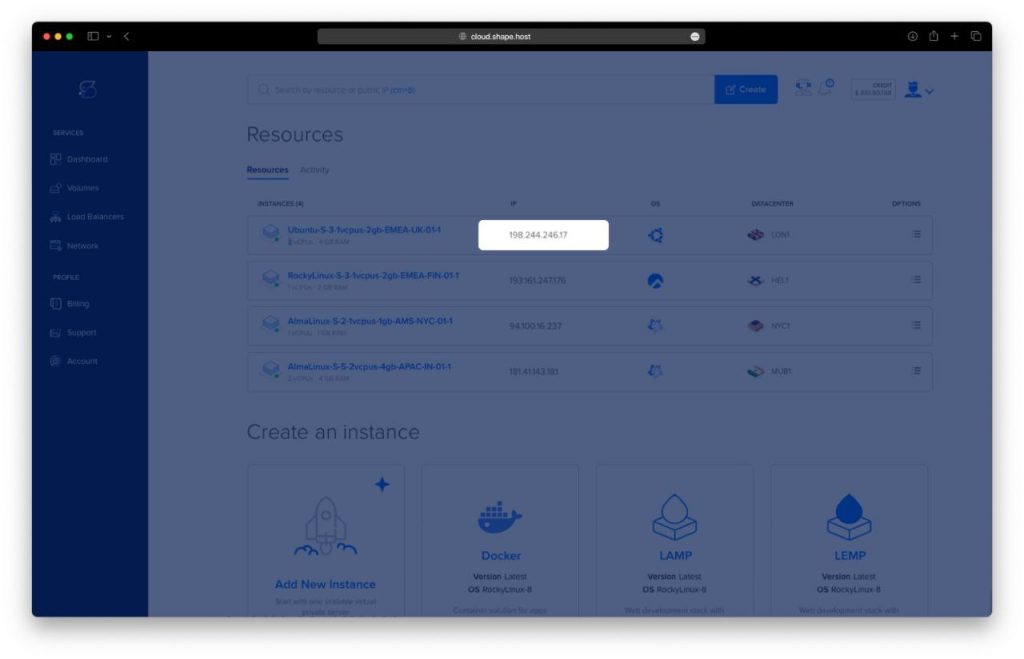
Step 1: Create a Server Instance on Shape.Host
Before adding swap memory, you need a server to host your environment. Here’s how to set up a server instance on Shape.Host:
Access Shape.Host: Log in to your Shape.Host account and navigate to the Cloud VPS section.
Launch a New Server: Click on “Create” and select the server type that best suits your project requirements.
Choose a Data Center: Pick a data center location that is closest to your target audience for optimal performance.
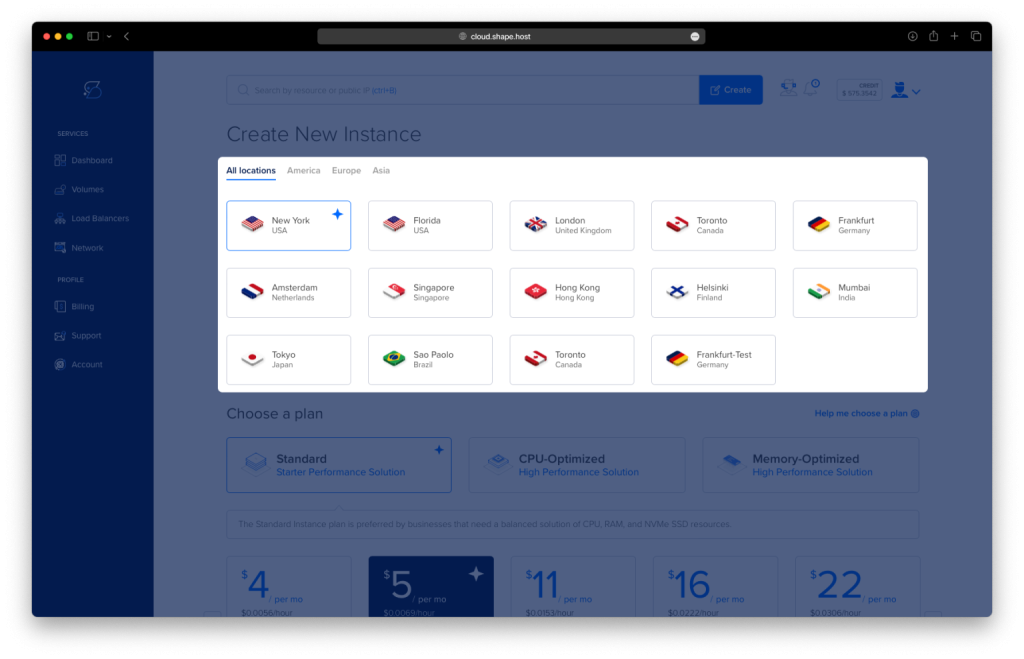
Select a Plan: Choose a hosting plan that aligns with your resource needs and budget.
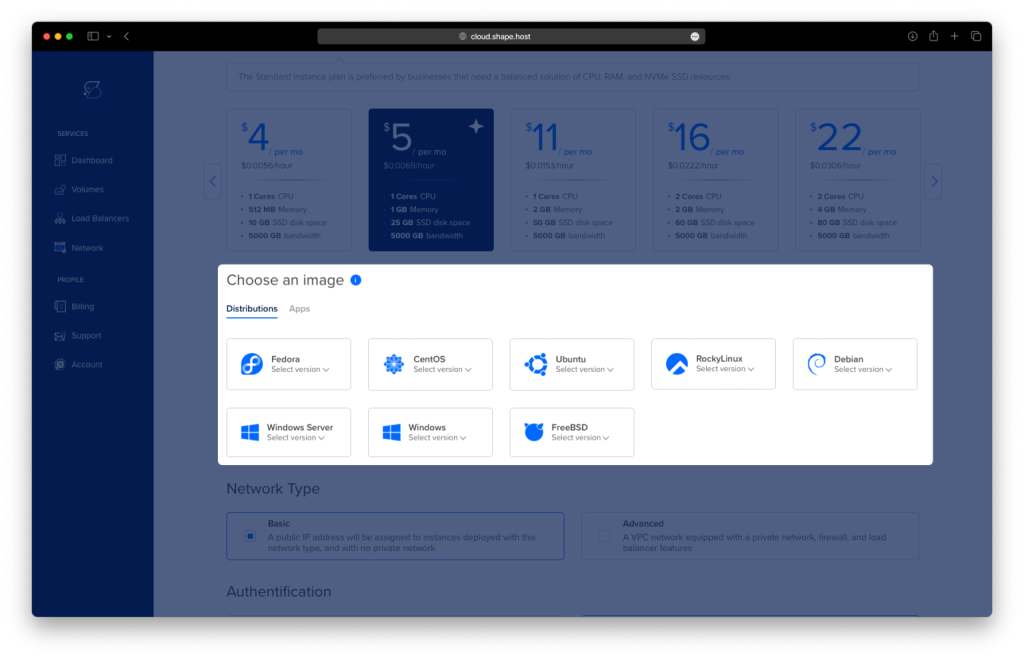
Set the OS: Select Debian 12 as your operating system.
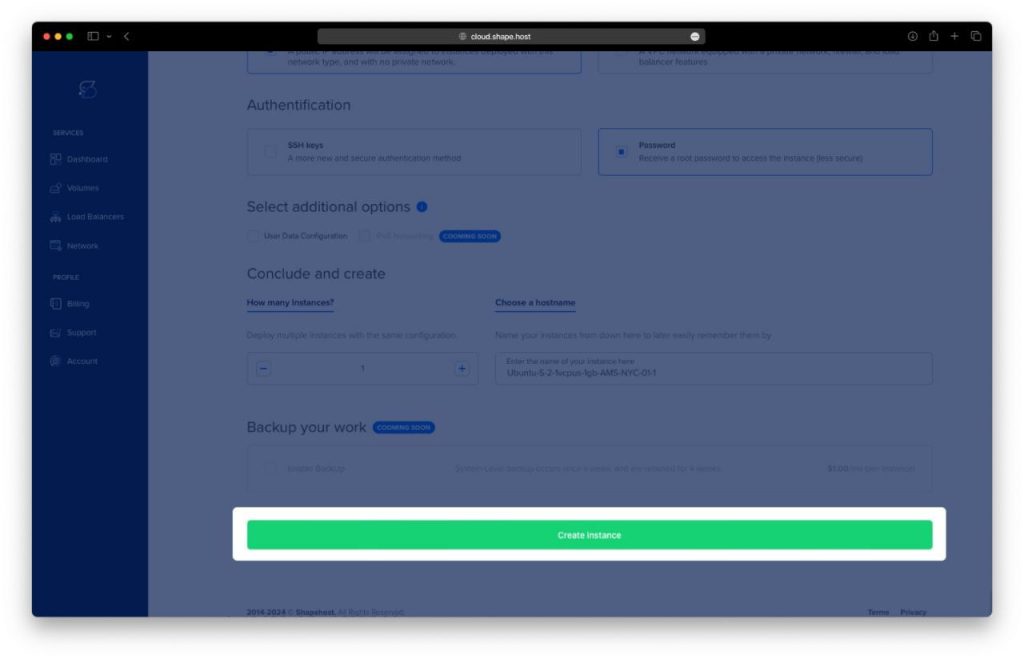
Finalize the Setup: Review your configuration and click “Create Instance” to deploy your instance. Your server will be ready in a few minutes.
In Dashboard, under Resources you will find your Instance IP.
Step 2: Connect to Your Instance
Once your server is ready, you need to connect to it using SSH. Here’s how to do it:
- Linux/macOS: Open your terminal and use the following command:
ssh root@your_server_ipReplace your_server_ip with the server’s IP address.
- Windows: Use an SSH client like PuTTY. Enter your server’s IP address, specify the port (usually 22), and click “Open.” Log in with your username and password.
Step 3: Check Current Swap Usage
Check if your system already has swap memory enabled and how much is being used:
swapon --show
You can also check the overall memory usage, including swap:
free -h
Step 4: Create a Swap File
If your system does not have swap memory or you need to add more, you can create a swap file. For this example, we will create a 2GB swap file:
fallocate -l 2G /swapfileVerify the swap file creation:
ls -lh /swapfile
Step 5: Set Correct Permissions
Ensure that only the root user can read and write to the swap file:
chmod 600 /swapfileStep 6: Set Up the Swap Area
Format the file as swap space:
mkswap /swapfile
Step 7: Enable the Swap File
Activate the swap file:
swapon /swapfileVerify that the swap file is active:
swapon --showCheck the overall memory usage again to confirm the swap file is being used:
free -h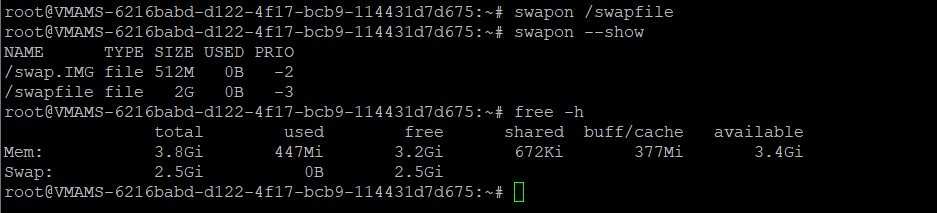
Step 8: Make the Swap File Permanent
To ensure the swap file is enabled after a reboot, add it to the /etc/fstab file:
echo '/swapfile none swap sw 0 0' | tee -a /etc/fstabStep 9: Verify Swap Configuration
Check the swap configuration to ensure everything is set up correctly:
cat /proc/swapsYou should see your swap file listed.
Step 10: Check Memory Usage
Finally, verify the overall memory usage to ensure the swap file is active and being used:
free -h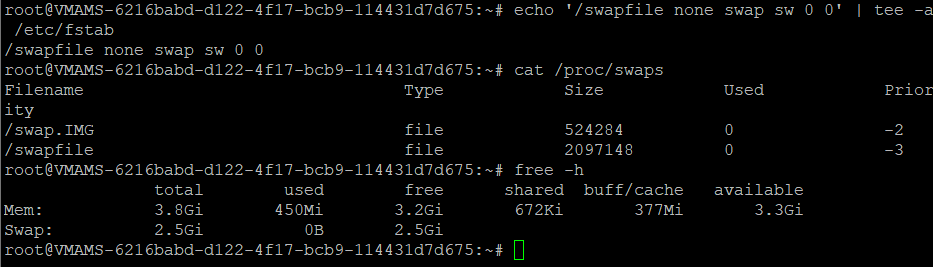
If you’re looking for a reliable and high-performance hosting solution for your server, consider Shape.Host Linux SSD VPS services. With fast SSD storage, scalable resources, and excellent support, Shape.Host provides the perfect environment for running your applications securely. Visit Shape.Host to learn more and get started today!