WonderCMS is a lightweight, open-source CMS that offers a simple and fast way to build websites. It requires minimal resources and installation steps, making it a great choice for users looking for an easy-to-manage CMS.
WonderCMS is an extremely lightweight content management system designed for simplicity and ease of use. It’s ideal for users who want a fast and efficient solution for managing small websites without complicated setup or maintenance.
Key features of WonderCMS include:
- Flat file CMS: No need for a MySQL database.
- Minimal setup: Installation takes just a few minutes.
- Customizable: Easy to modify themes and plugins.
- Responsive: Works well on mobile and desktop browsers.
Step 1: Create an Instance on Cloud.shape.host
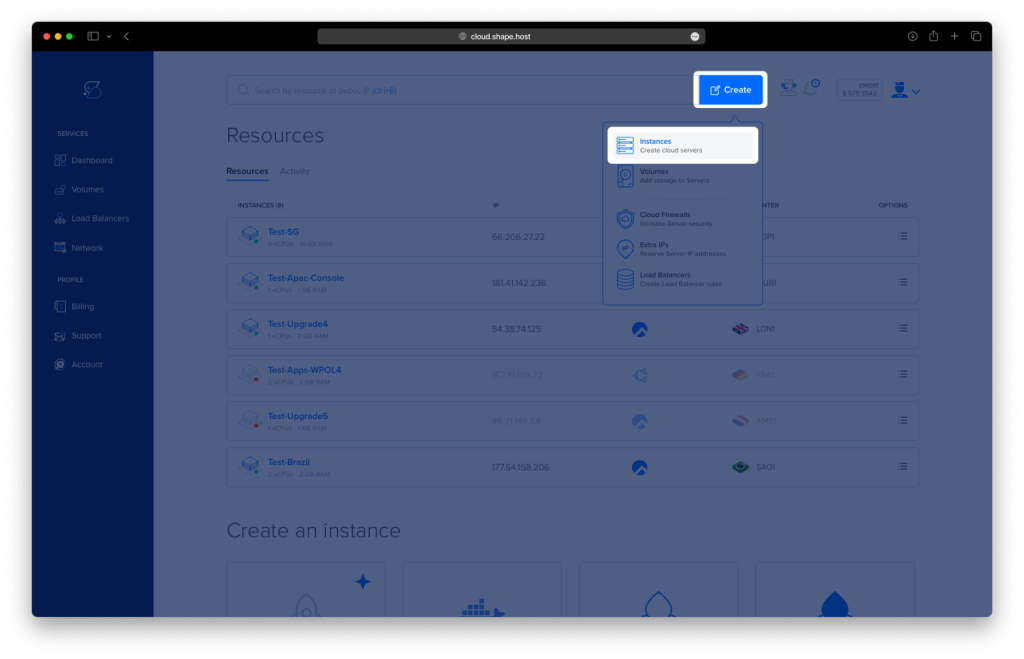
Step 1.1: Access the Dashboard
- Log in to Cloud.shape.host and go to the Dashboard.
Step 1.2: Create a New Instance
- Click Create and select Instances.
Step 1.3: Choose Datacenter Location
- Choose a datacenter closest to your audience (e.g., New York, London).
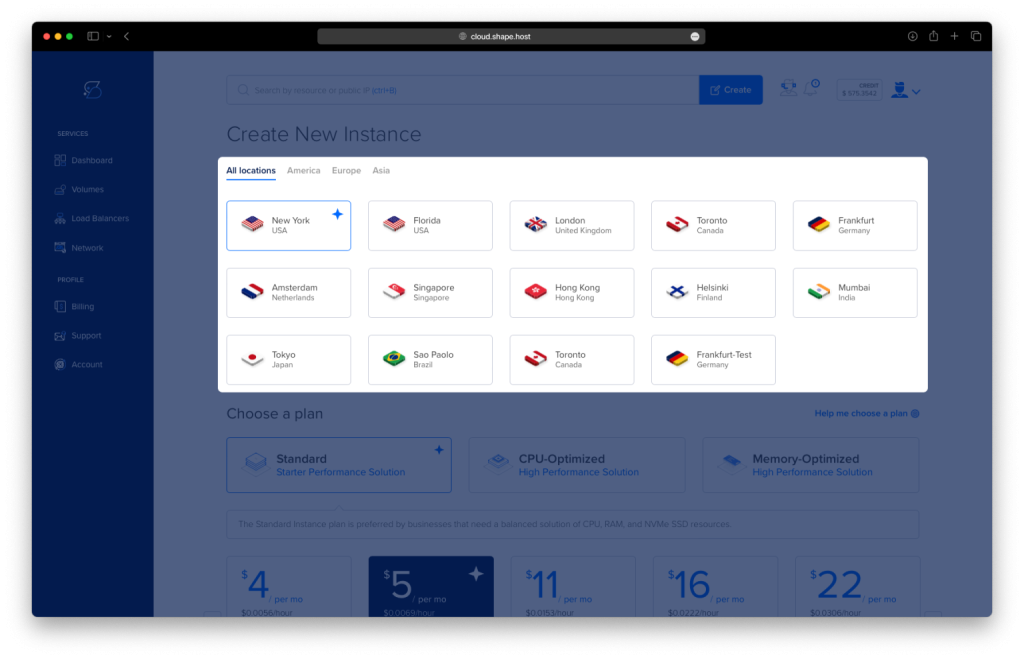
Step 1.4: Select Your Plan
- Choose a Standard or CPU-Optimized plan.
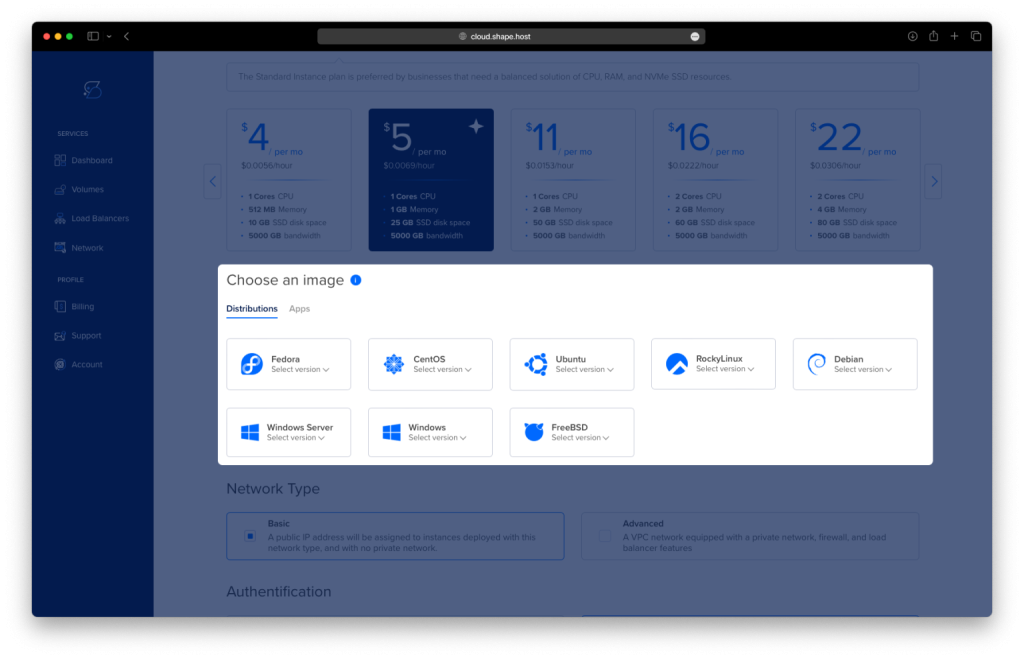
Step 1.5: Configure the Instance
- Select Debian 12 as the operating system.
- Configure network and authentication settings.
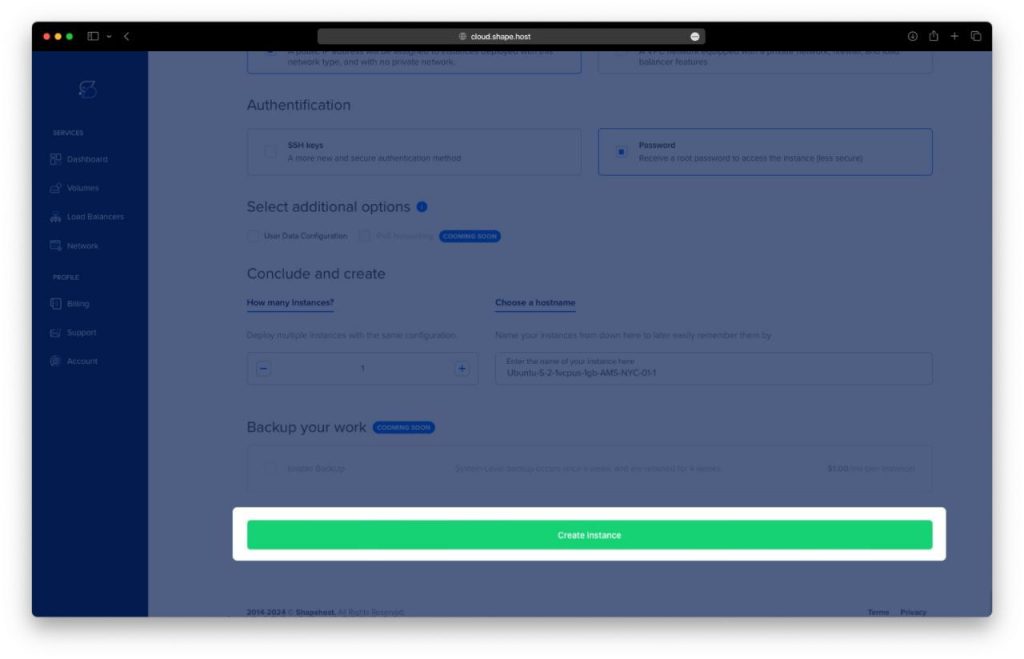
Step 1.6: Configure and Launch
- Set the Network Type and Authentication Method (SSH key or password).
- Click Create Instance.
Step 1.7: Locate your Instance’s IP
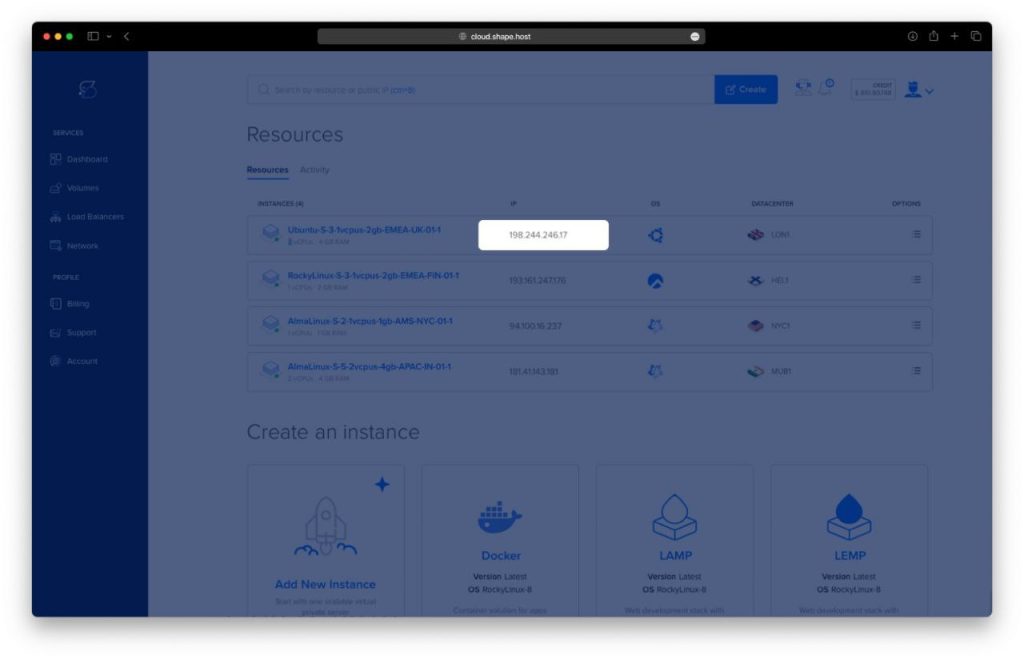
Step 1.8: Access the Instance
- Access your instance via SSH:
ssh root@<your-instance-ip>Step 2: Update System and Install Dependencies
First, update the system:
apt update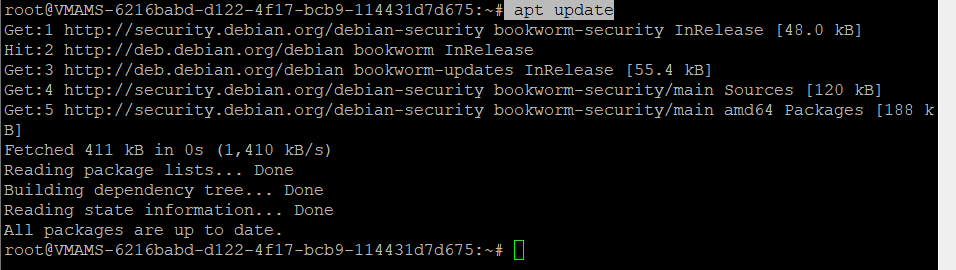
Install Apache, PHP, and other necessary packages:
apt install apache2 php php-common php-mbstring php-curl php-zip unzip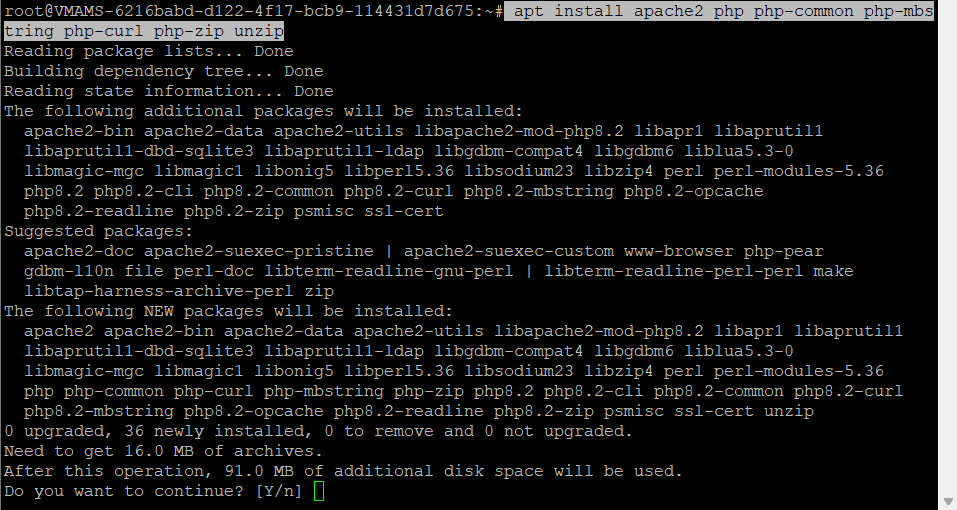
Verify that Apache is running:
systemctl is-enabled apache2
systemctl status apache2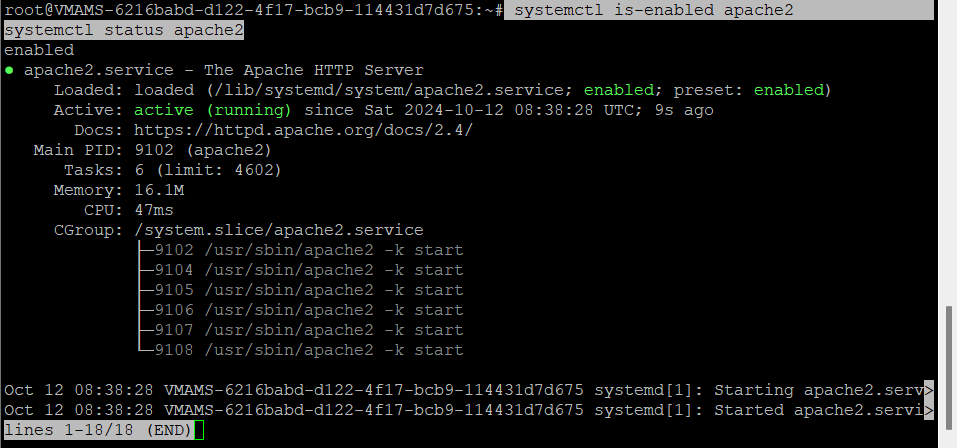
Step 3: Configure PHP
Open the PHP configuration file:
nano /etc/php/8.2/apache2/php.iniAdjust the following values according to your server’s needs:
date.timezone = "Europe/Amsterdam"
memory_limit = 512M
upload_max_filesize = 128MB
post_max_size = 128MB
max_execution_time = 300
max_input_vars = 5000
Restart Apache to apply changes:
systemctl restart apache2
Step 4: Configure Firewall
Install UFW and configure the firewall:
apt install ufw
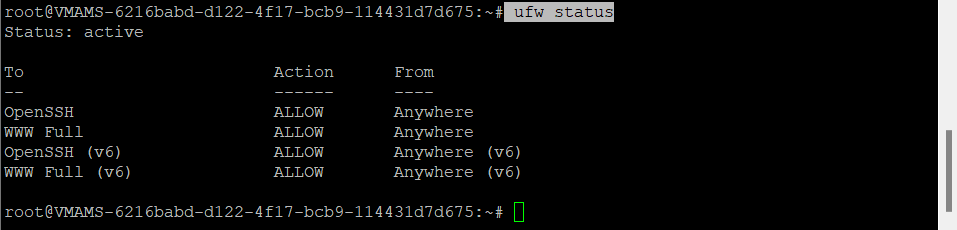
ufw allow OpenSSH
ufw allow "WWW Full"
ufw enable
ufw status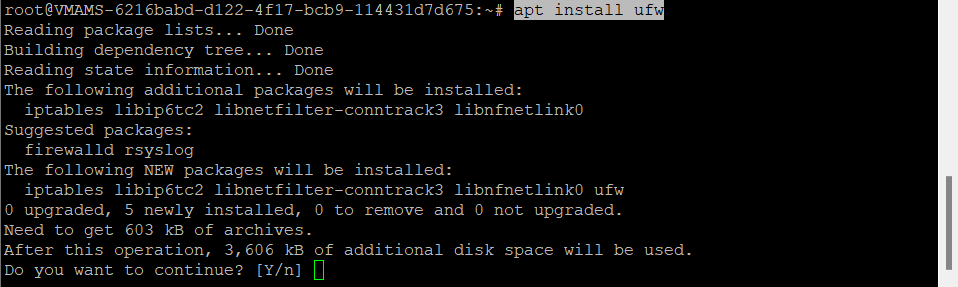


Step 5: Download and Install WonderCMS
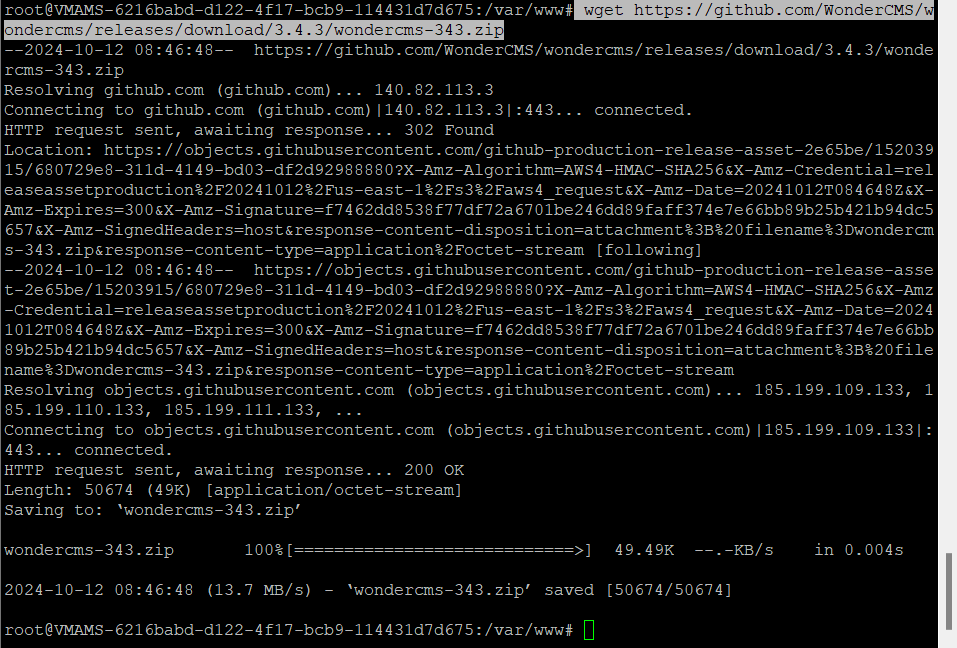
Navigate to the web directory and download WonderCMS:
cd /var/www/
wget https://github.com/WonderCMS/wondercms/releases/download/3.4.3/wondercms-343.zip
Unzip the WonderCMS package:
unzip wondercms-343.zip -d /var/www/wondercms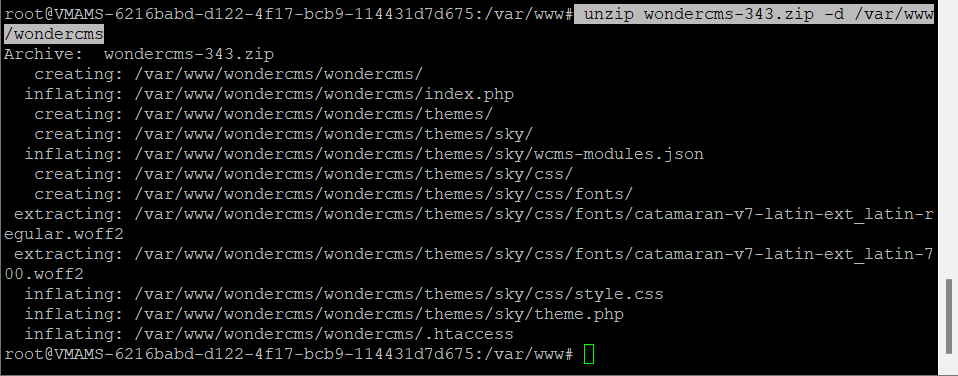
Move WonderCMS files to the correct location: It appears that the actual WonderCMS files are inside the /var/www/wondercms/wondercms/ subdirectory. You need to move the contents of that subdirectory to the parent directory (/var/www/wondercms/).
mv /var/www/wondercms/wondercms/* /var/www/wondercms/
mv /var/www/wondercms/wondercms/.* /var/www/wondercms/ 2>/dev/null
rmdir /var/www/wondercms/wondercms
Set the correct permissions:
chown -R www-data:www-data /var/www/wondercms
chmod -R 755 /var/www/wondercms
Step 6: Configure Apache Virtual Host
Enable Apache rewrite module:
a2enmod rewrite
Create a new virtual host configuration file for WonderCMS:
nano /etc/apache2/sites-available/wondercms.confInsert the following configuration:
<VirtualHost *:80>
    ServerName debian.shape.host
    DirectoryIndex index.php
    DocumentRoot /var/www/wondercms
    Redirect /wondercms/loginURL /loginURL

    ErrorLog /var/log/apache2/debian.shape.host-error.log
    CustomLog /var/log/apache2/debian.shape.host-access.log combined

    <Directory /var/www/wondercms>
        Options FollowSymLinks
        AllowOverride All
        Require all granted
    </Directory>
</VirtualHost>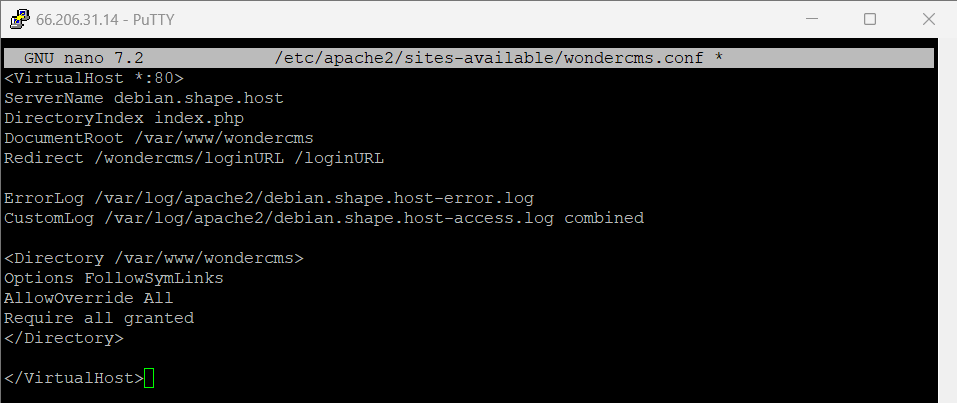
Enable the site and restart Apache:
a2ensite wondercms.conf
apachectl configtest
systemctl restart apache2

Step 7: Install SSL with Certbot
Install Certbot and generate SSL certificates for WonderCMS:
apt install certbot python3-certbot-apache
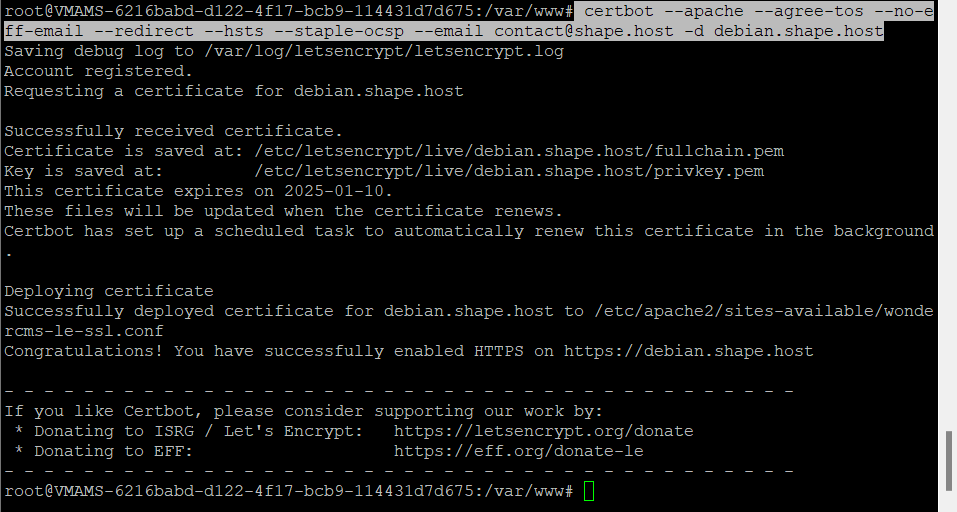
certbot --apache --agree-tos --no-eff-email --redirect --hsts --staple-ocsp --email contact@shape.host -d debian.shape.host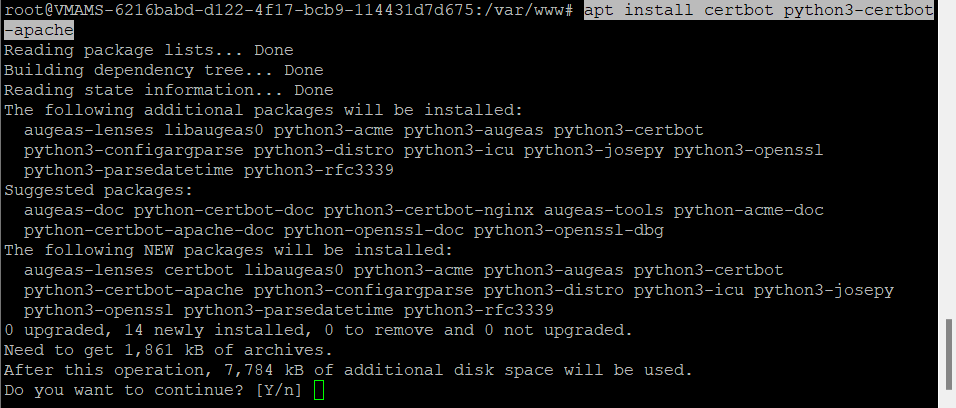
Step 8: Access WonderCMS
Open your web browser and visit your domain:
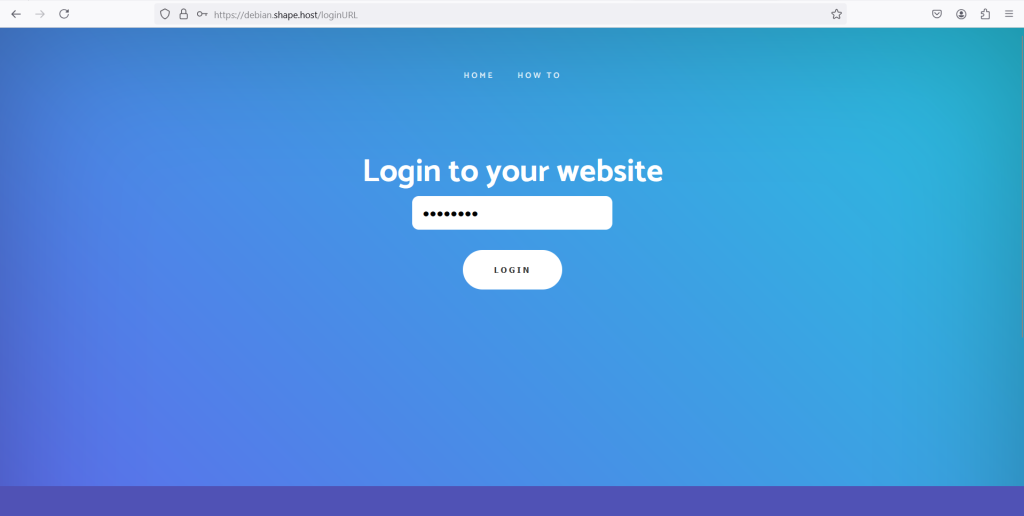
https://debian.shape.hostOn the WonderCMS homepage, you should see a generated password. Copy and save it in a secure place for future use.
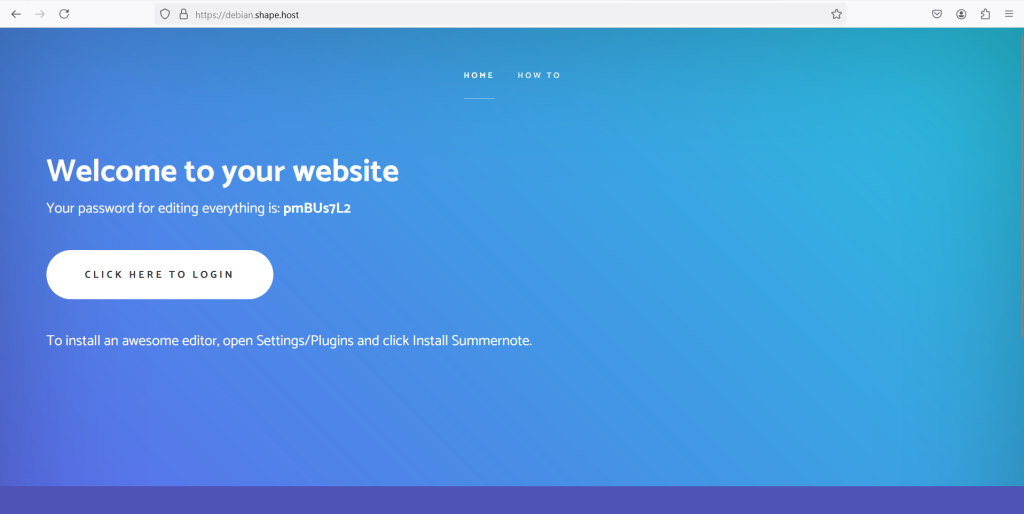
- Click the “Click Here to Login” button.
- You will be redirected to the login page, where you need to input the default password provided on the welcome page.
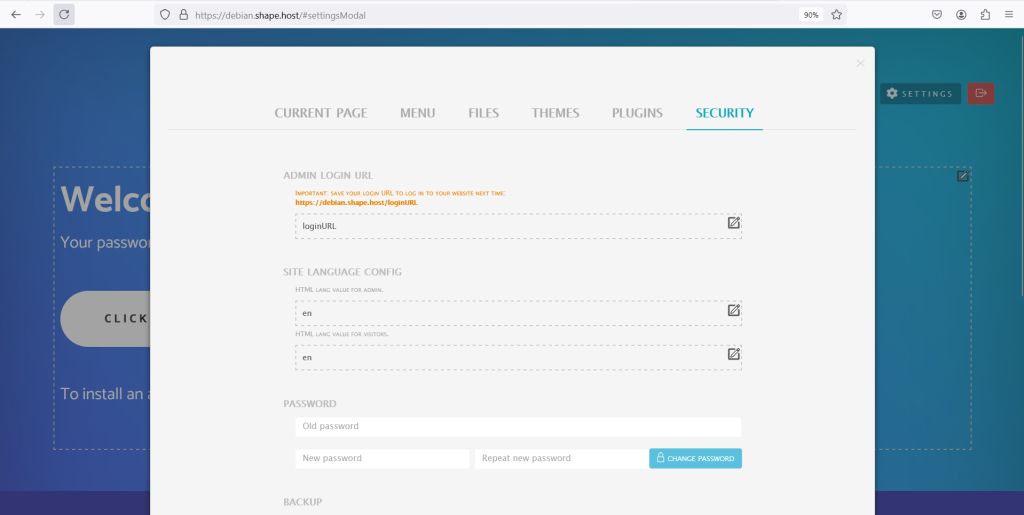
- After logging in, navigate to the Settings/Plugins.
- You can customize settings, such as changing the Admin Login URL or updating the password.
- Remember to save your new configuration and keep your login URL secure.
For best performance and security, host your WonderCMS site on Shape.Host’s Cloud VPS, providing fast speeds, scalability, and reliable uptime for your website.