TYPO3 CMS is a highly flexible, open-source content management system (CMS) used for building websites, intranets, and web applications. TYPO3 is particularly suited for enterprise-level projects, providing scalability, multi-language support, and a vast array of extensions. This makes TYPO3 a great choice for large corporations, non-profits, and government agencies, as well as smaller websites. TYPO3 can be customized to meet specific project needs through its modular architecture, and it is widely known for its security, flexibility, and developer-friendly nature.
What is TYPO3 CMS Used For?
- Scalable websites: From small blogs to large-scale websites.
- Multi-language websites: Built-in support for managing content in multiple languages.
- Content-heavy portals: Perfect for complex content management systems that handle thousands of pages.
- Enterprise solutions: Ideal for businesses that need to manage multiple websites from one installation.
With TYPO3, you get an advanced framework for building and maintaining any type of website, whether it’s an e-commerce platform, a content portal, or a corporate site.
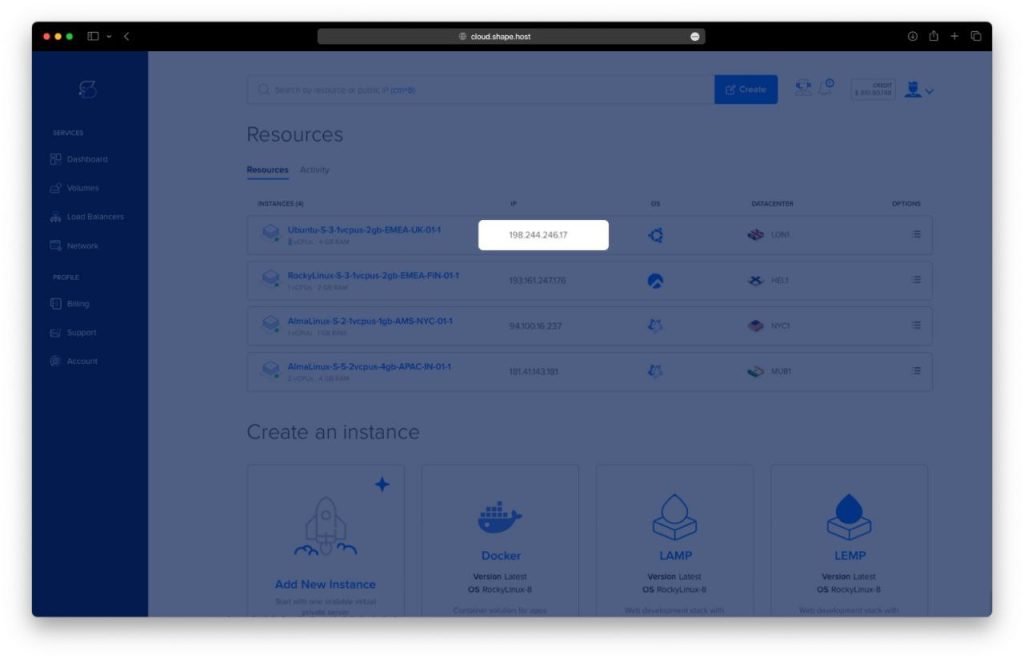
Step 1: Create an Instance on Cloud.shape.host
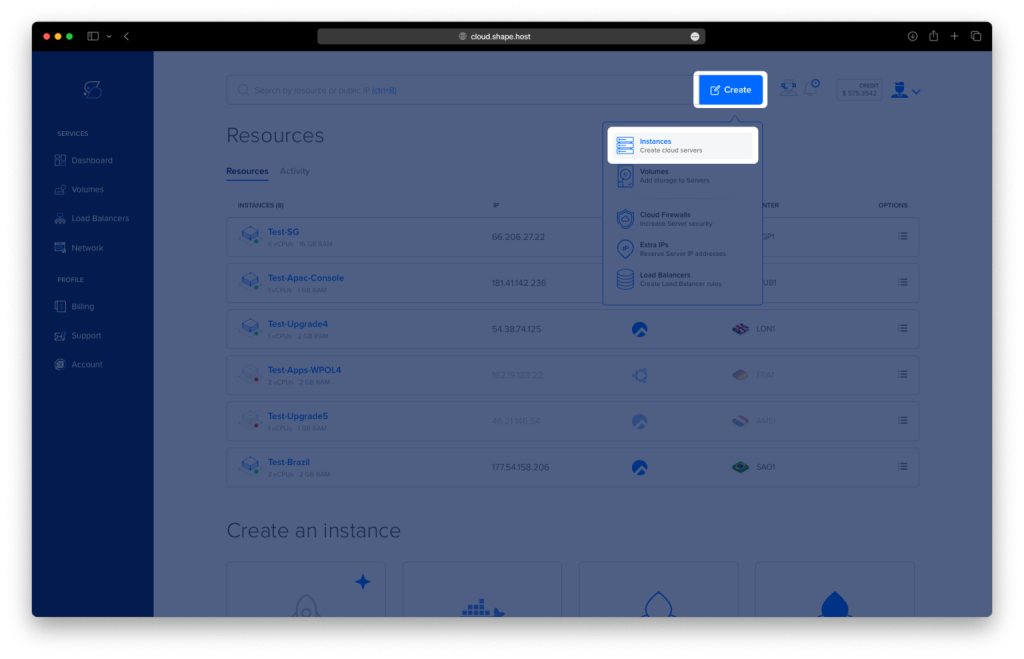
Step 1.1: Access the Dashboard
- Log in to Cloud.shape.host.
- Click Create, and select Instances.
Step 1.2: Choose a Datacenter Location
Select a datacenter closest to your target audience, such as New York, London, or Frankfurt.
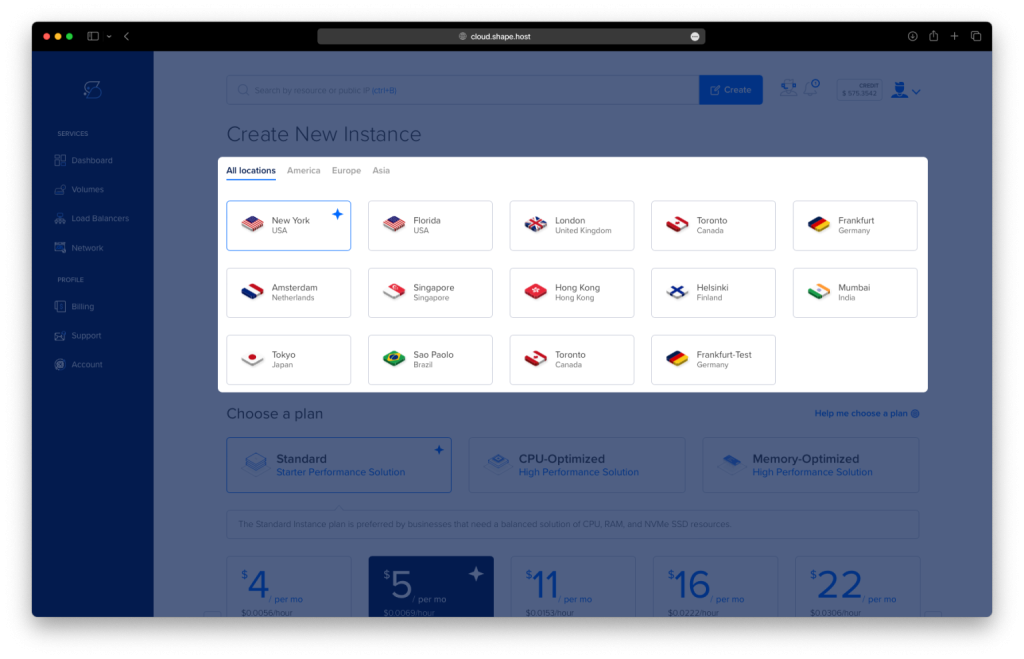
Step 1.3: Select a Plan
Choose a plan based on the resource needs of your TYPO3 installation: Standard, CPU-Optimized, or Memory-Optimized.
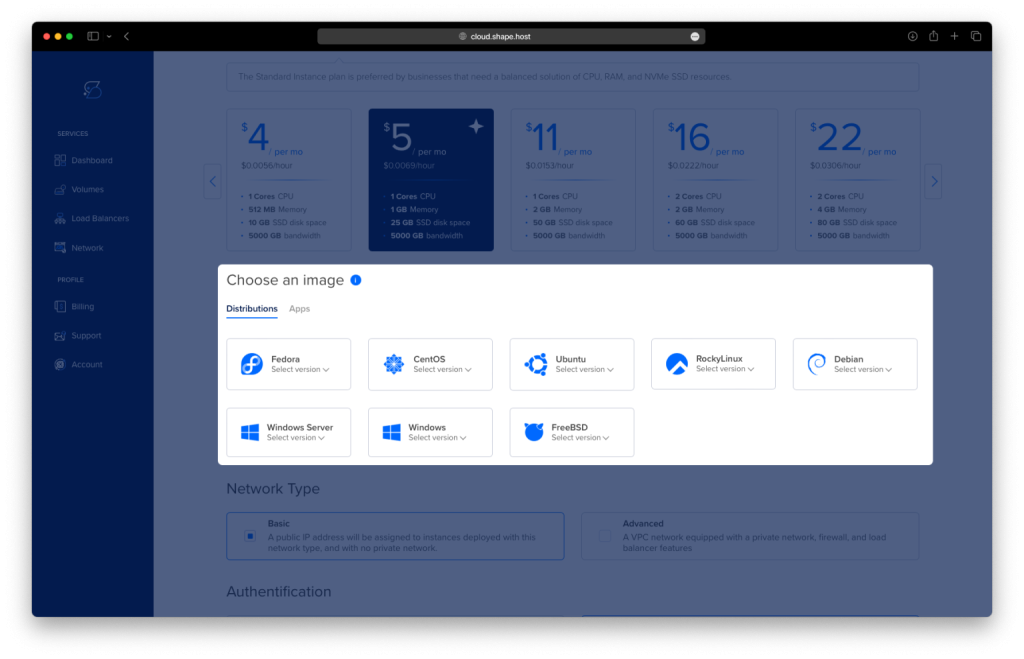
Step 1.4: Select an Operating System
Select Ubuntu 24.04 as your OS for installing TYPO3.
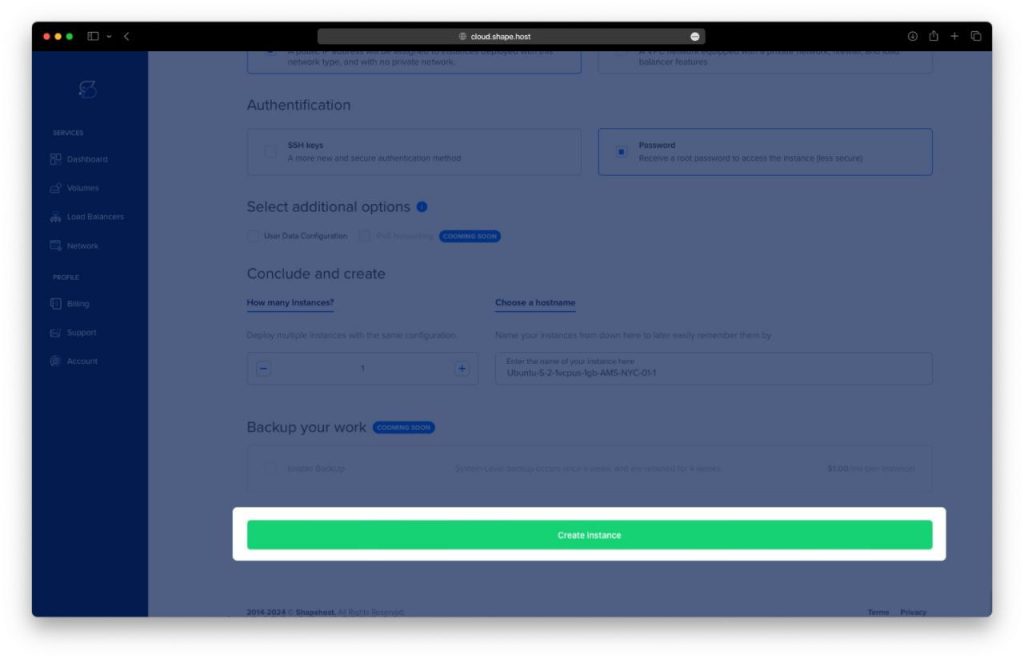
Step 1.5: Configure and Launch
- Set the Network Type and Authentication Method (SSH key or password).
- Click Create Instance.
Step 1.6: Locate your Instance’s IP
Step 1.7: Access Your Instance
- SSH (for Linux/macOS):
ssh root@<your-instance-ip>Replace <your-instance-ip> with the server’s public IP.
- PuTTY (for Windows):
Download PuTTY, enter the public IP, and click Open.
Step 2: Update and Upgrade the System
apt update -y
apt upgrade -y
Step 3: Install Apache, MariaDB, PHP, and Other Dependencies
We will install Apache for the web server, MariaDB as the database server, and PHP with the necessary extensions for TYPO3. Additionally, we’ll install GraphicsMagick for image processing and Composer for managing PHP dependencies.
apt install apache2 mariadb-server composer graphicsmagick php php-common php-mysql libapache2-mod-php php-gd php-curl php-json php-xmlrpc php-intl php-gmagick php-bcmath php-zip php-apcu php-mbstring php-fileinfo php-xml php-soap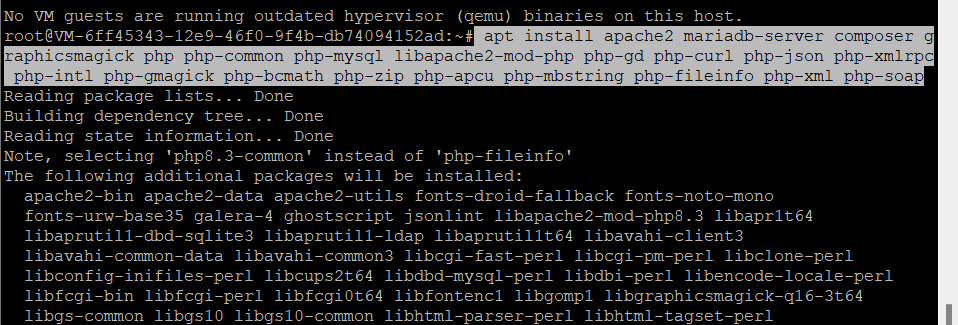
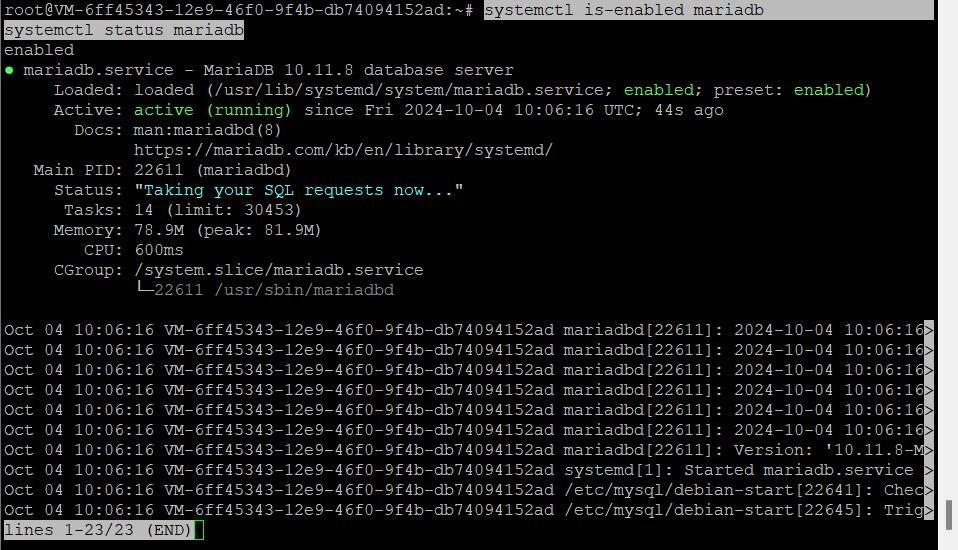
Step 4: Check Apache and MariaDB Status
Make sure both Apache and MariaDB services are running and enabled:
systemctl is-enabled apache2
systemctl status apache2
systemctl is-enabled mariadb
systemctl status mariadb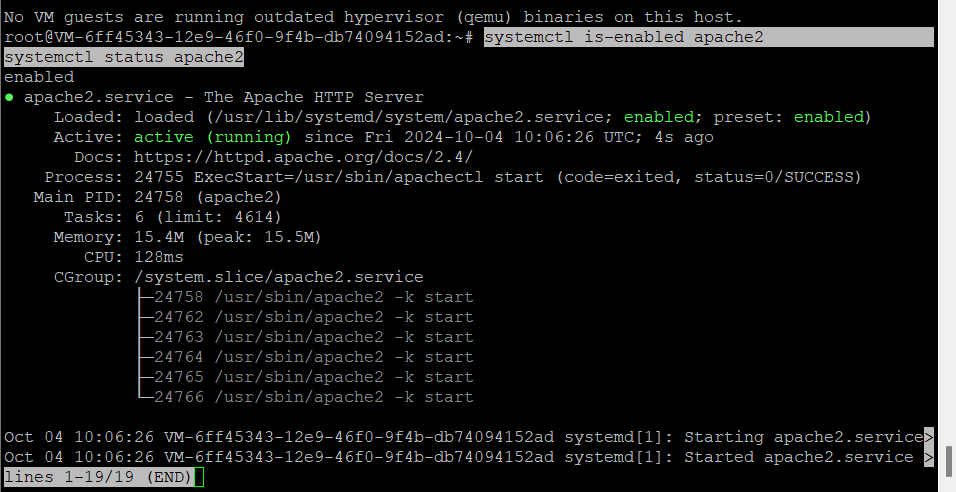
Step 5: Verify PHP and Composer Versions
Check the installed versions of PHP and Composer:
php -v
sudo -u www-data composer --version
Step 6: Verify GraphicsMagick Installation
Check if GraphicsMagick was installed successfully by running:
gm version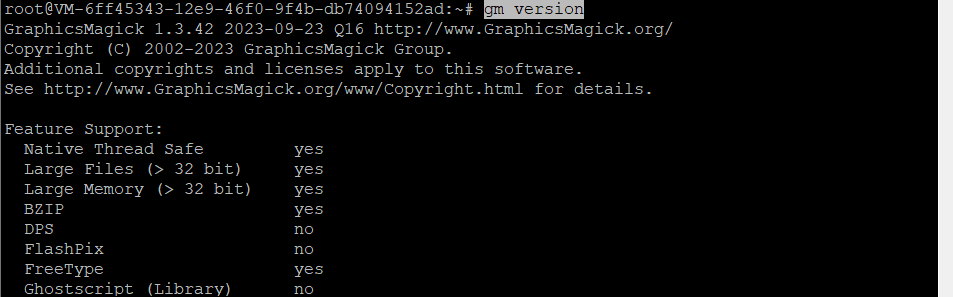
Step 7: Configure PHP Settings
We will configure the PHP settings to match the requirements for TYPO3. Edit the php.ini files for both Apache and CLI PHP environments:
nano /etc/php/8.3/apache2/php.ini
nano /etc/php/8.3/cli/php.ini

Modify the following settings:
date.timezone = Europe/Amsterdam
memory_limit = 512M
max_execution_time = 240
max_input_vars = 1500
post_max_size = 50M
upload_max_filesize = 50M
Step 8: Restart Apache
Restart Apache to apply the changes made in the PHP settings:
systemctl restart apache2
Step 9: Create a PHP Info Page (Optional)
This step is optional but useful for verifying your PHP installation. Create a phpinfo() page:
echo "<?php phpinfo(); ?>" > /var/www/html/info.php
You can access this page via your browser to check your PHP configuration by navigating to http://<your-server-ip>/info.php.
Step 10: Secure MariaDB and Create TYPO3 Database
Step 10.1: Secure MariaDB Installation
First, secure your MariaDB installation to remove any security risks:
mariadb-secure-installation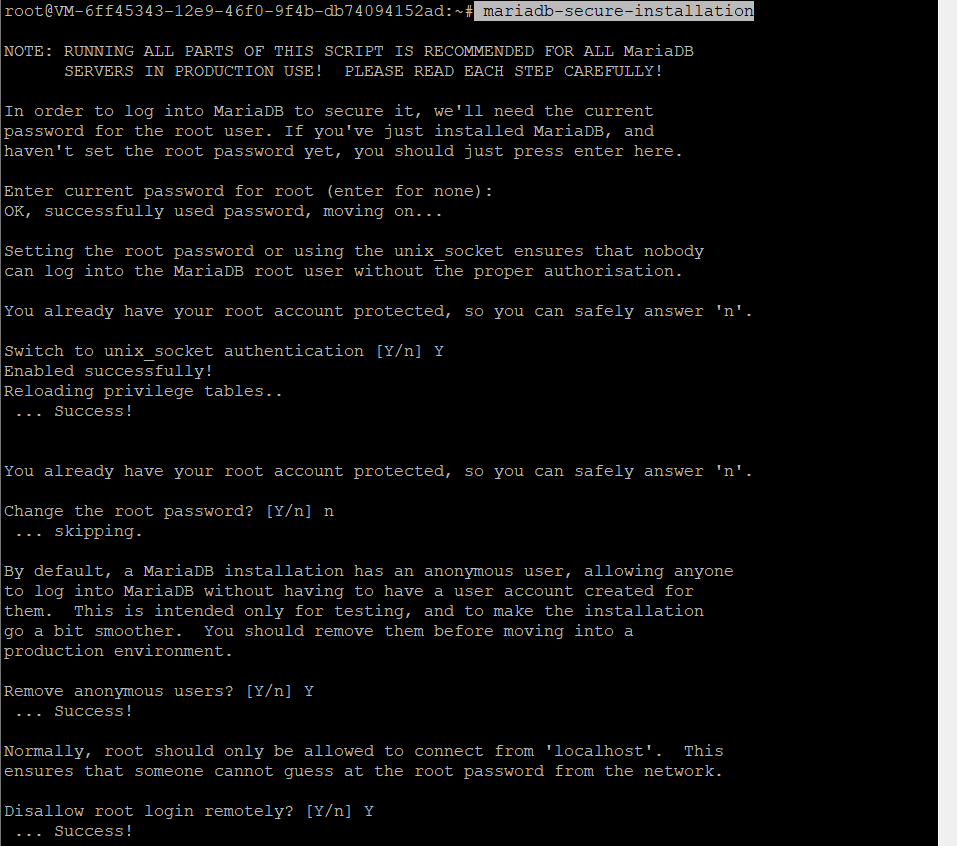
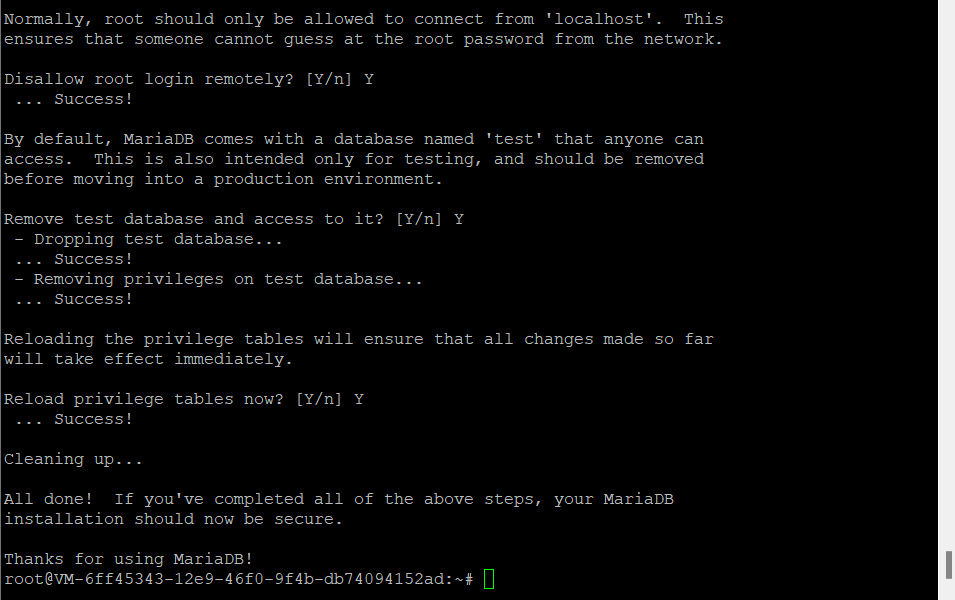
You will be prompted to set a root password, remove anonymous users, disallow remote root logins, and remove the test database.
Step 10.2: Log Into MariaDB and Create TYPO3 Database
After securing MariaDB, log into the MariaDB console:
mariadb -u root -pRun the following SQL queries to create a new database and user for TYPO3:
CREATE DATABASE typo3db;
CREATE USER 'typo3'@'localhost' IDENTIFIED BY 'Typo3Password';
GRANT ALL PRIVILEGES ON typo3db.* TO 'typo3'@'localhost';
FLUSH PRIVILEGES;
SHOW GRANTS FOR 'typo3'@'localhost';
Step 11: Set Up TYPO3 Directory
We will now create the necessary directories for TYPO3, give them the correct permissions, and change ownership to the www-data user:
mkdir -p /var/www/{.cache,.config,typo3}
chown -R www-data:www-data /var/www/{.cache,.config,typo3}
chmod u+rw /var/www/typo3


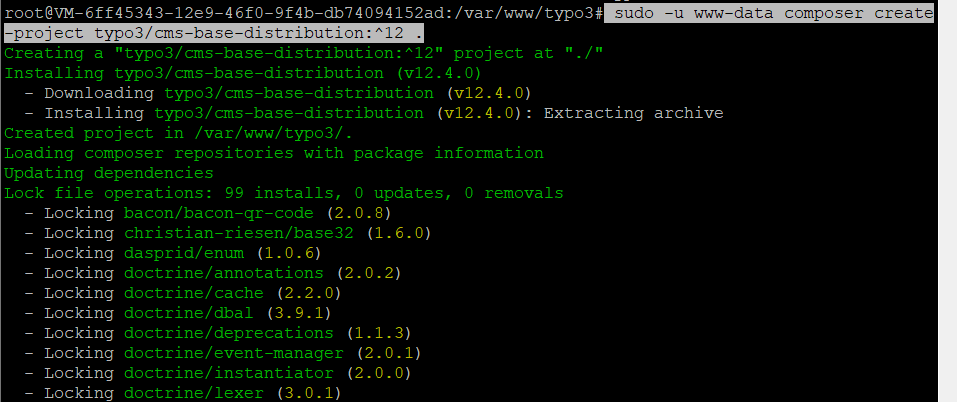
Step 12: Install TYPO3 CMS Using Composer
Navigate to the TYPO3 directory and install the base distribution using Composer:
cd /var/www/typo3
sudo -u www-data composer create-project typo3/cms-base-distribution:^12 .
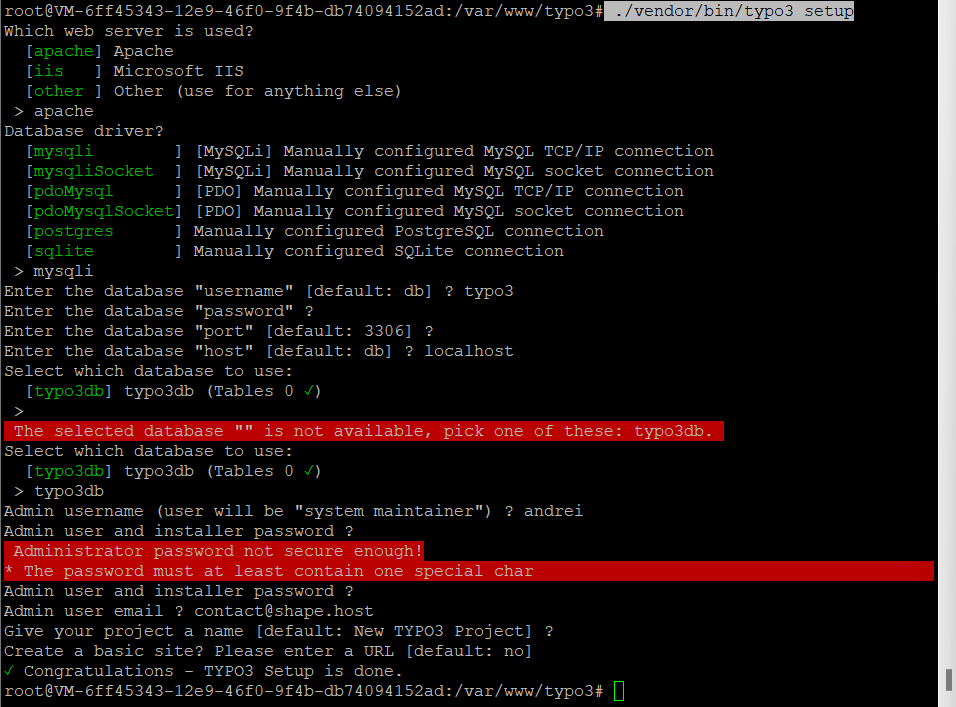
Run the TYPO3 setup script:
./vendor/bin/typo3 setupYou will be prompted to enter the following information:
- Web server type:
apache - Database driver:
mysqli - MariaDB user credentials, database name, and host.
- Admin user credentials for TYPO3 CMS (ensure the password includes a special character).
- Project name: leave as default or modify if necessary.
Press Enter to complete the basic site setup.
If successful, you’ll see a message: Congratulations - TYPO3 Setup is done.
Step 13: Change Ownership of TYPO3 Directory
After completing the setup, ensure that the TYPO3 directory is owned by the correct user:
chown -R www-data:www-data /var/www/typo3
Step 14: Enable Apache Rewrite Module and Configure Virtual Host
Enable the Apache rewrite module, which is necessary for TYPO3:
a2enmod rewrite
Create a new virtual host configuration for your TYPO3 site:
nano /etc/apache2/sites-available/typo3.conf
Insert the following configuration:
<VirtualHost *:80>
 ServerAdmin contact@example.com
 DocumentRoot /var/www/typo3/public
 ServerName example.com

 <Directory /var/www/typo3/public/>
 Options FollowSymlinks
 AllowOverride All
 Require all granted
 </Directory>

 ErrorLog ${APACHE_LOG_DIR}/error.log
 CustomLog ${APACHE_LOG_DIR}/access.log combined

 <Directory /var/www/typo3/public/>
 RewriteEngine on
 RewriteBase /
 RewriteCond %{REQUEST_FILENAME} !-f
 RewriteRule ^(.*) index.php [PT,L]
 </Directory>
</VirtualHost>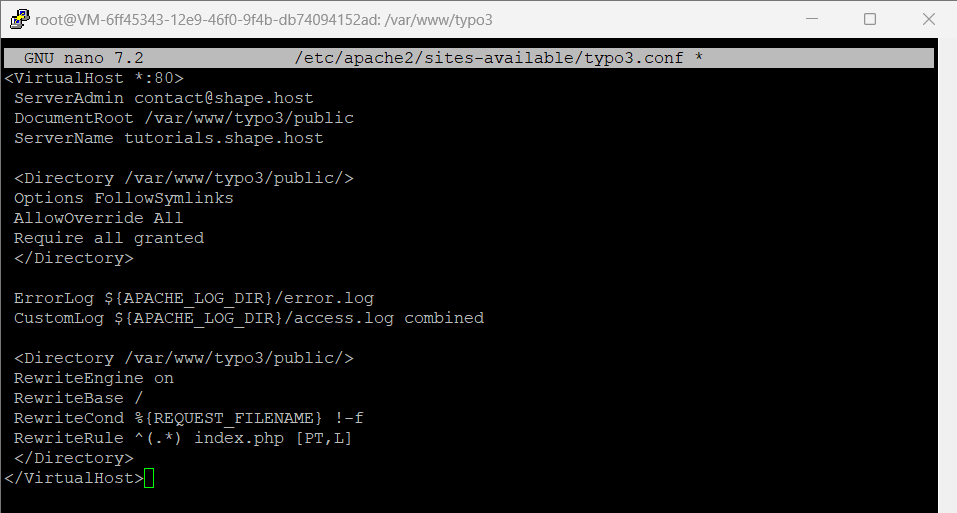
Step 15: Enable TYPO3 Site and Restart Apache
Enable the new TYPO3 site and restart Apache to apply the changes:
a2ensite typo3.conf
apachectl configtest
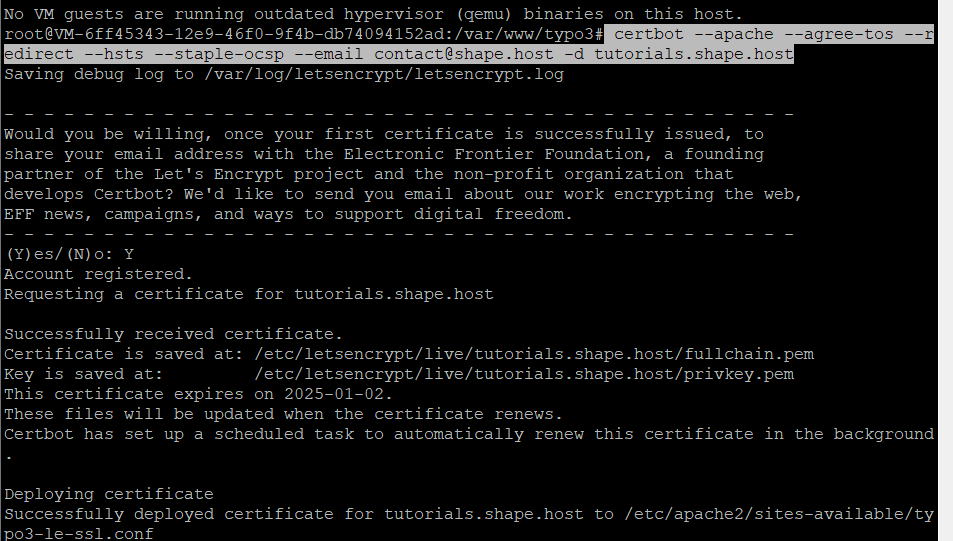
systemctl restart apache2Step 16: Secure TYPO3 with Let’s Encrypt SSL
Finally, we will install Certbot to generate and configure an SSL certificate using Let’s Encrypt:
apt install certbot python3-certbot-apache
certbot --apache --agree-tos --redirect --hsts --staple-ocsp --email contact@example.com -d example.com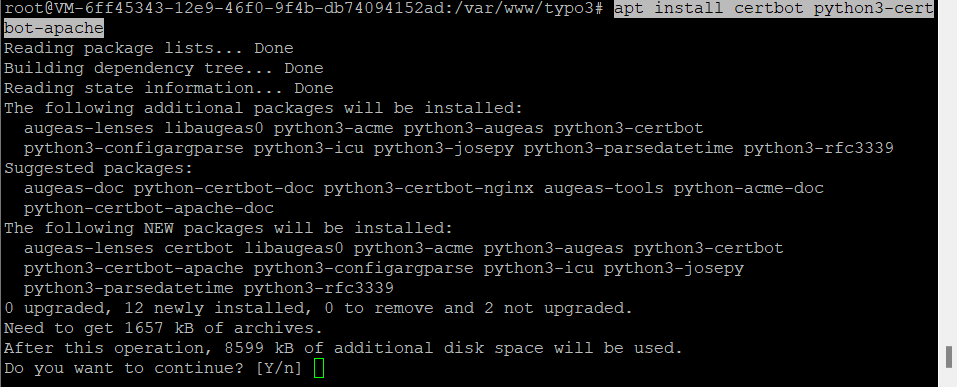
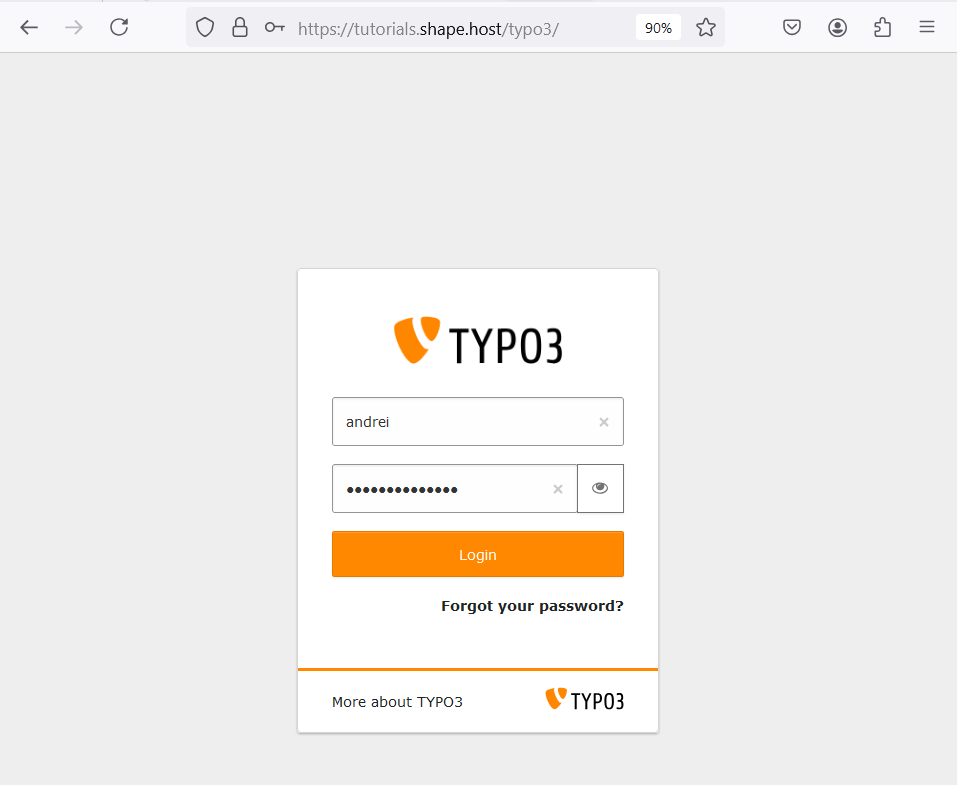
Step 17: Access TYPO3 From Your Browser
Once the TYPO3 installation is complete and your server is configured, you can access your TYPO3 site from your web browser.
- Open your browser and go to:
https://example.com/typo3/or replace tutorials.shape.host with your server’s domain or IP address:
https://<your-server-ip>/typo3/- You will be directed to the TYPO3 login page.
- Enter the admin username and password you created during the installation process.
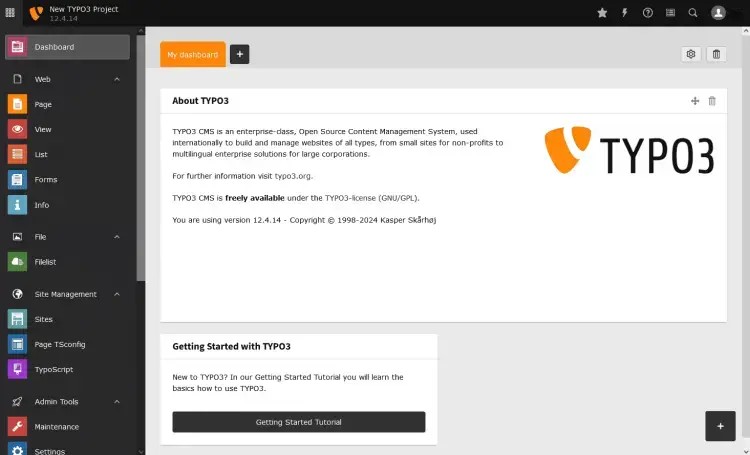
After logging in, you’ll have access to the TYPO3 backend where you can manage and configure your website content.
You have successfully installed TYPO3 CMS on Ubuntu 24.04 with Apache, MariaDB, and Let’s Encrypt SSL. Your TYPO3 site is now ready to be managed securely via HTTPS.
For enhanced performance, consider using Shape.Host’s Cloud VPS services to ensure fast and