What is Froxlor?
Froxlor is a free and open-source server management panel designed for hosting providers and system administrators who manage shared hosting environments. It provides a web-based GUI to handle Apache/Nginx configuration, domain management, FTP, email, SSL certificates, MySQL databases, and more—all without needing to manually edit configuration files.
Running Froxlor on Ubuntu 24.04 (Noble Numbat) offers a modern and secure platform to create and manage multi-user hosting setups with ease.
Key Features of Froxlor
Web Hosting Control Panel
- Manage multiple domains, subdomains, and customer accounts.
- Supports Apache, Nginx, and PHP-FPM with per-domain configuration.
Email and FTP Management
- Create and manage email accounts, forwarders, and quotas.
- Integrates with Postfix, Dovecot, and Courier for email services.
- Manage FTP users and directories via ProFTPD or Pure-FTPd.
DNS and SSL Management
- Configure DNS zones (if using external DNS tools).
- One-click integration with Let’s Encrypt for free SSL certificates.
- Custom SSL support per domain or subdomain.
Database Management
- Create and manage MySQL or MariaDB databases and users.
- Offers phpMyAdmin integration for database access via the web.
System and Resource Monitoring
- Track disk space, traffic usage, bandwidth quotas, and service status.
- Per-customer usage limits and reporting.
Multi-Customer Management
- User roles for admins, resellers, and customers.
- Set quotas, permissions, and access controls per user or group.
API and Automation
- REST API support for automating customer creation, domain setups, and more.
- Can be integrated with billing systems or external provisioning tools.
Why Use Froxlor on Ubuntu 24.04?
Ubuntu 24.04 provides a modern, LTS-backed foundation with:
- Long-term support and security updates
- Up-to-date versions of PHP 8.2+, Apache 2.4, Nginx, MariaDB, etc.
- Strong systemd integration and improved performance
- Easy integration with Certbot, UFW, and system monitoring tools
Using Froxlor on Ubuntu 24.04 is ideal for those who want lightweight shared hosting management without relying on heavyweight or commercial control panels like cPanel or Plesk.
System Requirements for Froxlor
| Component | Requirement |
|---|---|
| OS | Ubuntu 24.04 LTS |
| Web Server | Apache 2.4 or Nginx |
| PHP Version | PHP 8.1 or 8.2 with required modules |
| Database | MariaDB or MySQL 5.7+ |
| Mail Server | Postfix, Dovecot/Courier |
| FTP Server | ProFTPD or Pure-FTPd |
| RAM | 512 MB minimum (1 GB+ recommended) |
| Disk Space | 2 GB+ for OS and hosted content |
Use Cases
- Small to medium shared hosting services
- Self-hosted control panel for freelancers and resellers
- Educational setups or local development hosting
- Lightweight cPanel/Plesk alternative
- Secure and customizable hosting environments
Pros of Froxlor on Ubuntu 24.04
- Free and open-source with no licensing fees
- Clean and simple web interface
- Supports both Apache and Nginx
- Lightweight and resource-efficient
- Integrates well with Let’s Encrypt, mail, and FTP services
- Easy to manage multi-user hosting environments
Cons
- Requires manual setup and configuration of web/mail/FTP stacks
- Fewer features and polish than commercial panels (e.g., Plesk, cPanel)
- No built-in file manager (FTP required for file uploads)
- Limited plugin ecosystem compared to alternatives
- Updates must be managed carefully to avoid configuration conflicts
Security Recommendations
- Use UFW or iptables to restrict unused ports
- Enable HTTPS for panel access (via Let’s Encrypt)
- Disable unused PHP modules and services
- Use Fail2Ban for brute-force protection
- Keep all software components up to date
Froxlor on Ubuntu 24.04 is a capable and lightweight alternative to commercial hosting control panels. With features to manage web, email, FTP, and database services via a browser interface, it’s ideal for small hosting providers, VPS owners, and developers who want full control over their hosting environment without the cost or complexity of proprietary solutions.
If you’re running a self-managed web hosting setup, Froxlor provides the tools you need in a simple and efficient interface, perfectly supported by the stability and modern features of Ubuntu 24.04.
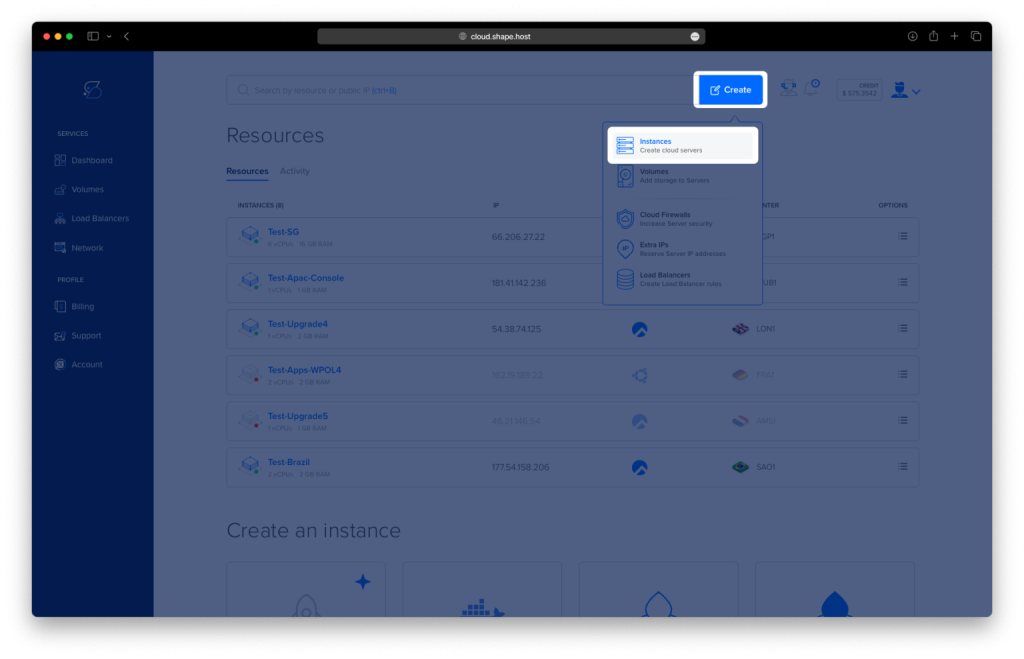
Step 1: Create a VPS on Shape.Host
Go to https://shape.host and log in.
Click Create.
Choose Instance.
Pick a server location.
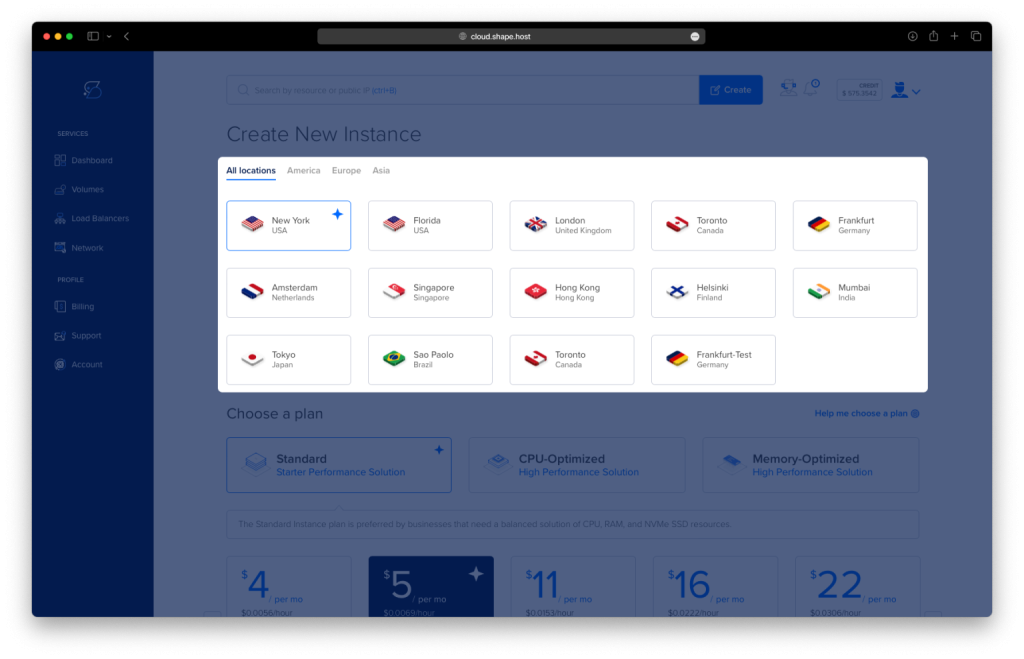
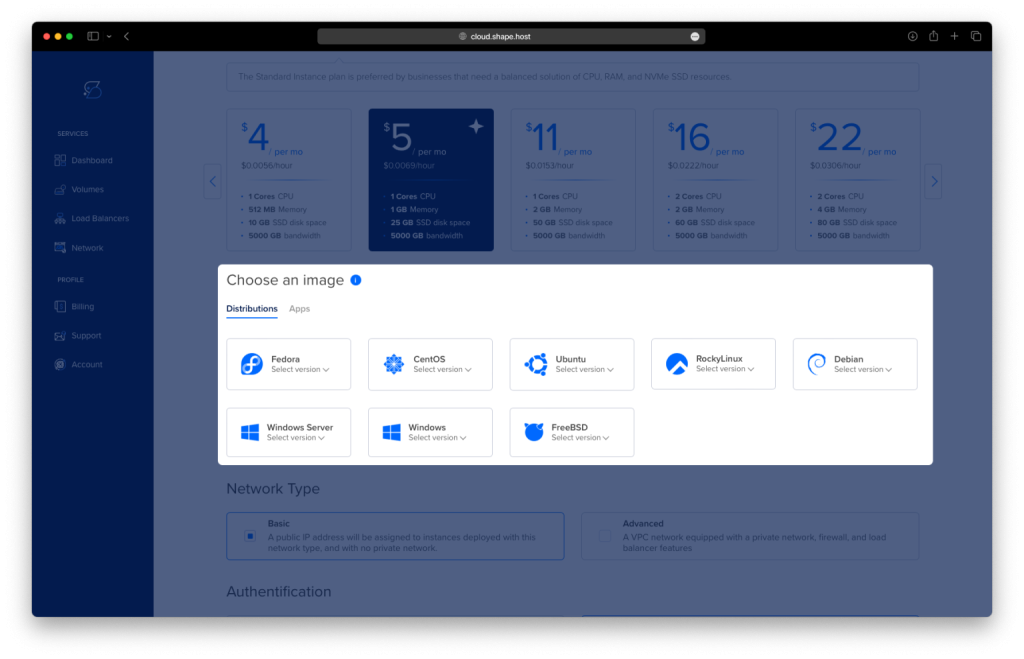
Select Ubuntu 24.04 (64-bit) as your OS.
Choose a plan with at least 2 CPUs, 4 GB RAM, and 20 GB SSD.
Click Create Instance.
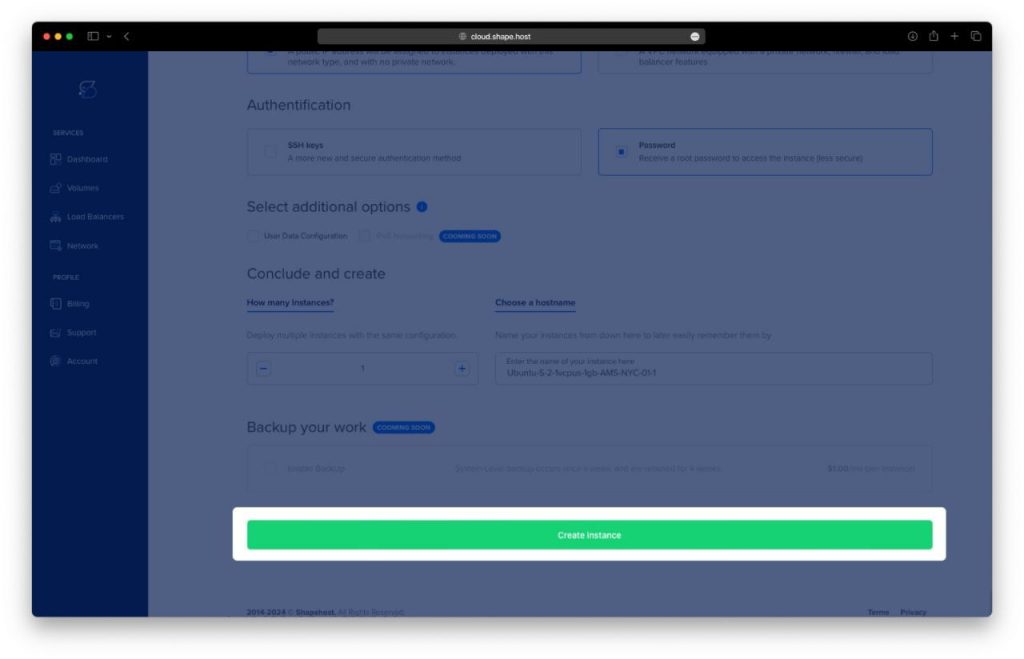
Once created, find your instance’s IP address under the Resources tab.

Step 2: Connect to Your Server
On Linux/macOS:
ssh root@your_server_ip
On Windows:
Use PuTTY, enter the IP, and log in as root.
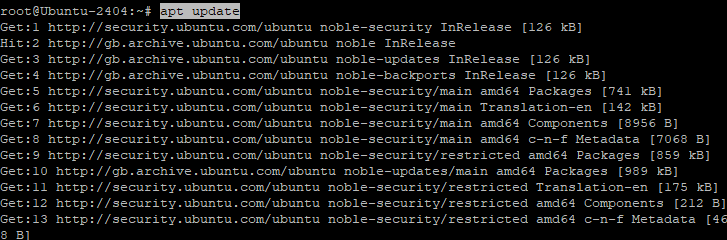
Step 3: Update Package Index
apt update
Refreshes your system’s list of available packages.
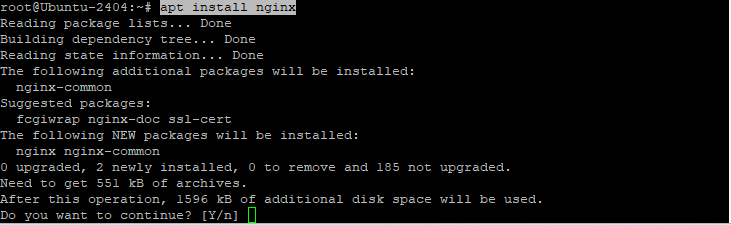
Step 4: Install and Configure Nginx
apt install nginx
systemctl start nginx
systemctl enable nginx
systemctl status nginx
Installs and starts Nginx, sets it to auto-start, and shows its status.

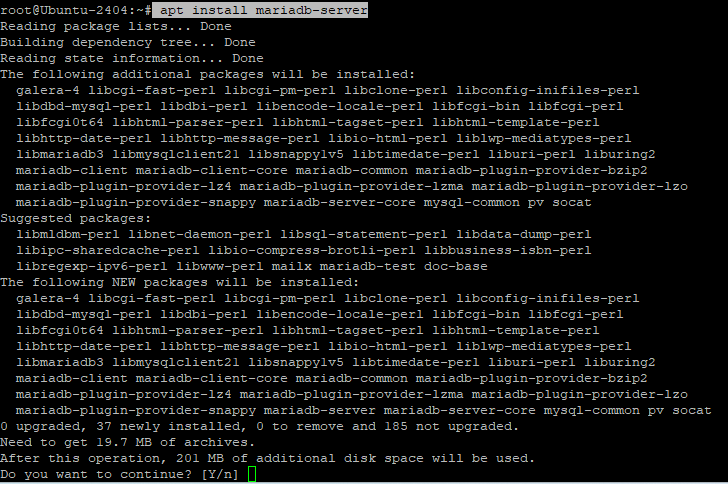
Step 5: Install and Start MariaDB
apt install mariadb-server
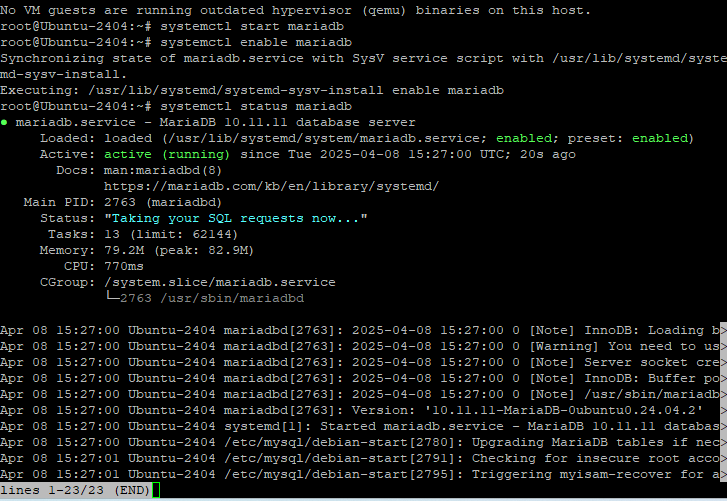
systemctl start mariadb
systemctl enable mariadb
systemctl status mariadb
This installs the MySQL-compatible database server, starts it, and ensures it runs at boot.
Step 6: Set Up Froxlor Database Access
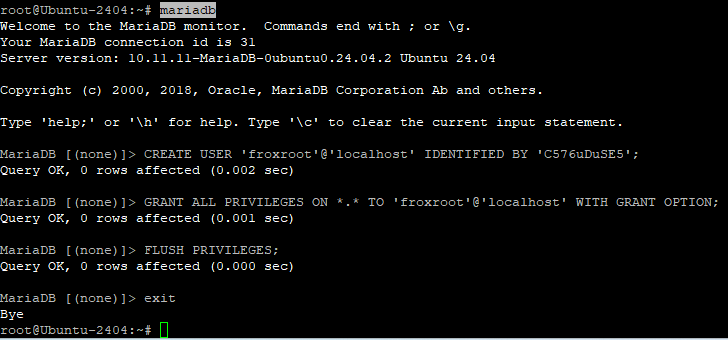
mariadb
Then inside MariaDB:
CREATE USER 'froxroot'@'localhost' IDENTIFIED BY 'your-password';
GRANT ALL PRIVILEGES ON *.* TO 'froxroot'@'localhost' WITH GRANT OPTION;
FLUSH PRIVILEGES;
exit
Creates a user froxroot with full access (replace 'your-password' with a secure password).
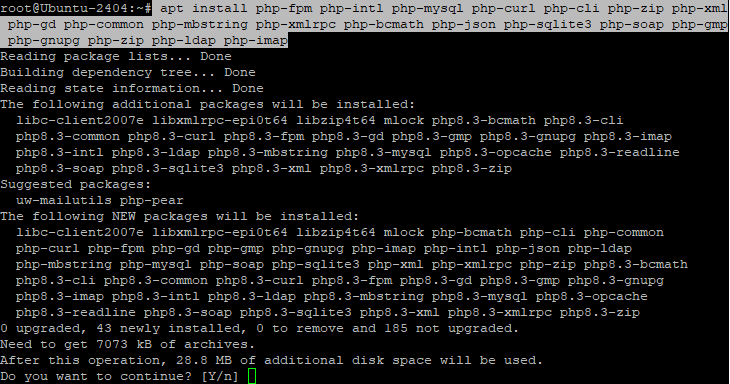
Step 7: Install PHP and Required Extensions
apt install php-fpm php-intl php-mysql php-curl php-cli php-zip php-xml php-gd php-common php-mbstring php-xmlrpc php-bcmath php-json php-sqlite3 php-soap php-gmp php-gnupg php-zip php-ldap php-imap
Froxlor needs many PHP extensions. This command installs all of them at once.
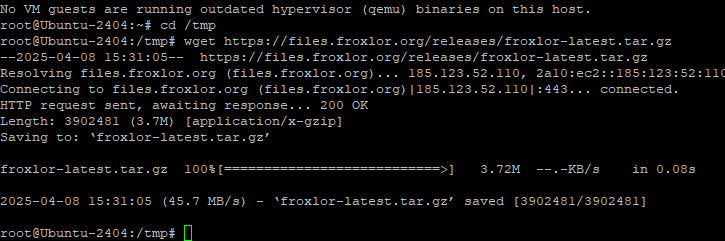
Step 8: Download and Extract Froxlor
cd /tmp
wget https://files.froxlor.org/releases/froxlor-latest.tar.gz
tar xvfz froxlor-latest.tar.gz -C /var/www/
chown -R www-data:www-data /var/www/froxlor/
Downloads the latest Froxlor archive, extracts it, and sets ownership for Nginx.
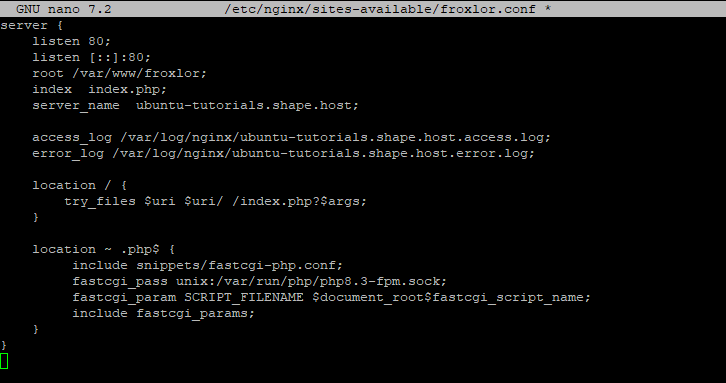
Step 9: Create the Nginx Virtual Host File
nano /etc/nginx/sites-available/froxlor.conf
Paste the following configuration, replacing your-domain.com with your actual domain or IP:
server {
    listen 80;
    listen [::]:80;
    root /var/www/froxlor;
    index index.php;
    server_name your-domain.com;

    access_log /var/log/nginx/your-domain.com.access.log;
    error_log /var/log/nginx/your-domain.com.error.log;

    location / {
        try_files $uri $uri/ /index.php?$args;
    }

    location ~ .php$ {
         include snippets/fastcgi-php.conf;
         fastcgi_pass unix:/var/run/php/php8.3-fpm.sock;
         fastcgi_param SCRIPT_FILENAME $document_root$fastcgi_script_name;
         include fastcgi_params;
    }
}
This configures Nginx to serve the Froxlor panel using PHP-FPM.
Step 10: Enable Site and Restart Services
ln -s /etc/nginx/sites-available/froxlor.conf /etc/nginx/sites-enabled/
systemctl restart nginx.service
systemctl restart php8.3-fpm
Activates the Froxlor site and restarts both Nginx and PHP-FPM to apply changes.

Step 11: Access Froxlor in Your Browser
Visit:
http://your_server_ip
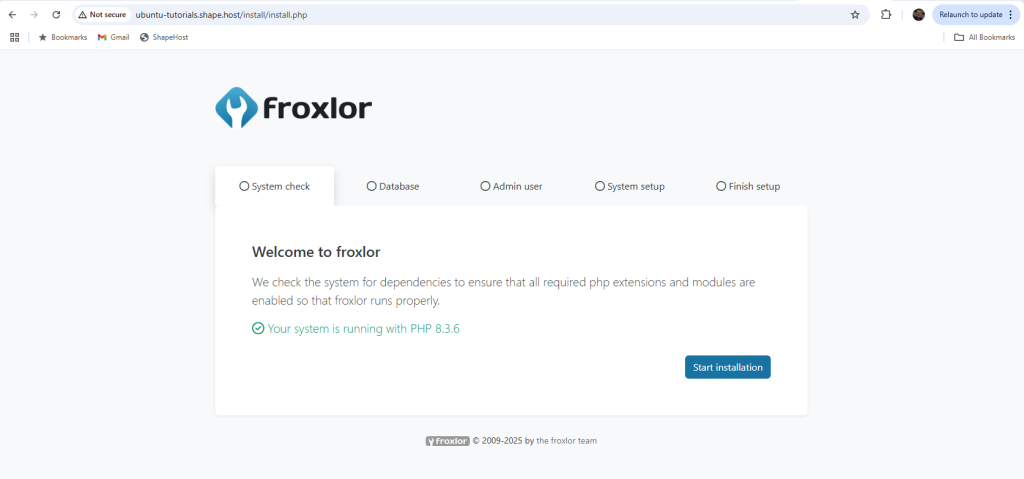
You’ll be guided through the Froxlor web-based installer.
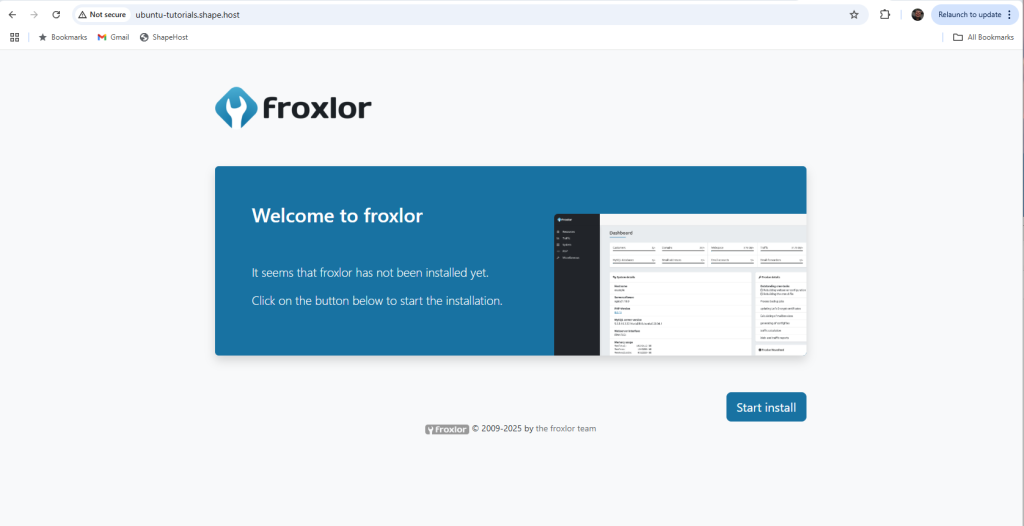
Click Start installation to begin.
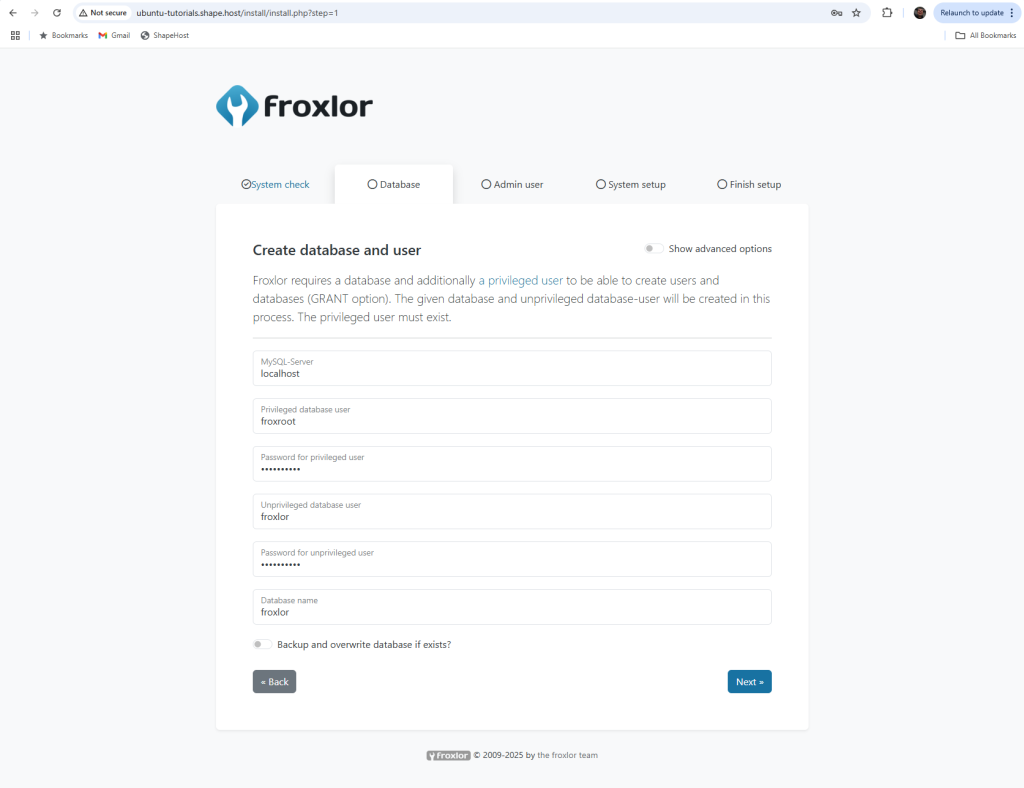
Type in the database name and password, then click Next.
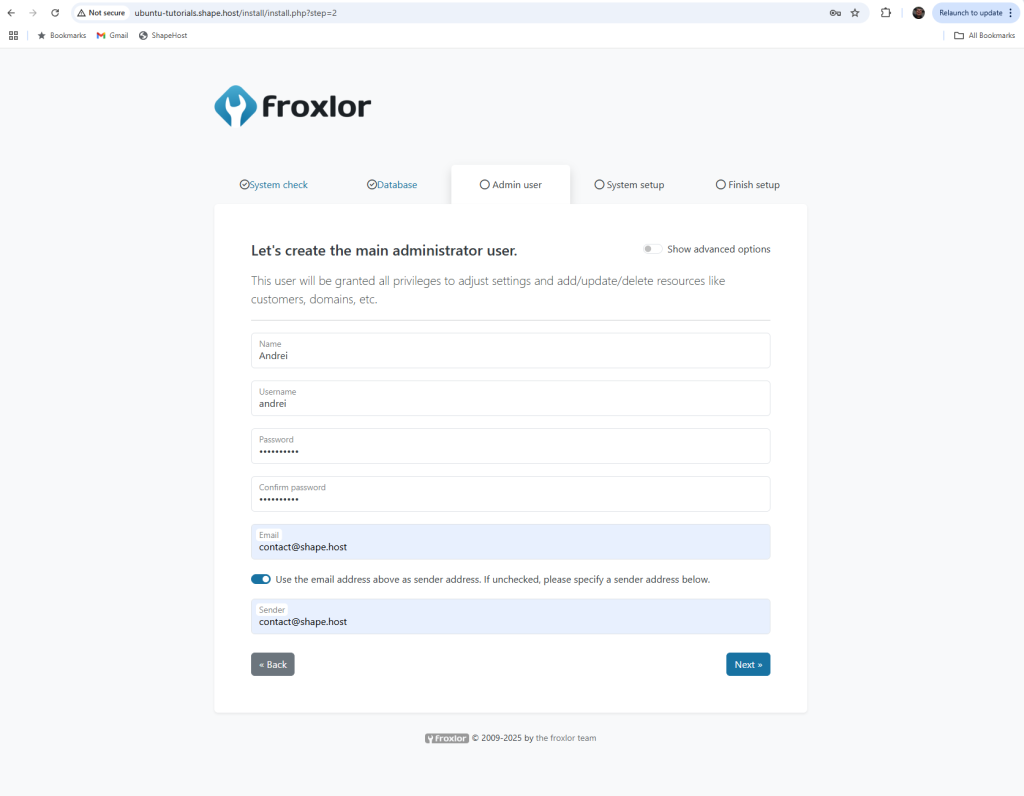
Create an admin account and continue.
Type in the server primary IP address and choose the webserver and backend for Nginx.
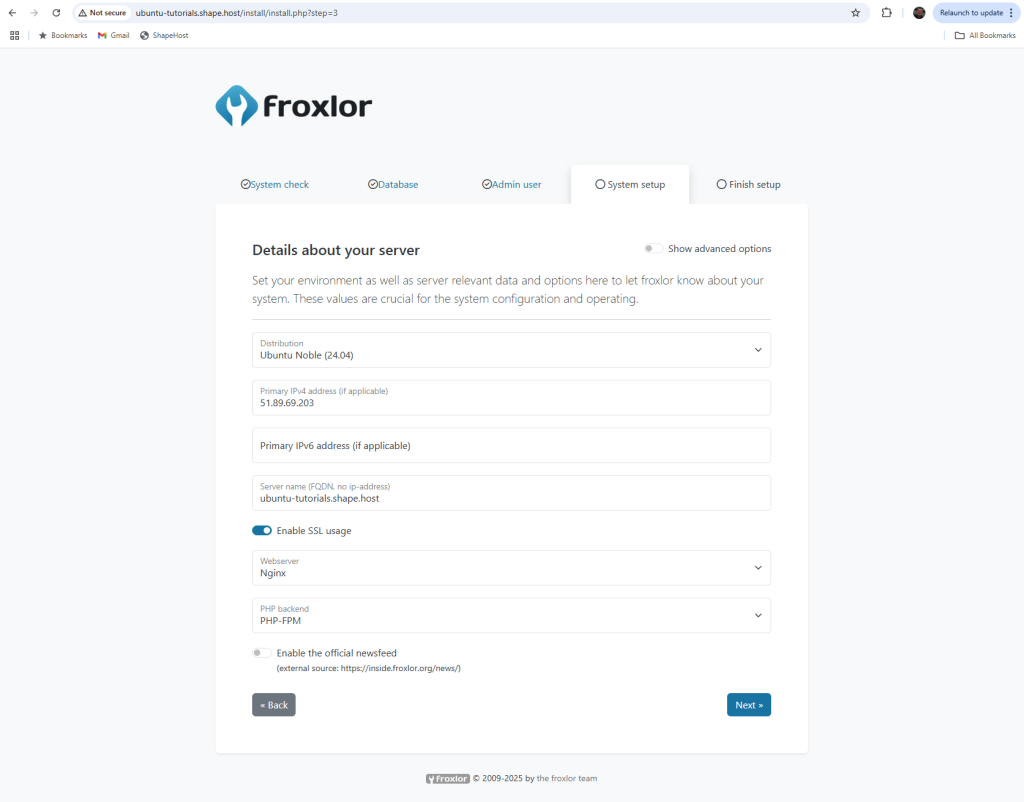
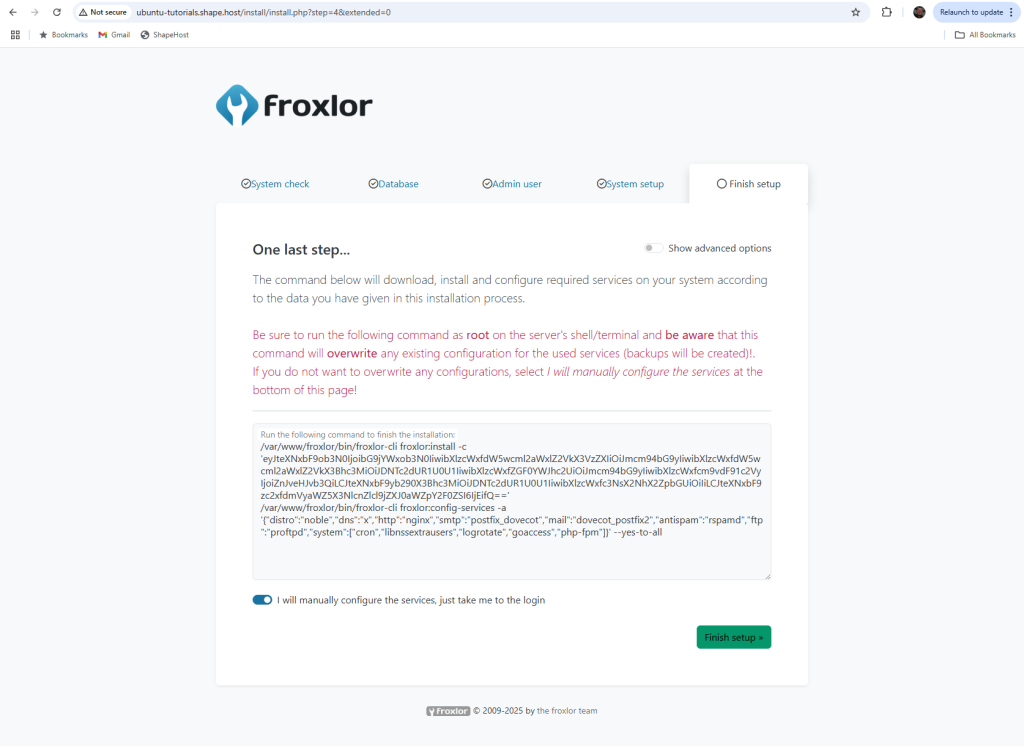
Choose to configure services yourself.
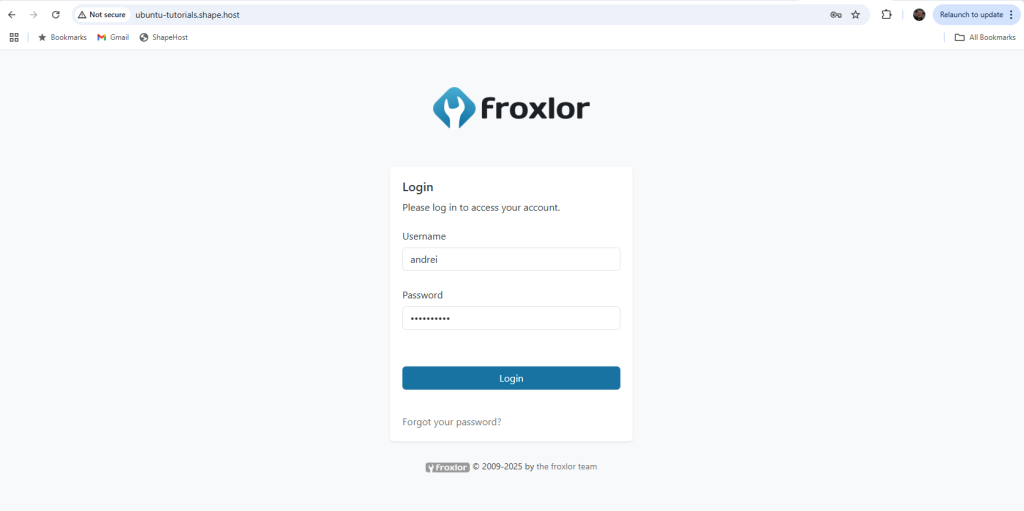
Login and begin configuring your services.
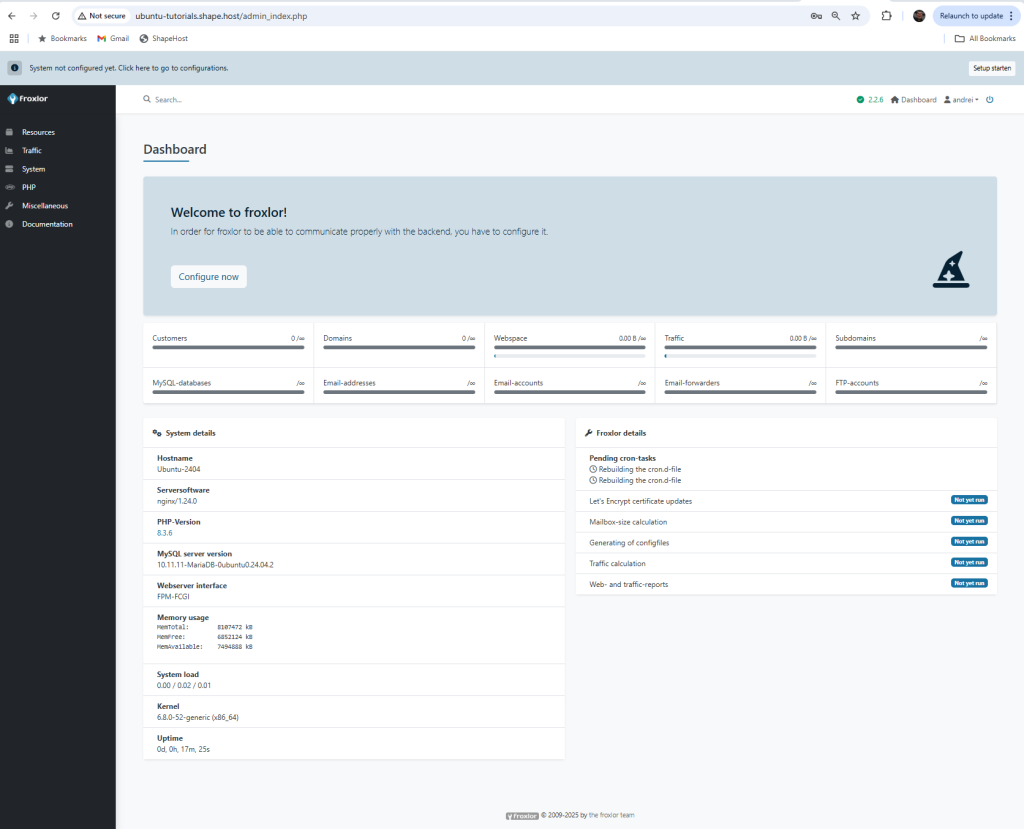
You now have Froxlor installed with Nginx on Ubuntu 24.04, using all your original commands, and it’s ready to manage domains, web servers, and user accounts.
Host Your Control Panel on Shape.Host
This setup runs perfectly on a fast and secure Shape.Host Cloud VPS.
- Instant instance creation
- Full root access
- Affordable plans with reliable performance
➡️ Try Shape.Host at https://shape.host