What is .NET?
.NET is a free, cross-platform, open-source development platform maintained by Microsoft. It supports building and running modern applications, including web, desktop, mobile, IoT, and cloud-based services. On Ubuntu 24.04, .NET offers native support and integration for both development and deployment through two main components: the .NET SDK and the .NET Runtime.
.NET SDK (Software Development Kit)
What It Is
The .NET SDK includes everything needed to build, compile, test, and publish .NET applications. It is the toolkit for developers working with C#, F#, and VB.NET.
What It Includes
- Compilers for supported .NET languages
- Command-line tools (
dotnet build,dotnet new,dotnet run, etc.) - MSBuild for project management and building
- .NET Runtime (automatically bundled)
- Project templates for different app types (web, console, API, etc.)
- Libraries and developer tools
Use Cases
- Creating and editing .NET applications
- Running unit tests and building applications
- Developing cross-platform software
- Using tools like Visual Studio Code with .NET extensions
Best For
- Developers and software teams who need to write or maintain .NET code
- Use in CI/CD pipelines for building .NET projects
- Education and prototyping in local development environments
.NET Runtime
What It Is
The .NET Runtime is a lightweight component that includes everything needed to run .NET applications, but not to develop or build them. It’s the minimal installation for production environments.
What It Includes
- Common Language Runtime (CLR) for executing managed code
- Base Class Libraries (BCL) for running .NET applications
- No compilers or build tools
- Support for ASP.NET Core (when using the ASP.NET Core Runtime)
Use Cases
- Running precompiled applications in production or staging environments
- Lightweight servers where development tools are not needed
- Containers and microservices where only the runtime is required
Best For
- System administrators and DevOps engineers deploying .NET apps
- Docker images and virtual machines for running .NET services
- Lightweight IoT or cloud deployments
Comparison: .NET SDK vs .NET Runtime
| Feature | .NET SDK | .NET Runtime |
|---|---|---|
| Purpose | Build and run apps | Only run apps |
| Includes Compiler | Yes | No |
| Includes dotnet CLI | Yes (full feature set) | Yes (limited commands) |
| Includes Runtime | Yes | Yes |
| Suitable for Development | Yes | No |
| Suitable for Production | Yes | Yes (runtime only) |
| Disk Usage | Larger | Smaller |
Installation on Ubuntu 24.04
- .NET SDK: Recommended for developer machines or build servers
- .NET Runtime: Recommended for production servers
Microsoft provides official packages and APT repositories for installing either the SDK or Runtime:
- Packages available:
dotnet-sdk-8.0aspnetcore-runtime-8.0dotnet-runtime-8.0
These can be installed via APT after configuring Microsoft’s package repository, and they are compatible with systemd, Snap, Docker, and all common Ubuntu tools.
On Ubuntu 24.04, the .NET SDK is the full-featured toolkit required for application development, while the .NET Runtime is designed solely to run existing applications. Choose the SDK when you are writing or modifying code, and use the Runtime for efficient, secure deployment in production environments. Both tools play essential roles in the modern .NET ecosystem and are fully supported on Ubuntu’s latest long-term release.
Step 1: Create a New Server on Shape.Host
Before installing anything, you need a server with Ubuntu 24.04. Follow these steps to create one using Shape.Host:
Visit https://shape.host and log in.
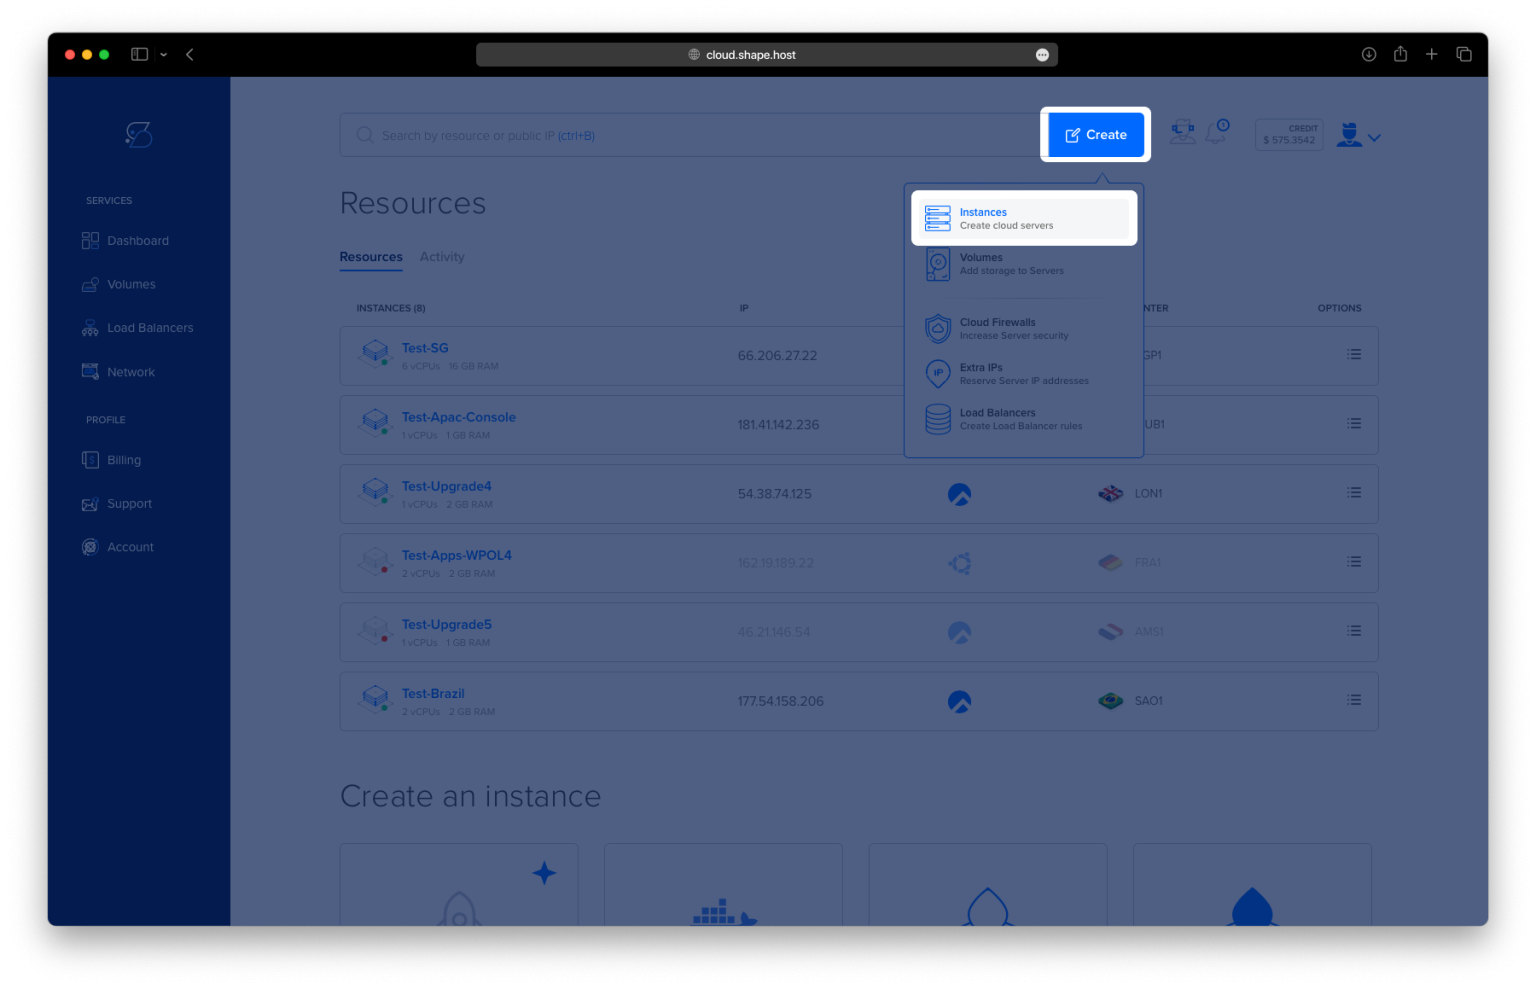
Click “Create”, then select “Instance”.

Choose your preferred server location.

Select Ubuntu 24.04 (64-bit) as the operating system.
Pick a hosting plan with at least 2 CPUs, 4 GB RAM, and 20 GB SSD.

Click “Create Instance”.

Once the instance is deployed, note the IP address under the Resources section.

Step 2: Connect to Your Instance
From Linux/macOS terminal:
ssh root@your_server_ip
From Windows, use PuTTY and connect using your instance’s IP address.
Step 3: Update the System
Run this command to ensure your system packages are up to date:
apt update

Step 4: Install .NET SDK and Runtimes
Install the .NET SDK 8.0, ASP.NET Core Runtime, and .NET Runtime:
apt install -y dotnet-sdk-8.0
This installs the full software development kit needed to build .NET applications.

apt install -y aspnetcore-runtime-8.0
This installs the runtime needed to run ASP.NET Core web applications.

apt install -y dotnet-runtime-8.0
This installs the runtime needed for running basic console or background .NET apps.

Step 5: Check .NET Installation
dotnet --version
This verifies that .NET is installed. You should see a version like 8.0.xxx.

Step 6: Create a Test .NET Project
Create and run a sample .NET console application:
dotnet new console -o my-app
cd my-app
dotnet run
This creates a directory called my-app, initializes a basic app inside it, and runs it. You should see Hello, World! as the output.


Step 7: Install Visual Studio Code (VS Code)
First, install required tools to add external repositories:
apt install software-properties-common apt-transport-https wget -y

Now add Microsoft’s GPG key:
wget -q https://packages.microsoft.com/keys/microsoft.asc -O- | sudo apt-key add -
Then add the VS Code repository to your system:
add-apt-repository "deb [arch=amd64] https://packages.microsoft.com/repos/vscode stable main"
Update the package list:
apt update

And finally, install Visual Studio Code:
apt install code

Step 8: Create a Developer User
You can create a separate user for development:
adduser andrei
usermod -aG sudo andrei
su - andrei
This creates a new user named andrei, gives them sudo privileges, and switches to that user.
Step 9: Check VS Code Installation
code --version
This confirms that VS Code was installed successfully.

Step 10: Install the C# Extension in VS Code
- Open Visual Studio Code.
- Press
Ctrl+Shift+Xto open Extensions. - Search for C#.
- Install the extension provided by Microsoft.
This enables IntelliSense, syntax highlighting, and debugging support for .NET apps in VS Code.
Launch your .NET apps with speed and confidence using Shape.Host Linux SSD VPS:
- Optimized for developers
- Root access for full control
- Fast deployment of Ubuntu 24.04 servers
- Affordable plans starting at just a few dollars
Visit https://shape.host and create your .NET-ready VPS today!