osTicket on Rocky Linux 9 – Open-Source Helpdesk on a Stable Enterprise Linux Platform
osTicket is a popular open-source ticketing system that helps organizations manage customer support, IT service requests, and internal workflows. It converts emails, web form submissions, and API requests into tickets, providing a unified interface for teams to track and resolve issues efficiently.
Deploying osTicket on Rocky Linux 9, a binary-compatible RHEL clone, offers a stable, enterprise-ready platform with a long support cycle and predictable updates, making it ideal for production environments.
Key Features of osTicket
- Email-to-Ticket Conversion – Automatically generates tickets from incoming emails.
- Customizable Ticket Forms – Collect specific information via dynamic fields.
- Departments & Roles – Organize agents with role-based permissions.
- Ticket Filters and Rules – Automatically assign and route tickets.
- Knowledgebase and FAQs – Provide self-service support to users.
- REST API – Integrate with external systems for ticket creation and management.
LAMP Stack Compatibility on Rocky Linux 9
| Component | Recommended Version |
|---|---|
| Linux Kernel | 5.14 (default in Rocky Linux 9) |
| Apache | 2.4.57 (from AppStream) |
| PHP | 8.1 (default AppStream version) |
| MariaDB/MySQL | MariaDB 10.5 (default) or MySQL 8.0 |
| OpenSSL | 3.0+ (for HTTPS and TLS encryption) |
osTicket supports PHP up to version 8.2. Since Rocky Linux 9 includes PHP 8.1, it is fully compatible without additional repositories.
Security and SSL Support
When deploying osTicket in production, SSL/TLS should always be enabled:
- Apache mod_ssl provides HTTPS support.
- Certbot (Let’s Encrypt) can automate SSL certificate issuance and renewal.
- FirewallD can limit access to necessary ports (80, 443, 22).
- Fail2Ban can prevent brute-force login attempts.
osTicket also supports encrypted SMTP connections for email notifications and replies.
Recommended Server Specifications
| Ticket Volume / Agents | CPU | RAM | Storage |
|---|---|---|---|
| Small (<10 agents) | 2 cores | 4 GB | 20–40 GB SSD |
| Medium (10–50 agents) | 4 cores | 8–16 GB | 50–100 GB SSD |
| Large (>100 agents) | 8+ cores | 16–32 GB | 100+ GB SSD/NVMe |
Attachments can quickly grow in size; for scalability, external storage or S3-compatible solutions can be used.
Common Use Cases
- Customer Support – Centralized ticket handling for external users.
- IT Service Desk – Internal support for technical issues and asset requests.
- Educational Institutions – Student and faculty support portals.
- Non-Profit Organizations – Free and efficient helpdesk for volunteers and staff.
Integrations and Automation
- REST API for ticket creation, user management, and reporting.
- IMAP/POP3 Email Fetching to automatically generate tickets.
- LDAP/AD Authentication for enterprise user management.
- Plugins for integrations with Slack, Microsoft Teams, and CRM tools.
Rocky Linux 9 works well with PHP-FPM, systemd-based cron jobs, and reverse proxies like Nginx for performance and security improvements.
osTicket vs. Other Helpdesk Systems
| Feature | osTicket | Zammad | FreeScout | Cerb |
|---|---|---|---|---|
| License | Open Source | Open Source | Open Source | Open Source (Pro) |
| Ease of Setup | Easy | Moderate | Easy | Advanced |
| Automation | Basic Rules | Strong | Moderate | Advanced (Scripting) |
| API Support | Yes | Yes | Yes | Yes |
| Self-Hosted | Yes | Yes | Yes | Yes |
osTicket is ideal for organizations that want a lightweight, self-hosted, and customizable ticketing solution without complex dependencies.
Deploying osTicket on Rocky Linux 9 provides:
- Enterprise-level stability with RHEL-compatible support cycles.
- Compatibility with PHP 8.1 and MariaDB 10.5 by default.
- SSL/TLS support for secure communications.
- A cost-effective, open-source helpdesk solution suitable for small to large organizations.
This makes Rocky Linux 9 a strong choice for businesses and IT teams looking for long-term support, predictable updates, and security compliance.
Step 1: Deploy a Rocky Linux 9 Server on Shape.Host
To begin, create a new VPS using Shape.Host:
Log in to your account at https://shape.host.
Click “Create”, then choose “Instance”.

Select a server location closest to your users for the best performance.

Choose Rocky Linux 9 (64-bit) as the operating system.
Pick a plan with at least 2 CPUs, 4 GB RAM, and 20 GB SSD.

Click “Create Instance”.

After the instance is ready, note down your server IP address and root credentials.

Step 2: Connect to Your Server via SSH
On Linux/macOS:
ssh root@your-server-ip
On Windows:
Use PuTTY and connect to root@your-server-ip.
Step 3: Install Apache, PHP, and MariaDB
3.1 Update System Packages
dnf update

3.2 Enable EPEL Repository and PHP 8.2
dnf install epel-release
dnf module reset php
dnf module enable php:8.2

3.3 Install Apache, PHP 8.2, and Required Extensions
dnf install httpd php php-cli php-fpm php-mysqlnd php-gd php-intl php-mbstring php-xml php-zip php-opcache unzip curl

3.4 Install and Start MariaDB
dnf install mariadb-server
systemctl enable --now mariadb
mysql_secure_installation


Step 4: Create the osTicket Database
mysql -u root <<EOF
CREATE DATABASE osticket CHARACTER SET utf8mb4 COLLATE utf8mb4_unicode_ci;
GRANT ALL PRIVILEGES ON osticket.* TO 'osticket'@'localhost' IDENTIFIED BY 'YourStrongPass!';
FLUSH PRIVILEGES;
EOF
🔒 Replace
YourStrongPass!with a secure password.

Step 5: Download and Prepare osTicket
cd /var/www/html
curl -s https://api.github.com/repos/osTicket/osTicket/releases/latest | grep browser_download_url | cut -d '"' -f 4 | wget -i -
unzip osTicket-*.zip -d osticket
mkdir -p /var/www/html/osticket
cp -r osticket/upload/* /var/www/html/osticket/

Step 6: Configure osTicket Files
cp /var/www/html/osticket/include/ost-sampleconfig.php /var/www/html/osticket/include/ost-config.php
chown -R apache:apache /var/www/html/osticket
find /var/www/html/osticket -type d -exec chmod 755 {} \;
find /var/www/html/osticket -type f -exec chmod 644 {} \;

Step 7: Configure Apache Virtual Host
Create a new virtual host configuration:
nano /etc/httpd/conf.d/osticket.conf
Paste the following:
<VirtualHost *:80>
  ServerName your-domain.com
  DocumentRoot /var/www/html/osticket

  <Directory /var/www/html/osticket>
    AllowOverride All
    Require all granted
  </Directory>

  ErrorLog /var/log/httpd/osticket_error.log
  CustomLog /var/log/httpd/osticket_access.log combined
</VirtualHost>

Restart Apache:
systemctl restart httpd

Step 8: Enable SSL with Certbot
dnf install certbot python3-certbot-apache
certbot --apache -d your-domain.com
Follow the instructions to install a free SSL certificate.


Step 10: Access osTicket
Visit your osTicket installation in a browser:
http://your-domain.com
or
https://your-domain.com
Complete the installer using the database credentials you created earlier.
Make sure every dependency for osTicket is installed and click Continue.
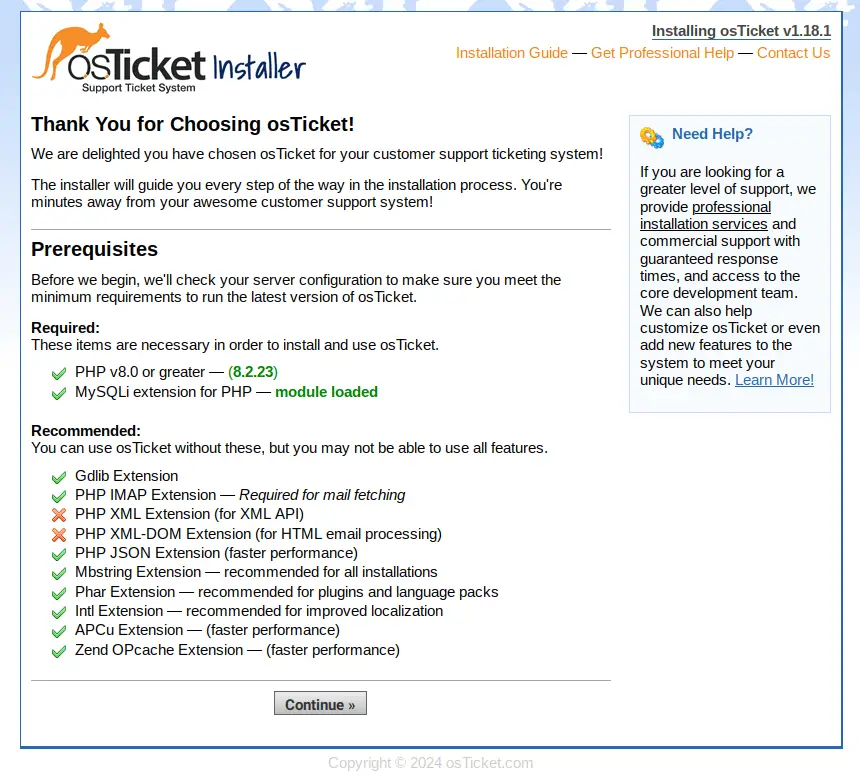

Change the basic system settings such as your domain name, then input the new admin user for osTicket, and input the database details that you’ve created.
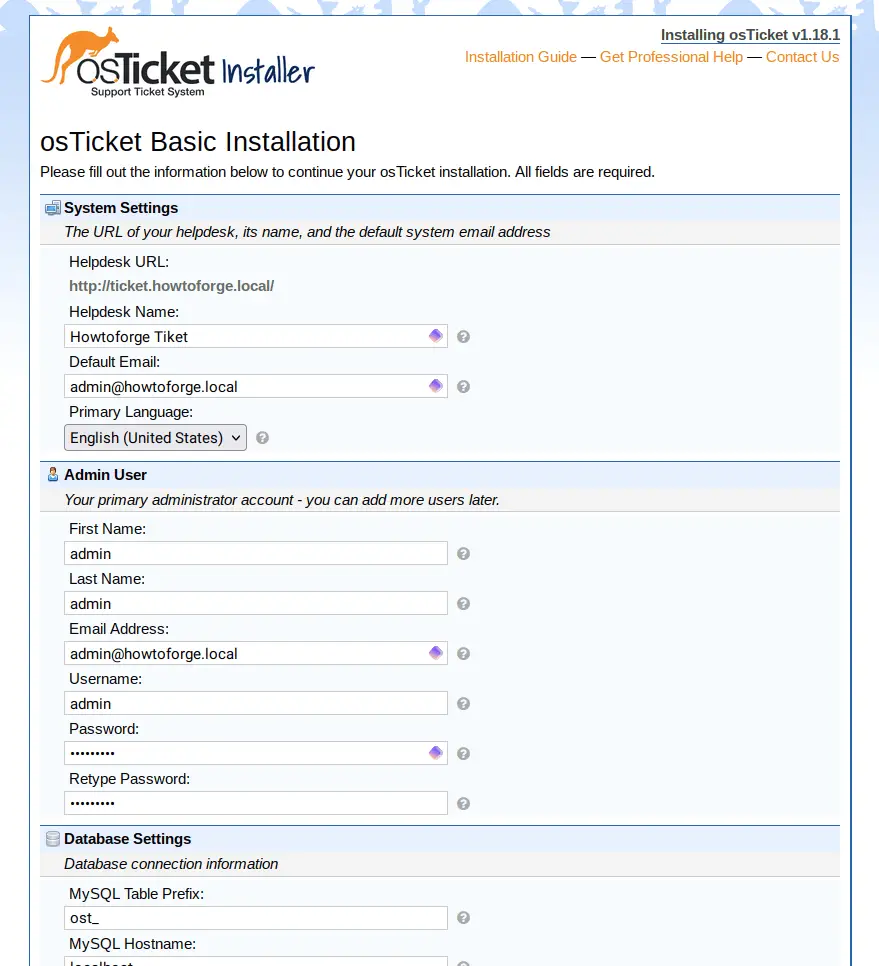

If the installation is complete, you’ll see the following page:

Remove Setup Directory
After completing the web-based setup, remove the installation directory:
rm -rf /var/www/html/osticket/setup
Open this link https://your-domain/scp and log in to the osTicket with your admin user and password.

You’ll see the following osTicket Administration Dashboard.

You have installed osTicket on Rocky Linux 9 with Apache, PHP 8.2, MariaDB, and SSL. Your ticketing system is now ready for production.
For fast and secure Linux SSD VPS hosting optimized for applications like osTicket, choose Shape.Host.
Deploy your server today at Shape.Host and enjoy reliable cloud hosting!