In this article, we will guide you through the installation and configuration of the OTRS (Open Ticket Request System) on an Ubuntu 22.04 server. OTRS is a powerful, open-source ticketing system used by businesses to manage customer support requests, IT services, and other internal processes. By the end of this tutorial, you’ll have a fully functional OTRS system ready to handle your organization’s ticketing needs, providing an efficient way to track and manage customer interactions.
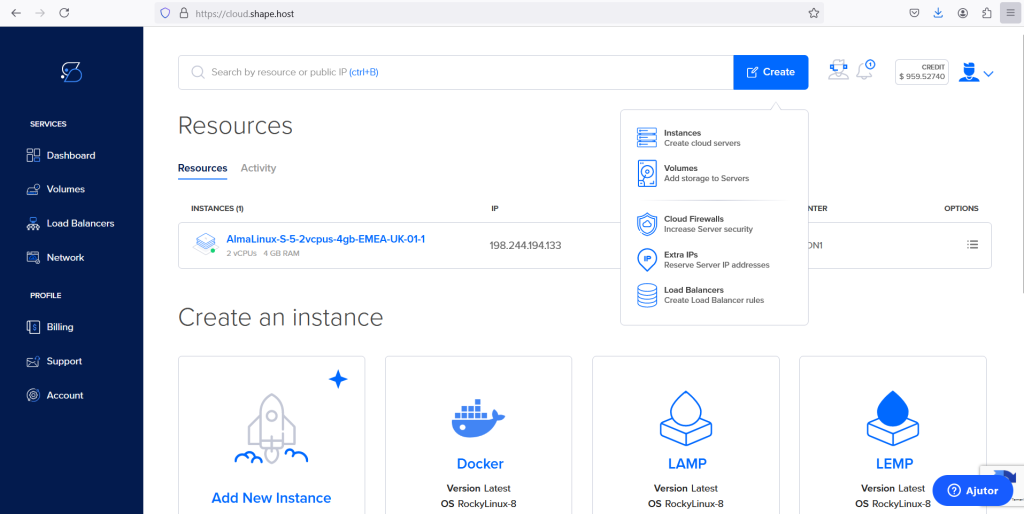
Prepare Your Instance
Before starting, make sure you have your server instance ready:
Initiating Instance Creation:
Create a new virtual machine instance on your hosting provider’s platform.
Choosing a Location:
Choose a hosting plan that meets your needs and select Ubuntu 22.04 as the operating system.
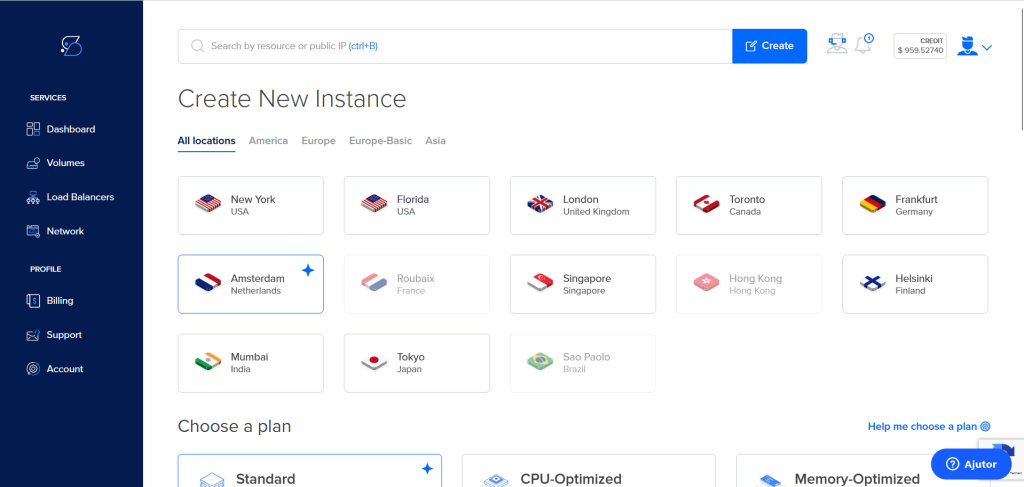
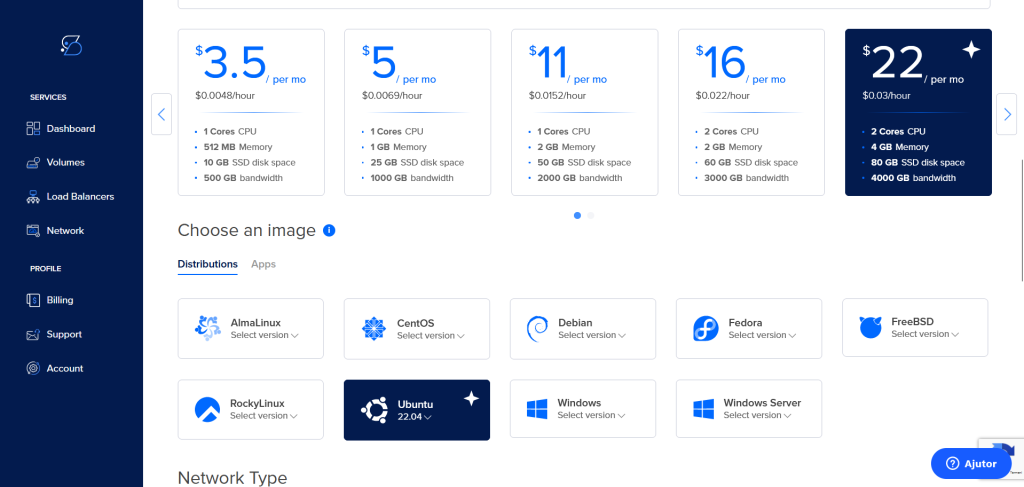
Selecting a Plan:
Choose a hosting plan that meets your needs and select Ubuntu 22.04 as the operating system.
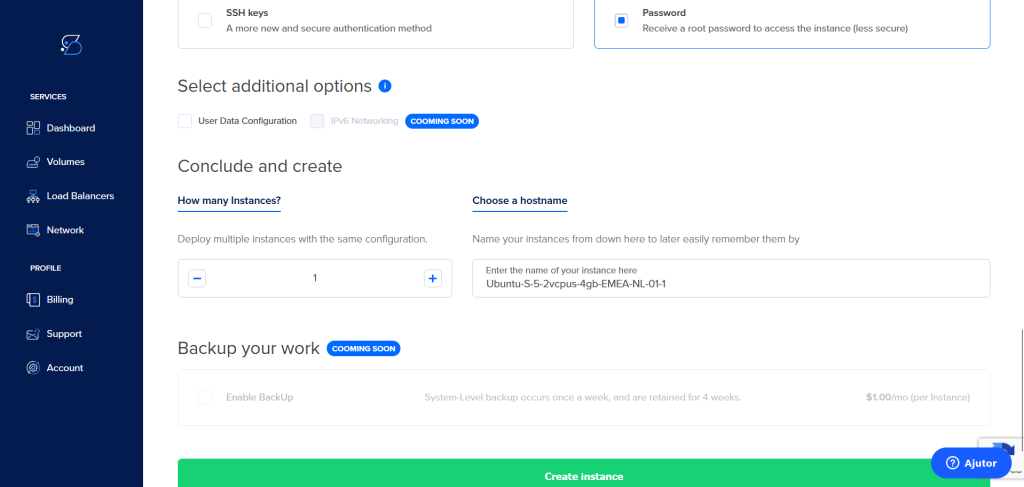
Authentication Method:
Set up authentication, either using SSH keys or a password, and finalize the instance creation.
Here you will find the ip to connect to your Instance.
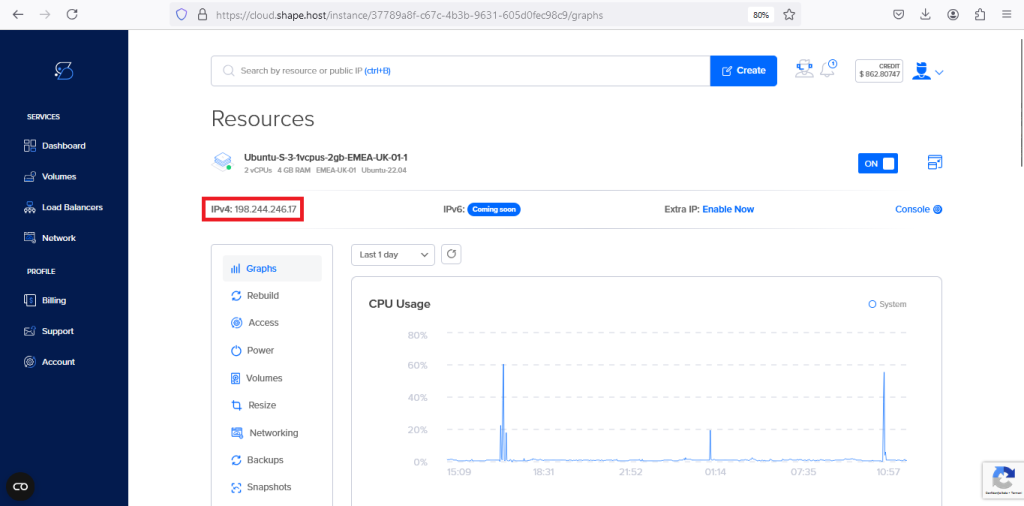
Connecting to Your Instance:
To connect to your instance, use SSH. Open a terminal and enter the following command:
ssh root@your-server-ipReplace your-server-ip with the IP address of your instance, which you can find in your hosting provider’s dashboard.
2. Update and Upgrade Your System
Start by updating and upgrading your system to ensure all packages are up to date:
apt update -y
apt upgrade -y
3. Install Required Perl Modules
OTRS requires several Perl modules to function properly. Install them using the following command:
apt install perl libapache2-mod-perl2 libdbd-mysql-perl libtimedate-perl libnet-dns-perl libnet-ldap-perl libio-socket-ssl-perl libpdf-api2-perl libsoap-lite-perl libtext-csv-xs-perl libjson-xs-perl libapache-dbi-perl libxml-libxml-perl libxml-libxslt-perl libyaml-perl libarchive-zip-perl libcrypt-eksblowfish-perl libencode-hanextra-perl libmail-imapclient-perl libtemplate-perl libmoo-perl libauthen-ntlm-perl libjavascript-minifier-xs-perl libdbd-odbc-perl libcss-minifier-xs-perl libdbd-pg-perl libdatetime-perl -y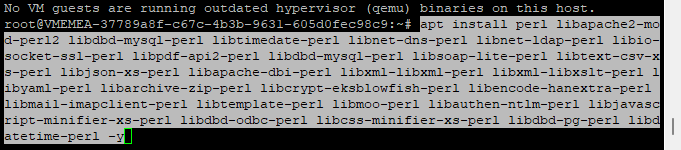
4. Install Apache and MariaDB Server
Install Apache and MariaDB, which are required to host the OTRS application and manage the database:
apt install apache2 mariadb-server mariadb-client -y
After installation, start and enable the services to ensure they run on startup:
systemctl start apache2 mariadb
systemctl enable apache2 mariadb
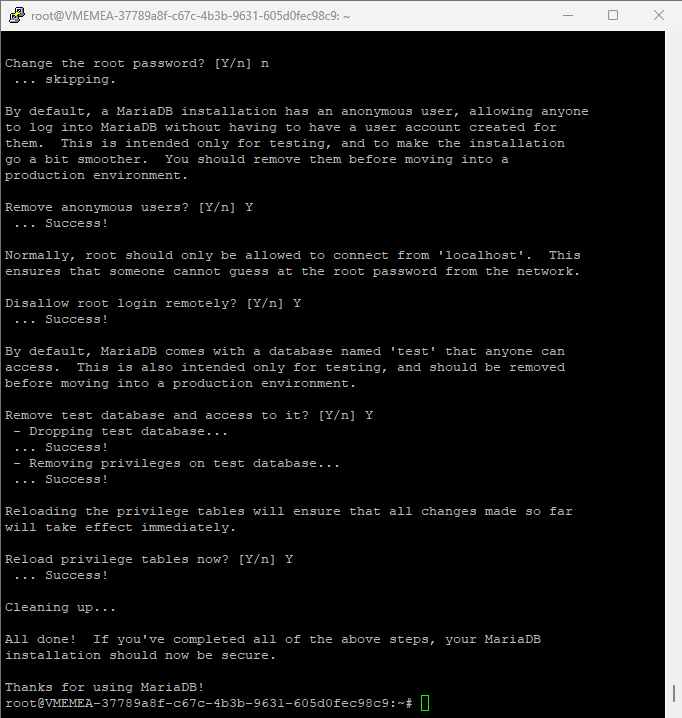
5. Configure MariaDB
Secure MariaDB and tweak its settings for optimal performance:
mysql_secure_installation
Edit the MariaDB configuration file:
nano /etc/mysql/mariadb.conf.d/50-server.cnf
Add the following lines under the [mysqld] section:
max_allowed_packet=256M
character-set-server=utf8
collation-server=utf8_general_ci
innodb_buffer_pool_size=4G
innodb_log_file_size=1G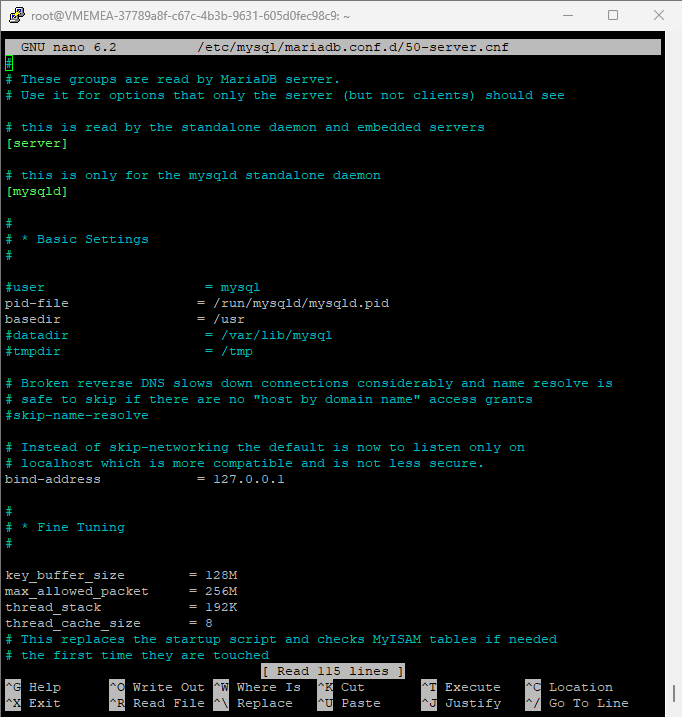
Save the file and restart MariaDB to apply the changes:
systemctl restart mariadb
6. Install OTRS
Create a dedicated user for OTRS:
useradd -r -m -d /opt/otrs -c "OTRS User" -s /usr/sbin/nologin otrs
usermod -aG www-data otrs

Download and extract the OTRS package:
wget https://otrscommunityedition.com/download/otrs-community-edition-6.0.35.tar.gz
tar xvfz otrs-community-edition-6.0.35.tar.gz -C /opt/otrs --strip-components=1

Change ownership of the OTRS directory:
chown -R otrs:otrs /opt/otrs
7. Configure OTRS
Check for required Perl modules:
perl /opt/otrs/bin/otrs.CheckModules.pl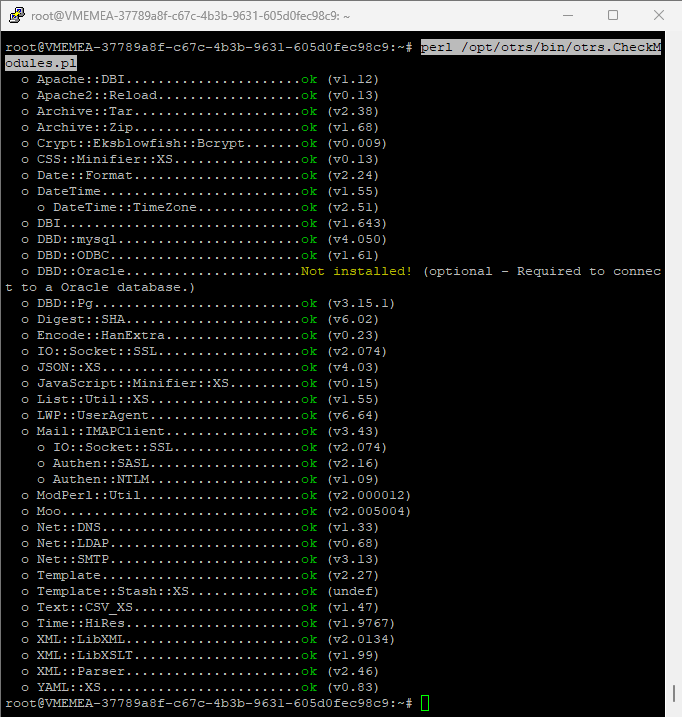
Rename the configuration file:
cp /opt/otrs/Kernel/Config.pm{.dist,}
Run the following scripts to set up the environment:
perl -cw /opt/otrs/bin/cgi-bin/index.pl
perl -cw /opt/otrs/bin/cgi-bin/customer.pl
perl -cw /opt/otrs/bin/otrs.Console.pl
perl /opt/otrs/bin/otrs.SetPermissions.pl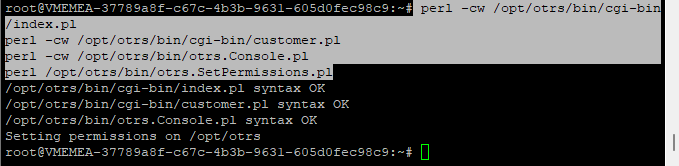
Link the Apache configuration file:
ln -s /opt/otrs/scripts/apache2-httpd.include.conf /etc/apache2/sites-enabled/
Disable the default Apache site and reload the service:
a2dissite 000-default.conf
systemctl reload apache2

Enable required Apache modules and restart the service:
a2enmod perl version deflate filter headers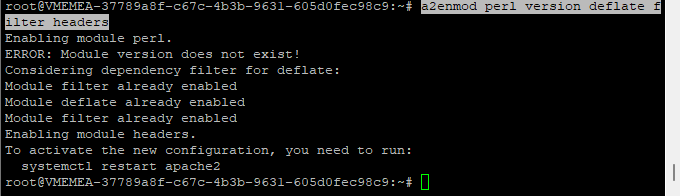
Fix permissions:
/opt/otrs/bin/otrs.SetPermissions.pl --web-group=www-data
systemctl restart apache2

8. Access OTRS Web Interface
Finally, check the status of Apache:
systemctl status apache2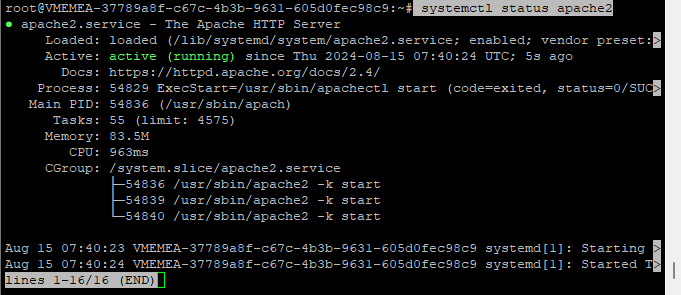
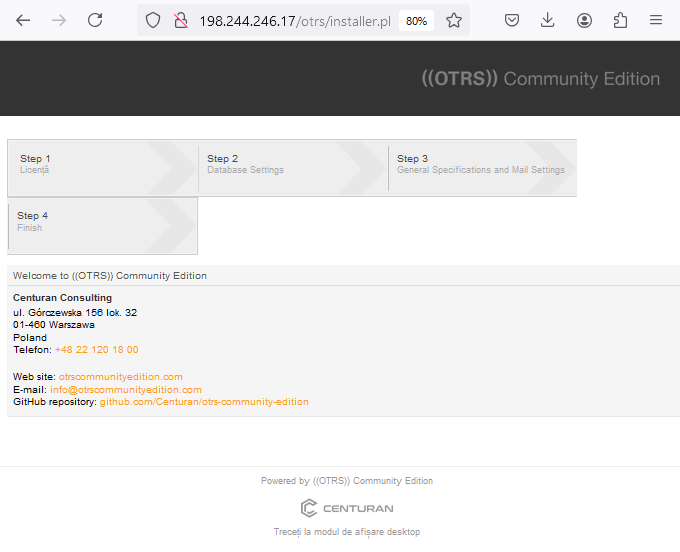
Open your browser and access the OTRS installer via http://your-server-ip/otrs/installer.pl.
Certainly! Here’s the step-by-step setup process for OTRS in a format suitable for adding photos under each step in WordPress:
Completing the OTRS Installation via Web Interface
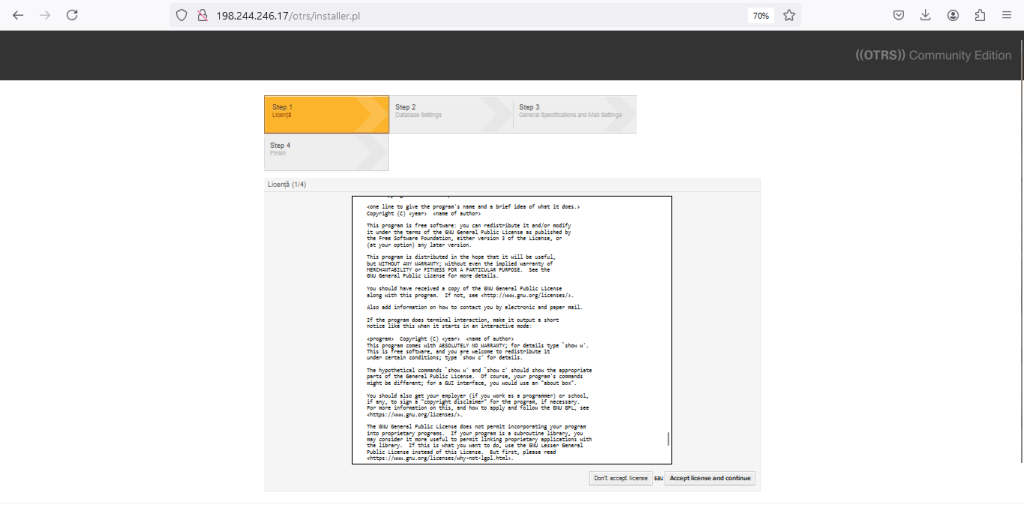
Step 1: License Agreement
First, review and accept the OTRS Community Edition license to proceed with the installation.
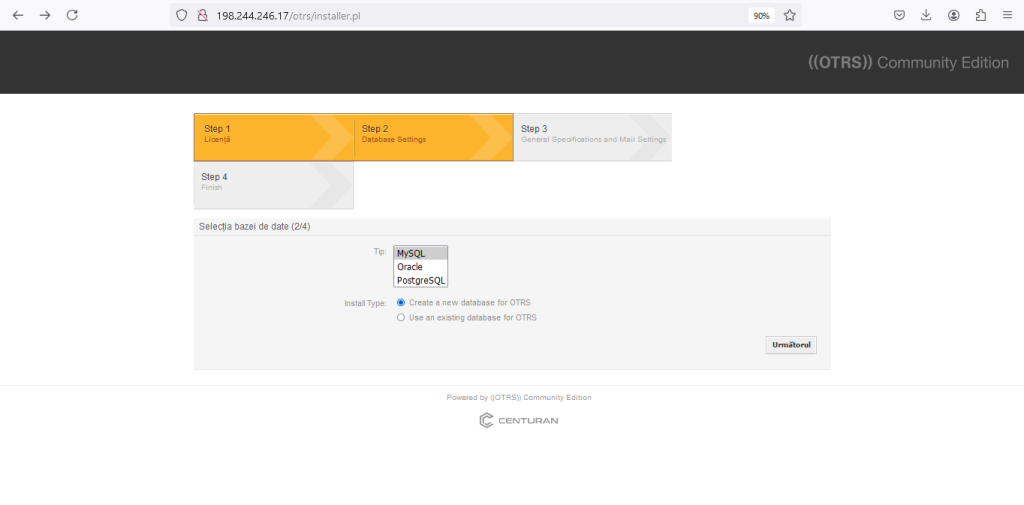
Step 2: Database Settings
Select your database type (MySQL, Oracle, or PostgreSQL) and opt to create a new database for OTRS.
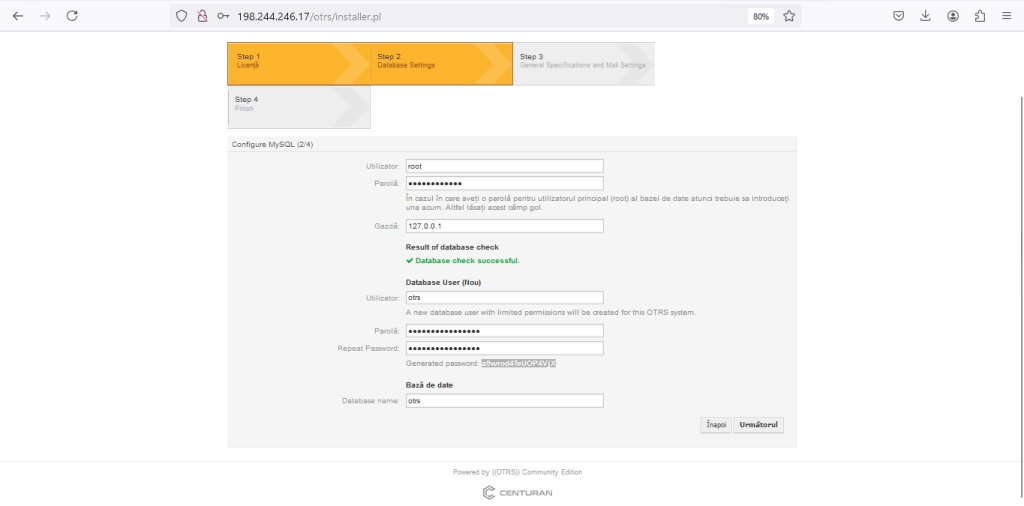
Step 3: Database Configuration
Enter the root database user credentials and configure a new OTRS database user with limited permissions. Specify the database name.
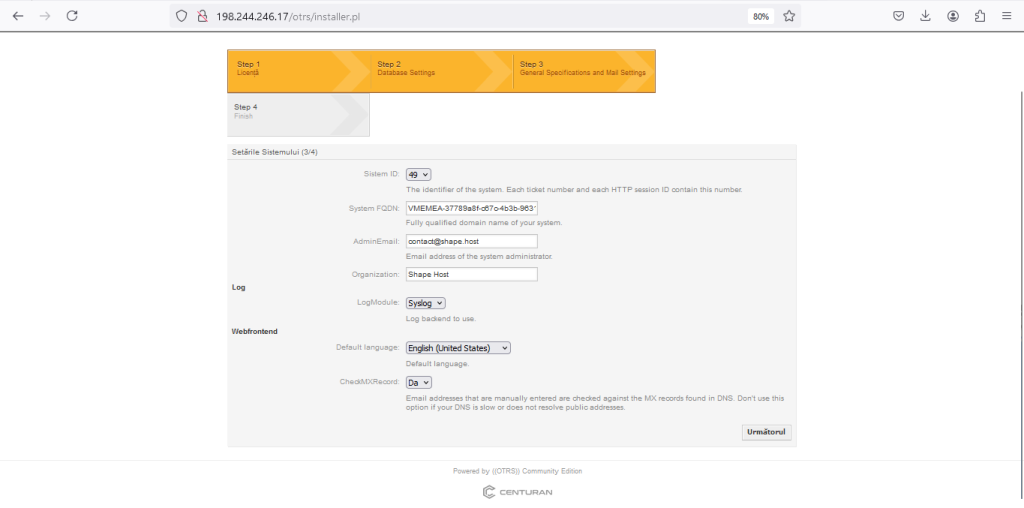
Step 4: System Configuration
Configure system settings including System ID, FQDN, Admin Email, Organization Name, Log Module, Default Language, and MX Record checks.

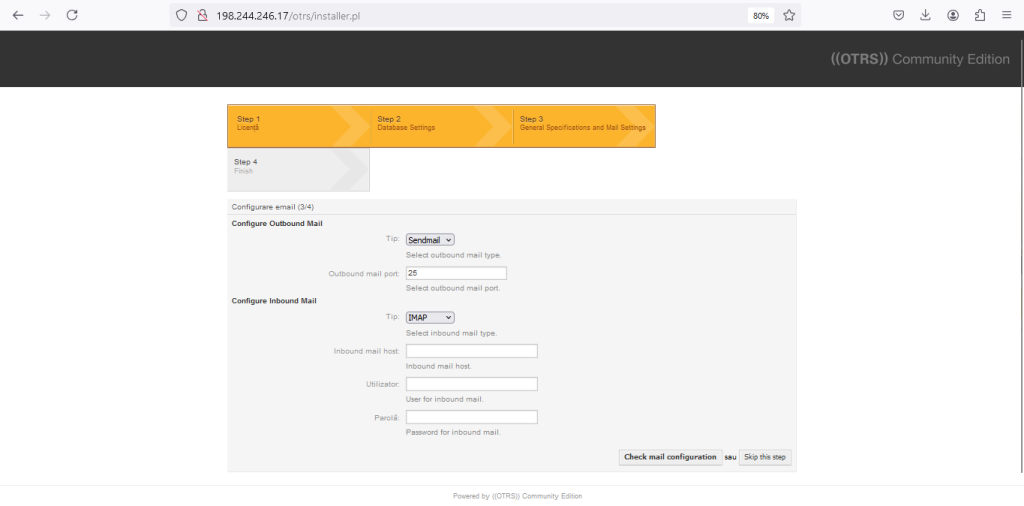
Step 5: Email Configuration.
Set up outbound and inbound mail configurations. Choose mail types (Sendmail, IMAP, etc.) and provide the necessary server details and credentials.
Step 6: Finish Setup
Confirm the installation. The system will provide login credentials for the root user, and you’ll see the installation completion page with a link to the login page.
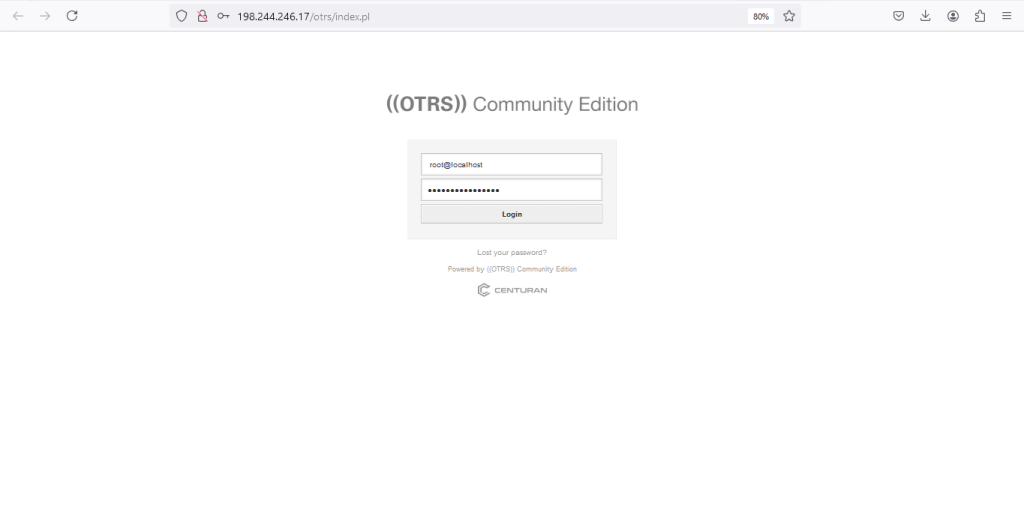
Step 7: Login to OTRS
Log in to the OTRS dashboard using the provided root credentials.
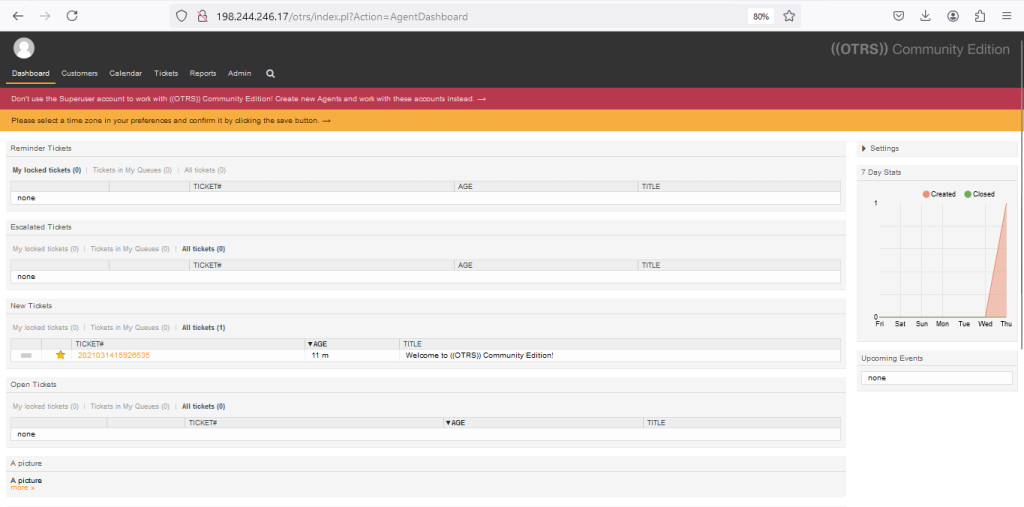
Step 8: Initial Dashboard Overview
Upon login, access the OTRS Agent Dashboard where you can start managing tickets and configuring further settings.
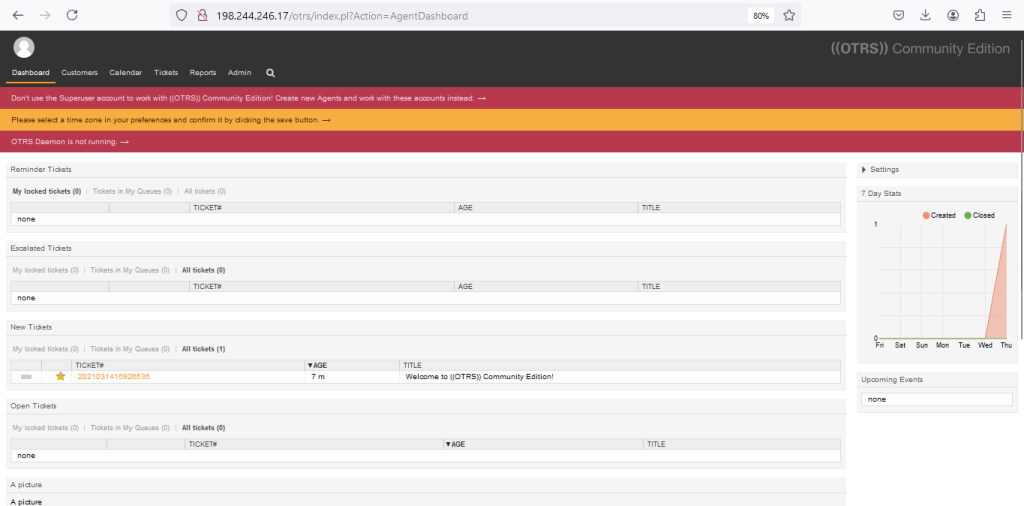
In the above screen, you should see the “OTRS Daemon not running error”.
To resolve this error, run the following command on your server interface:
su -c "/opt/otrs/bin/otrs.Daemon.pl start" -s /bin/bash otrs
cp /opt/otrs/var/cron/otrs_daemon{.dist,}
su -c "/opt/otrs/bin/Cron.sh start" -s /bin/bash otrs
Step 9: Initial Ticket Overview
The dashboard shows an overview of tickets, including new, open, and escalated ones, giving you a basic interface for managing customer requests.
You have now installed the OTRS ticketing system on Ubuntu 22.04. OTRS will enable you to streamline your customer service processes, enhance your team’s productivity, and provide better service to your clients.
At Shape.host, we offer high-performance Linux SSD VPS solutions that are perfect for hosting applications like OTRS. Our services provide scalable, reliable, and secure infrastructure, ensuring your applications run smoothly and efficiently. Whether you need a basic setup or a complex multi-server environment, our Cloud VPS plans can meet your needs.