RabbitMQ is a widely used open-source message broker that enables asynchronous communication between applications, microservices, and distributed systems. It implements the Advanced Message Queuing Protocol (AMQP) and supports various messaging patterns, making it ideal for enterprise messaging, event-driven architectures, and background task processing. Running RabbitMQ on Debian 12 ensures a stable, scalable, and high-performance messaging system for handling real-time data streams.
Key Features of RabbitMQ on Debian 12
1. Reliable Messaging and Delivery Guarantees
- Supports persistent messaging, acknowledgments, and retry mechanisms to ensure reliable delivery.
2. Asynchronous Processing
- Enables efficient decoupling of services by allowing messages to be processed in the background.
3. Flexible Routing with Exchange Types
- Supports different exchange types (Direct, Topic, Fanout, and Headers) for customized message routing.
4. Multi-Protocol Support
- Works with AMQP, MQTT, STOMP, and WebSockets for broad integration options.
5. Clustering and High Availability
- Scale horizontally with multi-node clusters and mirror queues for fault tolerance.
6. Lightweight and Fast Performance
- Optimized for low-latency messaging with efficient resource utilization.
7. Security and Access Control
- Supports TLS encryption, authentication, and role-based access control (RBAC).
8. Plugins and Integrations
- Extend functionality with LDAP authentication, monitoring tools, and third-party plugins.
9. Monitoring and Management UI
- Comes with a web-based management console to monitor queues, connections, and message throughput.
10. Distributed and Cloud Deployments
- Deploy RabbitMQ in on-premises, cloud environments, Kubernetes, and Docker containers.
Advantages of Using RabbitMQ on Debian 12
- Stable and Secure Platform: Debian 12 ensures long-term support (LTS) and security updates for reliable performance.
- Efficient Communication Between Services: Ideal for microservices, event-driven applications, and task queues.
- Scalable Architecture: Supports high availability and message replication for large-scale systems.
- Lightweight and Resource-Efficient: Uses low memory and CPU compared to other message brokers.
- Enterprise-Ready: Used in banking, e-commerce, IoT, and real-time analytics.
Use Cases for RabbitMQ on Debian 12
1. Microservices Communication
- Enables service-to-service messaging in distributed applications.
2. Event-Driven Architecture
- Publish/subscribe model for real-time notifications and streaming data processing.
3. Asynchronous Task Processing
- Queue background jobs such as image processing, email delivery, and data synchronization.
4. IoT and Sensor Data Processing
- Handles large-scale IoT telemetry, logs, and device messaging.
5. Logging and Monitoring Pipelines
- Collect logs and metrics for real-time monitoring and analytics.
6. Financial Transaction Processing
- Ensures secure and scalable transaction handling in banking and fintech systems.
7. Real-Time Chat and Messaging
- Backbone for instant messaging platforms and notification systems.
RabbitMQ vs. Other Message Brokers
| Feature | RabbitMQ | Kafka | ActiveMQ | Redis Pub/Sub |
|---|---|---|---|---|
| Message Durability | ✅ Yes | ✅ Yes | ✅ Yes | ❌ No |
| Routing Flexibility | ✅ Yes (Exchanges) | ❌ No (Log-based) | ✅ Yes | ❌ No |
| Protocol Support | ✅ AMQP, MQTT, STOMP | ❌ Kafka-Only | ✅ AMQP, JMS, MQTT | ✅ Redis-Only |
| Performance | ✅ Low Latency | ✅ High Throughput | ⚠️ Moderate | ✅ Fast In-Memory |
| Best Use Case | ✅ Microservices, Jobs | ✅ Big Data, Streaming | ✅ Enterprise Apps | ✅ Cache, Simple Messaging |
Why Use RabbitMQ on Debian 12?
- Optimized for High-Performance Messaging: Fast, reliable, and secure message delivery.
- Lightweight and Efficient: Uses fewer system resources compared to Kafka or ActiveMQ.
- Scalable for Large Deployments: Supports distributed message queuing and clustering.
- Secure and Enterprise-Ready: Comes with TLS encryption, role-based access, and monitoring tools.
- Perfect for Microservices and Asynchronous Workloads: Works well with Docker, Kubernetes, and cloud platforms.
RabbitMQ on Debian 12 is a lightweight, scalable, and secure message broker ideal for microservices, event-driven applications, and enterprise messaging. Whether you’re building real-time applications, distributed task queues, or IoT data pipelines, RabbitMQ ensures efficient, reliable, and asynchronous communication across services.
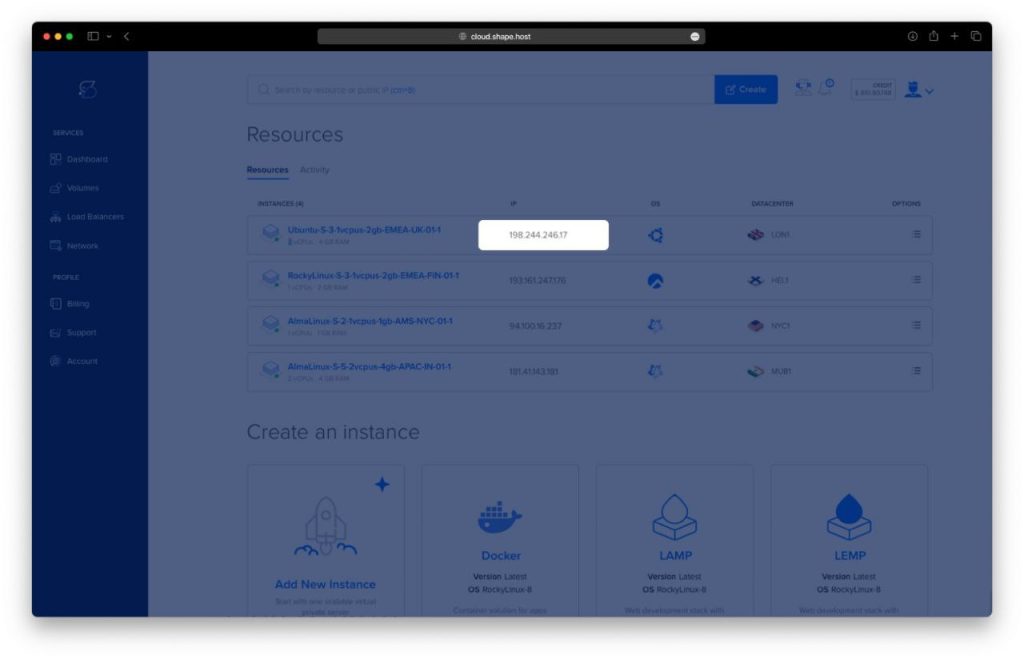
Step 1: Set Up Your Debian 12 Server
Before installing RabbitMQ, you need a Debian 12 server. If you haven’t set one up yet, follow these steps on Shape.Host:
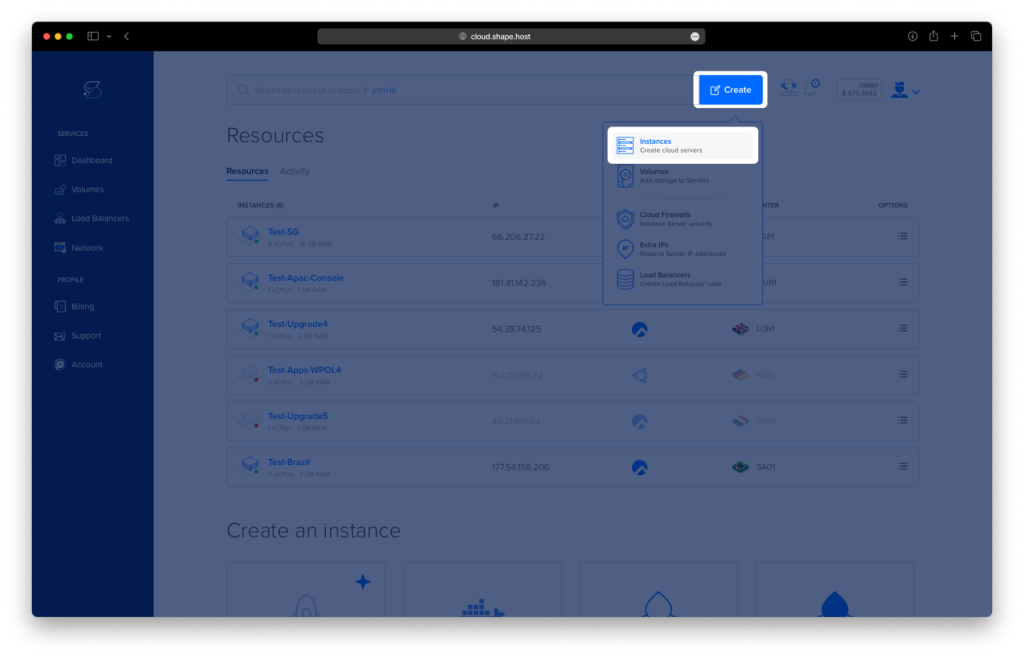
Log in to Shape.Host and go to your Dashboard.
Click “Create” to start a new server setup.
Choose “Instances” to create a new cloud server.
Select a Data Center Location that provides the best performance for your region.
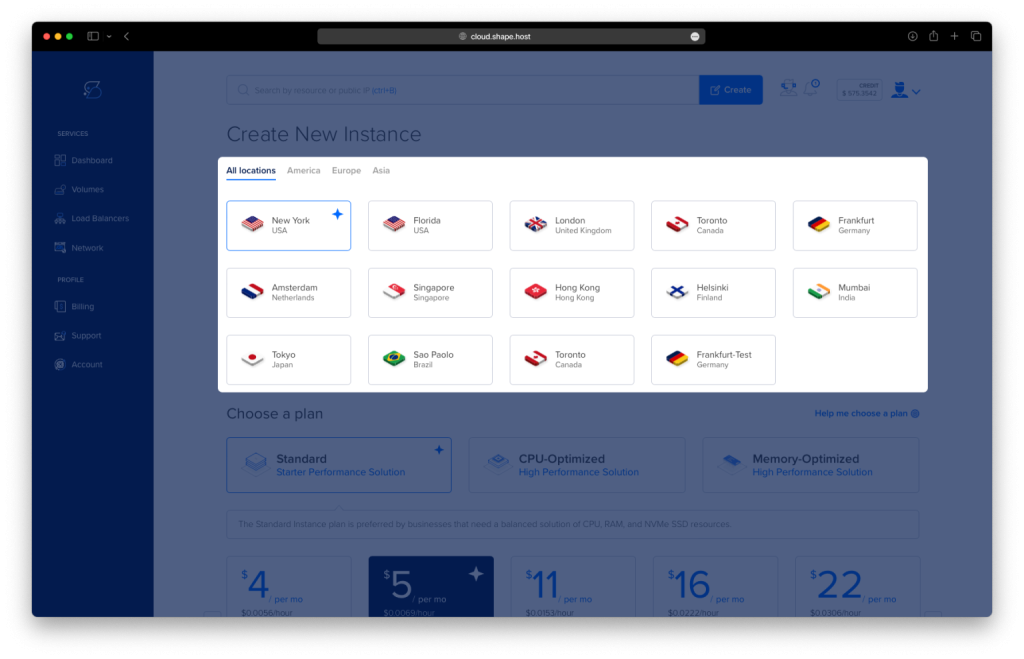
Pick a Hosting Plan based on your expected workload (e.g., Standard, CPU-Optimized).
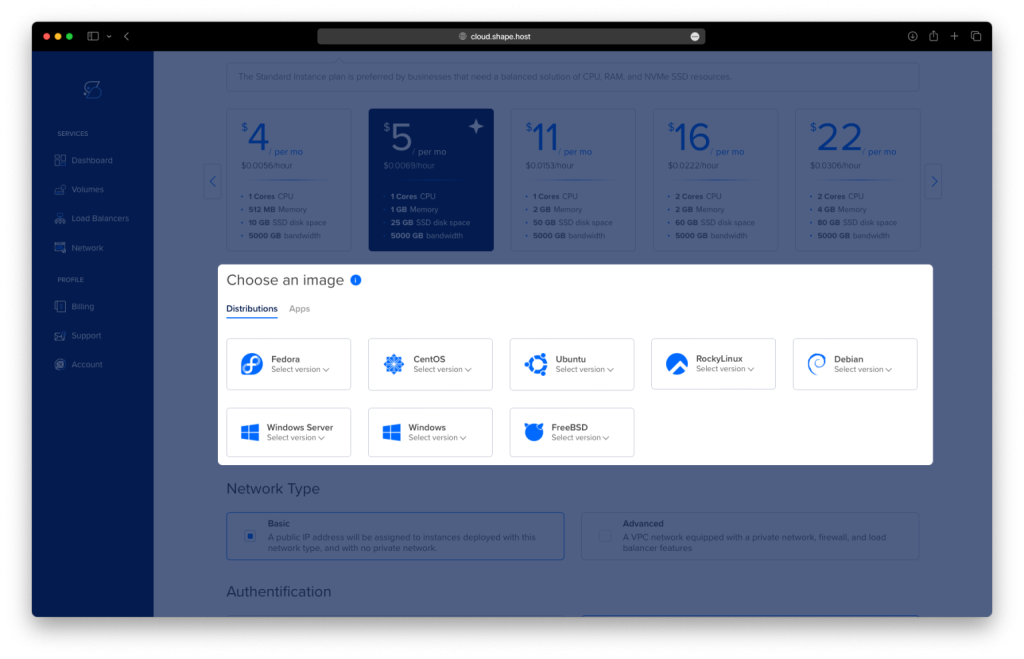
Set Debian 12 as your operating system and finalize the configuration.
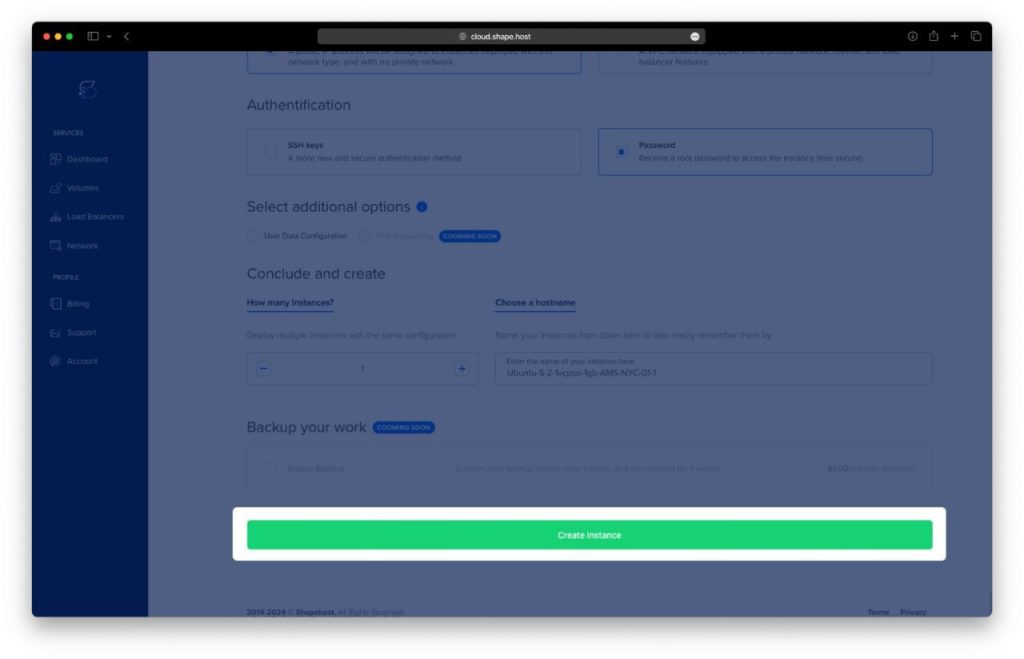
Deploy the Server by choosing an authentication method (SSH keys or password) and clicking Create Instance.
Locate Your Instance’s IP Address.
Step 2: Connect to Your Server
Once the server is ready, connect via SSH.
- For Linux/macOS Users:
ssh root@<your_server_ip> - For Windows Users: Use PuTTY, enter your server’s IP address, and establish the connection.
Step 3: Update the System
Ensure your system is up to date to avoid compatibility issues:
apt update -y

Step 4: Install RabbitMQ
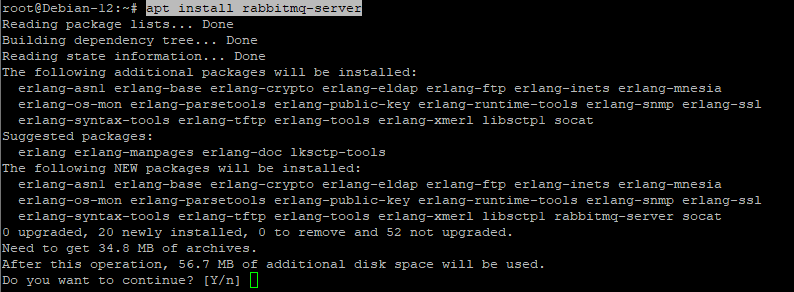
Step 4.1: Install RabbitMQ Server
apt install rabbitmq-server -y
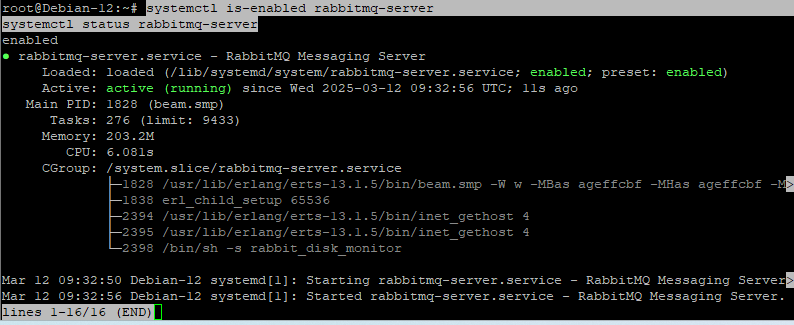
Step 4.2: Check RabbitMQ Status
To confirm RabbitMQ is running and enabled at boot:
systemctl is-enabled rabbitmq-server
systemctl status rabbitmq-server
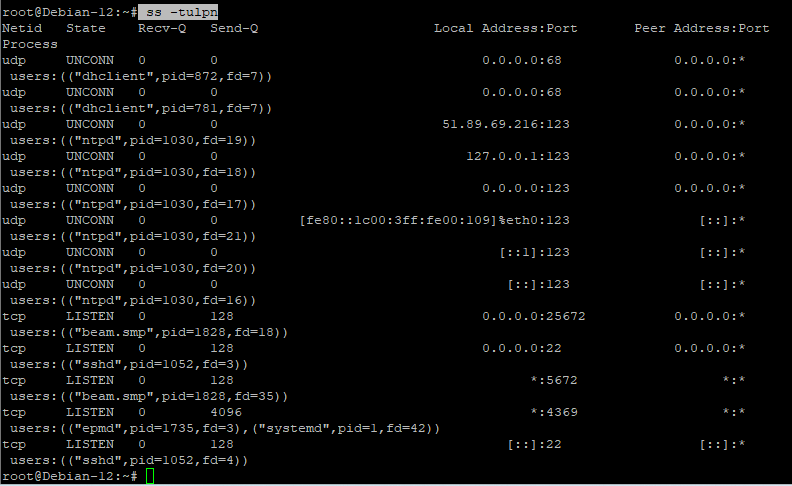
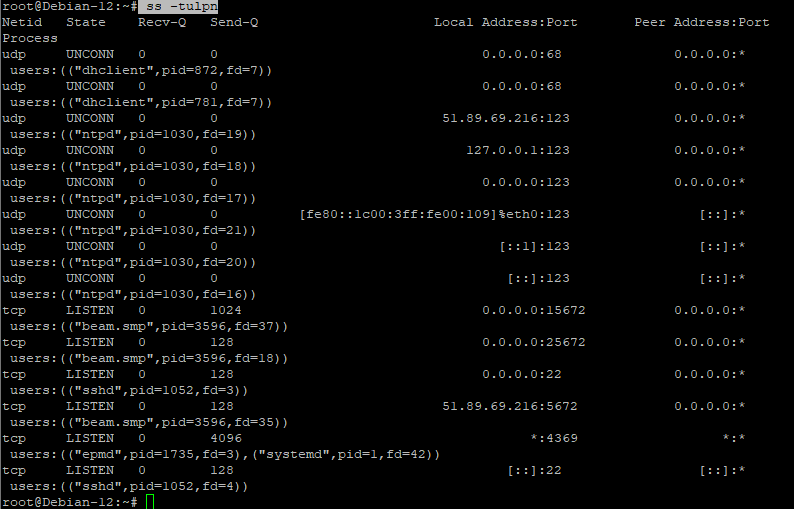
Step 4.3: Verify That RabbitMQ Is Listening on Port 5672
RabbitMQ uses port 5672 for communication. Run the following command to verify:
ss -tulpn
If RabbitMQ is running properly, you should see output indicating it is listening on port 5672.
Step 5: Configure RabbitMQ
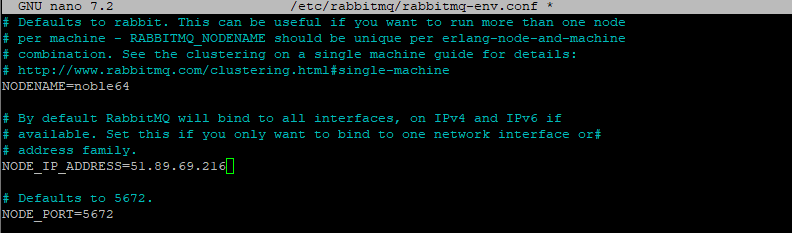
Step 5.1: Edit the RabbitMQ Environment Configuration
Open the RabbitMQ environment configuration file:
nano /etc/rabbitmq/rabbitmq-env.conf
Update the following settings:
NODENAME=noble64
NODE_IP_ADDRESS=192.168.5.65
NODE_PORT=5672
Make any necessary adjustments based on your specific needs. After editing, save the file (Ctrl + X, then Y, then Enter).
Step 5.2: Restart RabbitMQ to Apply Changes
systemctl restart rabbitmq-server
Step 5.3: Confirm That RabbitMQ Is Listening on Port 5672
ss -tulpn | grep 5672
This confirms that RabbitMQ is correctly running and accepting connections.

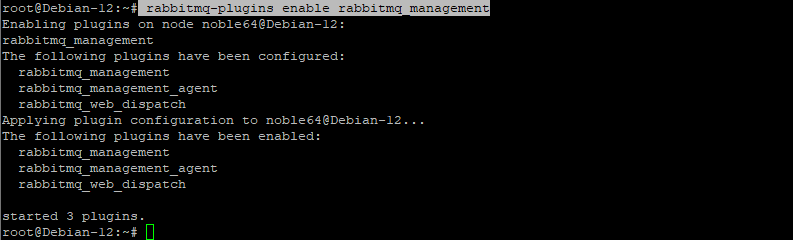
Step 6: Enable the RabbitMQ Management Plugin
RabbitMQ includes a web-based management interface that makes it easier to monitor and configure the service.
Step 6.1: Enable the Management Plugin
rabbitmq-plugins enable rabbitmq_management
Step 6.2: Create an Admin User
rabbitmqctl add_user admin adminpass
Replace adminpass with a strong password for better security.
Step 6.3: Assign Administrator Permissions
Grant full administrative permissions to the newly created user:
rabbitmqctl set_user_tags admin administrator
rabbitmqctl set_permissions -p / admin ".*" ".*" ".*"

Step 6.4: Verify That RabbitMQ Is Running
ss -tulpn
Step 6.5: Restart RabbitMQ
For the changes to take effect, restart the service:
systemctl restart rabbitmq-server
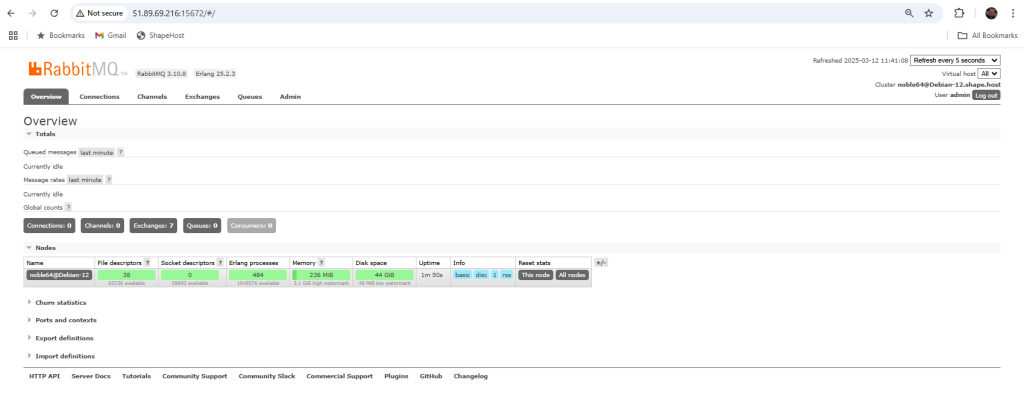
Step 7: Access RabbitMQ Web Interface
Once the setup is complete, you can access the RabbitMQ web management interface in your browser.
Open your web browser and navigate to:
http://<your_server_ip>:15672Log in using the admin credentials you created earlier:
Username: admin
Password: adminpass

Once logged in, you can:
Monitor message queues
View server performance
Manage users and permissions
- You can now use RabbitMQ for message queuing, inter-service communication, or event-driven applications.
- The web management interface allows easy monitoring and management of queues.
For a reliable and high-performance hosting solution, check out Shape.Host Linux SSD VPS, perfect for deploying RabbitMQ and other message-driven applications.