Set Up AnythingLLM on Ubuntu 24.04 with Docker
AnythingLLM is a self-hosted AI workspace that combines document ingestion, chat, connectors for different model backends, and a browser-based interface in one application. It is a strong fit when you want a full private AI workspace on your own server instead of only exposing a model endpoint.
In this guide, we restore a fresh Ubuntu 24.04.1 LTS server on Shape.Host, verify the current AnythingLLM stable release from the official project, install Docker Engine and Docker Compose from Docker’s official Ubuntu repository, deploy AnythingLLM v1.11.2 in a localhost-only container, and validate the web interface safely over an SSH tunnel.
| Application | AnythingLLM |
|---|---|
| Application version | v1.11.2 |
| Operating system | Ubuntu 24.04.1 LTS |
| Container runtime | Docker Engine 29.3.1 with Docker Compose 5.1.1 |
| Supporting tools | Git 2.43.0 and OpenSSL 3.0.13 |
| Access pattern | AnythingLLM bound to 127.0.0.1:3001 with browser access through an SSH tunnel |
| Validated on | Live Shape.Host Ubuntu 24.04.1 server |
Why Use AnythingLLM on Ubuntu 24.04?
- AnythingLLM gives you a polished self-hosted AI workspace with document chat, model connectors, and a browser UI.
- Ubuntu 24.04.1 LTS is a stable and current base for containerized applications.
- Docker keeps the deployment easy to reproduce and update.
- A localhost-only bind keeps the panel off the public interface until you intentionally add a reverse proxy later.
Before You Begin
Make sure you have the following before you start:
- A fresh Ubuntu 24.04 server
- Root or sudo access
- An SSH key that can log in to the server
- A local workstation where you can open an SSH tunnel to the server
1. Verify the Ubuntu 24.04 Release
Start by confirming that the rebuilt server is actually running Ubuntu 24.04.1 LTS.
cat /etc/os-release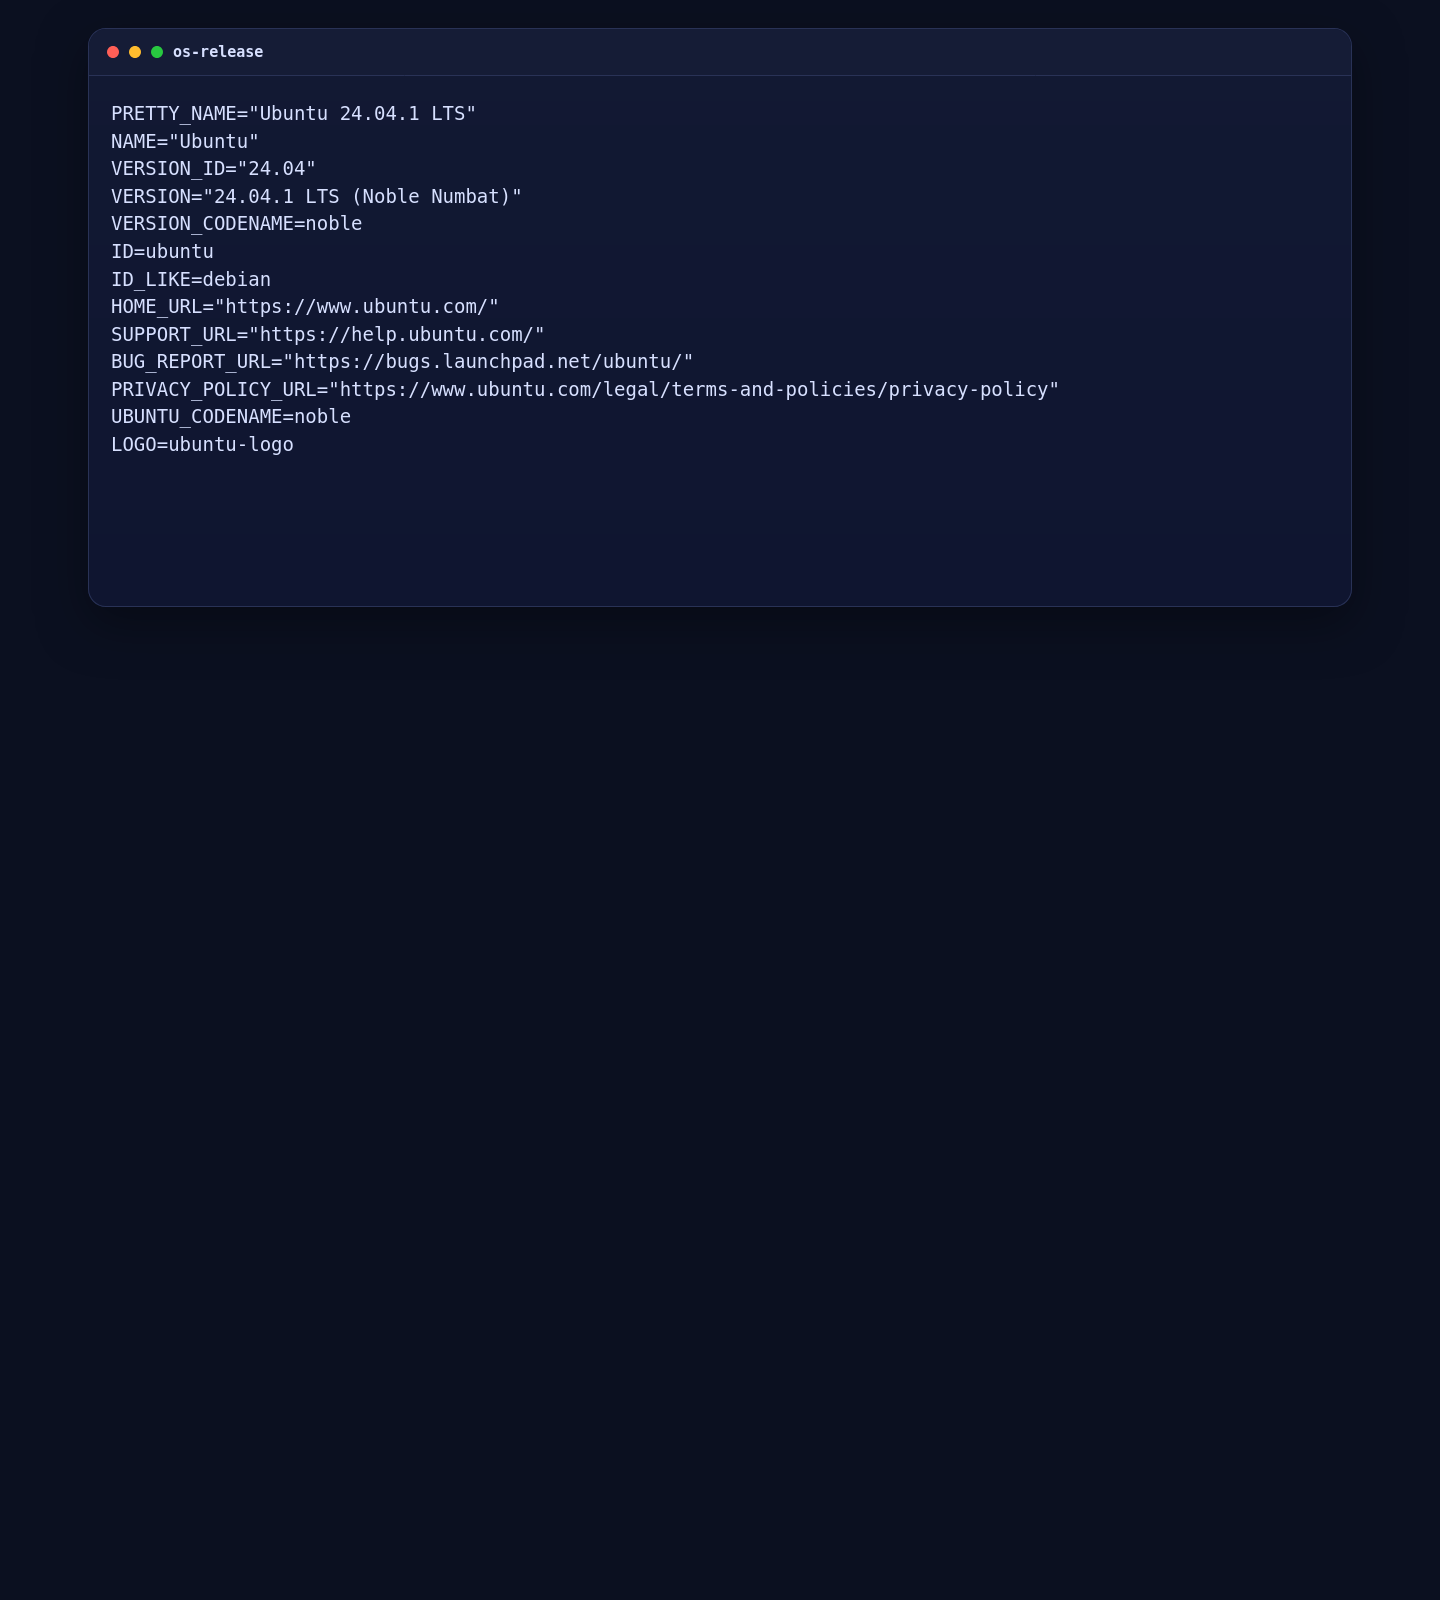
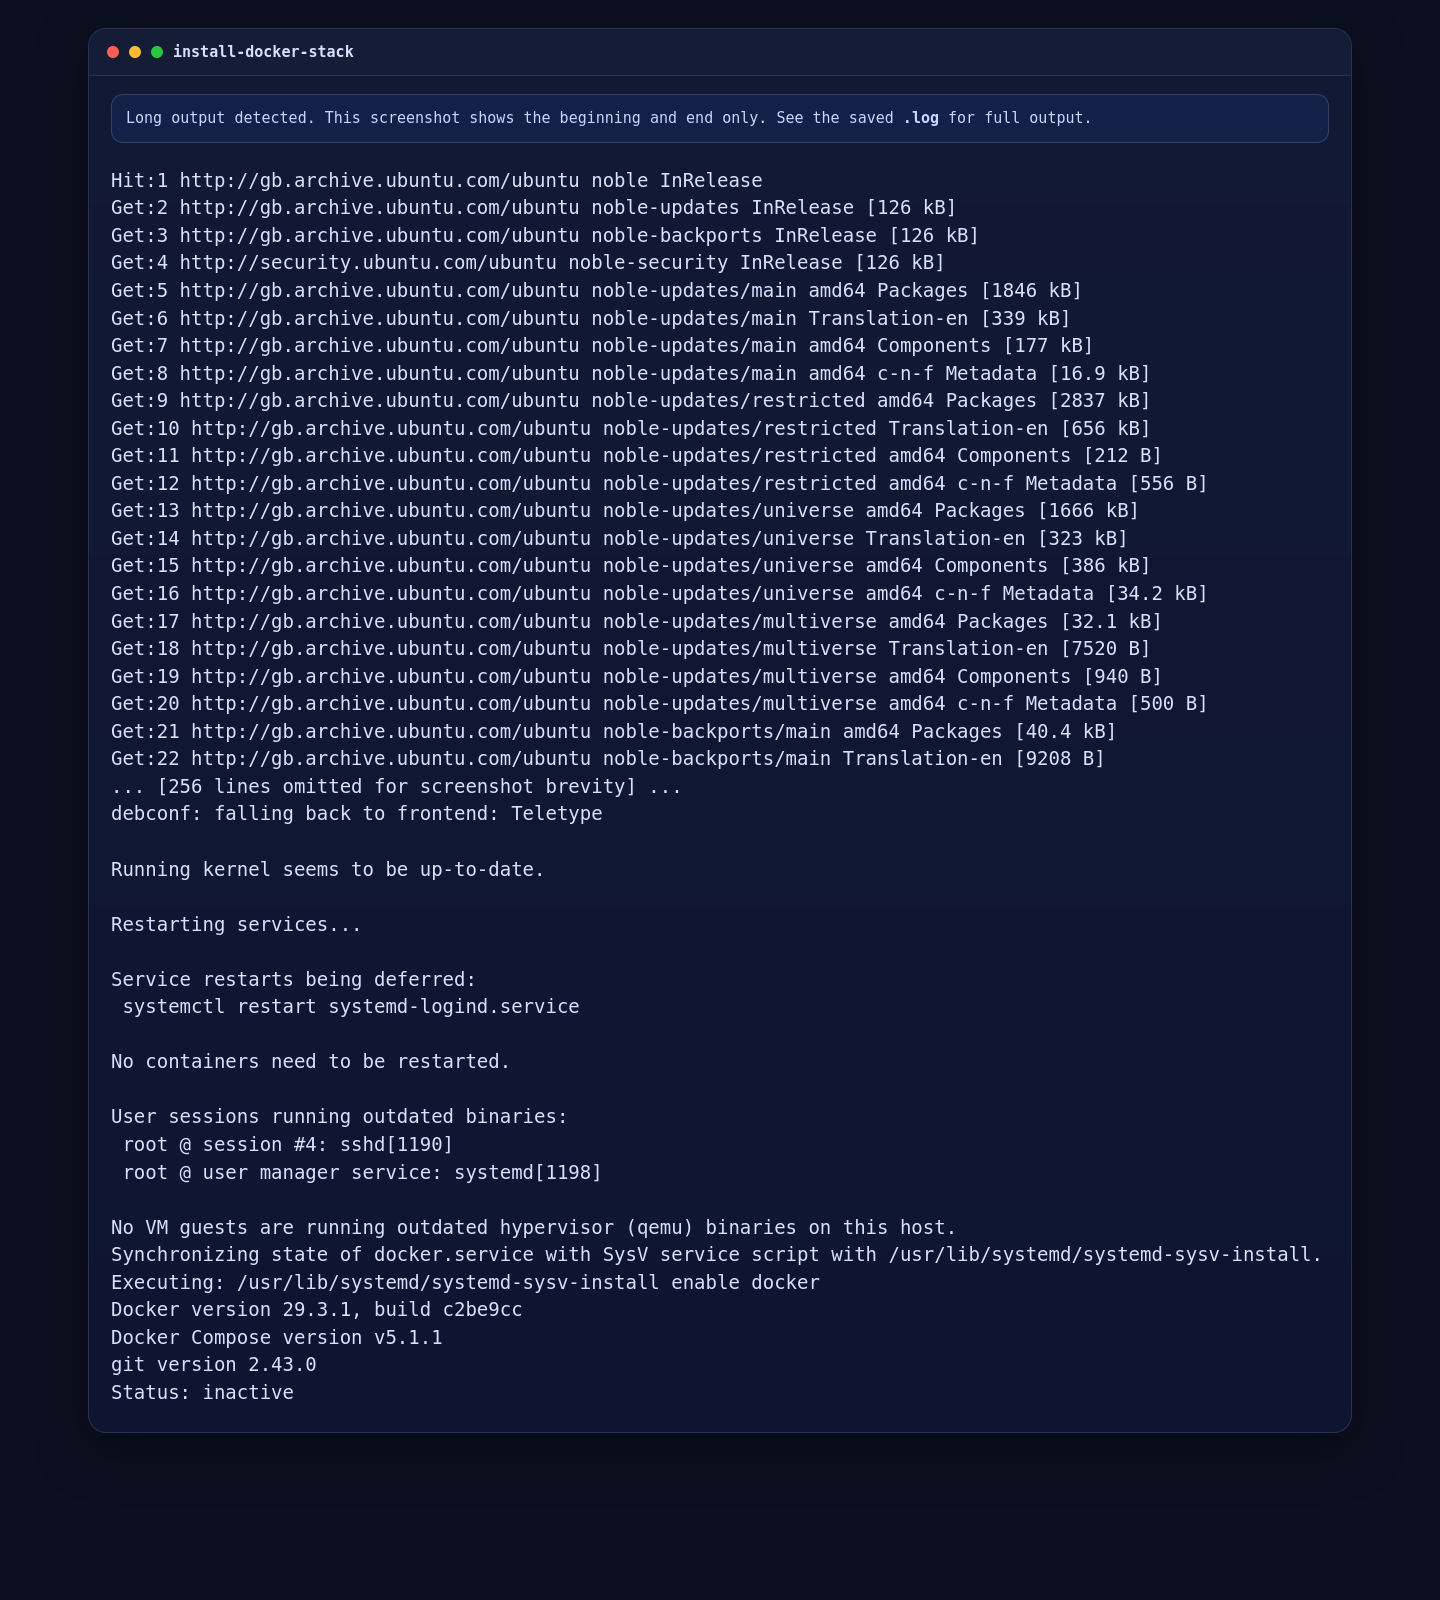
2. Install Docker Engine, Docker Compose, and Base Tools
The official AnythingLLM self-hosted path uses Docker, so the clean Ubuntu route is Docker’s official APT repository instead of an older distro-packaged container stack.
apt-get update
apt-get install -y ca-certificates curl git openssl
install -m 0755 -d /etc/apt/keyrings
curl -fsSL https://download.docker.com/linux/ubuntu/gpg -o /etc/apt/keyrings/docker.asc
chmod a+r /etc/apt/keyrings/docker.asc

cat > /etc/apt/sources.list.d/docker.list <<EOF
deb [arch=$(dpkg --print-architecture) signed-by=/etc/apt/keyrings/docker.asc] https://download.docker.com/linux/ubuntu \
  $(. /etc/os-release && echo "${UBUNTU_CODENAME:-$VERSION_CODENAME}") stable
EOF

apt-get update
apt-get install -y docker-ce docker-ce-cli containerd.io docker-buildx-plugin docker-compose-plugin

systemctl enable --now docker

docker --version
docker compose version
git --version
ufw status || true
On the validated Ubuntu 24.04.1 server, this installed Docker Engine 29.3.1, Docker Compose 5.1.1, Git 2.43.0, and kept the firewall state visible through the final ufw status check.
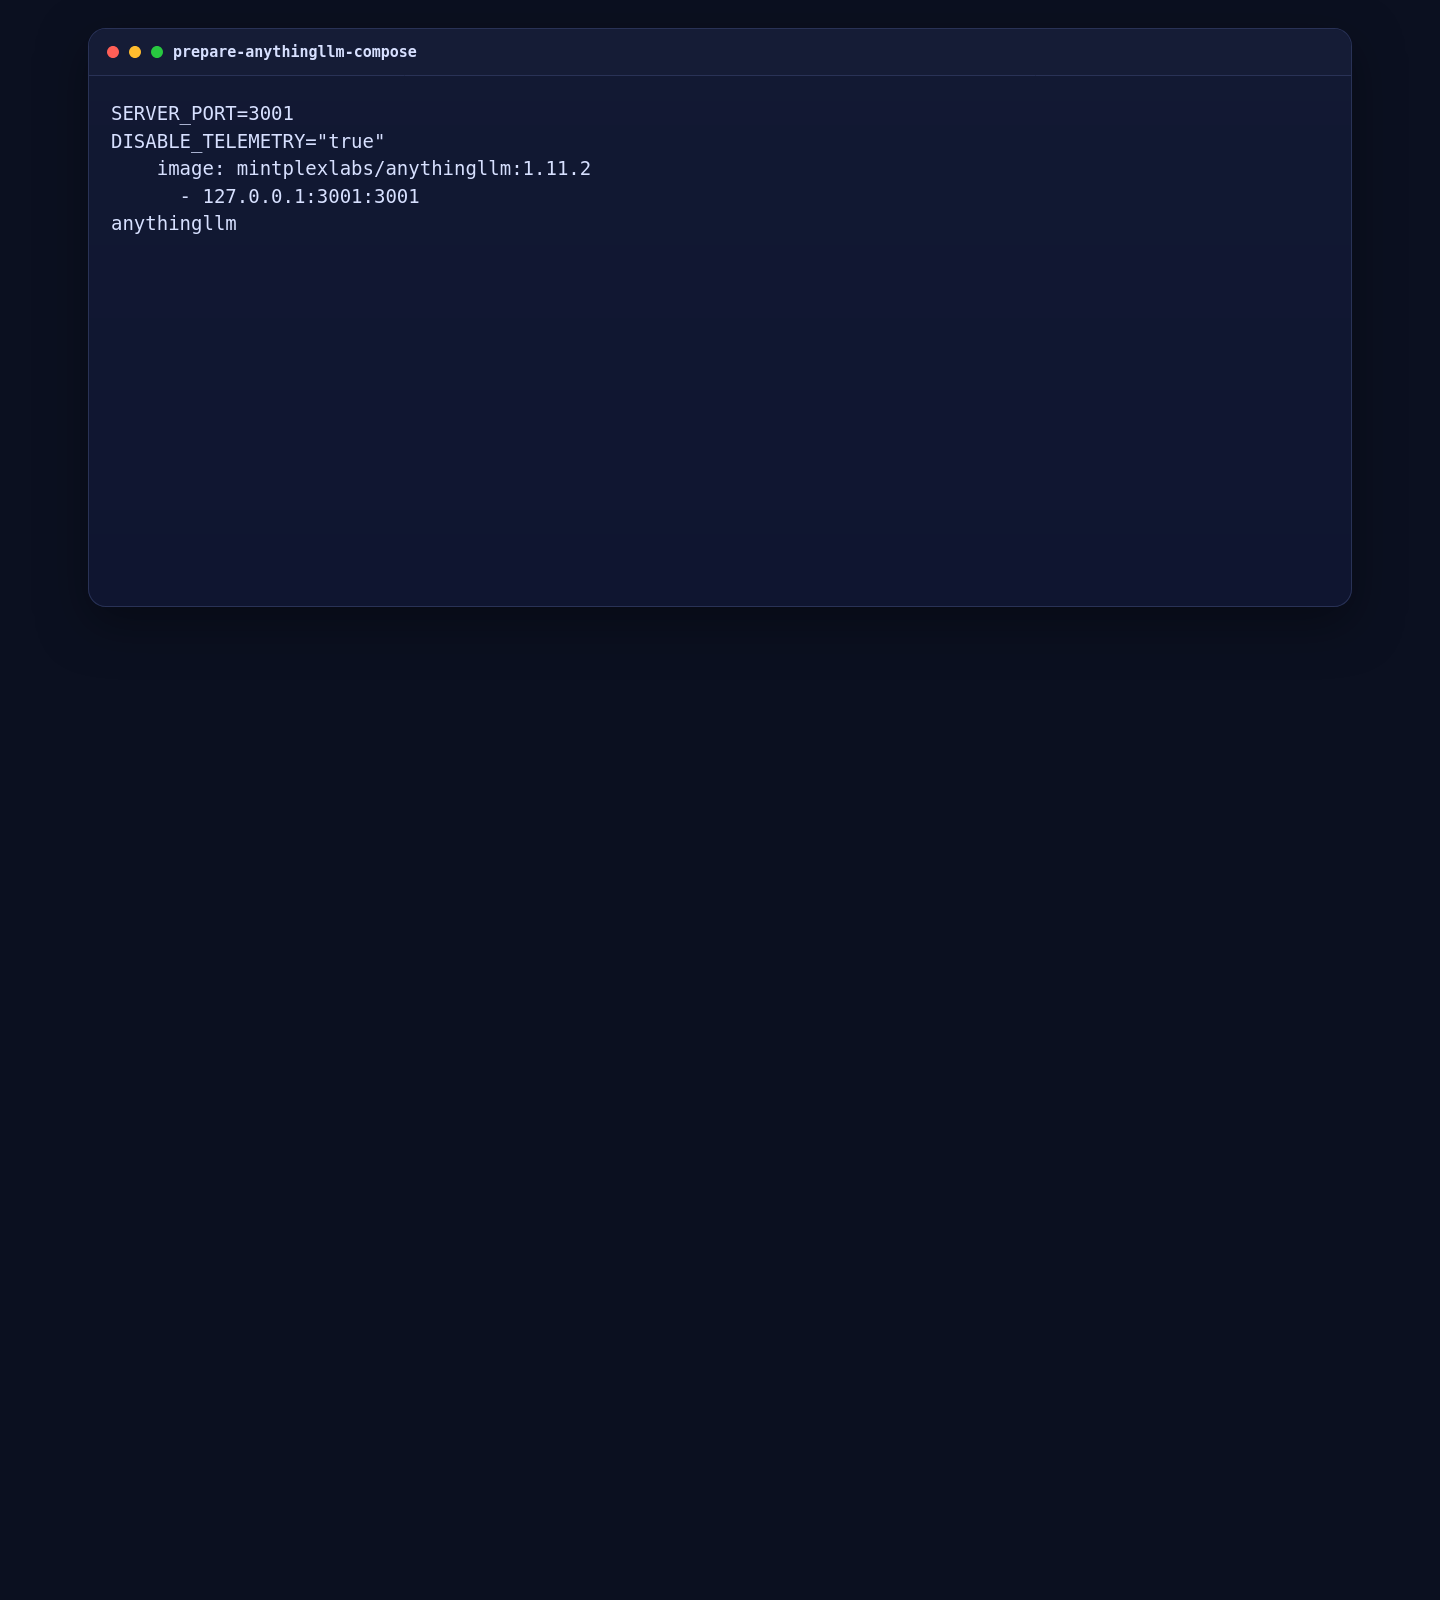
3. Create the AnythingLLM Configuration
AnythingLLM needs a persistent storage directory and an environment file. The storage path must be writable by the container user, so set the ownership before the first container start.
mkdir -p /opt/anythingllm/storage
chown -R 1000:1000 /opt/anythingllm/storage
chmod 775 /opt/anythingllm/storage
cd /opt/anythingllm

SIG_KEY="$(openssl rand -hex 32)"
SIG_SALT="$(openssl rand -hex 32)"

cat > .env <<EOF
SERVER_PORT=3001
STORAGE_DIR="/app/server/storage"
SIG_KEY="${SIG_KEY}"
SIG_SALT="${SIG_SALT}"
DISABLE_TELEMETRY="true"
EOF

cat > compose.yaml <<'EOF'
services:
  anythingllm:
    image: mintplexlabs/anythingllm:1.11.2
    container_name: anythingllm
    restart: unless-stopped
    cap_add:
      - SYS_ADMIN
    ports:
      - 127.0.0.1:3001:3001
    env_file:
      - .env
    volumes:
      - ./storage:/app/server/storage
      - ./.env:/app/server/.env
    extra_hosts:
      - "host.docker.internal:host-gateway"
EOF

grep '^SERVER_PORT=' .env
grep '^DISABLE_TELEMETRY=' .env
grep 'image:' compose.yaml
grep '127.0.0.1:3001:3001' compose.yaml
docker compose config --services
This configuration pins the current AnythingLLM release, keeps the web app on 127.0.0.1:3001, disables telemetry, and includes SYS_ADMIN so the instance can support the upstream web-scraping capability when needed.
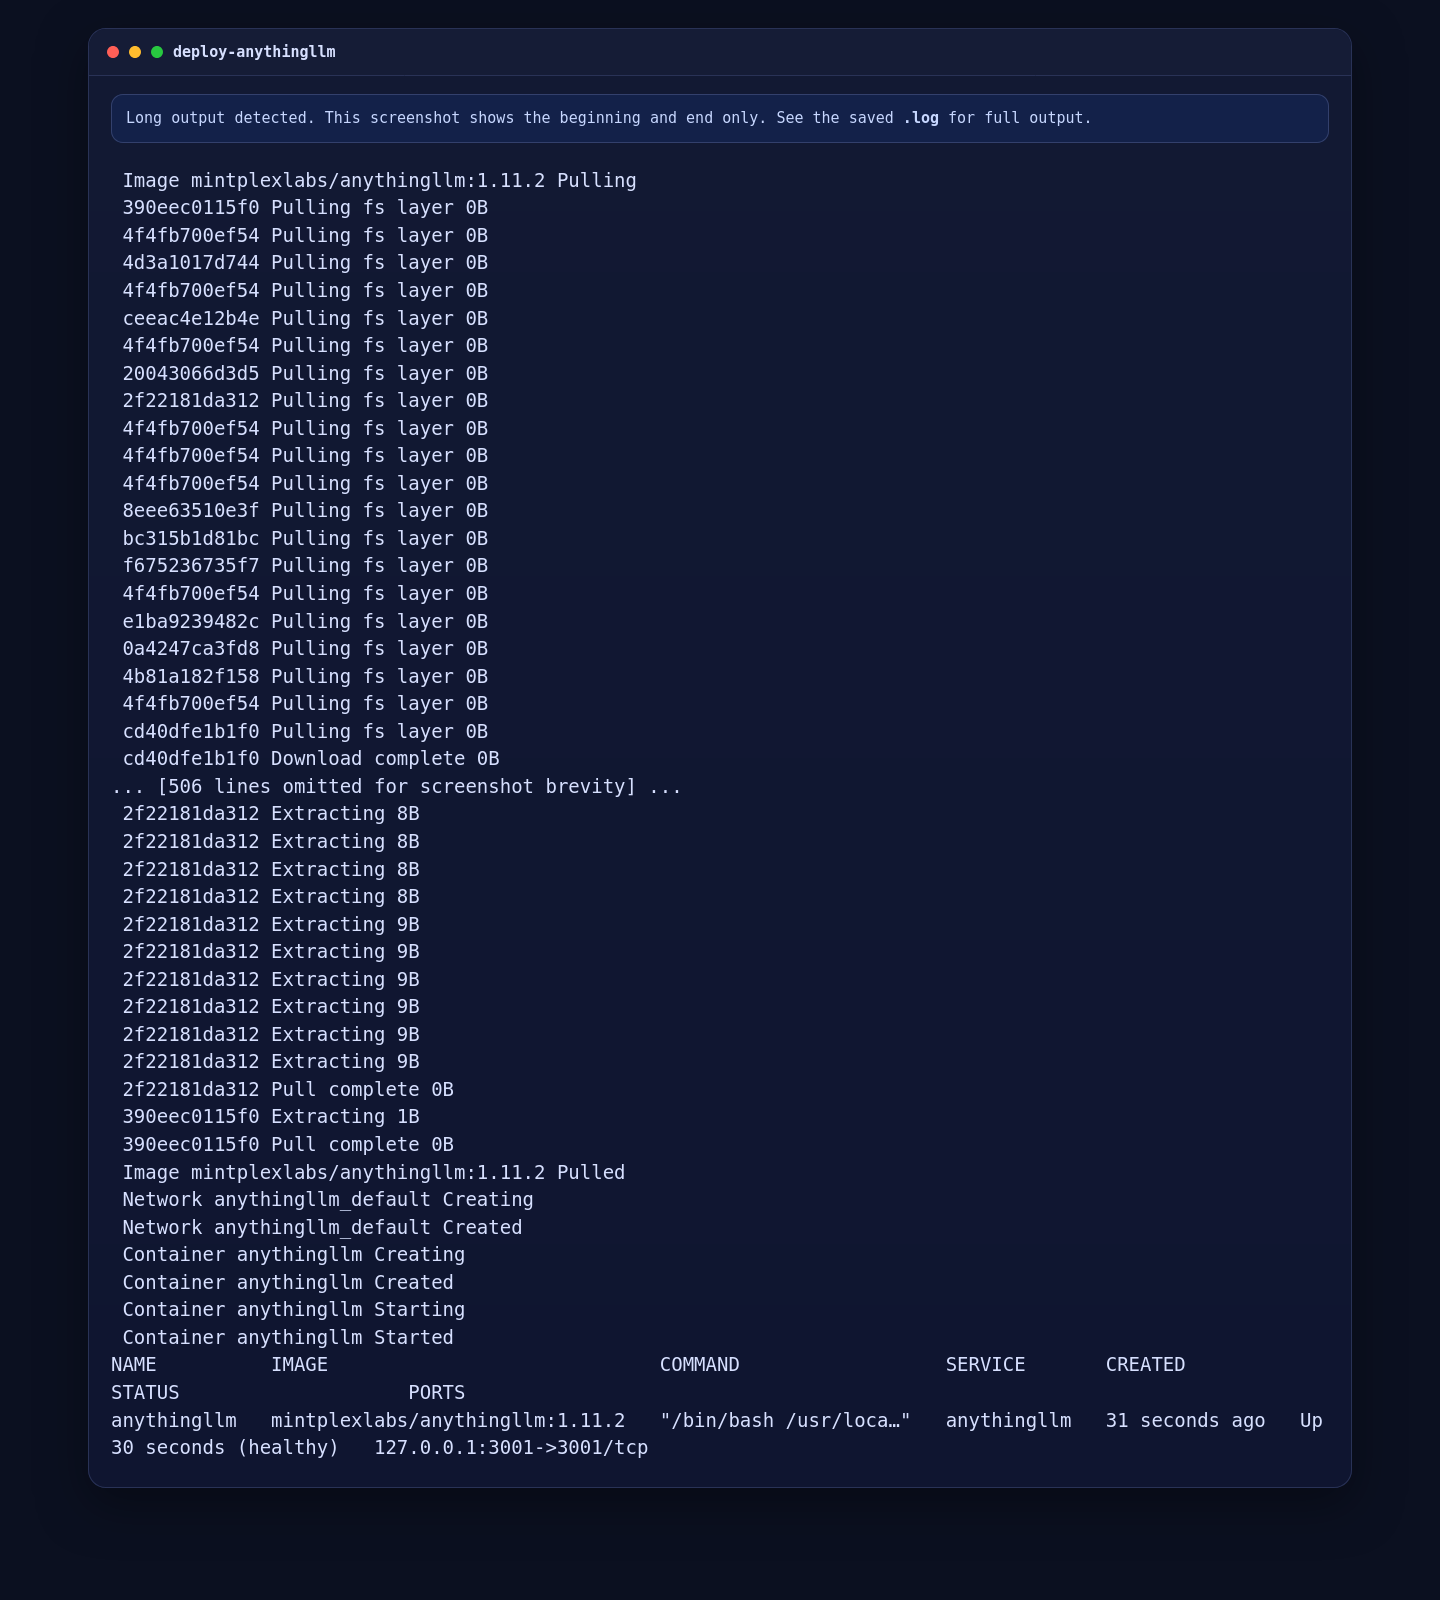
4. Start AnythingLLM
With the configuration in place, pull the image and start the application container.
4.1 Launch the Container
cd /opt/anythingllm
docker compose pull
docker compose up -d
sleep 30
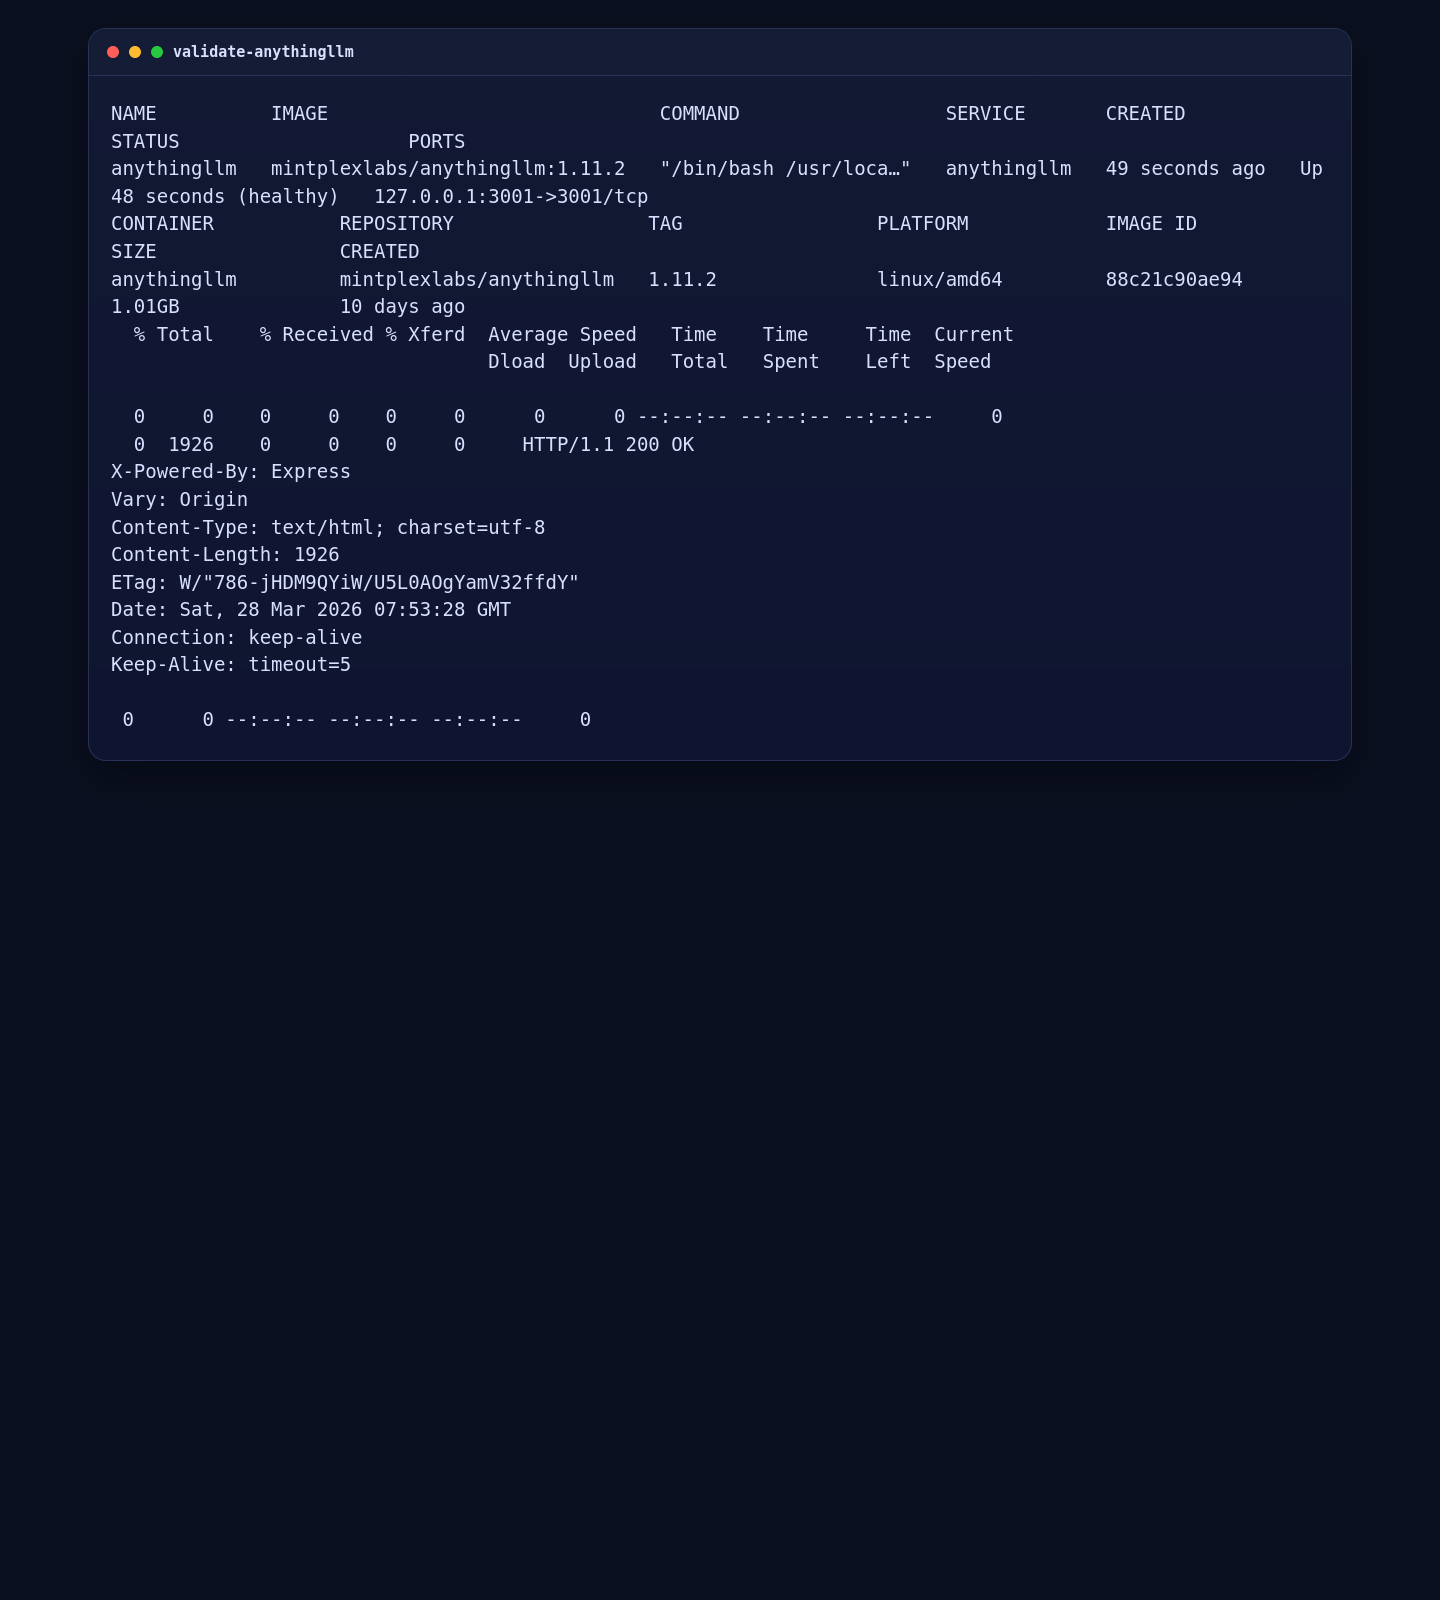
docker compose psOn the validated Ubuntu server, Docker pulled mintplexlabs/anythingllm:1.11.2, created the container, and brought the service up successfully.
4.2 Validate the Local HTTP Response
docker compose ps
docker compose images
curl -I http://127.0.0.1:3001
The live deployment reached a healthy container state and the local endpoint returned HTTP/1.1 200 OK, which is the expected result before opening a browser session through a tunnel.
5. Open the AnythingLLM Web Interface Through an SSH Tunnel
This installation keeps AnythingLLM on localhost instead of exposing it directly to the public network. Create an SSH tunnel from your local machine, then open the forwarded port in your browser.
ssh -L 13001:127.0.0.1:3001 root@YOUR_SERVER_IPAfter the tunnel is open, browse to:
http://127.0.0.1:13001On the live server, the AnythingLLM welcome page loaded correctly through the tunnel and was ready for the initial setup flow.

6. Run Final Server-Side Checks
Before you stop, confirm that the container is still healthy, the port is bound only to localhost, and the local HTTP response remains available.
cd /opt/anythingllm
docker compose ps
docker compose images
ss -lntp | grep ':3001'
curl -I http://127.0.0.1:3001
On the validated deployment, the final check showed the container in the healthy state, port 3001 listening only on 127.0.0.1, and the local AnythingLLM page still returning 200 OK.

Conclusion
You now have AnythingLLM on Ubuntu 24.04 running in Docker with persistent storage, a pinned stable image, and a safer localhost-only access pattern. From here, you can complete the in-app onboarding flow, connect your preferred LLM provider, and only add a public reverse proxy later if you decide you need browser access without SSH tunneling.