LocalAI on Ubuntu 24.04: Docker Deployment Guide
LocalAI is an open-source AI runtime that can serve language models behind an OpenAI-compatible API, which makes it useful for private testing, offline development, internal assistants, and self-hosted workflows that should not depend on an external inference provider.
In this guide, we deploy LocalAI on a fresh Ubuntu 24.04.1 LTS server, install Docker from the official Docker repository, pin the current LocalAI stable image tag, keep the service bound to 127.0.0.1:8080 instead of exposing it publicly, validate the API locally, and access the built-in WebUI through an SSH tunnel rather than forcing SSL onto a service that does not require it for a secure base installation.
| Application | LocalAI |
|---|---|
| Application version | v4.0.0 |
| Operating system | Ubuntu 24.04.1 LTS |
| Container runtime | Docker Engine 29.3.1 |
| Compose plugin | Docker Compose 5.1.1 |
| Service bind | 127.0.0.1:8080 |
| Validated on | Live Shape.Host Ubuntu 24.04.1 server |
Why Use LocalAI on Ubuntu 24.04?
- Ubuntu 24.04.1 LTS gives you a stable long-term support base for self-hosted AI tooling.
- LocalAI provides an OpenAI-compatible API plus a built-in WebUI for local experimentation.
- Using Docker Compose keeps the deployment easy to reproduce and easy to update.
- Binding the service to localhost only is a safer default than exposing an unauthenticated AI endpoint directly to the internet.
Before You Begin
Make sure you have the following before you start:
- A fresh Ubuntu 24.04 server
- Root or sudo access
- An SSH client on your local machine for tunneling the WebUI
- Enough disk space for the LocalAI image and any models you plan to download later
1. Verify the Ubuntu 24.04 Release
Start by confirming that the server is actually running Ubuntu 24.04.1 LTS.
cat /etc/os-release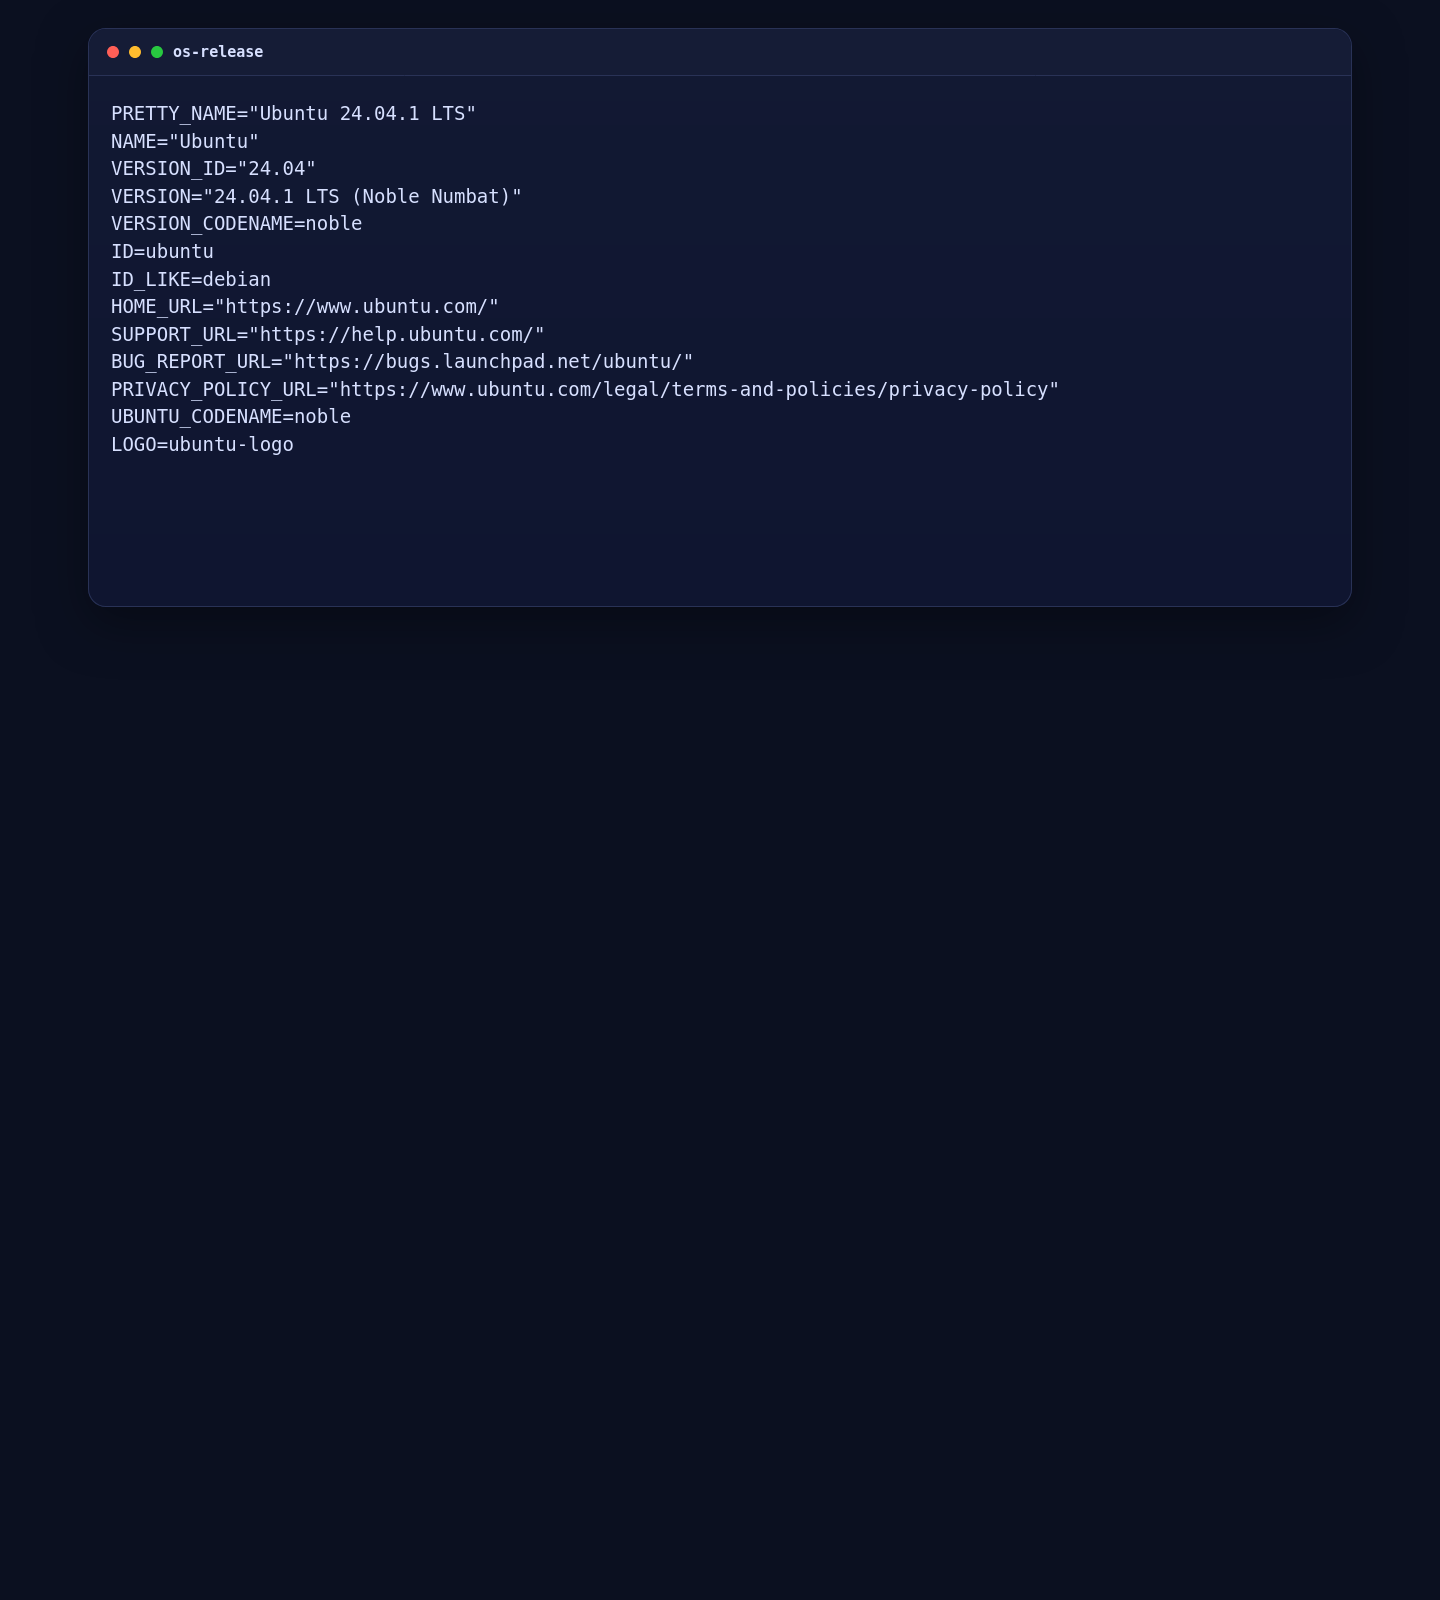
2. Install Docker Engine and the Compose Plugin
The LocalAI installation docs recommend a container-based deployment path. On Ubuntu 24.04, the cleanest approach is Docker’s official repository so you get a current Engine and Compose plugin instead of older distro packages.
apt-get update
apt-get install -y ca-certificates curl gnupg

install -m 0755 -d /etc/apt/keyrings
curl -fsSL https://download.docker.com/linux/ubuntu/gpg -o /etc/apt/keyrings/docker.asc
chmod a+r /etc/apt/keyrings/docker.asc

. /etc/os-release
echo "deb [arch=$(dpkg --print-architecture) signed-by=/etc/apt/keyrings/docker.asc] https://download.docker.com/linux/ubuntu ${VERSION_CODENAME} stable" > /etc/apt/sources.list.d/docker.list

apt-get update
apt-get install -y docker-ce docker-ce-cli containerd.io docker-buildx-plugin docker-compose-plugin

systemctl enable --now docker

docker --version
docker compose version
systemctl is-active docker
On the validated server, this installed Docker Engine 29.3.1, Docker Compose 5.1.1, and left the Docker service active after boot.

3. Deploy LocalAI 4.0.0 with Docker Compose
For a safer default setup, this guide binds LocalAI to 127.0.0.1:8080 instead of exposing it publicly. That keeps the API reachable on the server and through an SSH tunnel without adding a reverse proxy or SSL layer that the base installation does not require.
mkdir -p /opt/localai/models /opt/localai/data
cat > /opt/localai/compose.yaml <<'EOF'
services:
localai:
image: localai/localai:v4.0.0
container_name: local-ai
restart: unless-stopped
ports:
- "127.0.0.1:8080:8080"
environment:
- DEBUG=false
volumes:
- ./models:/models
- ./data:/data
EOF
cd /opt/localai
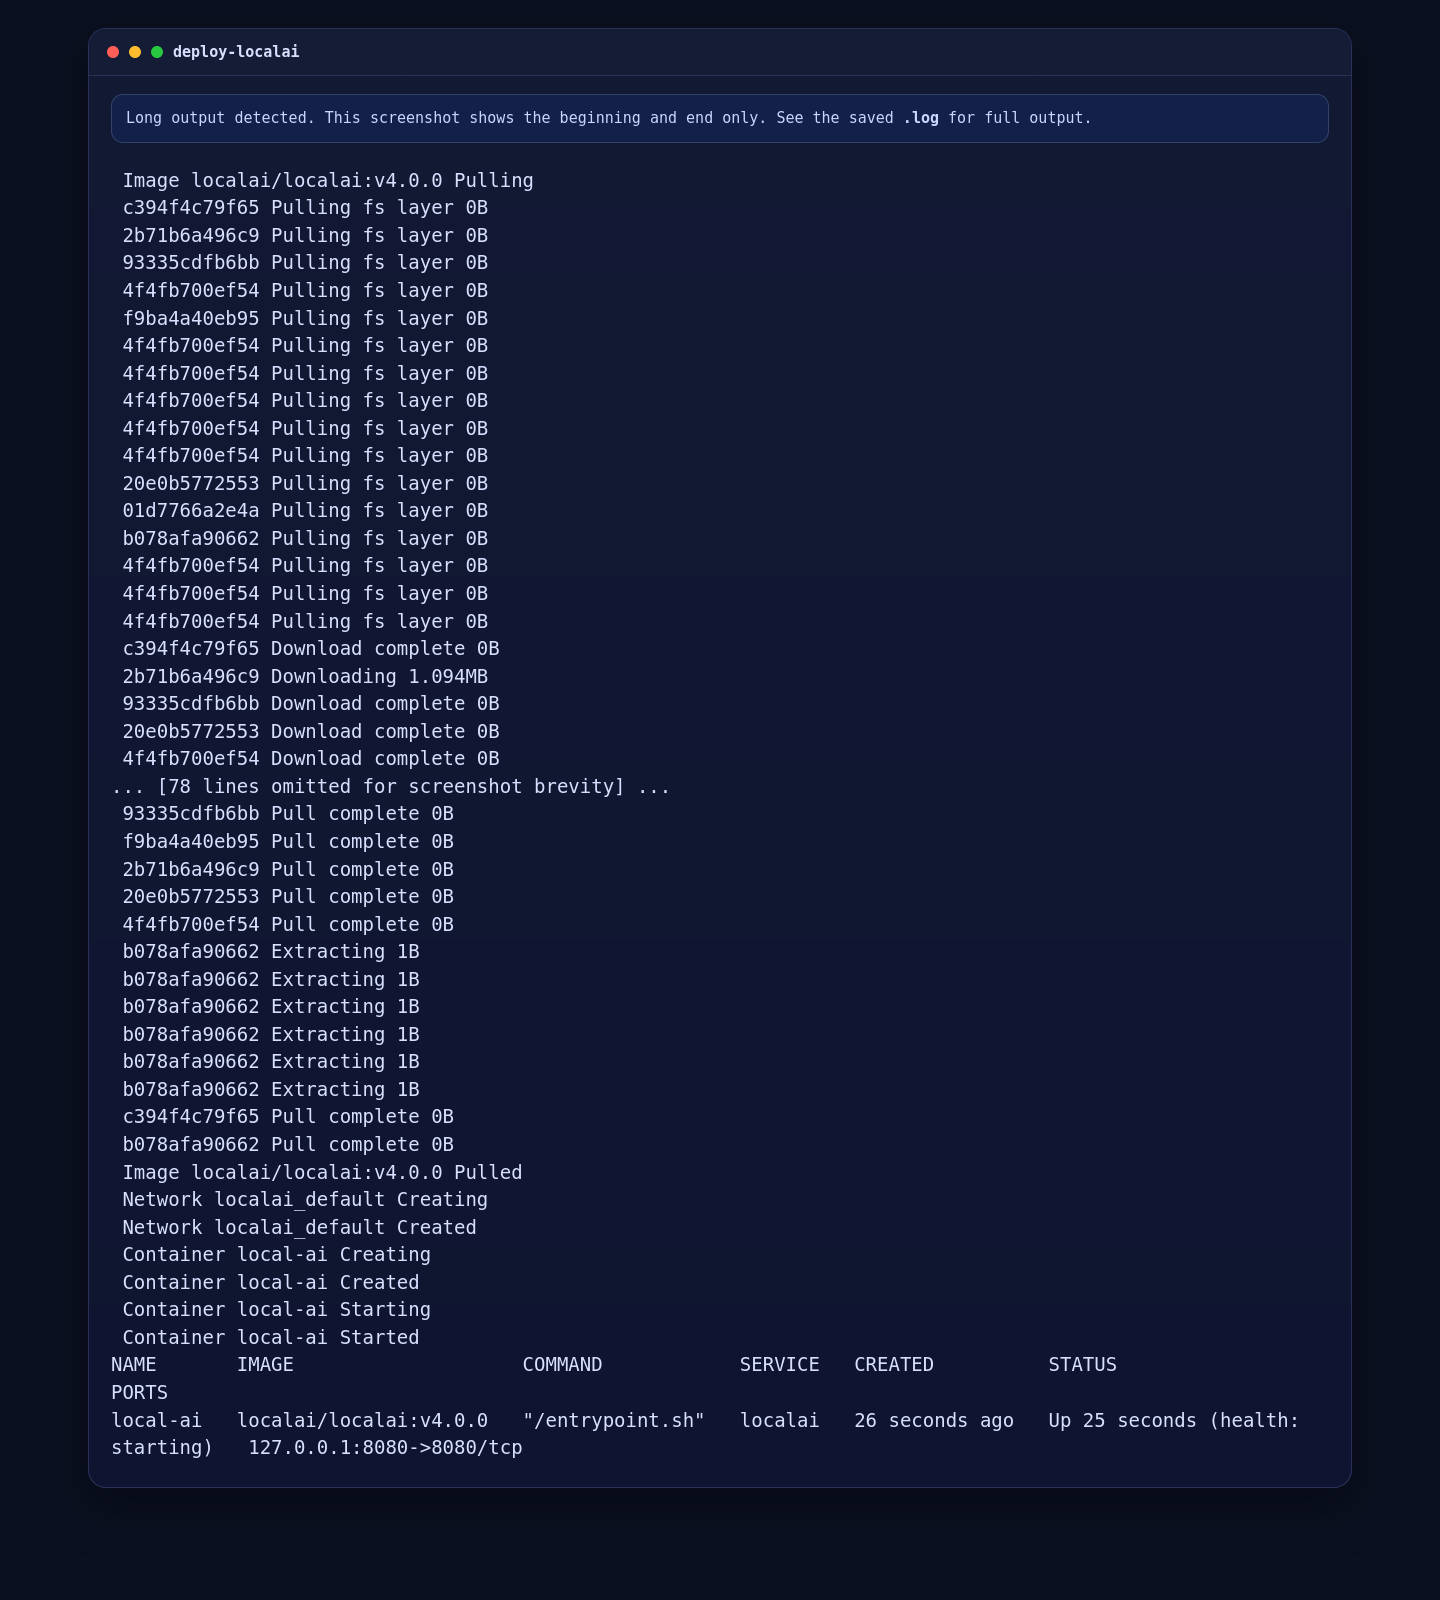
docker compose up -d
sleep 25
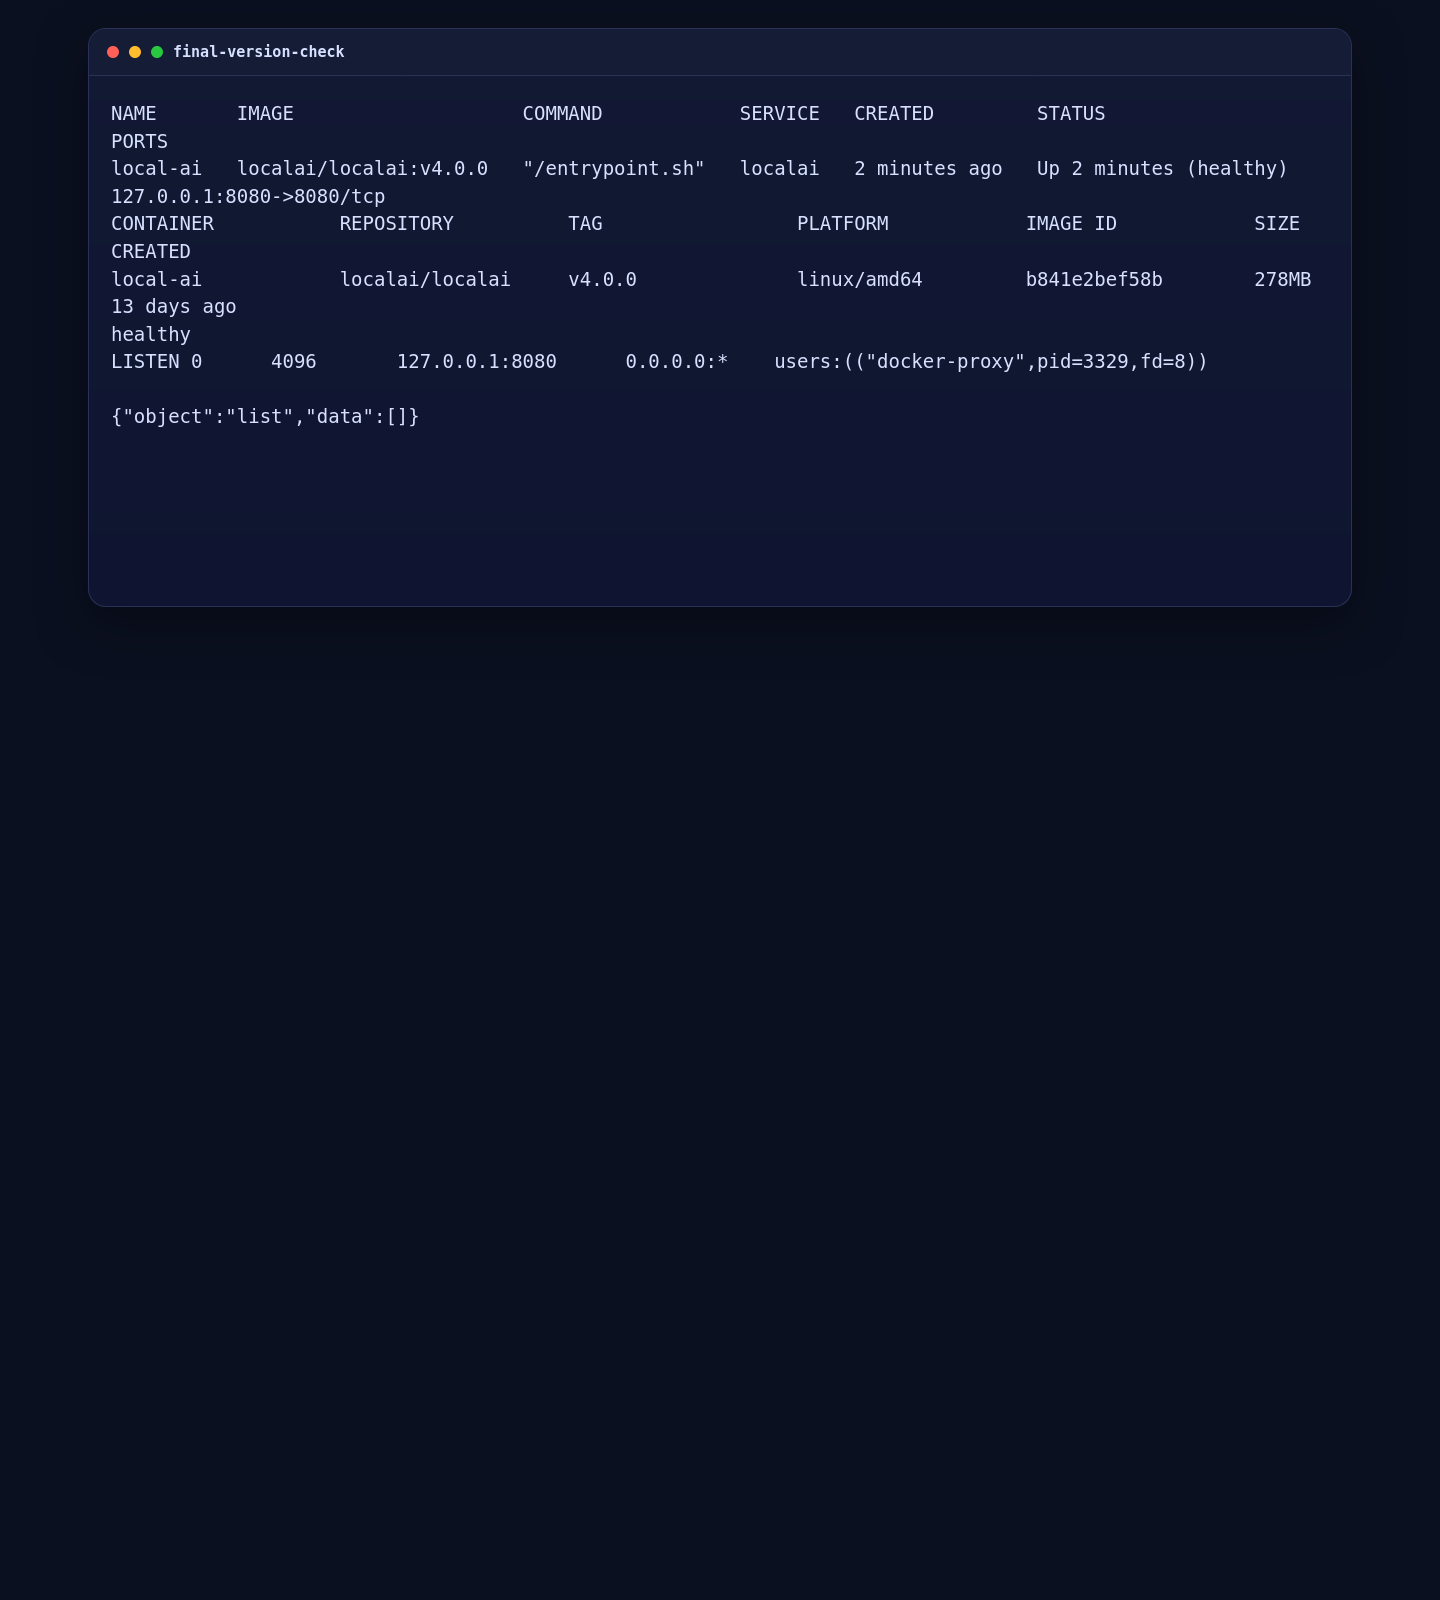
docker compose psOn the live server, Docker pulled the official localai/localai:v4.0.0 image, created the stack successfully, and exposed the container only on the localhost listener.
4. Validate the Local API and Container Health
Before you worry about browser access, confirm that the container is healthy and the local API responds on the server itself.
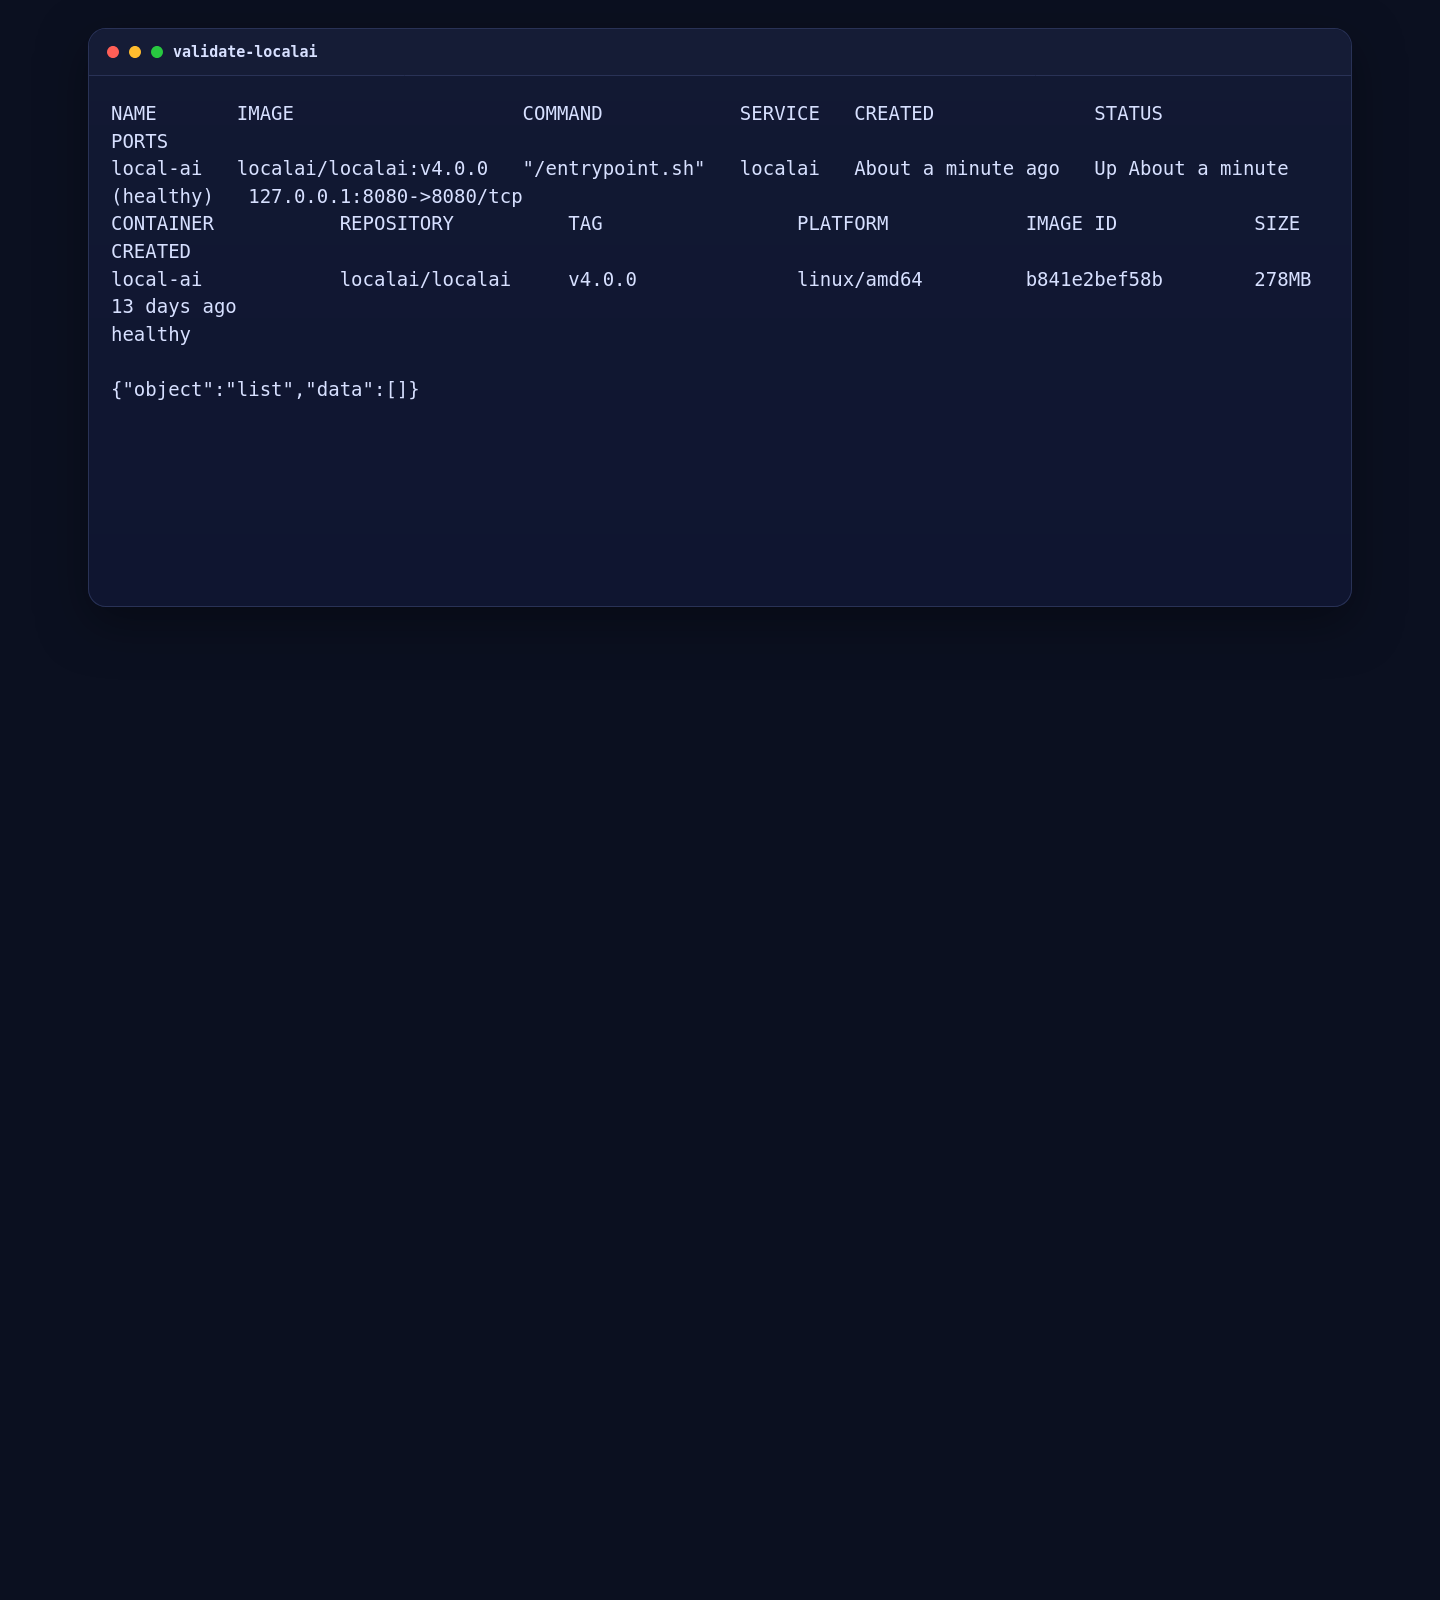
cd /opt/localai
docker compose ps
docker compose images
docker inspect --format '{{.State.Health.Status}}' local-ai

for _ in $(seq 1 24); do
  if curl -fsS http://127.0.0.1:8080/readyz >/dev/null 2>&1; then
    break
  fi
  sleep 5
done

curl -fsS http://127.0.0.1:8080/readyz
printf '\n'
curl -fsS http://127.0.0.1:8080/v1/models
printf '\n'
On the validated deployment, the LocalAI container reported healthy, the readiness endpoint responded successfully, and the models endpoint returned an empty list, which is expected before you import or download any models.
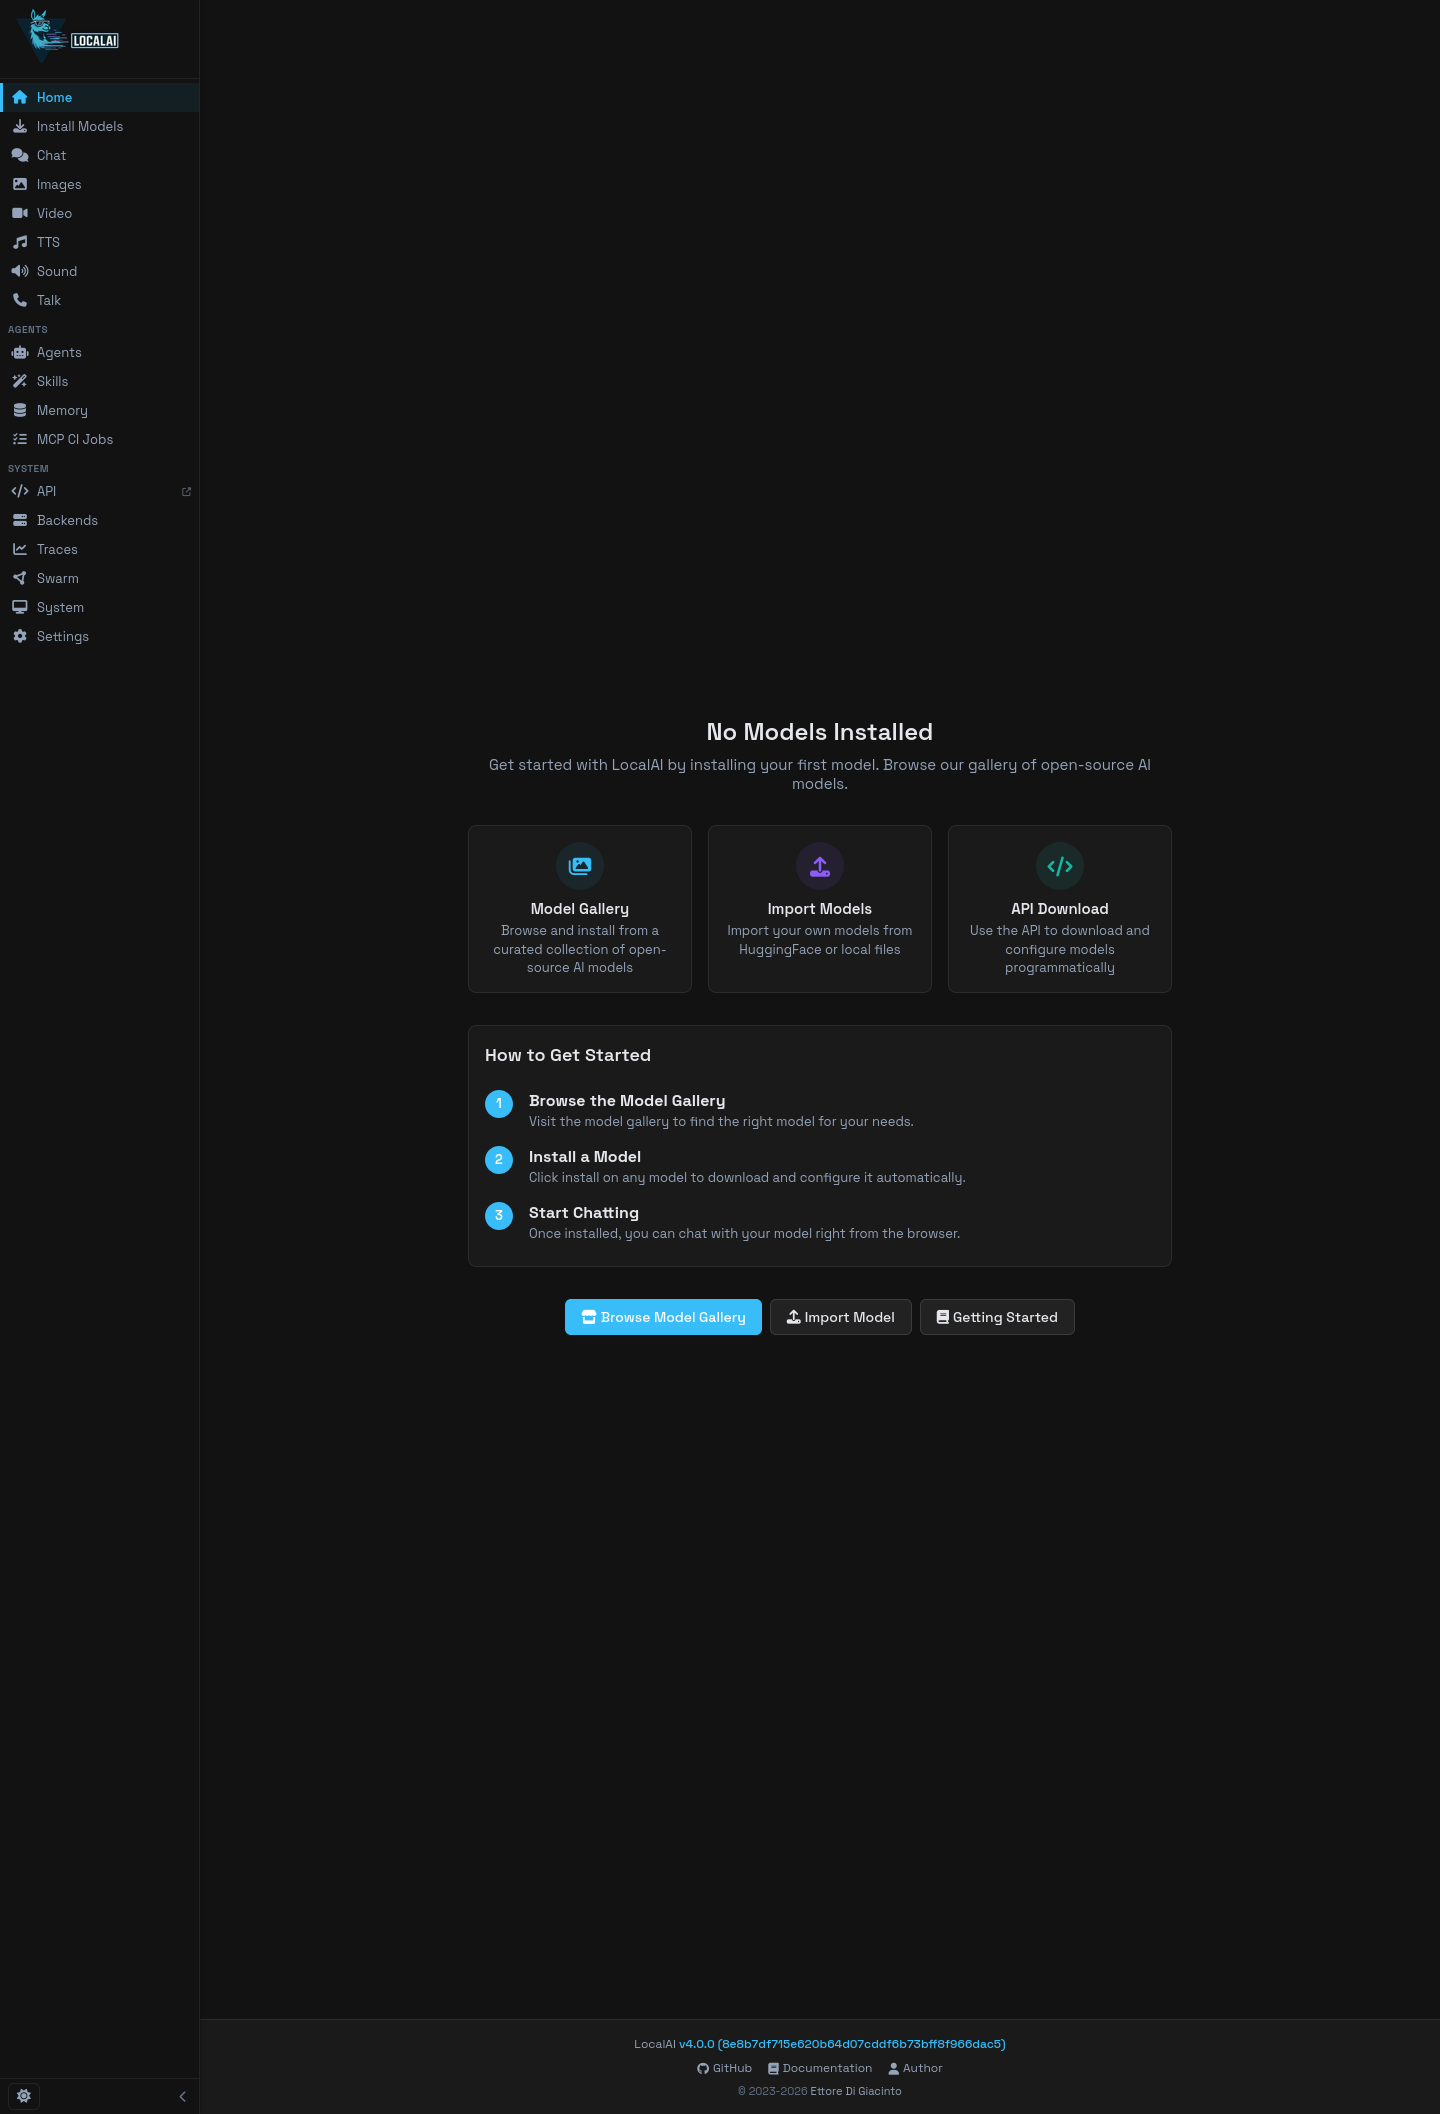
5. Access the LocalAI WebUI Through an SSH Tunnel
Because this guide keeps LocalAI on localhost only, use an SSH tunnel from your own machine to reach the WebUI securely without opening port 8080 to the public internet.
ssh -N -L 18080:127.0.0.1:8080 root@YOUR_SERVER_IPThen open the following URL in your local browser:
http://127.0.0.1:18080/On the validated server, the tunnel exposed the LocalAI WebUI cleanly in the browser while the service remained bound to the loopback interface on the server itself.
6. Run a Final Service Check
Finish by confirming the container image tag, health status, loopback listener, and API response one more time.
cd /opt/localai
docker compose ps
docker compose images
docker inspect --format '{{.State.Health.Status}}' local-ai
ss -lntp | grep ':8080'
curl -fsS http://127.0.0.1:8080/readyz
printf '\n'
curl -fsS http://127.0.0.1:8080/v1/models
printf '\n'
On the live server, LocalAI remained healthy on 127.0.0.1:8080, the readiness endpoint responded successfully, and the API was ready for model imports or further configuration.
Hardening Notes
- This guide intentionally avoids public exposure and SSL because LocalAI does not require HTTPS for the base localhost-only install.
- If you later publish LocalAI behind a reverse proxy, add authentication and TLS before exposing it publicly.
- The empty
/v1/modelsresult is normal on a fresh install; you still need to add models after deployment. - Model storage can grow quickly, so keep an eye on disk usage under
/opt/localai/modelsand/opt/localai/data.
Conclusion
You now have LocalAI v4.0.0 running on Ubuntu 24.04.1 LTS with Docker Compose, bound to 127.0.0.1:8080, validated locally through the API, and accessible through an SSH tunnel for WebUI use. This gives you a clean and safer base installation without forcing a public SSL layer onto a service that does not need it for its initial deployment.