What You Can Do with CloudPanel
CloudPanel is a robust web hosting control panel that provides many features to help you efficiently manage your server and websites. Here are some of the key features and capabilities:
- Website Management: Easily create and manage multiple websites from a centralized interface. You can add new domains, set up SSL certificates, and manage web files effortlessly.
- Application Hosting: CloudPanel is optimized for popular web applications such as WordPress, Magento, and Joomla. You can quickly deploy and manage these applications without needing advanced technical knowledge.
- Database Management: CloudPanel allows you to create and manage MySQL databases seamlessly. You can set up database users, assign privileges, and monitor database activity.
- User Management: Create different user roles with customizable access permissions. This feature is particularly useful if you want to delegate specific tasks to other administrators or developers.
- System Monitoring: Monitor your server’s performance in real-time. CloudPanel provides insights into CPU, RAM, and disk usage, making it easy to identify bottlenecks and optimize performance.
- Security Management: CloudPanel provides tools for managing firewall settings, securing connections with Let’s Encrypt SSL certificates, and monitoring access logs to ensure your server remains secure.
- Backup & Restore: Set up automated backups to ensure that your data is safe. You can easily restore a previous version of your website or server settings if needed.
- Command Line Interface (CLI): Advanced users can access the server’s CLI to perform tasks that require more control and customization.
CloudPanel’s intuitive interface, combined with its powerful features, makes it a perfect choice for hosting providers, developers, and businesses that need a scalable and easy-to-use server management solution.
Step 1: Create an Instance
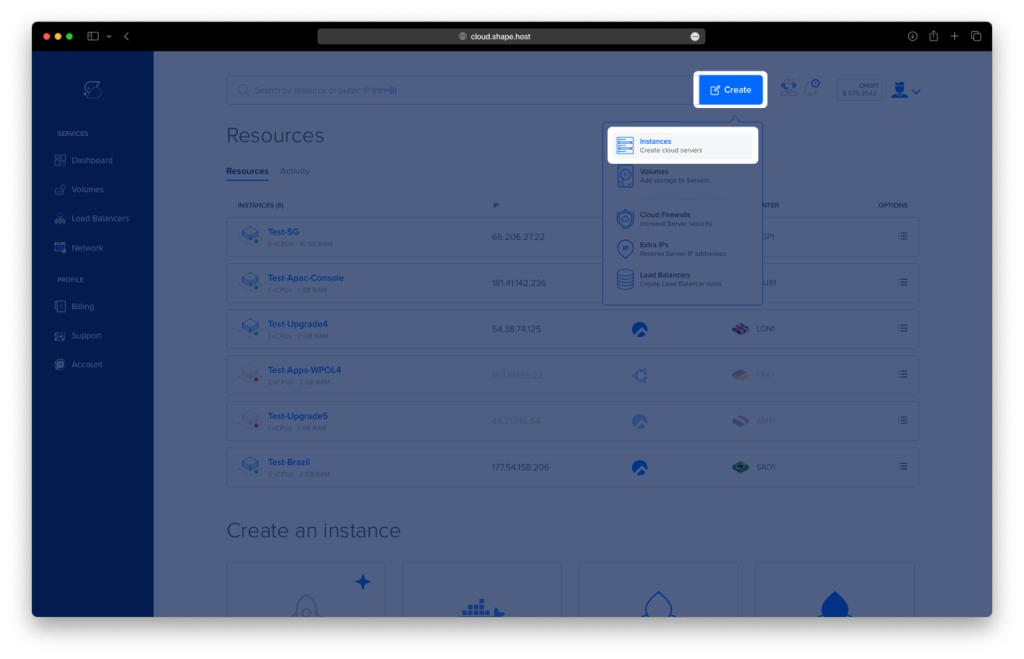
- Access the Dashboard: Log in to your Shape.Host account and navigate to your Dashboard.
- Click Create: Click on the “Create” button located in the top-right corner.
- Select Instances: From the dropdown menu, choose “Instances” to begin creating a new cloud server.
- Select Location: Choose a data center location for your instance closest to your target audience for optimal performance.
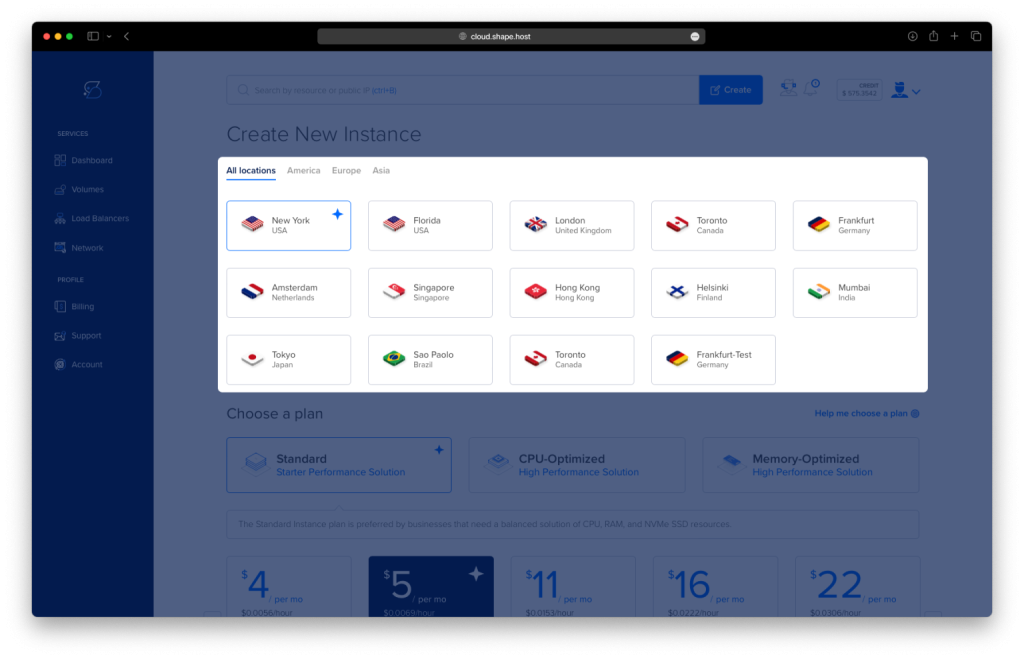
- Choose a Plan: Scroll through the available pricing plans. Select a plan based on your project requirements, such as Standard, CPU-Optimized, or Memory-Optimized.
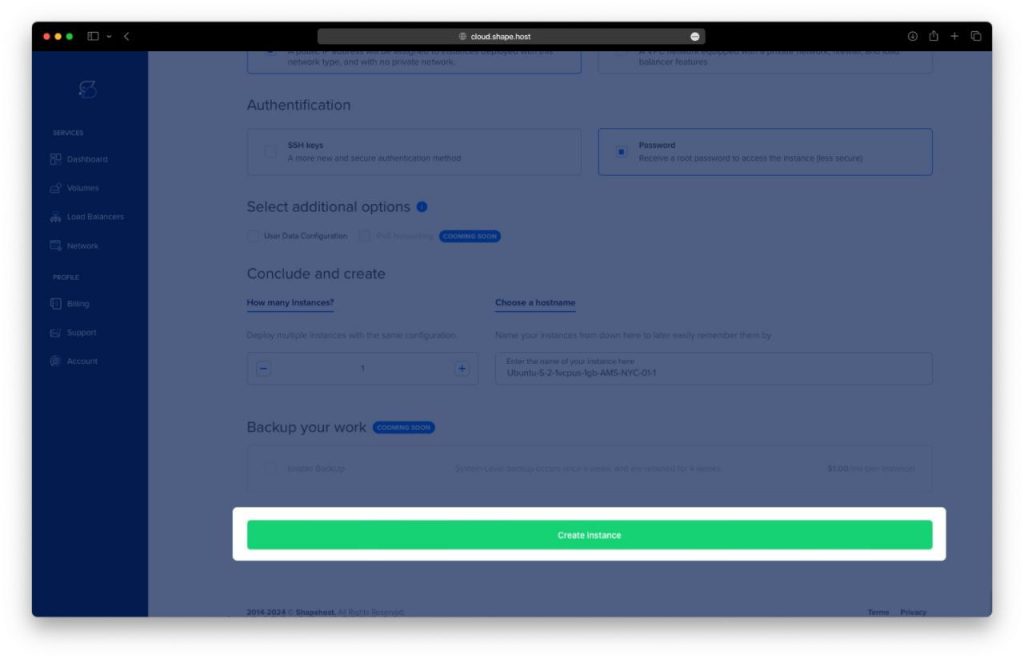
- Choose an Image: Select Ubuntu 24.04 as the operating system for your instance.

- Authentication and Finalize: Choose your authentication method, either via SSH keys or password. Once done, click Create Instance to launch your server.
Step 2: Access Your Instance
To connect to your instance on Shape.Host, follow these steps:

- Get the Instance IP: After creating your instance, find the public IP address in the Shape.Host dashboard under Resources.
- Open SSH Client: Use an SSH client like Terminal (Linux/macOS) or PuTTY (Windows).
- SSH into the Instance: Run the following command in your terminal:
ssh root@<your-instance-ip>Replace <your-instance-ip> with your actual instance IP address.
- Enter the Password: If prompted, enter your instance’s root password or use your SSH key if configured.
You are now connected to your instance!
Step 3: Update the System
Update and upgrade your packages to ensure everything is up to date:
apt update
apt upgrade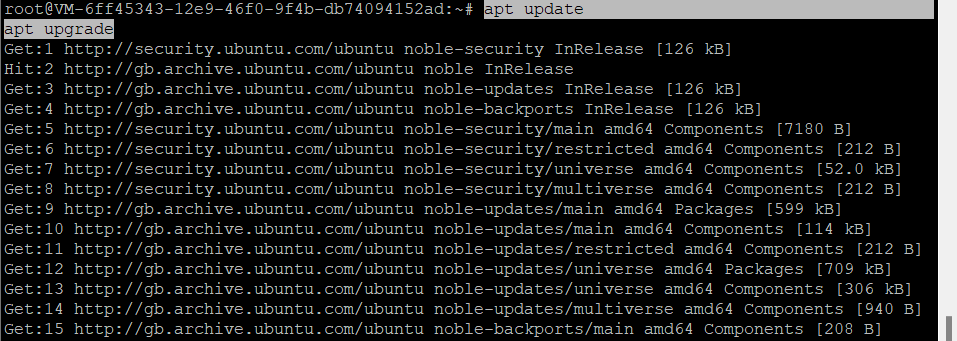
Step 4: Install Essential Packages
Install curl and wget which are required for fetching files and data:
apt install curl wget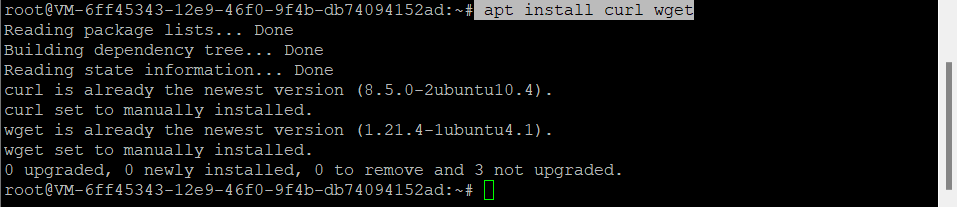
Step 5: Install CloudPanel
Download and verify the CloudPanel installer script:
curl -sS https://installer.cloudpanel.io/ce/v2/install.sh -o install.sh
echo "2aefee646f988877a31198e0d84ed30e2ef7a454857b606608a1f0b8eb6ec6b6 install.sh" | sha256sum -c && sudo bash install.sh
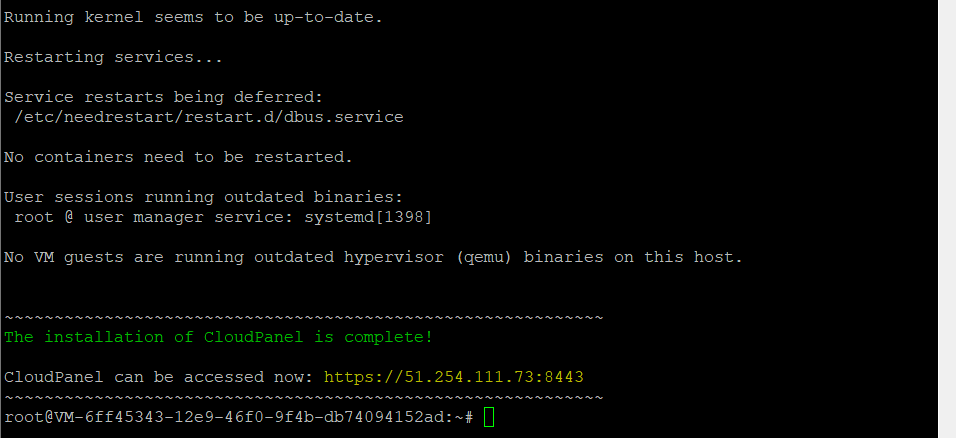
This command:
- Downloads the installation script for CloudPanel.
- Verifies the integrity of the installer script using SHA-256 checksum.
- Runs the installation script to install CloudPanel.
Step 6: Access CloudPanel
Once the installation is complete, you can access your CloudPanel dashboard through a web browser. Use the following URL, replacing server_name with your server’s hostname or IP address:
https://server_name:8443Make sure you use HTTPS and include port 8443.
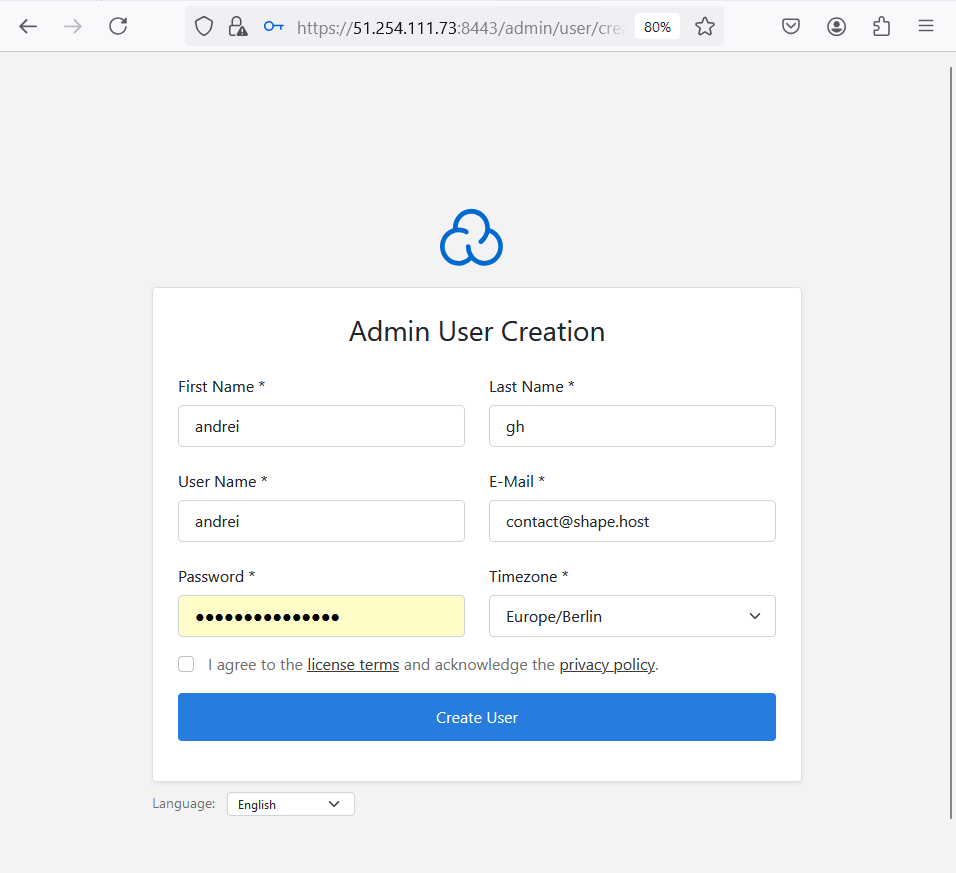
You will then directed to the Admin User Creation page, where you can set up an administrator user by entering details and configuring the time zone for your CloudPanel.
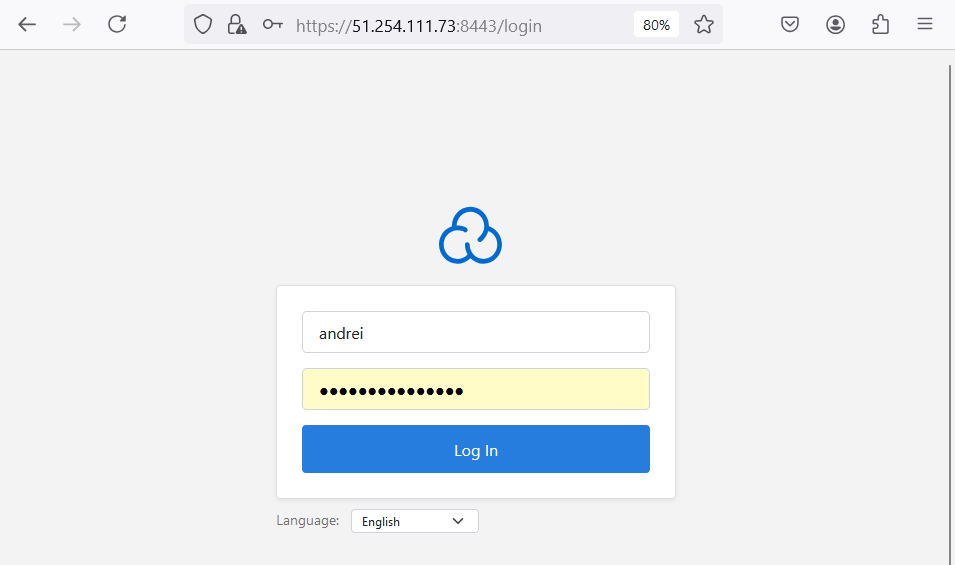
Once these steps are completed, you can log in to your CloudPanel using the administrator username and password you created in previous step.
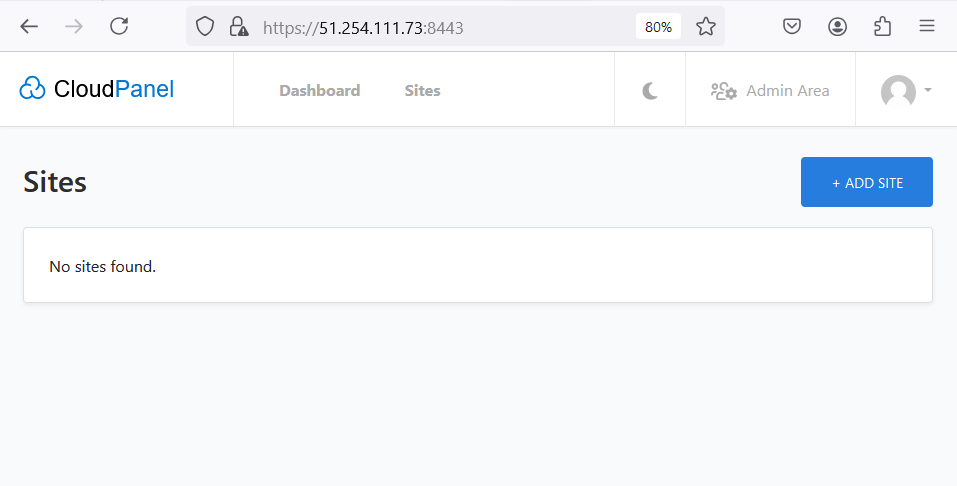
After completing these steps, you will then directed to the Cloudpanel dashboard. CloudPanel has been successfully installed and configured on Ubuntu 24.04.
CloudPanel has now been installed successfully on your Ubuntu 24.04 server. You can use CloudPanel to manage web services, create websites, and deploy applications easily. Its user-friendly features make managing server infrastructure efficient and straightforward.
For hosting solutions like Cloud VPS, visit Shape.Host to explore a wide range of services that can help scale and manage your online presence.