What is Consul?
Consul is an open-source tool developed by HashiCorp that provides service discovery, distributed key-value storage, health checking, and network segmentation for microservices and cloud-native infrastructure.
On Ubuntu 24.04, Consul runs efficiently as a lightweight, production-ready service that can operate as a standalone server, a multi-node cluster, or as part of a broader orchestration stack with Nomad, Kubernetes, or Terraform.
Core Features of Consul
Service Discovery
- Enables services to register themselves and discover other services without hardcoding IP addresses.
- Uses DNS or HTTP APIs to query services dynamically.
Health Checking
- Consul can perform health checks on services and nodes (e.g., HTTP, TCP, script-based).
- Automatically deregisters unhealthy services from discovery.
Key/Value Store
- Distributed, eventually-consistent KV store for storing configuration, feature flags, secrets, and metadata.
- Supports ACLs for securing access.
Multi-Datacenter and Clustering
- Supports multi-datacenter deployments with WAN federation.
- Runs as agent/client (lightweight node) or server (consensus node using Raft).
DNS and API Interface
- Integrates with system DNS (
.consuldomain) for service lookups. - Offers a RESTful HTTP API for interaction and automation.
Service Mesh Support (with Envoy)
- Built-in service mesh capabilities using Envoy as the data plane.
- Provides mTLS encryption, intentions-based ACLs, and sidecar proxies.
How Consul Fits into Ubuntu 24.04 Environments
Ubuntu 24.04 offers a modern, secure, and stable platform for deploying Consul:
- Excellent support for systemd, which Consul uses for process management.
- Works with Ubuntu-native tools like iptables/nftables, Netplan, and cloud-init for integration into cloud infrastructure.
- Can be installed via HashiCorp’s official apt repository, Snap, or a binary release.
Consul Use Cases
✅ Microservice Environments
Dynamic discovery and health checking of services in distributed architectures.
✅ Infrastructure Configuration
Use the KV store to store dynamic app configs or feature flags.
✅ Zero Trust Networking
With the service mesh enabled, Consul provides secure mTLS communication and ACLs between services.
✅ Multi-Cloud or Hybrid Clusters
Consul helps federate services across regions or environments.
✅ High Availability Systems
Built-in leader election, quorum-based Raft consensus, and recovery support.
Consul vs Similar Tools
| Feature | Consul | etcd | Zookeeper | Eureka (Spring) | CoreDNS |
|---|---|---|---|---|---|
| Service Discovery | ✅ Yes | ❌ No | ❌ No | ✅ Yes | ✅ Yes (basic) |
| Health Checks | ✅ Yes | ❌ No | ⚠️ Limited | ✅ Yes | ❌ No |
| KV Store | ✅ Yes | ✅ Yes | ✅ Yes | ❌ No | ❌ No |
| DNS Integration | ✅ Yes | ❌ No | ❌ No | ❌ No | ✅ Yes |
| Service Mesh (Envoy) | ✅ Built-in | ❌ No | ❌ No | ❌ No | ❌ No |
| API Access | ✅ Yes | ✅ Yes | ✅ Yes | ✅ Yes | ✅ Yes |
| Ease of Use | ✅ Easy | ⚠️ Moderate | ❌ Complex | ✅ Easy | ✅ Easy |
Security Features
- Supports ACLs for fine-grained access control.
- TLS encryption for agent-server and inter-agent communications.
- Integrates with Vault and other secret management tools.
- Supports mTLS and service intentions for service mesh authorization.
System Requirements for Ubuntu 24.04
| Component | Requirement |
|---|---|
| OS | Ubuntu 24.04 (Noble Numbat) |
| RAM | 512 MB minimum (1 GB+ recommended) |
| Disk | Minimal (binary <100 MB, logs/configs vary) |
| Network | Inbound ports 8300-8302, 8500, 8600 (TCP/UDP for DNS), secured via firewall |
| Systemd | Required for running as a service |
Pros of Consul on Ubuntu 24.04
✅ Easy to install and configure on a modern LTS platform
✅ Full-featured service registry with DNS and API interfaces
✅ Supports high-availability and multi-datacenter deployments
✅ Built-in observability and integration with monitoring tools
✅ Works well with other HashiCorp tools like Nomad, Vault, and Terraform
Cons
❌ Learning curve for beginners unfamiliar with distributed systems
❌ Full service mesh functionality requires Envoy and extra configuration
❌ Manual bootstrapping needed for secure, production-grade deployments
❌ WAN federation and ACLs can be complex to manage at scale
Consul on Ubuntu 24.04 is a robust, scalable solution for service discovery, configuration management, and network observability in modern infrastructure. Whether you’re deploying microservices, managing dynamic environments, or building zero-trust networks, Consul integrates seamlessly with the Ubuntu ecosystem, offering both flexibility and power.
For DevOps teams and platform engineers, it’s an essential component in the cloud-native stack.
Step 1: Create an Ubuntu 24.04 VPS on Shape.Host
Before installing Consul, you need a server to run it. Here’s how to create a VPS on Shape.Host:
Go to https://shape.host and log in or create an account.
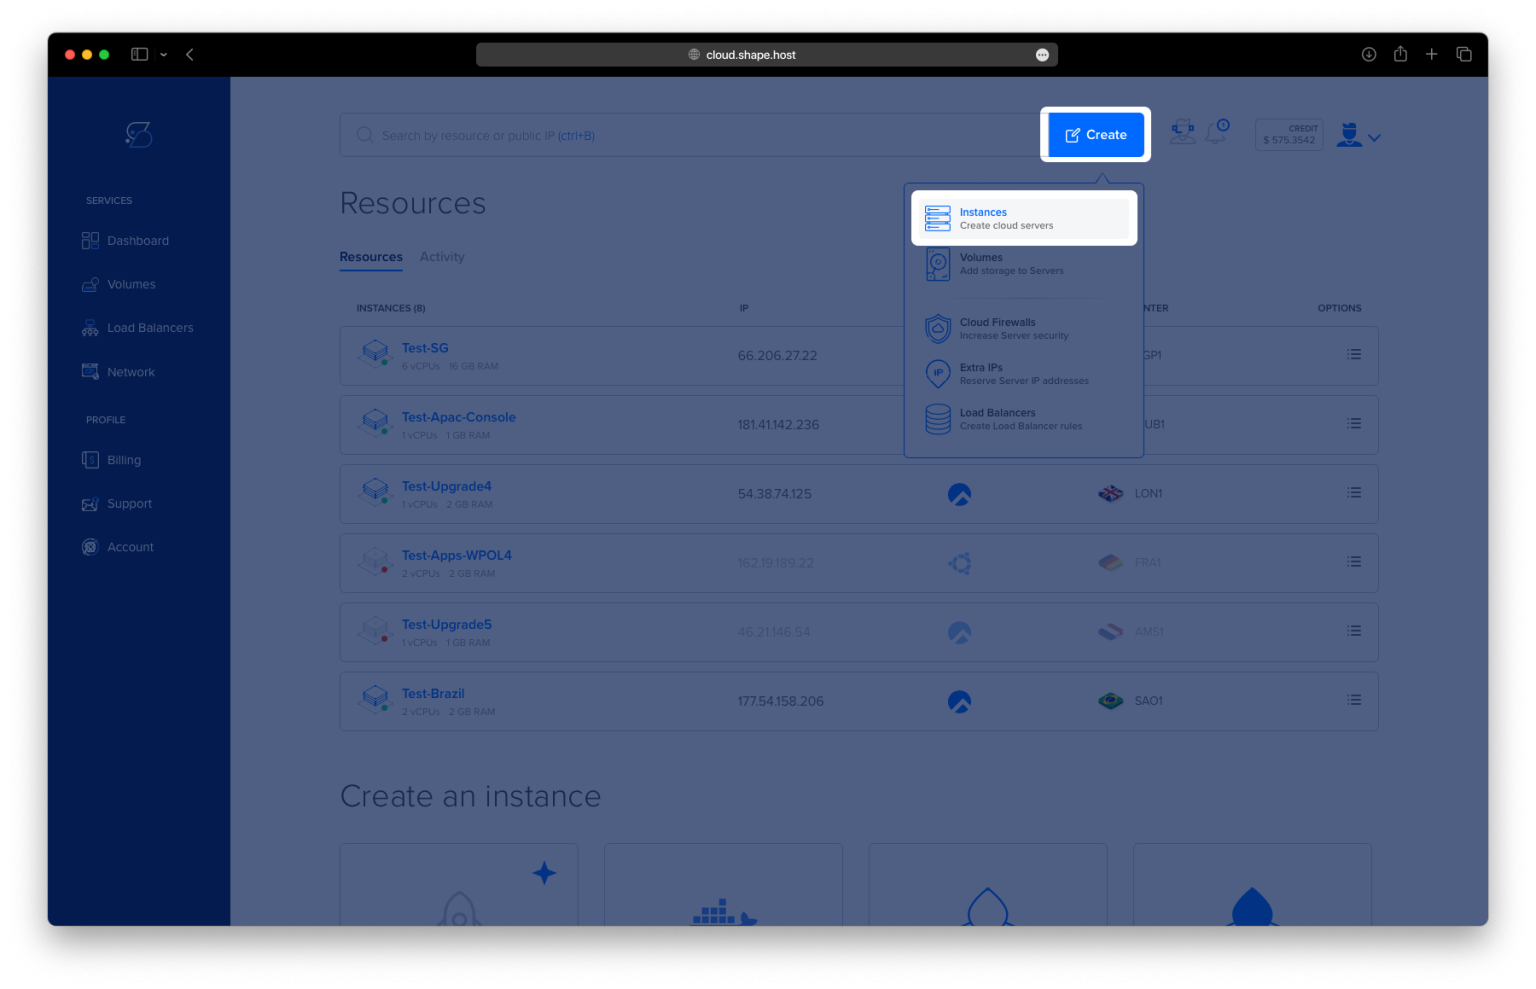
Click “Create” in your dashboard.
Choose “Instance” as your server type.

Select a data center location and deploy your instance.

Select Ubuntu 24.04 (64-bit) as the operating system.
Pick a plan with at least 1 CPU, 1 GB RAM, and 10 GB SSD.

Launch the Instance by selecting either SSH keys or a password for authentication. Click Create Instance to complete the process.

Find your instance’s IP address under the Resources section and use it to access your server.

Step 2: Connect to Your Server
Once your VPS is ready, connect to it using SSH.
On Linux/macOS:
ssh root@your_server_ip
On Windows: Use PuTTY or Windows Terminal to connect using your server’s IP and root password.
Step 3: Update Your System
Start by updating your system’s package index and upgrading any outdated packages:
apt update
apt upgrade

Step 4: Install Required Tools
Install basic dependencies needed for downloading and unzipping the Consul binary:
apt install -y gnupg software-properties-common unzip

Step 5: Download and Install Consul
Use the following commands to download the Consul binary from the official HashiCorp repository and install it:
wget https://releases.hashicorp.com/consul/1.15.0/consul_1.15.0_linux_amd64.zip
unzip consul_1.15.0_linux_amd64.zip
mv consul /usr/local/bin/


Verify the installation:
consul --version

Step 6: Create a Dedicated Consul User
To enhance security, create a separate system user for Consul:
useradd --system --create-home --shell /bin/false consul
Step 7: Prepare Directories and Set Permissions
Create the necessary directories for Consul and set ownership and permissions:
mkdir -p /etc/consul.d
mkdir -p /opt/consul

chown -R consul:consul /usr/local/bin/consul
chown -R consul:consul /etc/consul.d
chown -R consul:consul /opt/consul

chmod 750 /etc/consul.d
Step 8: Create the Consul Configuration File
Open the main configuration file:
nano /etc/consul.d/consul.hcl
Add the following configuration:
data_dir = "/opt/consul"
client_addr = "0.0.0.0"
bind_addr = "127.0.0.1"
advertise_addr = "127.0.0.1"
server = true
bootstrap_expect = 1
ui = true
This configuration sets up Consul in single-node mode with the web interface enabled.

Step 9: Create a systemd Service File for Consul
Create a systemd service file so Consul can run in the background:
nano /etc/systemd/system/consul.service
Paste the following content:
[Unit]
Description=Consul
Documentation=https://www.consul.io/docs
After=network.target

[Service]
ExecStart=/usr/local/bin/consul agent -bind=127.0.0.1 -config-dir=/etc/consul.d
Restart=on-failure
User=consul
Group=consul
LimitNOFILE=65536
LimitNPROC=65536

[Install]
WantedBy=multi-user.target

Step 10: Start and Enable Consul
Reload systemd, start the Consul service, and enable it to start on boot:
systemctl daemon-reload
systemctl start consul
systemctl enable consul
Check the status to ensure it’s running:
systemctl status consul

Step 11: Access the Consul Web Interface
If everything is configured correctly, the Consul UI should be accessible at:
http://your_server_ip:8500
Use this interface to view nodes, services, health checks, and more.

For a reliable and affordable hosting solution that supports tools like Consul, consider using Shape.Host Cloud VPS — a flexible platform ideal for developers, teams, and microservices environments.