What is Django?
Django is a high-level, open-source Python web framework that promotes rapid development, clean code, and secure web applications. Django follows the Model-View-Template (MVT) architectural pattern and is known for its “batteries-included” philosophy—offering tools for database management, authentication, forms, admin panels, and more right out of the box.
Django 5.0, released in December 2023, introduces a number of modern enhancements that improve performance, maintainability, and security. Ubuntu 24.04 (Noble Numbat), being a modern LTS release, is well-suited for developing and deploying Django applications in production.
What’s New in Django 5.0
- Python 3.10+ Required
Django 5.0 requires Python 3.10 or higher, ensuring compatibility with the latest language features and improvements. - Form Rendering Improvements
More flexible, consistent form rendering APIs usingrender()methods and improved widget handling. - Database Features
Better support for PostgreSQL, MariaDB, and MySQL with extended JSON field capabilities and more robust query optimizations. - ASGI and Async Enhancements
Improved support for asynchronous views, middleware, and handlers. Better integration with ASGI servers like Daphne, Uvicorn, or Hypercorn. - Template Engine and Admin Improvements
Template engine updates and admin interface enhancements, including accessibility fixes and more customizable widgets. - Deprecated Python 3.7 and 3.8
Removed compatibility with older Python versions to streamline performance and security.
Why Use Django 5 on Ubuntu 24.04?
Ubuntu 24.04 provides:
- The latest LTS Python versions (Python 3.11 by default)
- Access to the latest PostgreSQL, Redis, Nginx, and systemd improvements
- Security patches and support until 2029
- First-class compatibility with virtual environments, Docker, and CI/CD pipelines
Ubuntu’s stability, combined with Django’s power, makes it an excellent choice for building and deploying reliable, scalable web applications.
System Requirements for Django 5 on Ubuntu 24.04
| Component | Recommended Configuration |
|---|---|
| OS | Ubuntu 24.04 LTS |
| Python Version | Python 3.11 (default in Ubuntu 24.04) |
| Web Server | Nginx or Apache (with uWSGI or Gunicorn) |
| WSGI/ASGI Server | Gunicorn, Daphne, Uvicorn, or Hypercorn |
| Database | PostgreSQL, MariaDB, MySQL, SQLite (dev) |
| Optional | Redis (for caching and channels), Celery |
Common Use Cases
- Content Management Systems
- REST APIs and microservices using Django REST Framework (DRF)
- SaaS products and internal tools
- E-commerce platforms
- Educational platforms and learning management systems
- Real-time applications (via Django Channels)
Advantages of Using Django 5
- Secure by default: Protects against XSS, CSRF, SQL injection, etc.
- Built-in admin interface: Powerful interface for managing models and data.
- ORM (Object-Relational Mapping): Interact with databases using Python code.
- Scalable and production-ready: Used by Instagram, Pinterest, Disqus, and others.
- Extensive documentation and active community.
- Supports asynchronous views, ideal for high-performance APIs and websocket apps.
Development Tools and Environment
- Virtualenv / venv for isolated environments
- Django Extensions, debug-toolbar, and Celery for extended dev capabilities
- IDEs like VS Code, PyCharm, or Vim
- Test frameworks: Django’s built-in test suite, pytest-django
- CI/CD integrations: GitHub Actions, GitLab CI, Jenkins
Deployment Options on Ubuntu 24.04
- Gunicorn + Nginx + PostgreSQL
Traditional stack using Gunicorn as the WSGI server and Nginx as the reverse proxy. - ASGI Stack for Async Support
Use Uvicorn or Daphne with Nginx for websocket-based apps or async APIs. - Dockerized Deployment
Containerized environments using Docker and Docker Compose, often combined with tools like Traefik, Redis, and PostgreSQL. - Cloud Deployments
Easily deploy Django apps to:- AWS (EC2, Lightsail, Elastic Beanstalk)
- DigitalOcean
- Google Cloud
- Heroku (with Docker or buildpacks)
Security Best Practices
- Set
DEBUG = Falsein production - Use
ALLOWED_HOSTSto restrict access - Serve static and media files securely
- Use SSL certificates via Let’s Encrypt
- Regularly update Django and dependencies
- Use tools like Bandit, Safety, and Black for code security and formatting
Django 5 on Ubuntu 24.04 is a robust, secure, and scalable solution for developing modern web applications and APIs. With asynchronous capabilities, a powerful ORM, and a rich ecosystem, Django continues to be one of the most productive frameworks for developers. Ubuntu 24.04 provides a stable and secure platform for both development and production environments, making it an ideal choice for deploying Django-powered projects in 2024 and beyond.
Step 1: Create a Cloud VPS on Shape.Host
Go to https://shape.host and log in.
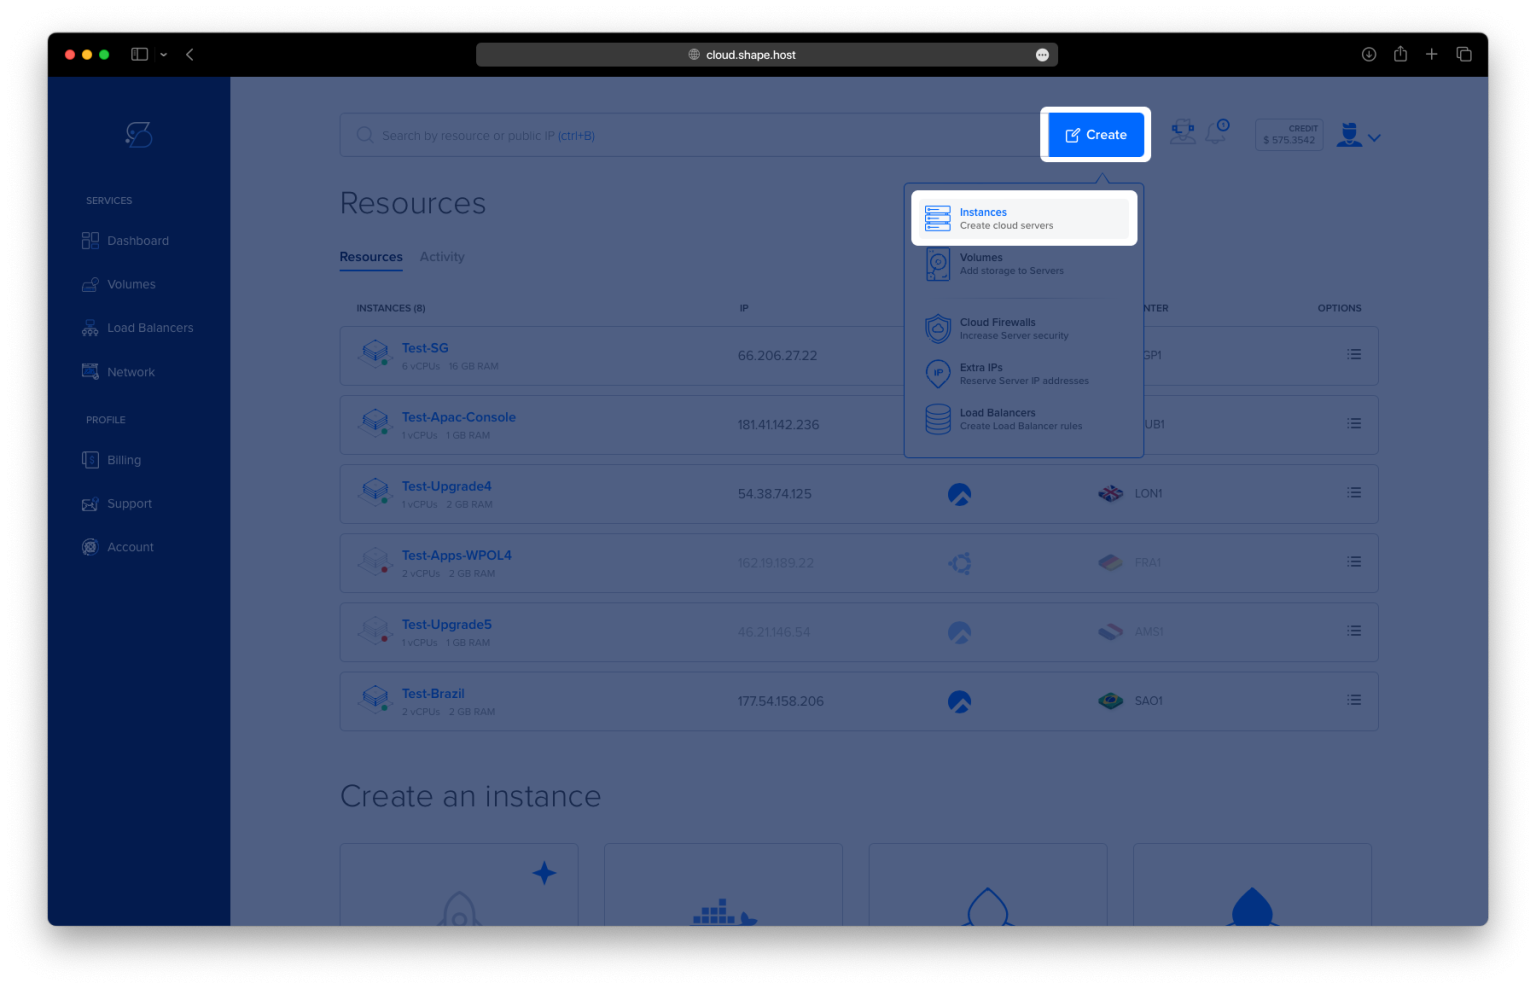
Click Create.
Choose Instance.

Pick your preferred server location.

Select Ubuntu 24.04 (64-bit) as the OS.
Choose a plan with at least 2 CPUs, 4 GB RAM, and 20 GB SSD.

Click Create Instance.

Find the IP address under the Resources tab.

Step 2: Connect to Your Server
Linux/macOS:
Open your terminal and run:
ssh root@your_server_ip
Windows:
Use PuTTY, enter your IP, and log in as root.
Step 3: Update System Package Index
apt update
Refreshes the list of available packages on your system.

Step 4: Install Python 3.12 and Virtual Environment Tools
apt install python3.12 python3.12-venv
Installs Python 3.12 and the venv module to manage isolated environments.

Step 5: Check Python Version
python3 -V
Confirms that Python is installed and shows the version number.

Step 6: Create a Python Virtual Environment for Django
python3 -m venv --system-site-packages ~/django5
Creates a virtual environment named django5 in your home directory.
Step 7: Activate the Virtual Environment
source ~/django5/bin/activate
Switches to the isolated Python environment.
Step 8: Install Django 5 (or any version between 5 and 6)
pip3 install 'Django>=5,<6'
Installs the latest Django 5.x version using pip.

Step 9: Verify Django Installation
django-admin --version
Shows the installed version of Django to confirm it’s working.
Step 10: Deactivate the Environment (Optional)
deactivate
Exits the virtual environment. You can re-activate it anytime.

Step 11: Reactivate the Virtual Environment
source ~/django5/bin/activate
Enter the Django environment again to continue your project.
Step 12: Create a New Django Project
django-admin startproject myproject
This creates a new Django project in a folder named myproject.
Step 13: Move into the Project Folder
cd myproject
Navigates to the project directory.

Step 14: Apply Migrations
python manage.py migrate
Sets up the default database schema used by Django.

Step 15: Create a Superuser
python manage.py createsuperuser
Creates an admin account for accessing the Django admin panel.

Step 16: Edit Allowed Hosts
nano /root/myproject/myproject/settings.py
Find this line:
ALLOWED_HOSTS = []
Change it to:
ALLOWED_HOSTS = ['your-ip', 'localhost', '127.0.0.1']
Replace 'your-ip' with the actual public IP of your server.

Step 17: Start the Django Development Server
python manage.py runserver 51.89.69.203:8000
Runs the server, listening on the specified IP and port.

Step 18: Access Your Django Site
Open your browser and visit:
http://51.89.69.203:8000
You should see the Django welcome page.

You now have Django 5 running on Ubuntu 24.04, with a virtual environment, admin access, and your project ready to go.
This setup runs smoothly on a Shape.Host Linux SSD VPS. Get:
- Instant instance creation
- Full root access
- Great performance for Python and Django projects
Start at https://shape.host