InfluxDB 2 on AlmaLinux 9 — Enterprise-Grade Time Series Platform on a RHEL-Based Distribution
InfluxDB 2.x is a modern time series database system developed by InfluxData, tailored for high-throughput ingestion, flexible querying with Flux, dashboarding, and task automation. Deploying it on AlmaLinux 9, a stable and enterprise-compatible RHEL 9 clone, offers a reliable, secure, and scalable environment suitable for production telemetry, monitoring, and observability infrastructure.
InfluxDB 2 Architecture Highlights
InfluxDB 2 integrates previously separate components (e.g., Chronograf, Kapacitor) into one cohesive platform. Key components include:
| Component | Description |
|---|---|
| Time Series Engine | Optimized for large-scale, high-ingest workloads |
| Flux Language | Unified query and scripting system replacing InfluxQL |
| Bucket Model | Logical storage for time series with custom retention |
| Token-based Auth | Granular, organization-based access control |
| Web UI | Built-in dashboarding, administration, and visualization |
| REST API | Access to all features programmatically |
Benefits of Running InfluxDB 2 on AlmaLinux 9
AlmaLinux 9 offers a production-grade, open-source RHEL-compatible operating system with a 10-year support lifecycle. It’s ideal for long-term infrastructure deployments.
| AlmaLinux 9 Feature | InfluxDB 2 Advantage |
|---|---|
| Linux Kernel 5.14 | Excellent I/O and network stack performance |
| SELinux Enforcing by Default | Strong security posture for public-facing deployments |
| Systemd 250+ | Efficient service lifecycle control and restart policies |
| FirewallD & OpenSSL 3 | Robust security for HTTPS and remote API endpoints |
| Compatibility with EPEL & RPMs | Simplifies dependencies for Grafana, Telegraf, NGINX |
HTTPS (TLS) Support in InfluxDB 2
InfluxDB 2 supports native TLS encryption, which is strongly recommended for production environments:
| TLS Setting | Purpose |
|---|---|
tls-cert | Path to the public certificate in PEM format |
tls-key | Path to the private key file |
https-enabled = true | Enables encrypted REST and Web UI |
Optional: tls-ca | Add a trusted CA for mTLS or signed client certs |
Optional: tls-min-version | Define protocol (e.g., TLS 1.2+) for compliance |
In RHEL-based environments like AlmaLinux 9, TLS can be enabled natively in InfluxDB or offloaded to NGINX or Apache HTTPD as a reverse proxy for HTTPS termination, path routing, rate limiting, and HSTS headers.
Typical Use Cases
InfluxDB 2 on AlmaLinux 9 serves a variety of industrial and research workloads:
- DevOps & Infrastructure Monitoring — paired with Telegraf and Grafana
- IoT Sensor Aggregation — secure ingestion and visualization of field data
- Application Performance Metrics — service latency, request volume, error tracking
- Scientific & Financial Time Series — analysis of temporal datasets
- Prometheus Integration — via remote write to centralize observability pipelines
- Data Retention Compliance — separate retention policies via bucket configuration
Security Best Practices on AlmaLinux 9
AlmaLinux 9, with SELinux enforcing mode and hardened defaults, allows fine control over InfluxDB’s attack surface:
| Security Component | Integration with InfluxDB |
|---|---|
| SELinux Policies | Constrain access to TLS keys and binary execution |
| FirewallD | Restrict ports (e.g., 8086) to trusted networks |
| Systemd Hardening | Lock down capabilities, access to home/tmp |
| Token-Based Auth | Enforce read/write access per org/user |
| mTLS Support | Optionally require client certificates for ingestion |
Additionally, journald and systemd integration help monitor and audit operational events.
Performance Considerations
InfluxDB 2 is built for speed. On AlmaLinux 9, it benefits from efficient kernel-level caching, memory handling, and disk performance.
| Parameter | Impact |
|---|---|
| I/O Throughput | Critical for sustained ingestion (e.g., 100k+ points/sec) |
| CPU Cores | Improves concurrent queries and task executions |
| Memory | 2–4 GB RAM recommended for moderate-scale deployments |
| Disk | SSD/NVMe preferred for WAL and index performance |
Flux scripting and data transformations (e.g., joins, aggregations) benefit from ample RAM and CPU.
Ecosystem Compatibility
InfluxDB 2 on AlmaLinux 9 integrates with most common monitoring tools and external systems:
| Tool | Integration Method | Use Case |
|---|---|---|
| Telegraf | Native input/output plugin | Metric ingestion |
| Grafana | InfluxDB 2 data source | Advanced dashboards and visualizations |
| Prometheus | Remote write endpoint | Ingest Prometheus metrics into InfluxDB |
| NGINX | Reverse proxy & HTTPS | TLS, rate limiting, and routing |
| Ansible/Podman | Infrastructure automation | Configuration and containerized ops |
The platform is fully scriptable via influx CLI and InfluxDB’s API, supporting automation workflows and GitOps-style management.
Running InfluxDB 2 on AlmaLinux 9 provides a production-ready, secure, and scalable foundation for managing high-volume time series data. It combines InfluxDB’s modern capabilities (Flux, dashboards, tasks, tokens) with AlmaLinux’s:
- Long-term support (through 2032)
- RHEL binary compatibility
- SELinux security model
- Systemd and service orchestration reliability
- Compatibility with enterprise CI/CD and monitoring stacks
This makes it well-suited for mission-critical observability platforms, secure IoT networks, and real-time analytics infrastructure.
Step 1: Create and Connect to a VPS
Create your VPS on Shape.Host:
Go to https://shape.host and log in.
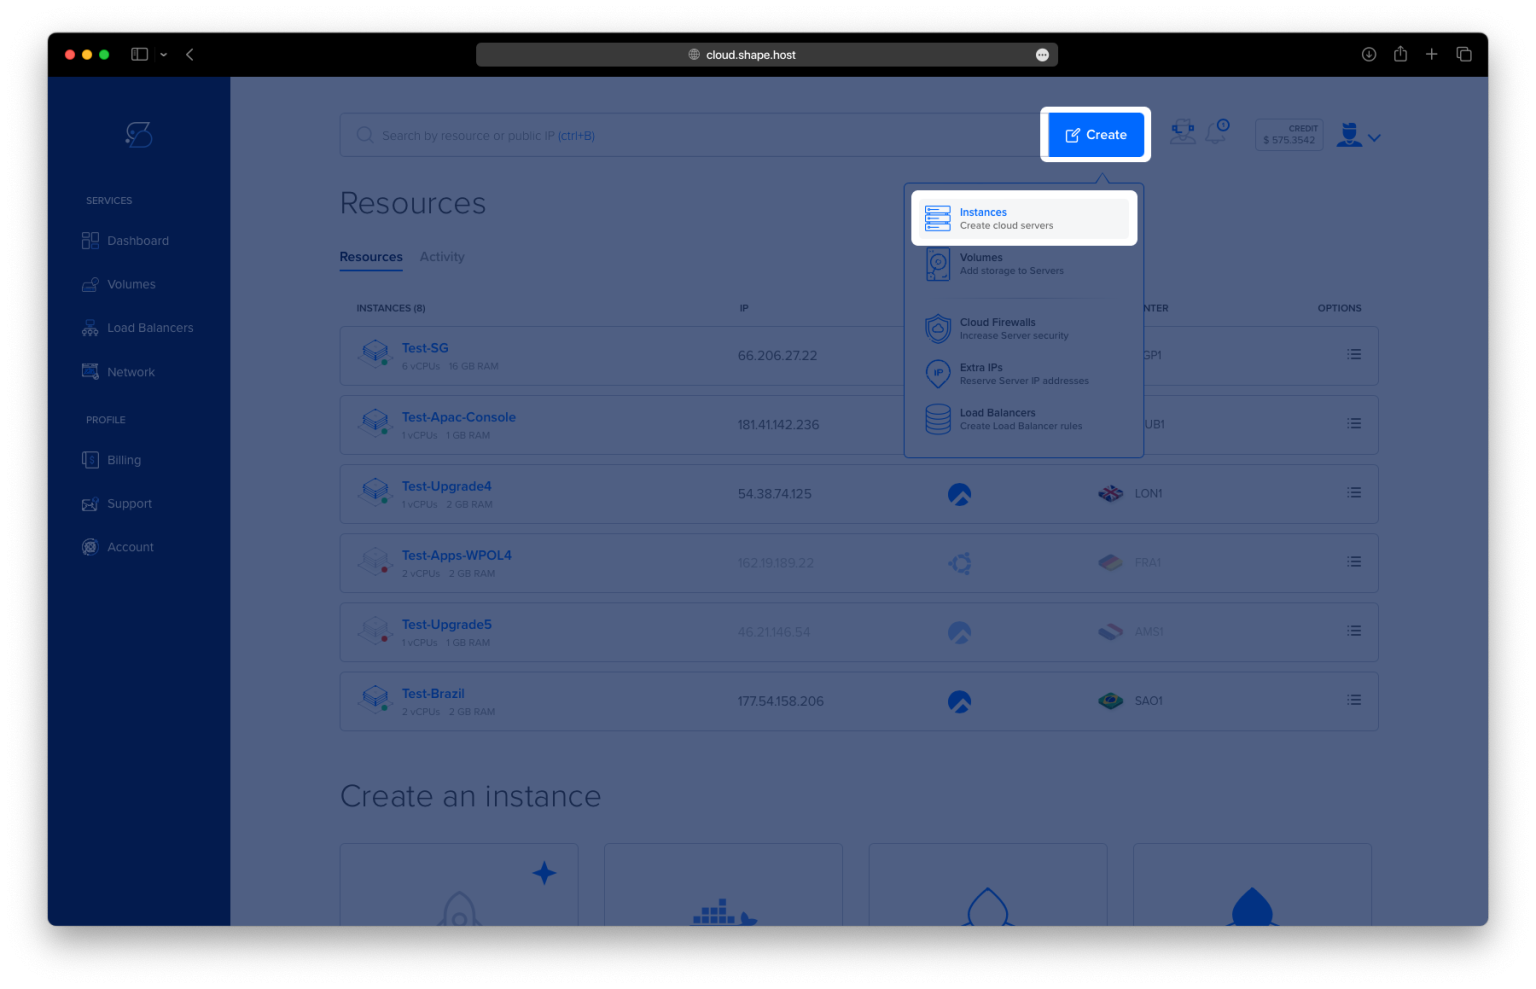
Click “Create” → select “Instance”.

Choose the server location closest to your users.

Choose AlmaLinux 9 (64-bit) as your operating system.
Select a plan with at least 1 CPU, 1 GB RAM, and 10 GB SSD.

Click “Create Instance”.

Copy the instance IP address from the Resources section.

Step 2: Connect to Your Server
For Linux/macOS:
Open your terminal and run:
ssh root@your_server_ip
For Windows:
- Download and install PuTTY.
- Open PuTTY, enter your IP in Host Name, then click Open.
Step 3: Update the System
dnf update -y

Step 4: Install Required Packages
dnf install curl gnupg2 ca-certificates lsb-release -y

Step 5: Add the InfluxData GPG Key
mkdir -p /etc/pki/rpm-gpg/
curl -fsSL https://repos.influxdata.com/influxdata-archive_compat.key -o /etc/pki/rpm-gpg/influxdata.key
Step 6: Add the InfluxDB Repository
cat > /etc/yum.repos.d/influxdb.repo <<EOF
[influxdb]
name = InfluxDB Repository - RHEL
baseurl = https://repos.influxdata.com/rhel/9/x86_64/stable/
enabled = 1
gpgcheck = 1
gpgkey = file:///etc/pki/rpm-gpg/influxdata.key
EOF
Step 7: Install InfluxDB
dnf install influxdb2 influxdb2-cli -y

Step 8: Enable and Start InfluxDB
systemctl enable influxdb
systemctl start influxdb
Check its status:
systemctl status influxdb

Step 9: Confirm It’s Running on Port 8086
ss -tulpn | grep 8086

Step 10: Run InfluxDB Setup Wizard
influx setup
Fill in the following details:
- Username
- Password
- Organization
- Bucket name
- Retention settings (optional)

Access the Web UI
Visit:
http://your-server-ip:8086
Replace your-server-ip with your actual VPS IP address.


Deploy your InfluxDB server on fast and reliable Linux SSD VPS from Shape.Host — ideal for databases, monitoring tools, and analytics apps.