Moodle LMS on Debian 12
Moodle (Modular Object-Oriented Dynamic Learning Environment) is a free, open-source Learning Management System (LMS) widely used in schools, universities, and enterprises for delivering online education and training. It offers a modular architecture, extensive plugin support, and a user-friendly interface for both educators and learners. Deploying Moodle on Debian 12 ensures a stable, secure, and high-performance environment.
Key Features of Moodle
| Feature | Description |
|---|---|
| Course Management | Create and organize courses, modules, lessons, and activities |
| User Roles and Permissions | Define roles such as student, teacher, admin, with fine-grained access control |
| Quizzes and Exams | Build advanced quizzes, question banks, and auto-graded assessments |
| Collaboration Tools | Forums, chats, wikis, and messaging for learner engagement |
| Mobile Support | Fully responsive design and official mobile apps |
| Plugin System | Thousands of plugins for themes, activities, reports, and integrations |
| Multilingual Support | Available in over 100 languages |
| SCORM and LTI Compliant | Supports e-learning standards for content and third-party tool integration |
| Gradebook | Track and manage student grades, performance, and feedback |
Why Use Moodle on Debian 12?
- Stability: Debian is known for its robustness and long-term support, ideal for production Moodle servers.
- Security: Regular security updates and a large community ensure safe operation of your LMS.
- Performance: Debian’s lightweight architecture allows for efficient resource use.
- Package Availability: Debian 12 supports all required services like Apache, PHP 8.x, MariaDB/PostgreSQL, and required PHP modules.
- Community Support: Both Moodle and Debian have extensive documentation and active communities.
System Requirements on Debian 12
| Component | Recommended Specification |
|---|---|
| Web Server | Apache, Nginx |
| PHP | PHP 8.0 or newer with required extensions |
| Database | MariaDB, MySQL, or PostgreSQL |
| RAM | 2 GB minimum (4 GB or more recommended for production) |
| Storage | At least 200 MB for Moodle core; more for content |
| OS | Debian 12 (Bookworm) |
Typical Use Cases
- Universities and Colleges: Full-featured platform for blended or fully online courses.
- Schools: Manage digital classrooms, homework, quizzes, and student engagement.
- Corporate Training: Build custom training programs and monitor employee progress.
- Freelance Educators: Launch online courses with minimal infrastructure cost.
Comparison with Other LMS Platforms
| LMS | Open Source | Self-Hosted | Customizable | Best For |
|---|---|---|---|---|
| Moodle | Yes | Yes | Highly | Education, training programs |
| Canvas LMS | Yes | Yes | Medium | K–12 and higher education |
| Google Classroom | No | No | Limited | Basic classroom collaboration |
| Chamilo | Yes | Yes | Medium | Simple course delivery |
| Blackboard | No | Yes/Cloud | Limited | Enterprise academic settings |
Deploying Moodle LMS on Debian 12 provides a powerful and flexible foundation for online education. Its compatibility with open-source technologies and ease of customization make it ideal for institutions seeking a scalable and cost-effective e-learning solution. Debian 12 enhances Moodle’s stability, security, and performance, making it a reliable platform for learners and educators alike.
Step 1: Create a Shape.Host Instance
Go to https://shape.host and log in.
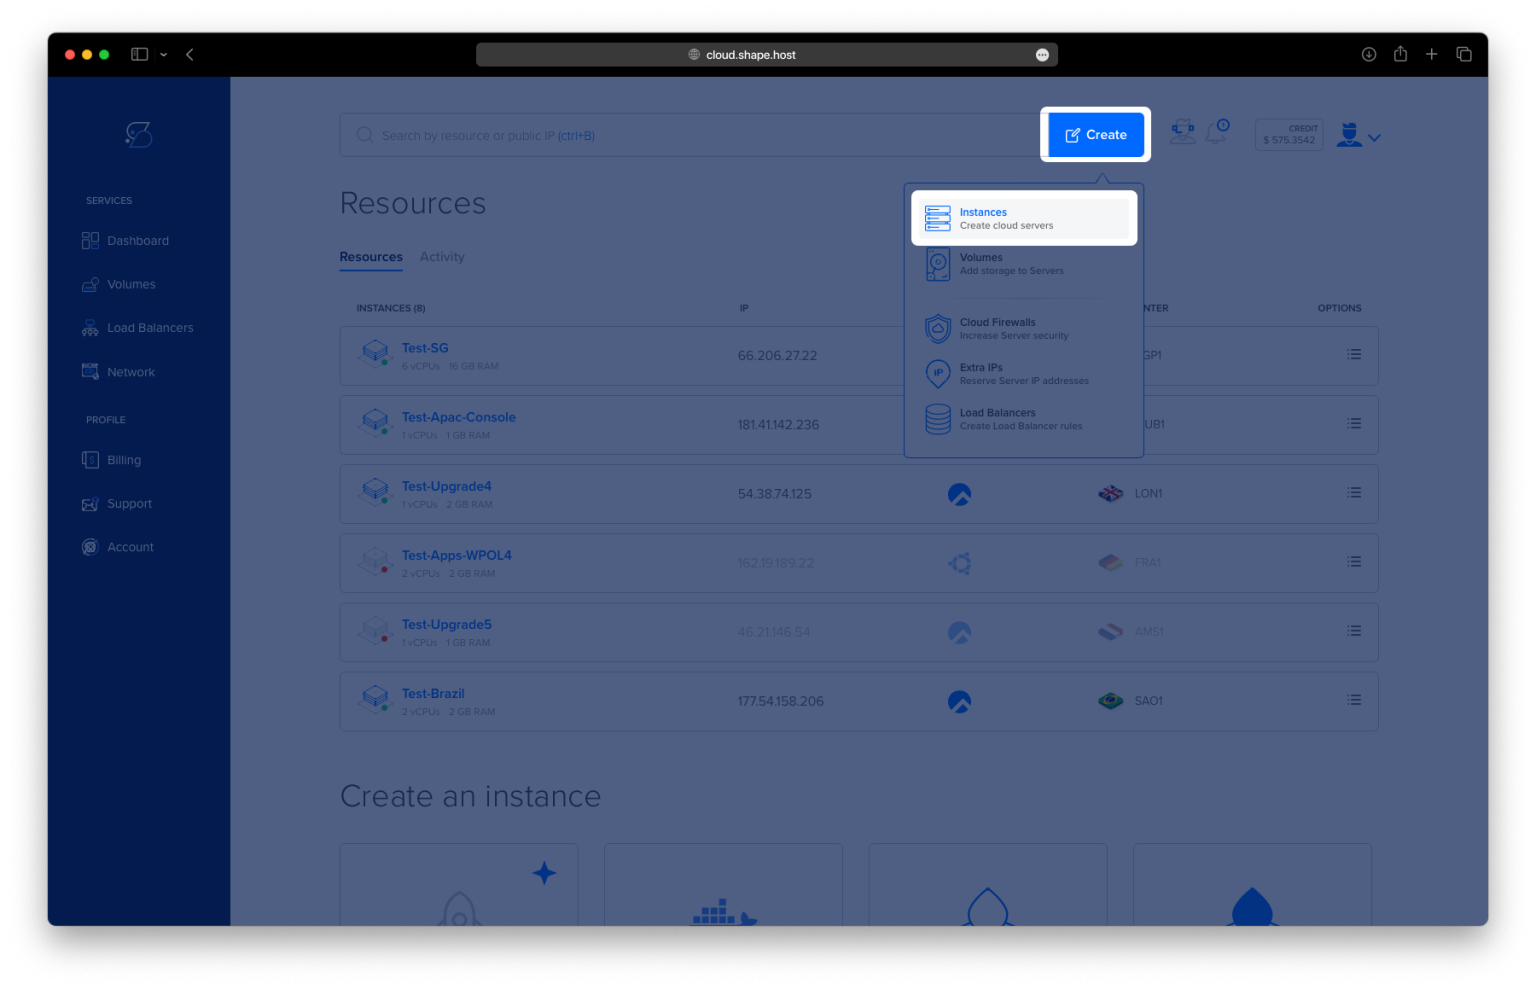
Click “Create”.
Choose “Instance”.

Select your desired server location.

Choose Debian 12 (64-bit) as the operating system.
Pick a plan with at least 2 CPUs, 4 GB RAM, and 20 GB SSD.

Click Create Instance.

Find your instance’s IP address under the “Resources” section.

Connect via SSH:
ssh root@your-server-ipOn Windows, use PuTTY.
Step 2: Install Apache, MariaDB, and PHP with Extensions
Update the system and install required packages:
apt update
apt install apache2 mariadb-server php-cli php-intl php-xmlrpc php-soap php-mysql php-zip php-gd php-tidy php-mbstring php-curl php-xml php-pear php-bcmath libapache2-mod-php


Step 3: Check Services Status
Ensure Apache and MariaDB are running and enabled:
systemctl is-enabled apache2
systemctl status apache2
systemctl is-enabled mariadb
systemctl status mariadb


Step 4: Check PHP Version and Modules
Verify PHP installation:
php -v
php -m

Step 5: Configure UFW Firewall
Install and configure the firewall:
apt install ufw
ufw allow OpenSSH
ufw allow 80/tcp
ufw allow 443/tcp
ufw enable


Step 6: Secure MariaDB and Create Moodle Database
Edit the MariaDB configuration file (optional tuning):
nano /etc/mysql/mariadb.conf.d/50-server.cnf
Insert the configuration below to enable the ‘Barracuda’ format and set up the default storage engine to ‘InnoDB’.
innodb_file_format = Barracuda
default_storage_engine = innodb
innodb_large_prefix = 1
innodb_file_per_table = 1
Restart MariaDB to apply any changes:
systemctl restart mariadb

Secure the MariaDB installation:
mariadb-secure-installation

Create the Moodle database:
mariadb -u root -p
Inside MariaDB:
CREATE DATABASE moodle DEFAULT CHARACTER SET utf8mb4 COLLATE utf8mb4_unicode_ci;
GRANT ALL ON moodle.* TO 'moodle'@'localhost' IDENTIFIED BY "MoodlePassw0rd";
FLUSH PRIVILEGES;
SHOW GRANTS FOR moodle@localhost;

Step 7: Edit PHP Configuration
Edit php.ini for Apache:
nano /etc/php/8.2/apache2/php.ini
Apply the following changes:
memory_limit = 256M
upload_max_filesize = 60M
max_execution_time = 300
date.timezone = Europe/Amsterdam
max_input_vars = 5000
Restart Apache:
systemctl restart apache2
Step 8: Download and Set Up Moodle
Download and extract Moodle:
cd /var/www
wget https://download.moodle.org/download.php/direct/stable405/moodle-latest-405.tgz
tar -xf moodle-latest-405.tgz


Create data directory and set permissions:
mkdir -p /var/www/moodledata
chown -R www-data:www-data /var/www/moodle /var/www/moodledata
chmod u+rwx /var/www/moodle /var/www/moodledata

Step 9: Configure Apache for Moodle
Create Moodle virtual host file:
nano /etc/apache2/sites-available/moodle.conf
Paste the configuration:
<VirtualHost *:80>
DocumentRoot /var/www/moodle/
ServerName your-domain.com
ServerAdmin admin@example.com

<Directory /var/www/moodle/>
Options +FollowSymlinks
AllowOverride All
Require all granted
</Directory>

ErrorLog /var/log/apache2/moodle_error.log
CustomLog /var/log/apache2/moodle_access.log combined
</VirtualHost>

Enable Apache modules and site:
a2enmod rewrite
a2ensite moodle.conf
apachectl configtest
systemctl restart apache2

Step 10: Enable HTTPS with Certbot
Install Certbot and generate SSL:
apt install certbot python3-certbot-apache
certbot --apache --agree-tos --no-eff-email -m contact@shape.host -d debian-tutorials.shape.host


Step 11: Access Moodle in Your Browser
Open your web browser and navigate to:
https://your-domain.com
Follow the Moodle installation wizard to complete the setup.
Select your default language for Moodle and click ‘Next‘.

Enter your domain name and Moodle data directory to ‘/var/www/moodledata‘.

Select ‘MariaDB‘ as the default database for Moodle.

Input your MariaDB database details such as dbname, dbuser, and password.

Click ‘Continue‘ on the copyright notice.

Within the ‘Server checks’ section, make sure that your Debian server is met with the Moodle requirements. The status of every item should be ‘OK‘.

Now you’ll see the Moodle installation like the following:

Once the installation is finished, enter your admin details (username, email, and password).

Now enter your Moodle site information.

Lastly, you’ll see the following Moodle admin dashboard.


Deploy your own Moodle LMS on Shape.Host Linux SSD VPS:
Choose Debian 12 and set up your online learning platform in minutes.