Moodle is a widely-used, open-source Learning Management System (LMS) designed to provide educators and institutions with powerful tools to create and deliver online courses. Running Moodle on Ubuntu 24.04 Server offers excellent compatibility with modern PHP versions, robust performance, and access to a large support community.
Key Features of Moodle
| Feature | Description |
|---|---|
| Course Creation | Organize content into structured lessons, assignments, and quizzes |
| User Management | Define users as students, teachers, or administrators |
| Grading and Feedback | Built-in gradebook and personalized feedback options |
| Mobile Support | Responsive UI with native mobile apps for iOS and Android |
| Activity Modules | Forums, chats, wikis, SCORM, surveys, and more |
| Plugin Ecosystem | Thousands of plugins to extend functionality and appearance |
| Secure Authentication | Supports OAuth2, LDAP, SAML, and manual user creation |
| Multilingual Interface | Available in more than 100 languages |
| Custom Themes | Flexible theming system to brand your LMS |
Why Use Moodle on Ubuntu 24.04?
- Modern PHP Support: Ubuntu 24.04 supports PHP 8.3, fully compatible with recent Moodle versions.
- Stable Environment: Ideal for long-term deployments thanks to Ubuntu’s LTS (Long-Term Support) cycle.
- Up-to-Date Packages: Benefit from newer versions of Apache, MariaDB, PostgreSQL, and other dependencies.
- Security: Frequent security updates and optional automatic updates ensure safe server operation.
- Community Support: Both Ubuntu and Moodle have vast communities for help, documentation, and plugins.
System Requirements for Moodle on Ubuntu 24.04
| Component | Recommended Specification |
|---|---|
| Web Server | Apache or Nginx |
| PHP | PHP 8.0–8.3 with extensions: intl, xmlrpc, soap, curl, mbstring, etc. |
| Database | MariaDB, MySQL, or PostgreSQL |
| RAM | Minimum 2 GB (4 GB+ recommended for production) |
| Disk Space | At least 200 MB for core Moodle; additional for file storage |
| OS | Ubuntu Server 24.04 LTS |
Common Use Cases
- Universities: Deploy robust e-learning platforms supporting thousands of users.
- Schools: Deliver homework, virtual classrooms, and interactive activities.
- Businesses: Train employees through structured courses and performance tracking.
- Freelancers: Launch online educational programs independently.
Comparison with Other LMS Solutions
| LMS | Open Source | Customizable | Cloud/On-Premise | Target Users |
|---|---|---|---|---|
| Moodle | Yes | Highly | Both | Educational institutions |
| Canvas LMS | Yes | Medium | Both | Higher education |
| Chamilo | Yes | Medium | Both | Simple e-learning deployments |
| Google Classroom | No | Limited | Cloud Only | Basic classroom environments |
| Blackboard | No | Limited | Mostly Cloud | Large enterprise universities |
Running Moodle LMS on Ubuntu 24.04 Server gives you a scalable, secure, and flexible platform for online learning. The latest Ubuntu LTS version ensures long-term support and access to the newest server technologies, while Moodle offers unmatched customization and educational tools. It’s an ideal match for institutions, teachers, and developers looking to build or scale an e-learning environment.
Step 1: Create a Shape.Host Instance
Go to https://shape.host and log in.
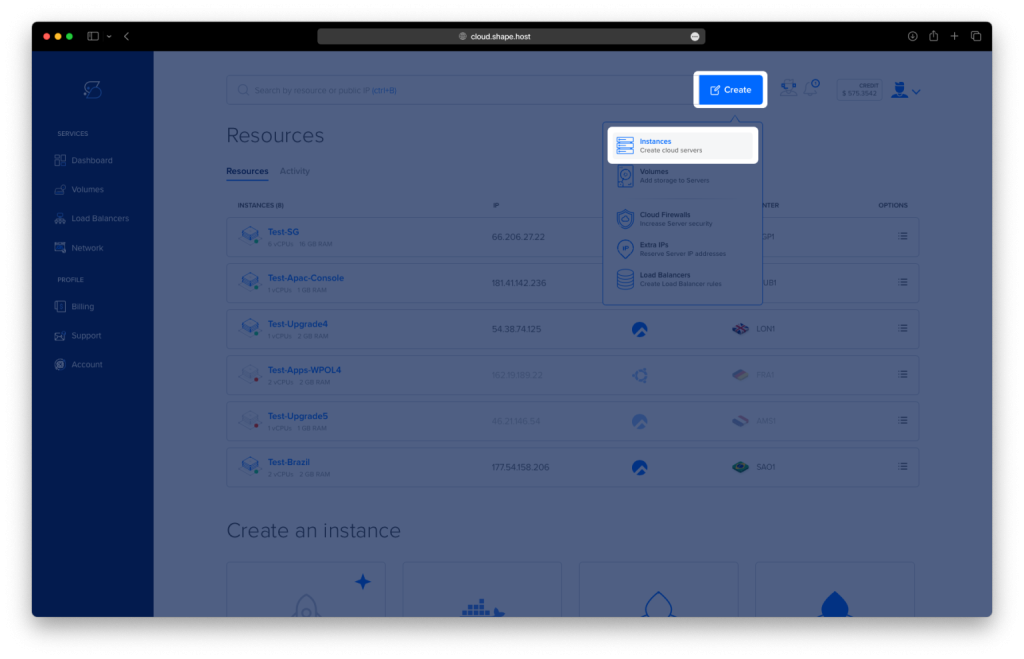
Click “Create”.
Choose “Instance”.
Select your desired server location.
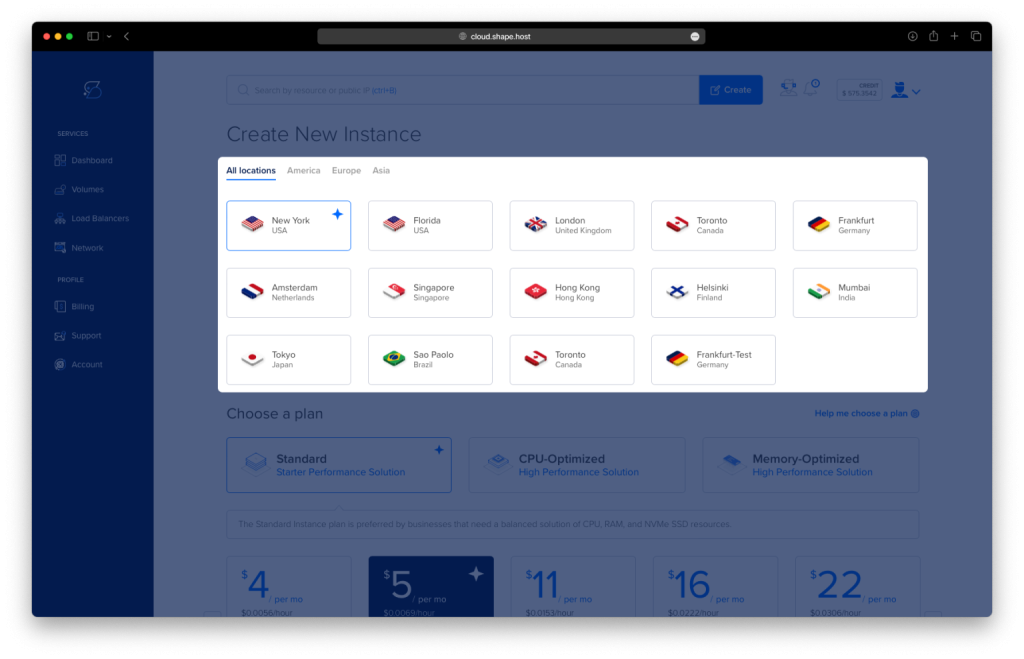
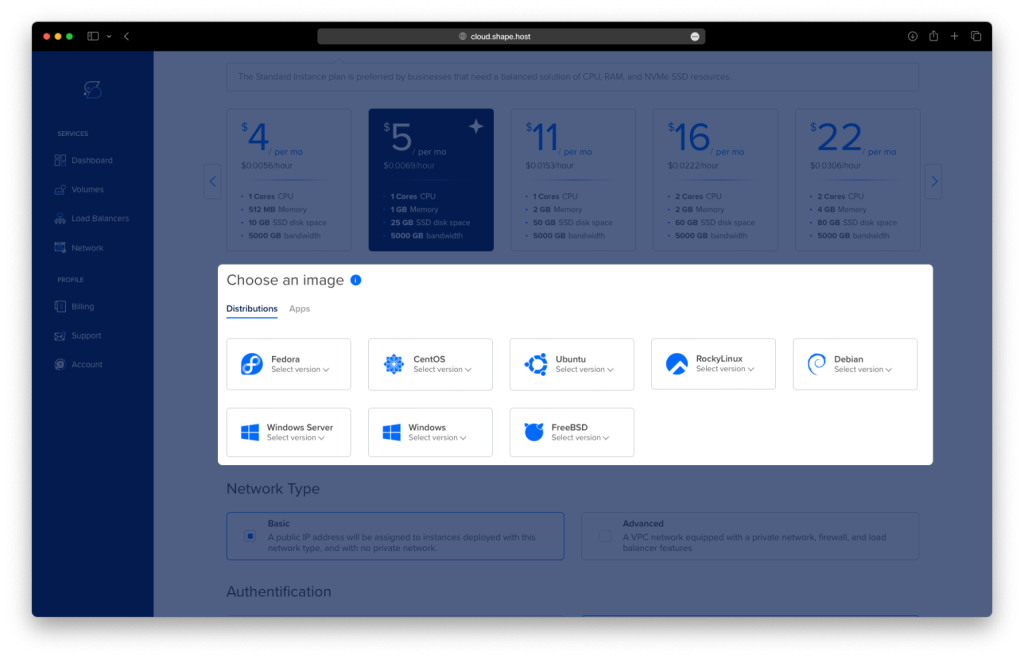
Choose Ubuntu 24.04 (64-bit) as the operating system.
Pick a plan with at least 2 CPUs, 4 GB RAM, and 20 GB SSD.
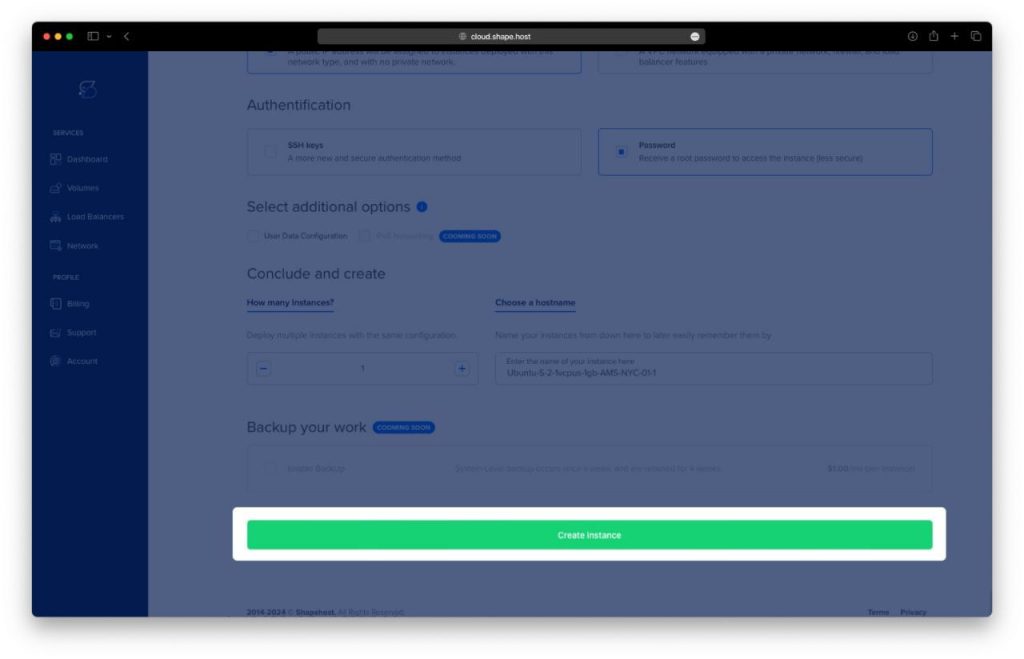
Click Create Instance.
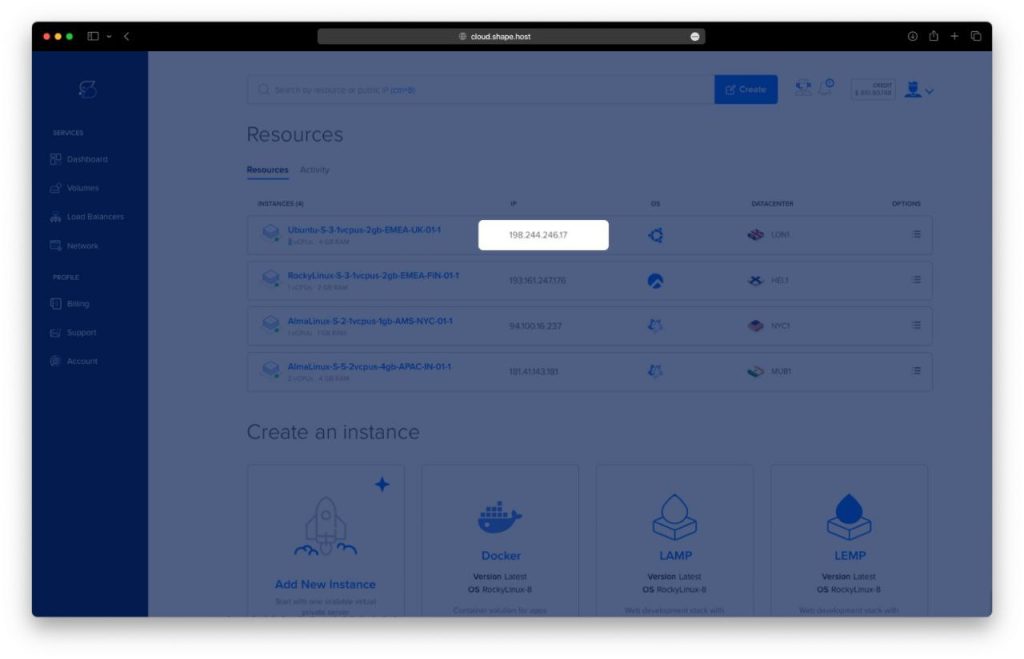
Find your instance’s IP address under the “Resources” section.
Connect via SSH:
ssh root@your-server-ipOn Windows, use PuTTY.
Step 2: Install Apache, MariaDB, and PHP with Extensions
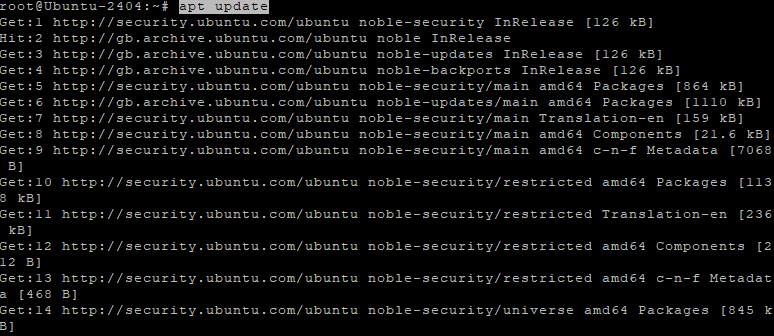
Update the system and install required packages:
apt update
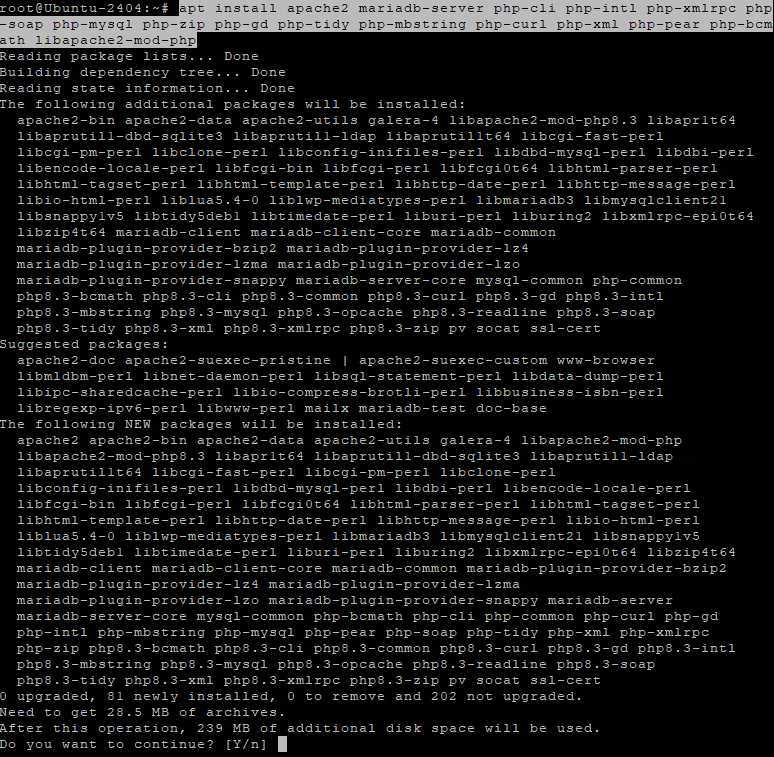
apt install apache2 mariadb-server php-cli php-intl php-xmlrpc php-soap php-mysql php-zip php-gd php-tidy php-mbstring php-curl php-xml php-pear php-bcmath libapache2-mod-php
Step 3: Check Services Status
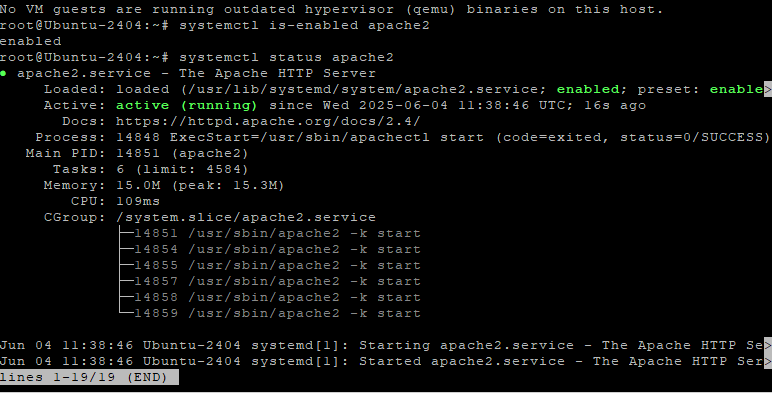
Ensure Apache and MariaDB are running and enabled:
systemctl is-enabled apache2
systemctl status apache2
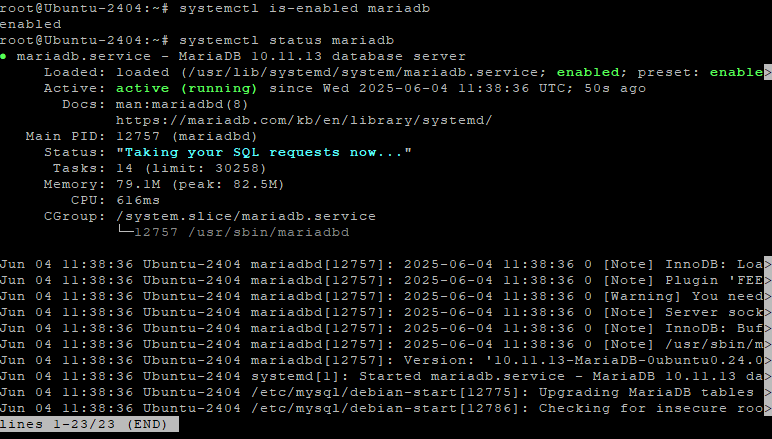
systemctl is-enabled mariadb
systemctl status mariadb
Step 4: Check PHP Version and Modules
Verify PHP installation:
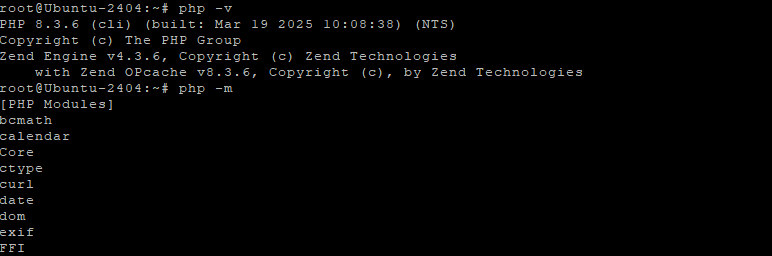
php -v
php -m
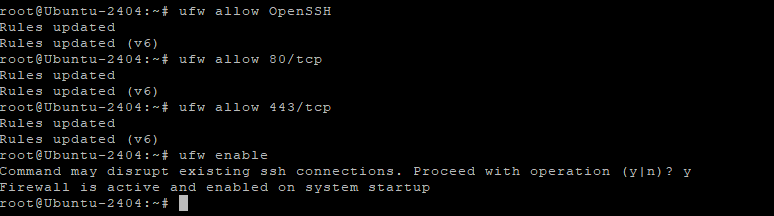
Step 5: Configure UFW Firewall
Allow necessary ports and enable firewall:
ufw allow OpenSSH
ufw allow 80/tcp
ufw allow 443/tcp
ufw enable
Step 6: Configure MariaDB and Create Database
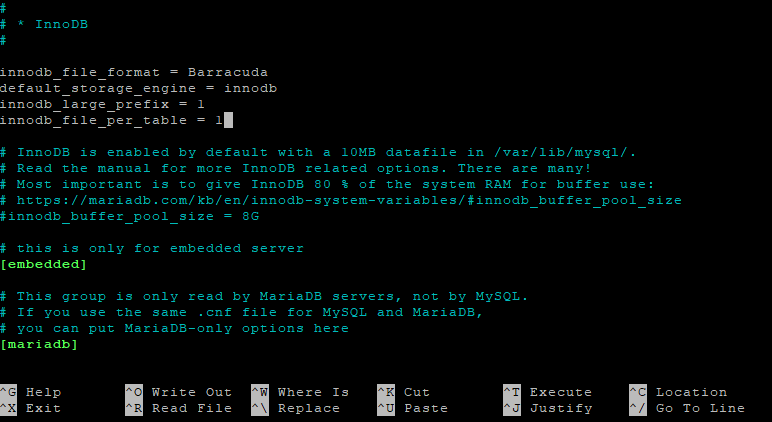
Edit the MariaDB configuration file:
nano /etc/mysql/mariadb.conf.d/50-server.cnf
Add the following:
innodb_file_format = Barracuda
default_storage_engine = innodb
innodb_large_prefix = 1
innodb_file_per_table = 1
Restart MariaDB:
systemctl restart mariadb

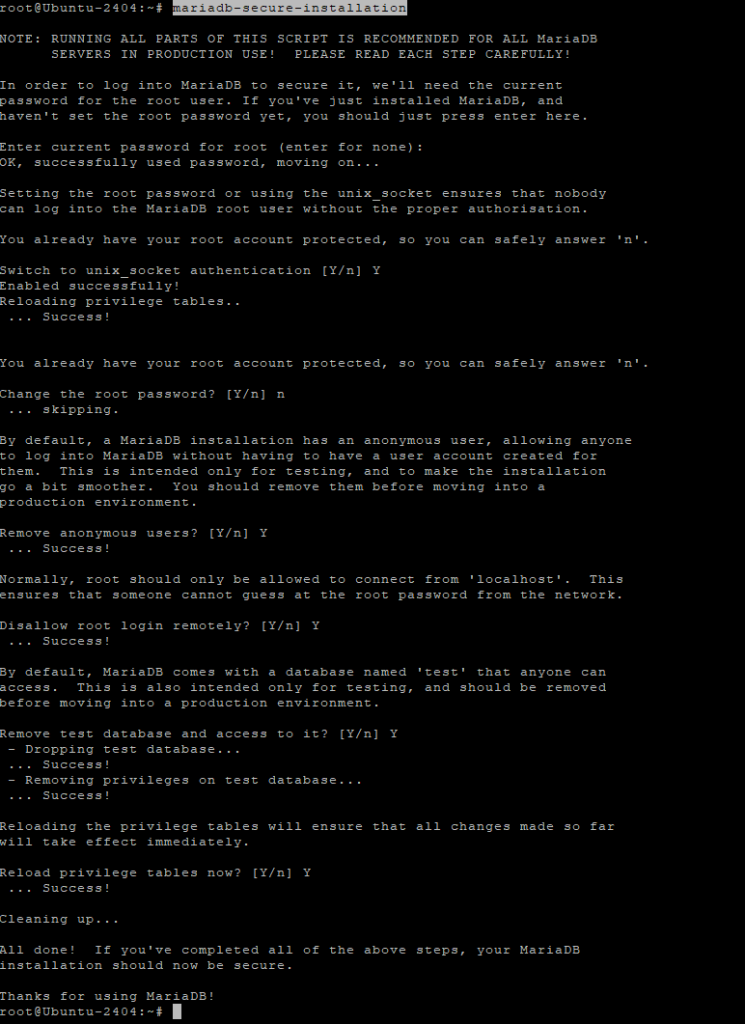
Secure the installation:
mariadb-secure-installation
Create Moodle database:
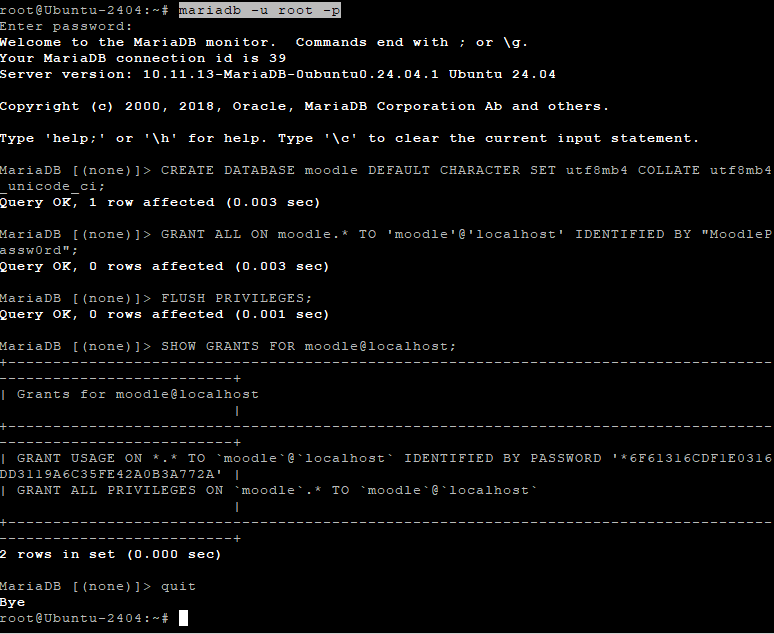
mariadb -u root -p
Then inside the MariaDB shell:
CREATE DATABASE moodle DEFAULT CHARACTER SET utf8mb4 COLLATE utf8mb4_unicode_ci;
GRANT ALL ON moodle.* TO 'moodle'@'localhost' IDENTIFIED BY "MoodlePassw0rd";
FLUSH PRIVILEGES;
SHOW GRANTS FOR moodle@localhost;
Step 7: Edit PHP Configuration
Edit php.ini file:
nano /etc/php/8.3/apache2/php.ini
Adjust these settings:
memory_limit = 256M
upload_max_filesize = 60M
max_execution_time = 300
date.timezone = Europe/Amsterdam
max_input_vars = 5000
Restart Apache:
systemctl restart apache2

Step 8: Download and Set Up Moodle
Download and extract Moodle:
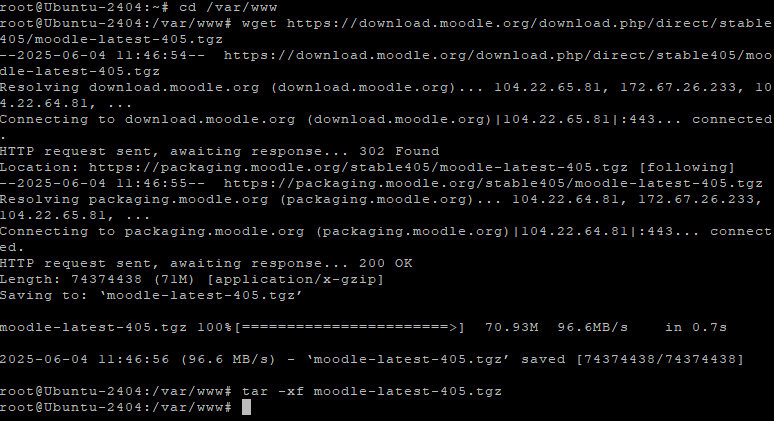
cd /var/www
wget https://download.moodle.org/download.php/direct/stable405/moodle-latest-405.tgz
tar -xf moodle-latest-405.tgz
Create data directory and set permissions:
mkdir -p /var/www/moodledata
chown -R www-data:www-data /var/www/moodle /var/www/moodledata
chmod u+rwx /var/www/moodle /var/www/moodledata

Step 9: Configure Apache for Moodle
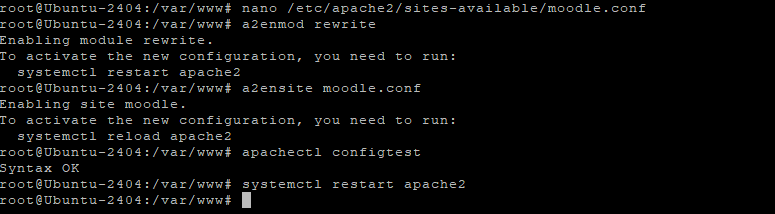
Create the virtual host file:
nano /etc/apache2/sites-available/moodle.conf
Paste this config:
<VirtualHost *:80>
DocumentRoot /var/www/moodle/
ServerName your-domain.com
ServerAdmin admin@example.com

<Directory /var/www/moodle/>
Options +FollowSymlinks
AllowOverride All
Require all granted
</Directory>

ErrorLog /var/log/apache2/moodle_error.log
CustomLog /var/log/apache2/moodle_access.log combined
</VirtualHost>

Enable necessary modules and site:
a2enmod rewrite
a2ensite moodle.conf
apachectl configtest
systemctl restart apache2
Step 10: Enable HTTPS with Certbot
Install Certbot and generate certificate:
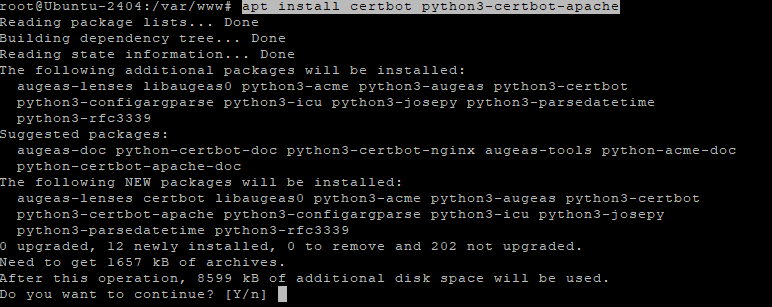
apt install certbot python3-certbot-apache
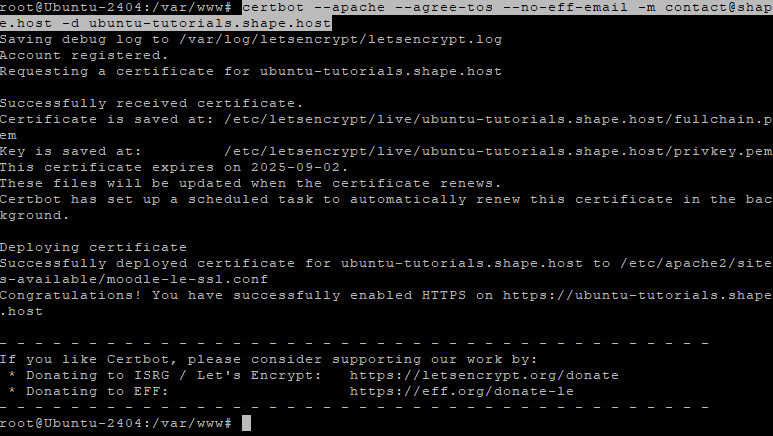
certbot --apache --agree-tos --no-eff-email -m contact@shape.host -d ubuntu-tutorials.shape.host
Step 11: Access Moodle in Your Browser
Visit your server in the browser:
https://your-domain.com
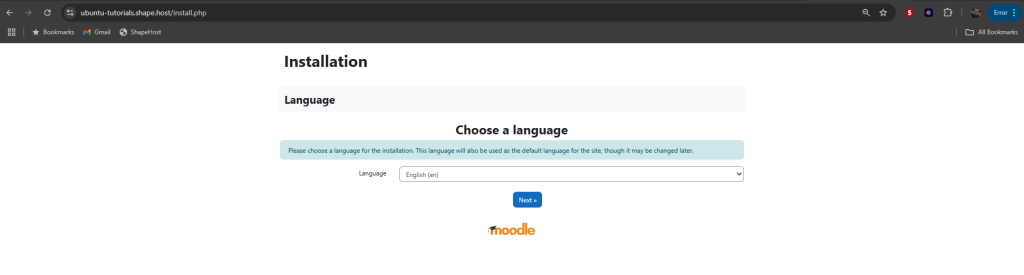
Complete the Moodle installation through the web wizard.
Select your default language for Moodle and click ‘Next‘.
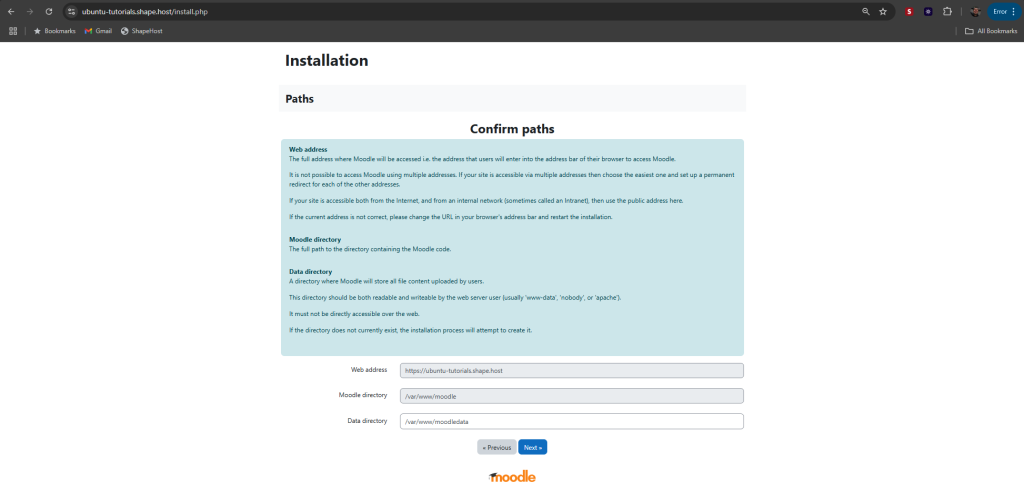
Enter your domain name and Moodle data directory to ‘/var/www/moodledata‘.
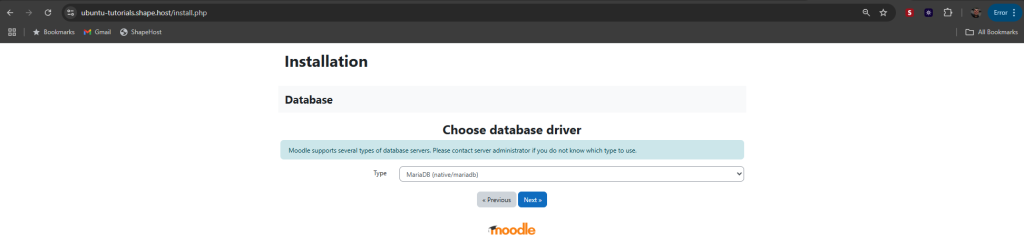
Select ‘MariaDB‘ as the default database for Moodle.
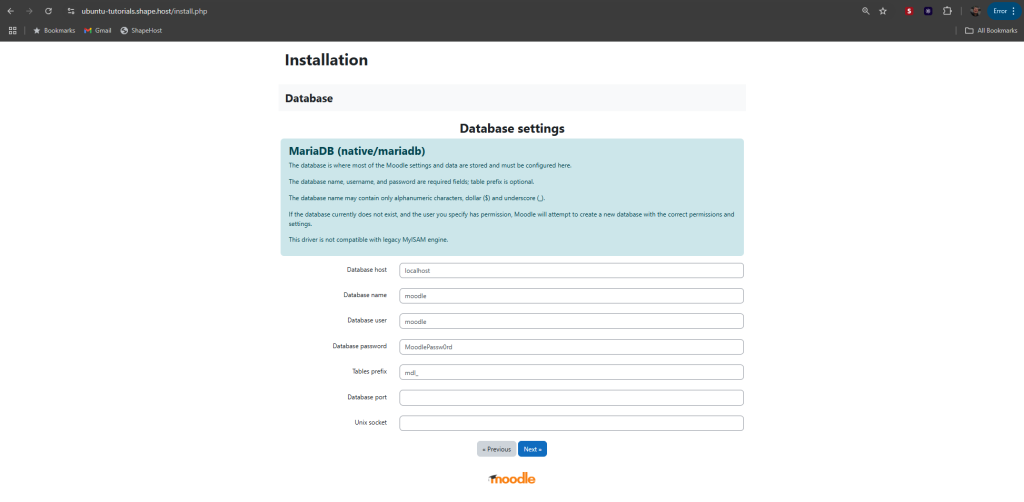
Input your MariaDB database details such as dbname, dbuser, and password.
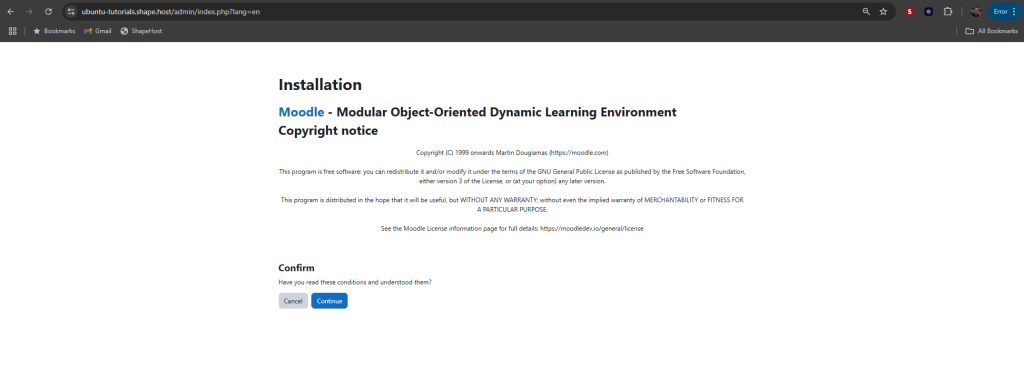
Click ‘Continue‘ on the copyright notice.
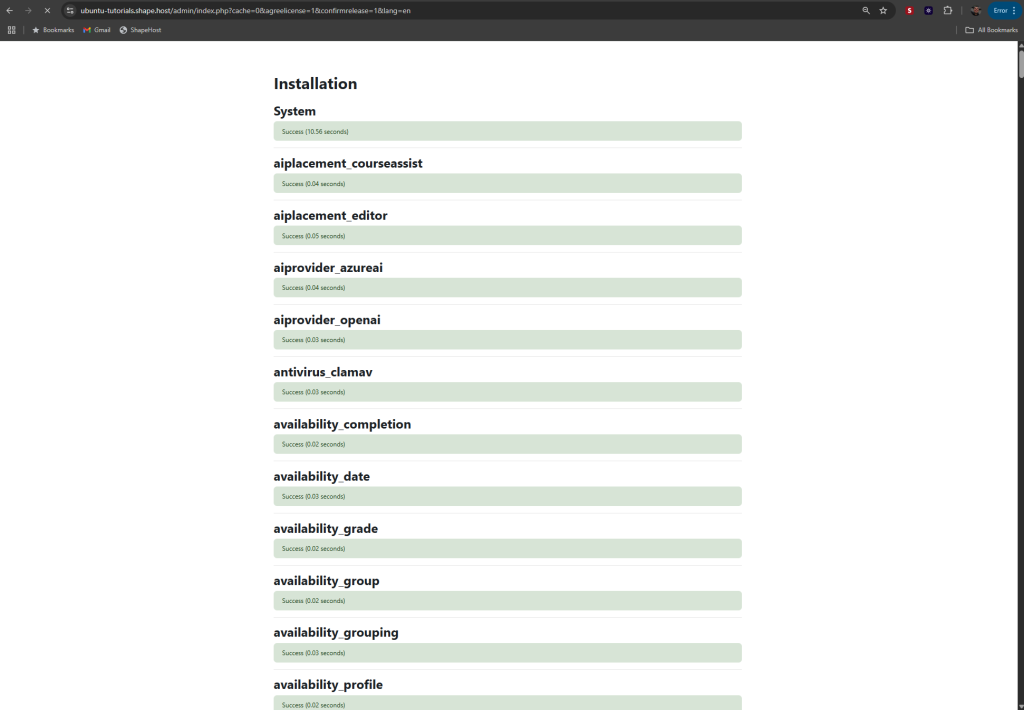
Within the ‘Server checks’ section, make sure that your Debian server is met with the Moodle requirements. The status of every item should be ‘OK‘.
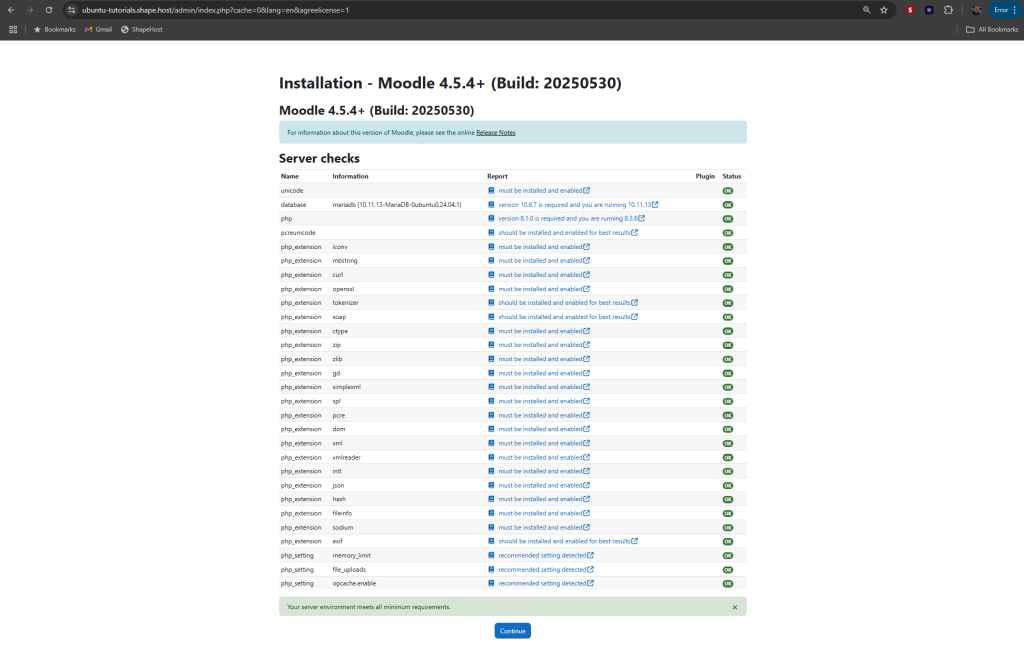
Now you’ll see the Moodle installation like the following:
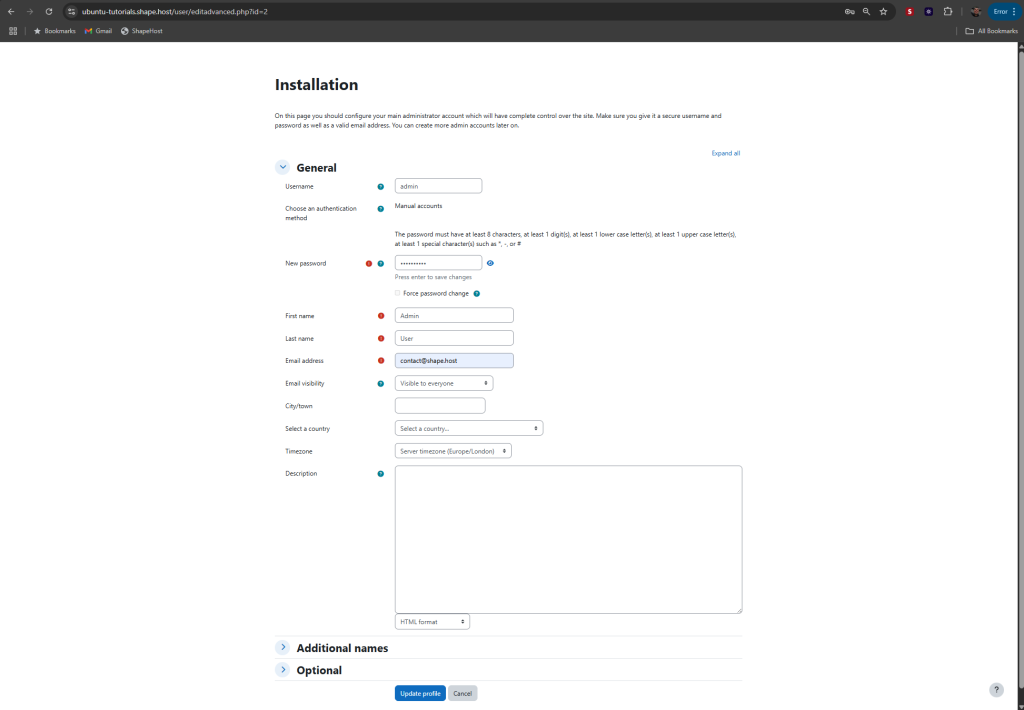
Once the installation is finished, enter your admin details (username, email, and password).
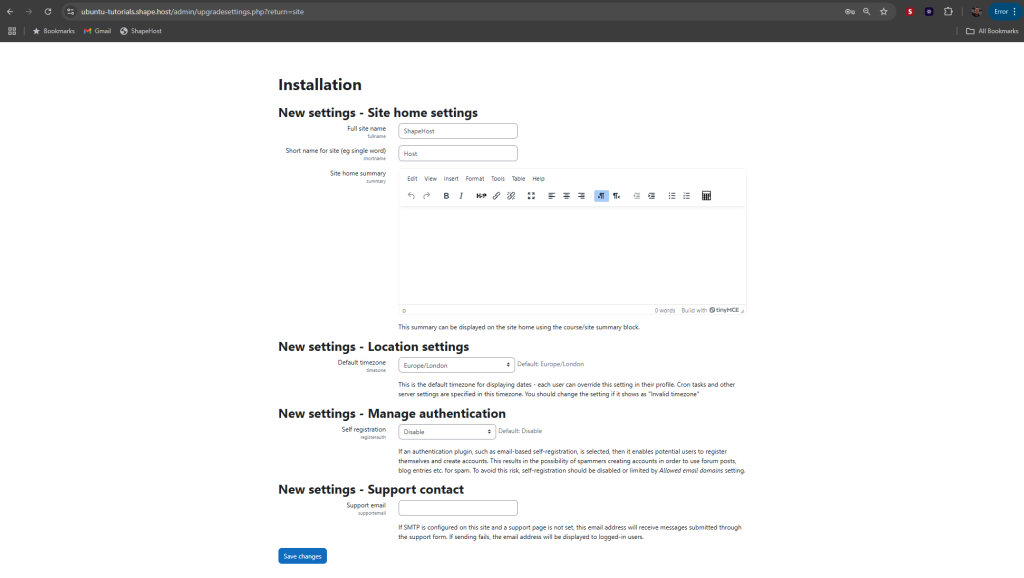
Now enter your Moodle site information.
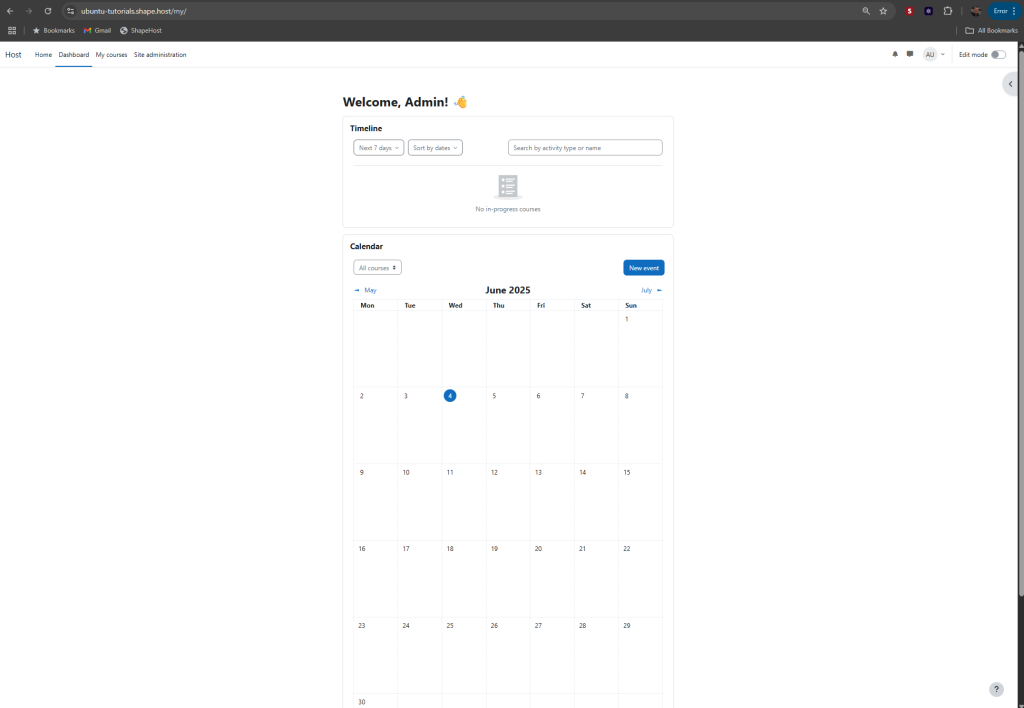
Lastly, you’ll see the following Moodle admin dashboard.
Deploy your own Moodle LMS on Shape.Host Linux SSD VPS: 👉 https://shape.host
Choose Ubuntu 24.04 and set up your online learning platform in minutes.