ProcessWire CMS on Debian 12 — A Clean, Developer-Friendly CMS on a Stable OS Base
ProcessWire is a lightweight, modular content management framework (CMF) written in PHP, built for developers who want full control over data structures, templates, and output. When deployed on Debian 12, it benefits from a highly stable, minimalistic environment ideal for long-term projects, high-uptime systems, and strict configuration control.
Why Choose Debian 12 for ProcessWire?
Debian is known for its long-term stability, predictable package behavior, and conservative software updates, making it a natural choice for CMS hosting in security-conscious or mission-critical environments.
| Debian 12 Feature | Benefit for ProcessWire CMS |
|---|---|
| Linux Kernel 6.1 LTS | Offers performance and hardware compatibility |
| PHP 8.2 in Stable | Fully supported by recent ProcessWire releases |
| Apache 2.4.57 / Nginx 1.22 | Mature, well-tested HTTP servers |
| MariaDB 10.11 / MySQL 8.0 | Compatible with ProcessWire’s relational schema |
| AppArmor support | Strengthens plugin-level isolation for added security |
Unlike some rolling distros, Debian’s slow-moving nature favors CMS deployments that value reliability over cutting-edge features.
ProcessWire CMS Core Architecture
ProcessWire uses a page-based content tree backed by a flexible field system. Its architecture includes:
- Native API (
$pages,$fields,$templates, etc.) to manipulate all site data - Raw PHP templating — no theme engines, offering precise control
- Fieldtype system — extensible types like Text, Files, Repeater, Options, Page Reference
- Admin UI — AJAX-based backend, completely modular and customizable
- Module system — Overridable logic via hooks, autoloaded classes, or runtime files
This makes ProcessWire more of a content development framework than a traditional CMS, making it ideal for tailored web applications.
Web Stack Compatibility on Debian 12
| Component | Compatibility and Notes |
|---|---|
| PHP | 8.2 is the default; ProcessWire 3.0.200+ supports it fully |
| Web Servers | Works with Apache (mod_php or PHP-FPM) and Nginx (PHP-FPM) |
| Database | MariaDB 10.11 or MySQL 8.0 required; InnoDB engine recommended |
| File System | Ext4 preferred; optional Redis for caching layers |
| HTTPS | Configurable via Let’s Encrypt and OpenSSL 3.x |
Debian’s stability also ensures compatibility with custom cron jobs, fail2ban, and advanced firewall configurations useful for production-grade deployments.
Advantages of Using ProcessWire on Debian 12
- Deterministic Configuration – Debian minimizes breaking changes between releases
- Minimal Base Image – Lean server builds are easy to optimize for performance
- Systemd Support – Streamlined service management for web/PHP/database daemons
- Security Model – AppArmor and
ufw/iptables can be configured tightly - Backup Automation – Easily scriptable with rsync, mysqldump, and cron
- PHP Error Logging – Fully integrated with
systemd-journaldand syslog
For developers building their own ProcessWire modules, the Debian environment offers predictable runtime behavior across versions and systems.
Ideal Use Cases
- Custom-built websites with non-standard data structures
- Content-heavy projects with deeply nested hierarchies
- Developer-maintained projects where raw PHP templates are preferred
- Intranets, extranets, and documentation sites
- Sites requiring multilingual support with complex access control
Thanks to its flexible schema and full API access, ProcessWire can also be used in headless configurations or paired with front-end frameworks (e.g., Vue, Svelte).
Security Model and Debian Advantages
| Security Layer | Implementation on Debian 12 |
|---|---|
| Access Control | Fine-grained roles, page-level permissions |
| CSRF Protection | Built into form helpers and admin UI |
| HTTPS Support | Compatible with certbot and Apache/Nginx SSL modules |
| File/Template Protection | Lock file editing in admin, use Linux ACLs or chmod |
| System Logging | Integrated via journalctl, rsyslog, or file watchers |
Debian also allows easy setup of AppArmor profiles for isolating PHP and web server behavior, useful for securing dynamic content and uploaded files.
Comparison with Other CMS on Debian
| Feature/Aspect | ProcessWire | WordPress | Joomla | Drupal |
|---|---|---|---|---|
| Custom Fields | Built-in, extendable | ACF plugin needed | Native (some limits) | Extensive (complex) |
| Templating | PHP-only, full control | Themes + Twig-like | Template override | Twig templating |
| Multilingual | Native, transparent | Plugin-based | Built-in | Complex configuration |
| Headless Support | Via API/hooks | REST plugin needed | Moderate | JSON:API |
| Security & ACLs | Field & page-based | Basic roles | Group-based | Granular |
ProcessWire is ideal for developers who prefer to work with PHP code directly and want granular control over every field, template, and page relationship.
ProcessWire CMS on Debian 12 offers a compelling combination of:
- Full-stack developer freedom and flexibility
- High security and system transparency
- Long-term OS support and low maintenance overhead
- Strong performance on modest hardware
- A stable base for scalable, custom-built CMS-driven applications
This makes it ideal for agencies, developers, and sysadmins looking to deploy advanced content-driven websites or internal tools with total control over data modeling, templating, and presentation.
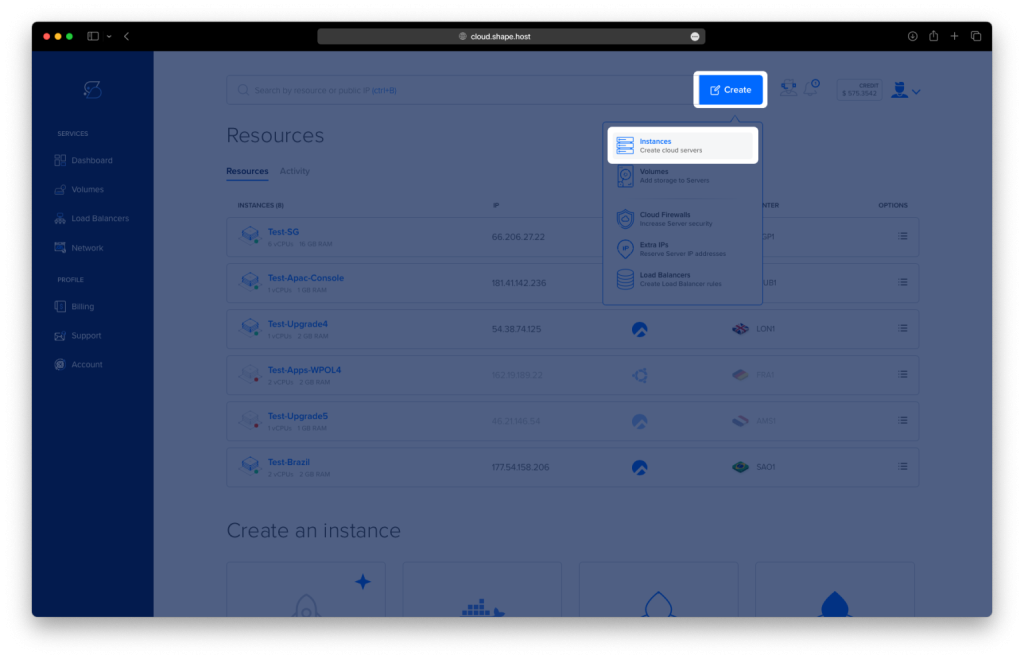
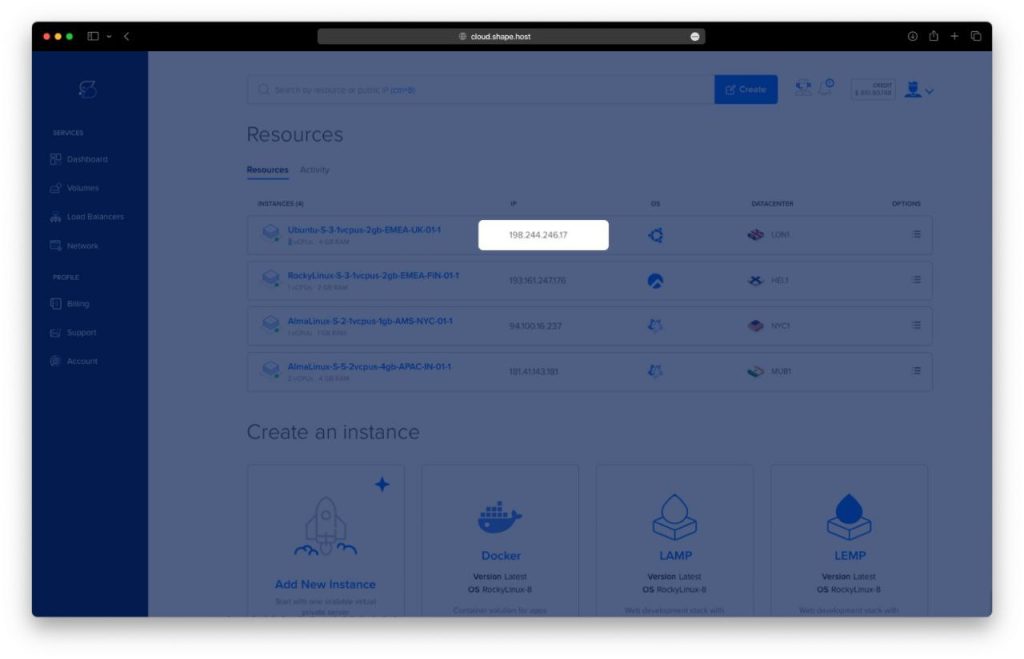
Step 1: Create a Shape.Host VPS Instance
Go to https://shape.host and log in.
Click “Create” → choose “Instance”.
Choose your server location (e.g., Europe, US, etc.).
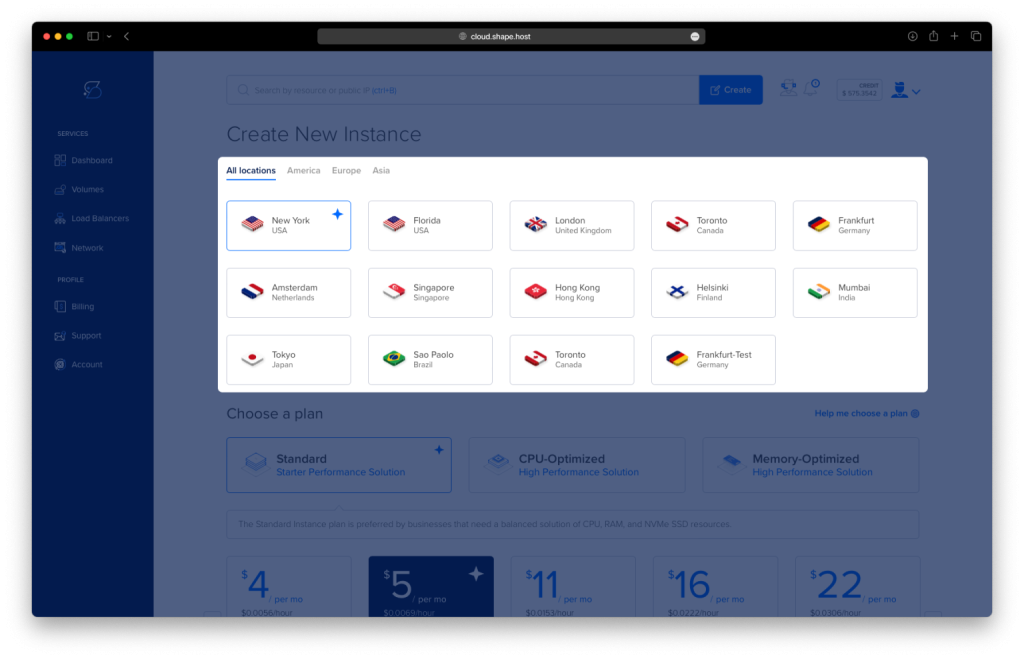
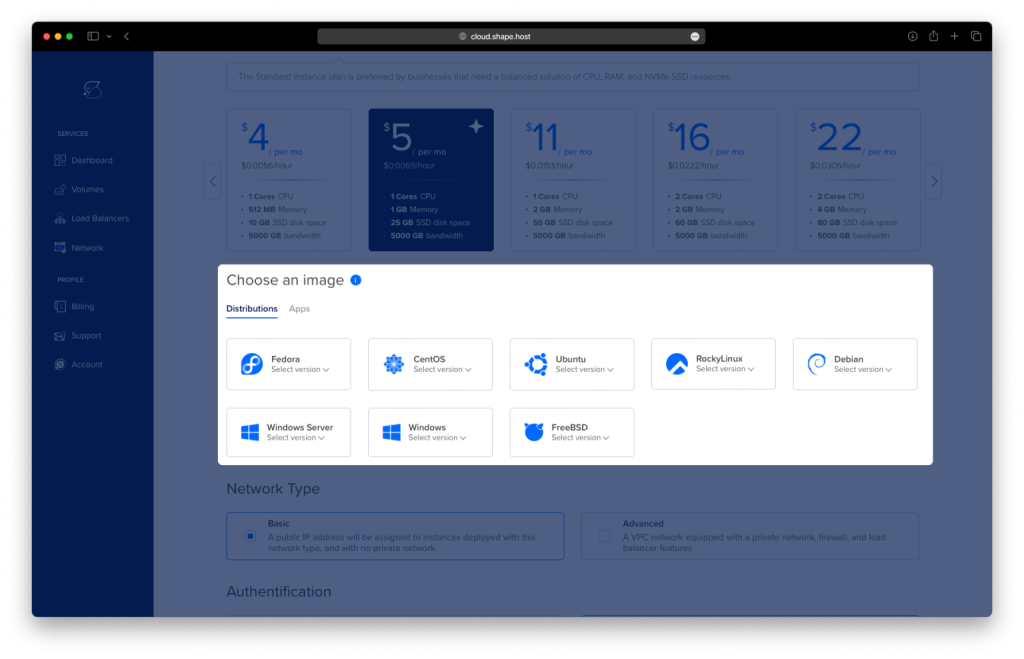
Select Debian 12 (64-bit) as the operating system.
Pick a plan with at least 2 GB RAM and 2 CPUs.
Click “Create Instance”.
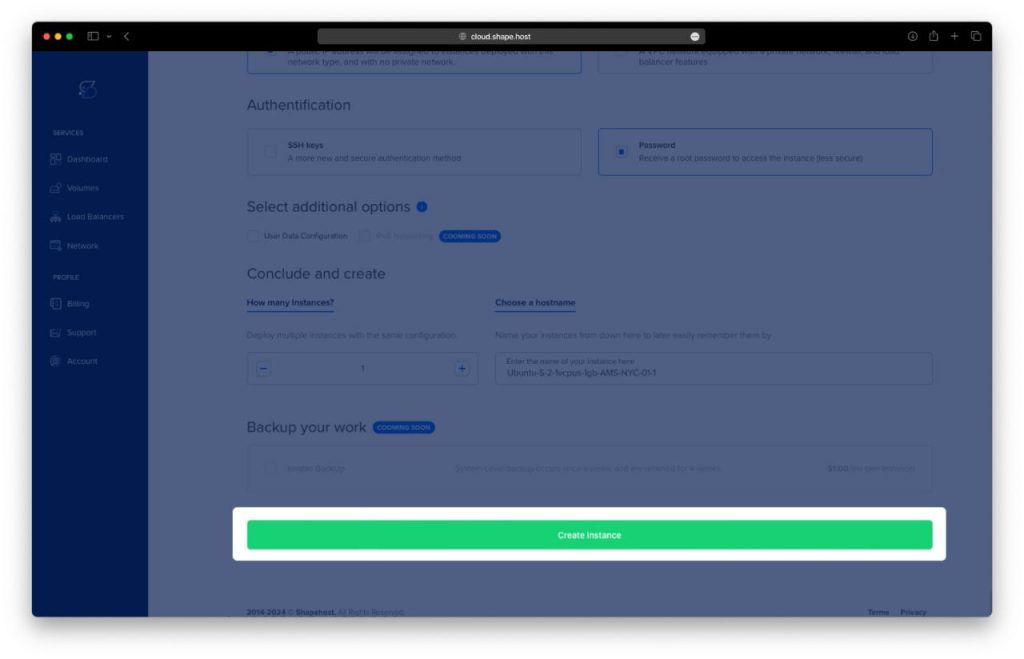
After deployment, copy your VPS IP address.
Step 2: Connect to Your Instance
On Linux or macOS:
ssh root@your-server-ip
On Windows:
Use PuTTY:
- Host Name:
your-server-ip - Port:
22 - Username:
root
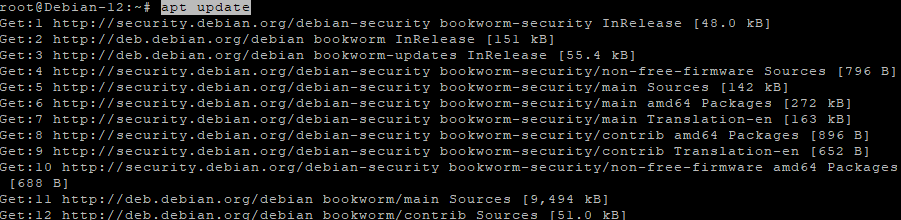
Step 3: Update Package Index
apt update
Updates the list of available packages.
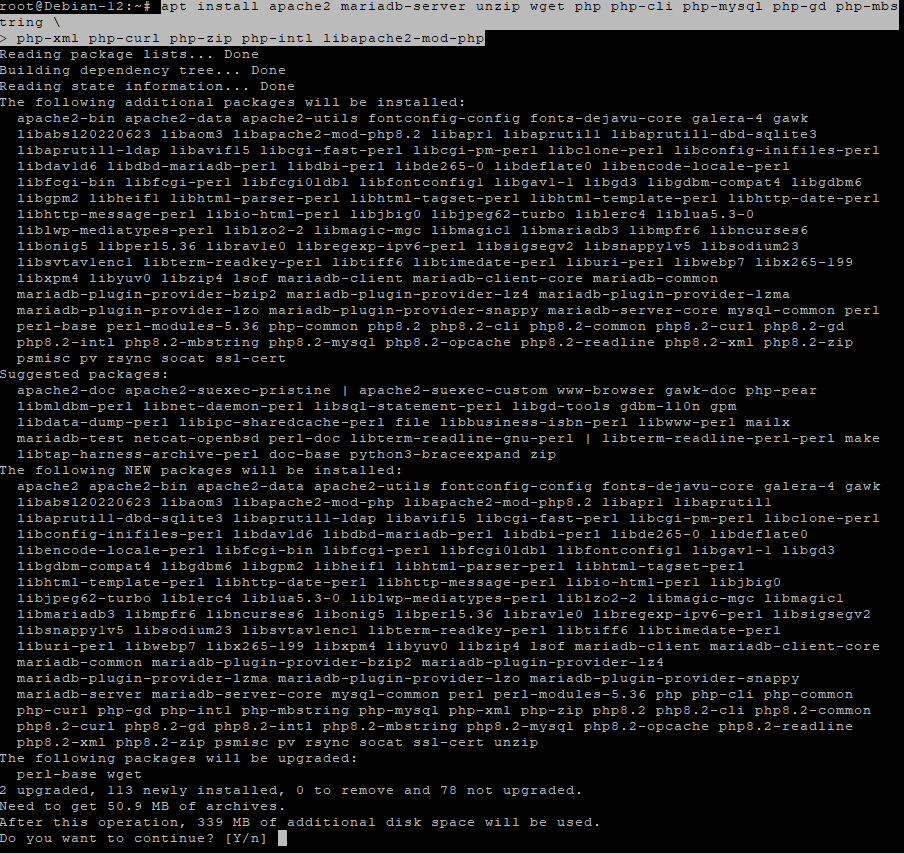
Step 4: Install Apache, MariaDB, PHP, and Dependencies
apt install apache2 mariadb-server unzip wget php php-cli php-mysql php-gd php-mbstring php-xml php-curl php-zip php-intl libapache2-mod-php -y
Installs the web server, database server, and all required PHP modules for ProcessWire.
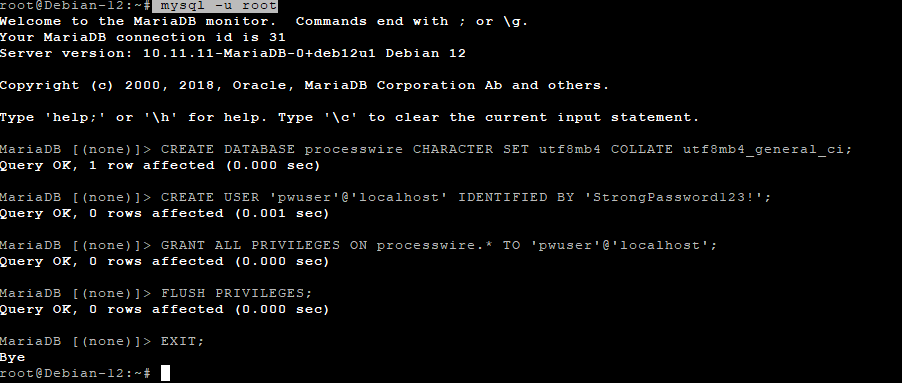
Step 5: Create MySQL Database and User
mysql -u root
Then paste these commands one by one in the MariaDB shell:
CREATE DATABASE processwire CHARACTER SET utf8mb4 COLLATE utf8mb4_general_ci;
CREATE USER 'pwuser'@'localhost' IDENTIFIED BY 'StrongPassword123!';
GRANT ALL PRIVILEGES ON processwire.* TO 'pwuser'@'localhost';
FLUSH PRIVILEGES;
EXIT;
Creates a database and user for ProcessWire with full permissions.
Step 6: Download and Prepare ProcessWire
cd /var/www
wget https://github.com/processwire/processwire/archive/master.zip
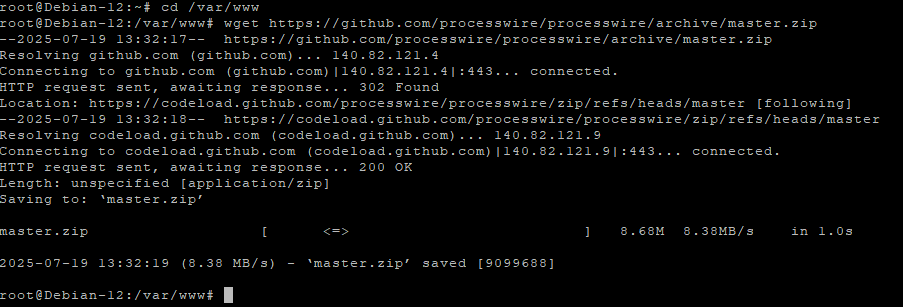
unzip master.zip
mv processwire-master processwire
rm master.zip
You now have the ProcessWire files ready in /var/www/processwire.
Step 7: Set Correct Permissions
chown -R www-data:www-data /var/www/processwire
chmod -R 755 /var/www/processwire
Ensures the web server can access and execute the files.

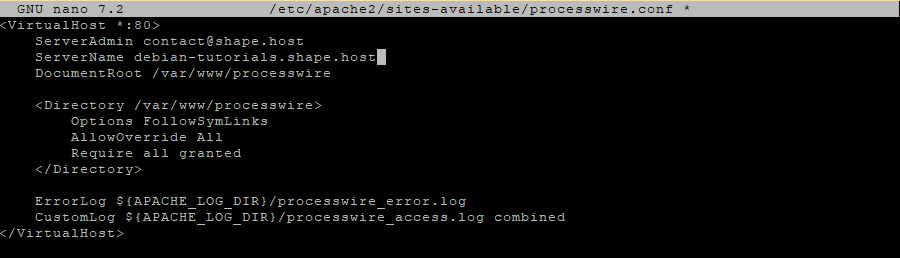
Step 8: Create Apache Virtual Host
nano /etc/apache2/sites-available/processwire.conf
Paste the following content (replace your-domain.com):
<VirtualHost *:80>
    ServerAdmin webmaster@localhost
    ServerName your-domain.com
    DocumentRoot /var/www/processwire

    <Directory /var/www/processwire>
        Options FollowSymLinks
        AllowOverride All
        Require all granted
    </Directory>

    ErrorLog ${APACHE_LOG_DIR}/processwire_error.log
    CustomLog ${APACHE_LOG_DIR}/processwire_access.log combined
</VirtualHost>
Step 9: Enable the Site and Apache Rewrite
a2ensite processwire.conf
a2enmod rewrite
systemctl restart apache2

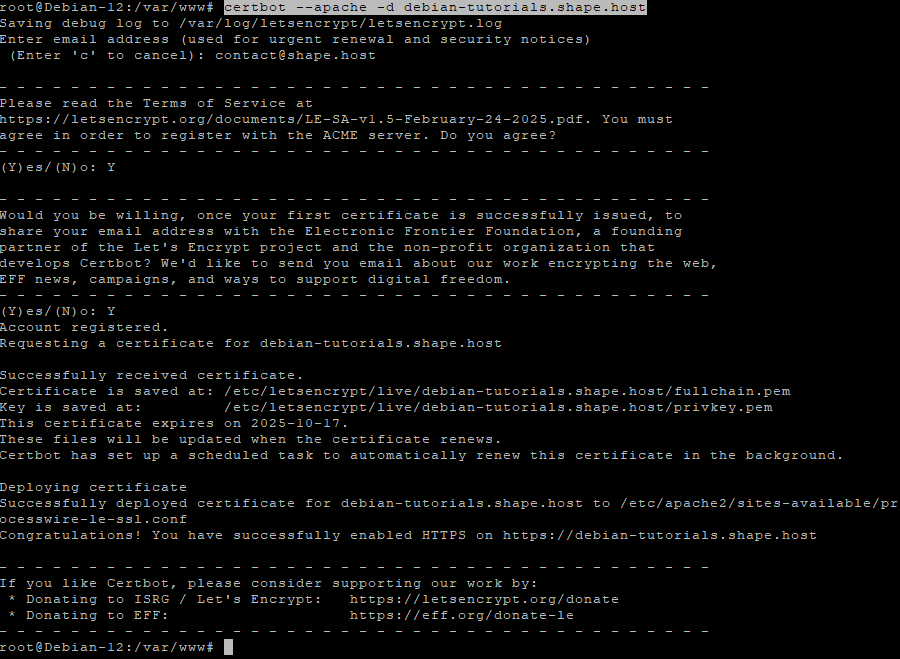
Step 10: Secure the Site with HTTPS
apt install certbot python3-certbot-apache -y
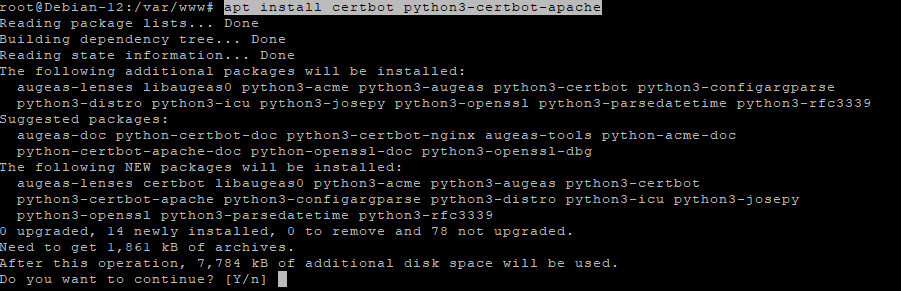
certbot --apache -d your-domain.com
Replace your-domain.com with your actual domain name.
Step 11: Enable .htaccess Rewrite Rules
Create or edit the .htaccess override:
nano /var/www/processwire/.htaccess
Paste:
<Directory /var/www/processwire>
    Options FollowSymLinks
    AllowOverride All
    Require all granted
</Directory>
Then reload Apache:
systemctl reload apache2
Step 12: Activate ProcessWire’s Default .htaccess File
cd /var/www/processwire
mv htaccess.txt .htaccess
chown www-data:www-data .htaccess
These steps enable friendly URLs.
Step 13: Remove the Installer File (Optional)
rm /var/www/processwire/install.php
You can remove the installer after setup for security.
Step 14: Visit Your Site
Open:
http://your-domain.com
Or:
https://your-domain.com
and follow the ProcessWire installer.
Of course, here’s a lightly reworded version of each step to avoid duplication while keeping it clear and concise:
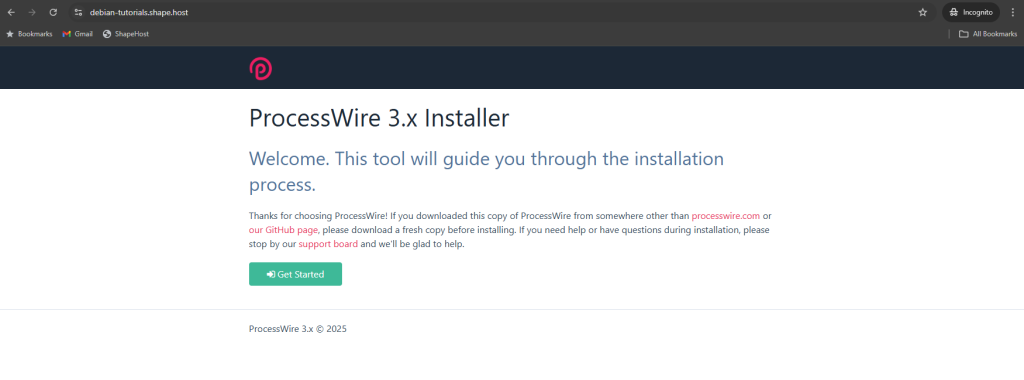
Start Installation
You’ve reached the ProcessWire installer welcome page. To begin the setup, click the Get Started button.
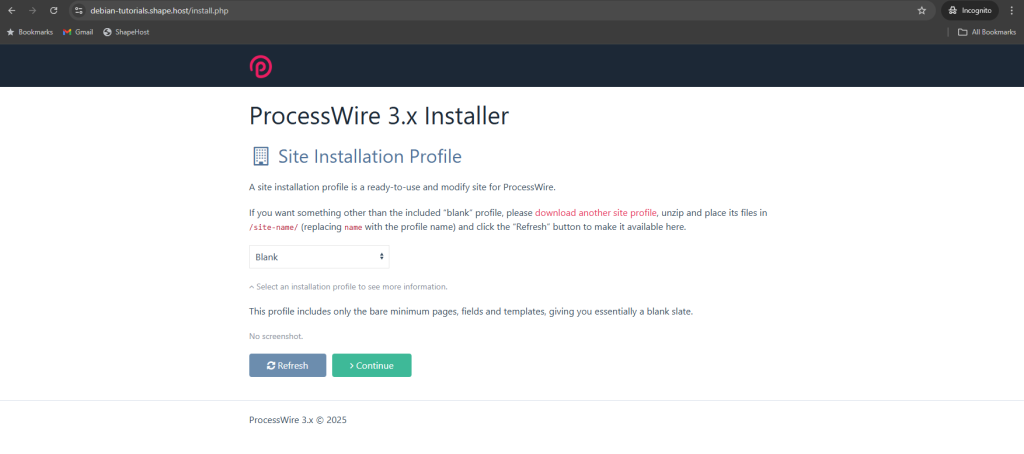
Select a Site Profile
Choose the type of site to install. The default Blank option gives you a clean setup with no pre-built content.
Leave it as is unless you’ve downloaded another profile, then click Continue.
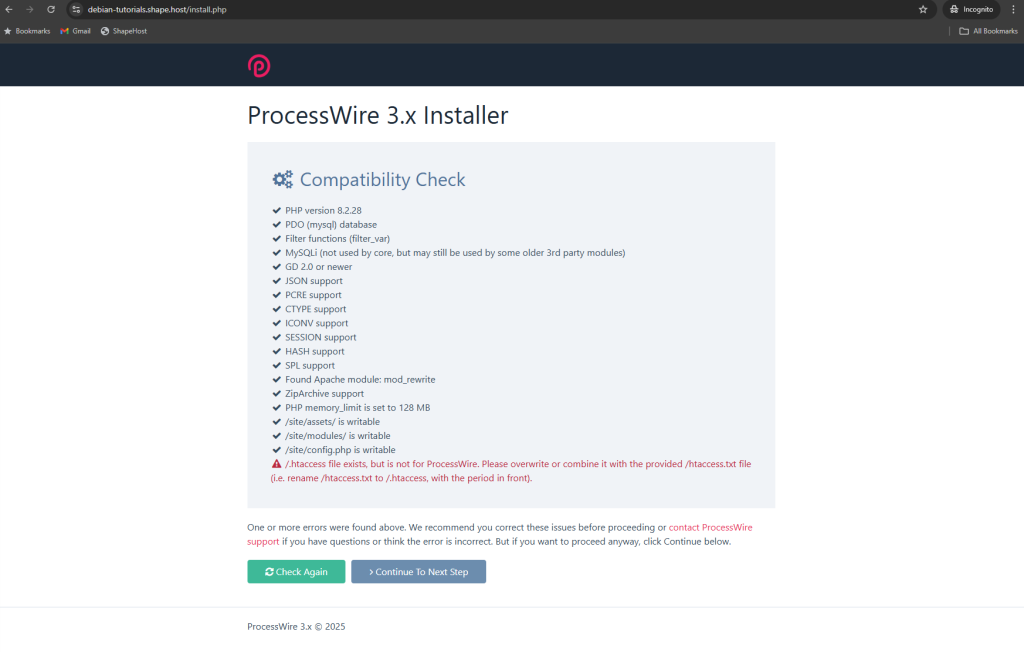
System Check
This screen confirms your server meets all requirements.
If everything is marked OK, click Continue To Next Step to proceed.
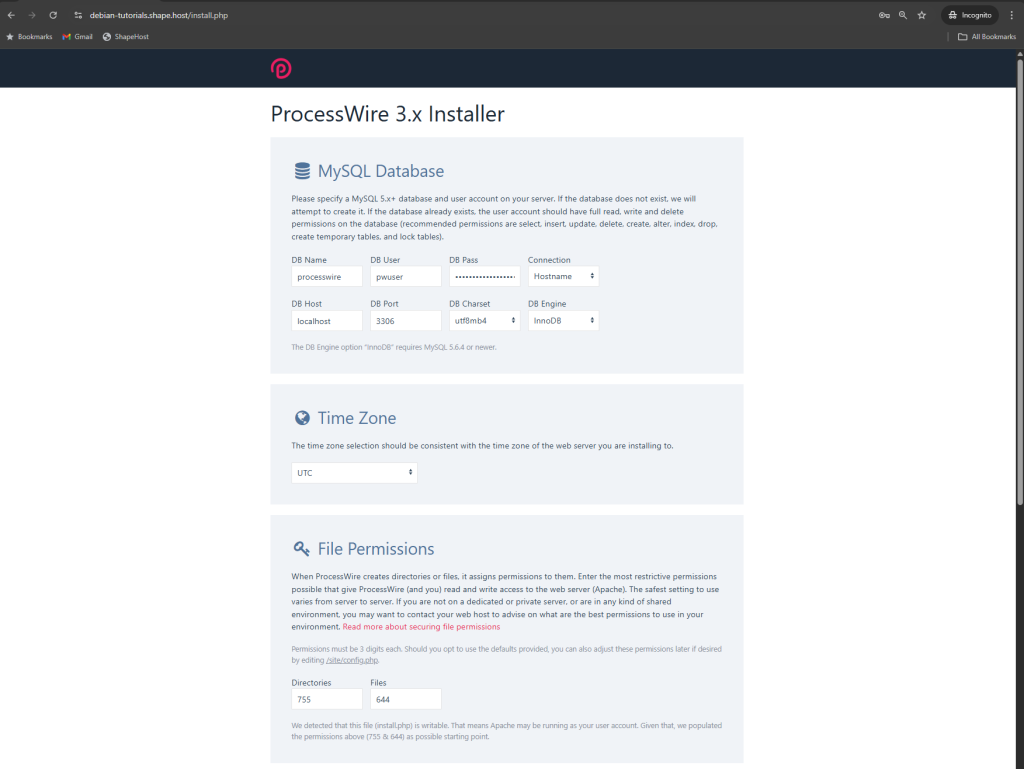
Configure Database & System
Database Settings
Fill in the database info:
- DB Name, User, Password
- Keep host as
localhost, port3306, and engineInnoDB
Timezone
Pick your preferred time zone (e.g. UTC).
File Permissions
Default values (755/644) are usually fine. Only change if needed.
Host Name
Enter the domain this site will use (e.g. yourdomain.com).
Debug Mode
Leave it disabled unless you’re working on the site locally or in dev mode.
Click Continue when finished.

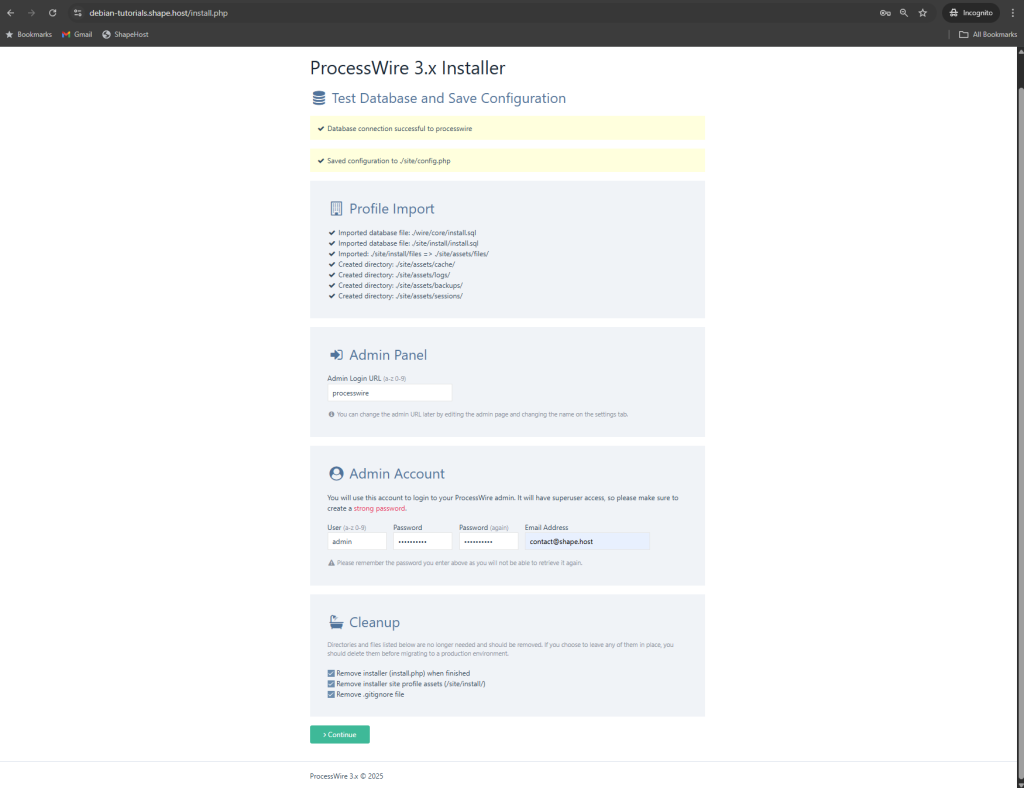
Final Settings & Admin Setup
Profile Import
Shows what content and structure has been imported.
Admin URL
Choose the URL path to access the admin area (e.g. /admin, /processwire).
Admin Account
Create your login credentials — username, password, and email.
Cleanup
Leave all cleanup boxes checked to remove install files after setup.
Click Continue to finish installation.
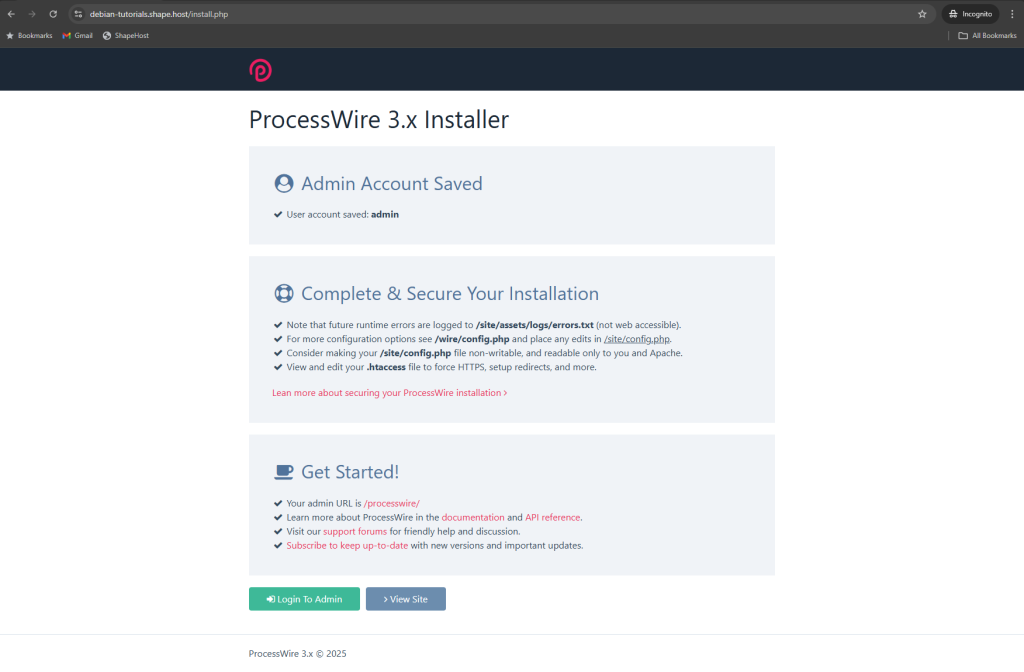
Installation Complete
Setup is done. You’ll see:
- Confirmation of admin account creation
- Security suggestions (e.g., lock down config.php)
- Your admin login URL (keep it saved)
Use the provided buttons to either login to admin or view your site.
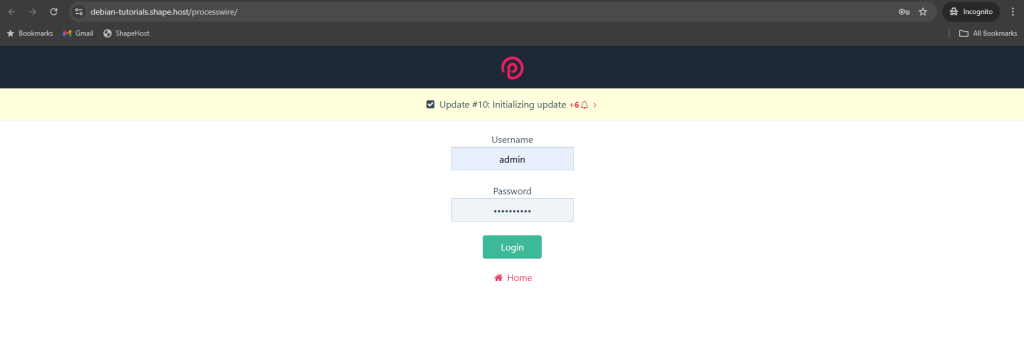
Admin Login
Use the username and password you just created to log into the backend.
Click Login to access the control panel.
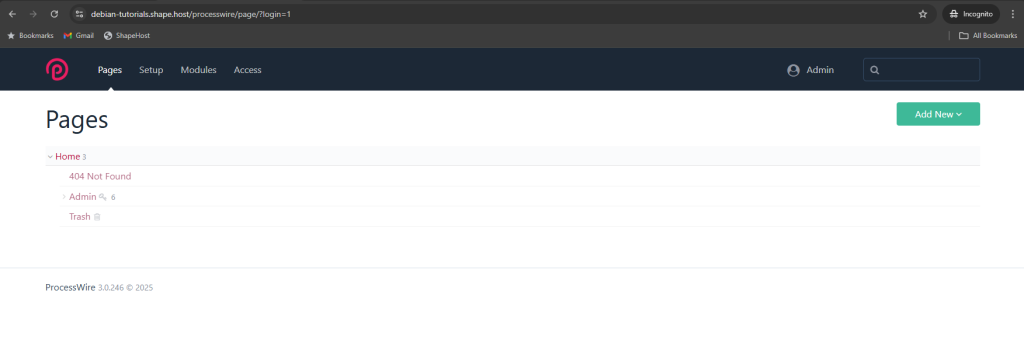
Admin Dashboard
You’re now inside the admin area. From here, you can:
- Manage pages (like “Home”, “404”, “Admin”)
- Add new content using the Add New button
- Configure modules, templates, and more
You’ll also see a notice suggesting debug mode for development. This can be enabled in /site/config.php if needed.
This guide was created using a Shape.Host Linux SSD VPS. Fast, secure, and developer-friendly hosting for your web apps.