What is WordPress?
WordPress is a powerful and user-friendly content management system (CMS) that allows you to build and manage websites of all types—from simple blogs to complex business portals and online stores. It is open-source, highly extensible with themes and plugins, and supports everything from blogging to e-commerce via tools like WooCommerce.
Why Use AlmaLinux 9 for Hosting WordPress?
AlmaLinux 9 is a Red Hat Enterprise Linux (RHEL)-compatible operating system developed as a stable, free replacement for CentOS. It is ideal for production servers where long-term support, security, and predictable updates are essential.
Key Benefits of AlmaLinux 9:
- 10-year support lifecycle (until 2032)
- Binary-compatible with RHEL 9
- Ideal for enterprise-grade WordPress deployments
- SELinux-enabled for security
- Compatible with tools like dnf, systemd, and firewalld
What is the LAMP Stack?
LAMP is an acronym for:
- Linux – Operating system (AlmaLinux 9)
- Apache – Web server
- MariaDB – Relational database
- PHP 8.3 – Server-side scripting language
This stack is well-known for its reliability, scalability, and widespread community support.
Why Use PHP 8.3 on AlmaLinux 9?
AlmaLinux 9 comes with older PHP versions by default (e.g., PHP 8.0), so PHP 8.3 must be installed from the Remi repository, which is actively maintained and offers the latest PHP builds.
Advantages of PHP 8.3:
- Faster execution and lower memory usage
- Enhanced syntax and strict typing
- JIT (Just-In-Time) compilation support
- Improved plugin and theme performance
MariaDB on AlmaLinux 9
MariaDB 10.5+ is included in the base repository and is fully compatible with WordPress. It stores all website content, user data, metadata, settings, and plugin information.
Recommended Configurations:
- Use
InnoDBfor all tables - Enable slow query logging for optimization
- Secure with
mysql_secure_installation - Restrict remote access unless needed
Apache on AlmaLinux 9
Apache 2.4 is the default web server and is widely used for WordPress deployments.
Key Apache Features for WordPress:
.htaccesssupport for permalinks and redirects- Easy SSL configuration with mod_ssl
- Compatible with mod_rewrite, mod_deflate, and http2
- Supports virtual hosts for hosting multiple WordPress sites
Typical Use Cases
- Small business websites and blogs
- Corporate portals with custom themes
- News and magazine-style sites
- E-commerce platforms with WooCommerce
- University and institutional websites
Security Best Practices
- Use SELinux in enforcing mode
- Set proper file permissions (
644for files,755for directories) - Restrict access to
wp-adminor secure with HTTP Auth - Disable XML-RPC if unused
- Install Fail2Ban to prevent brute-force logins
- Use Certbot with Let’s Encrypt for free HTTPS
Performance Optimization Tips
- Enable OPcache with PHP 8.3
- Use caching plugins like WP Super Cache or W3 Total Cache
- Enable GZIP compression and browser caching in Apache
- Optimize the database with plugins like WP-Optimize
- Use a CDN for faster delivery of images and static assets
Advantages of WordPress on AlmaLinux 9 LAMP Stack
| Component | Benefit |
|---|---|
| AlmaLinux 9 | Long-term supported, stable RHEL-compatible OS |
| Apache | Industry-standard HTTP server with strong plugin support |
| MariaDB | Lightweight, open-source, and fully compatible with WordPress |
| PHP 8.3 | Fast, modern, and required by many newer themes/plugins |
Running WordPress on AlmaLinux 9 with Apache, MariaDB, and PHP 8.3 delivers a secure, stable, and enterprise-ready platform for website hosting. By combining the robustness of AlmaLinux with the speed of PHP 8.3 and the flexibility of WordPress, you can deploy everything from personal blogs to mission-critical web applications with confidence.
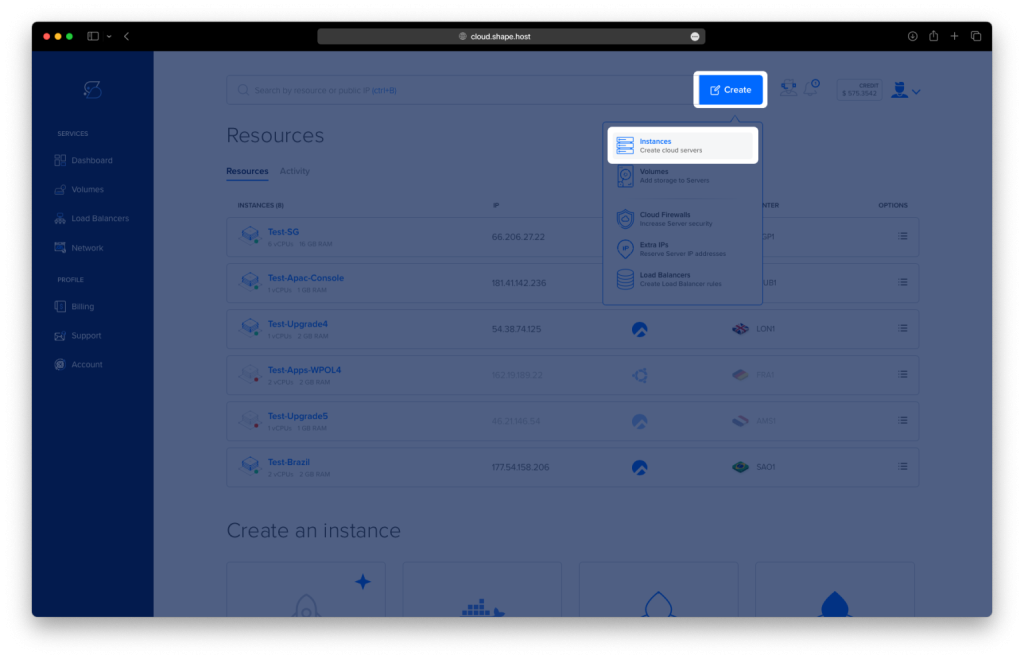
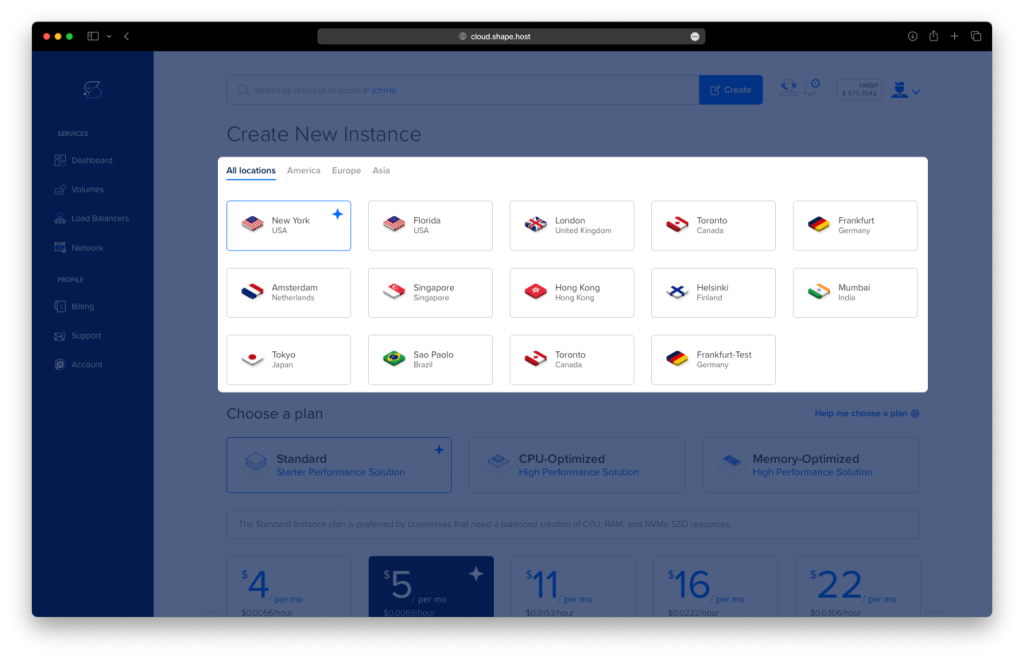
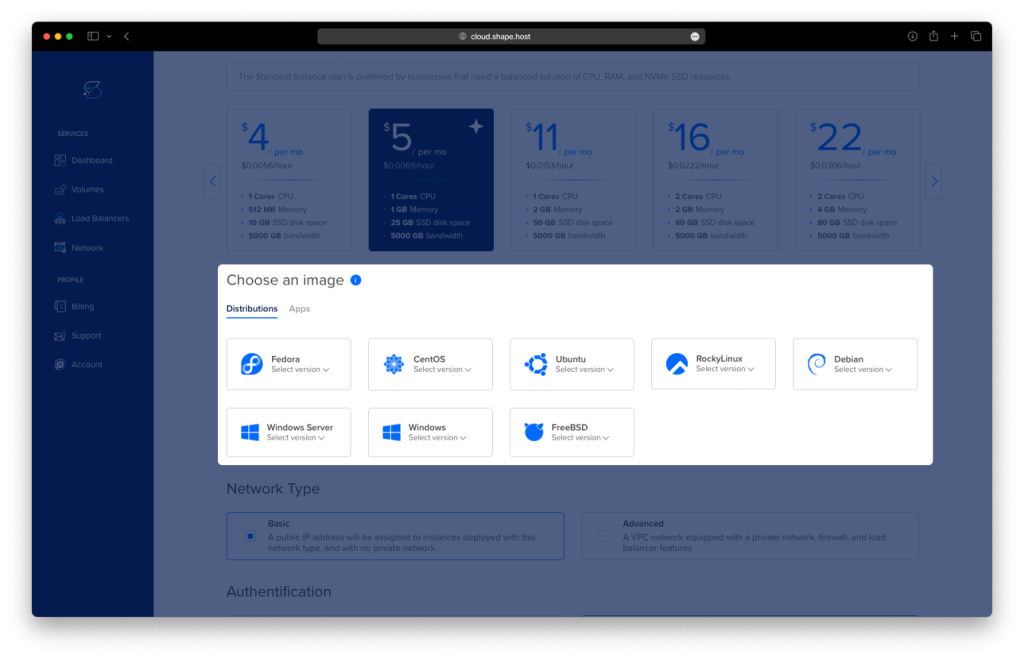
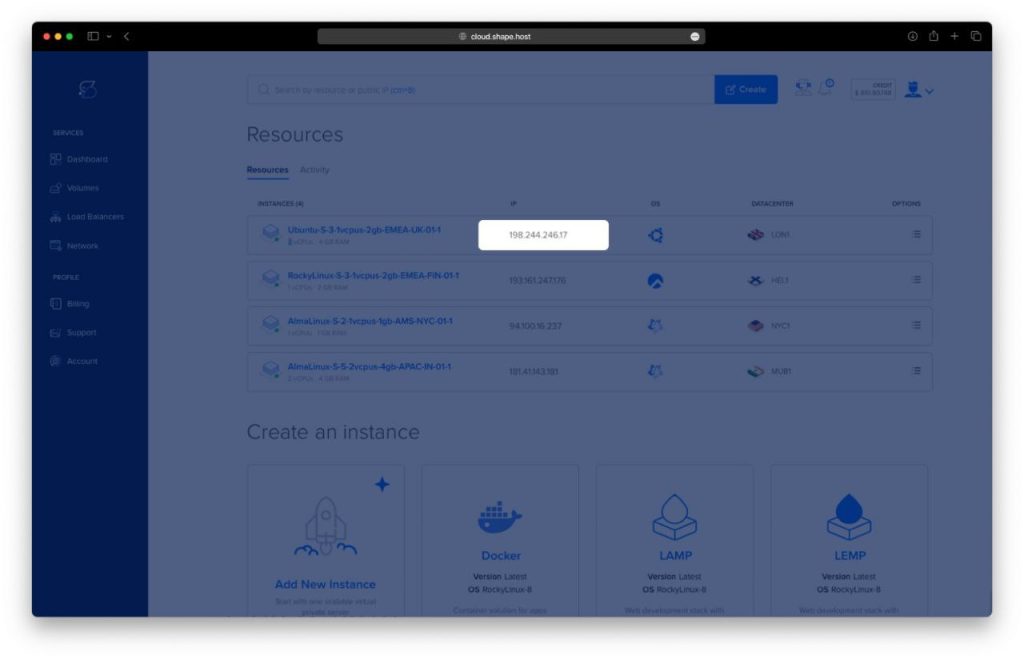
Step 1: Set Up a Server Instance on Shape.Host
Log into your Shape.Host account.
Click “Create” and choose “Instance”.
Select a server location close to your target audience.
Pick AlmaLinux 9 (64-bit) as the operating system.
Choose a plan with at least 2 vCPU, 4 GB RAM, and 20 GB SSD.
Click “Create Instance” and wait for deployment.
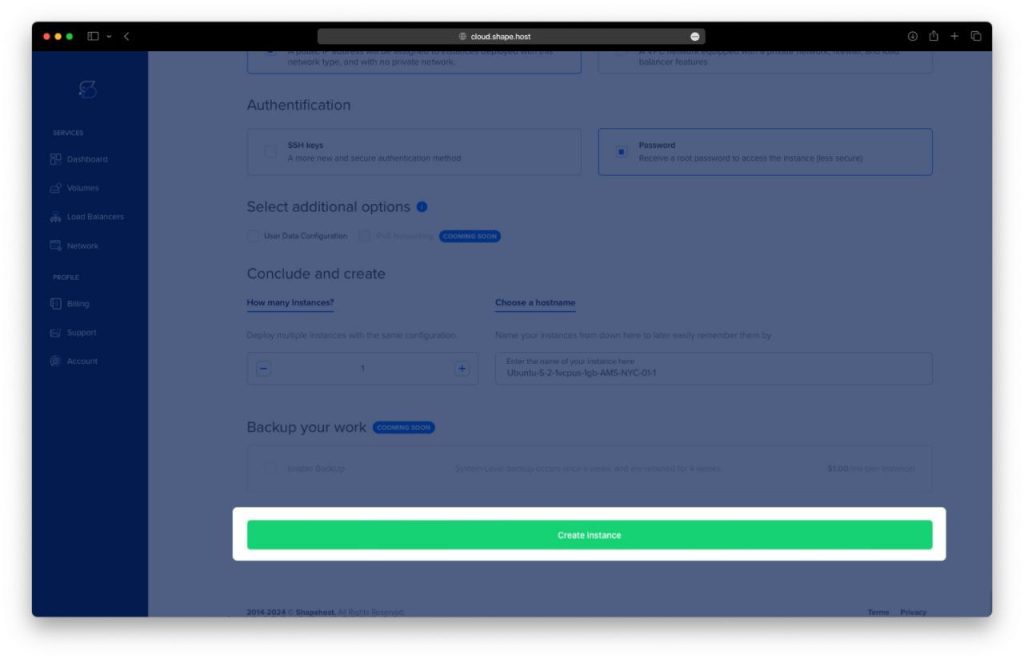
Copy your new instance’s IP address for SSH access.
Step 2: Connect to Your AlmaLinux 9 Server
On Linux/macOS:
ssh root@your_server_ip
On Windows:
- Use PuTTY, enter the IP, connect via port 22, and log in as
root.
Step 3: Install WordPress with Apache, MariaDB, PHP 8.3
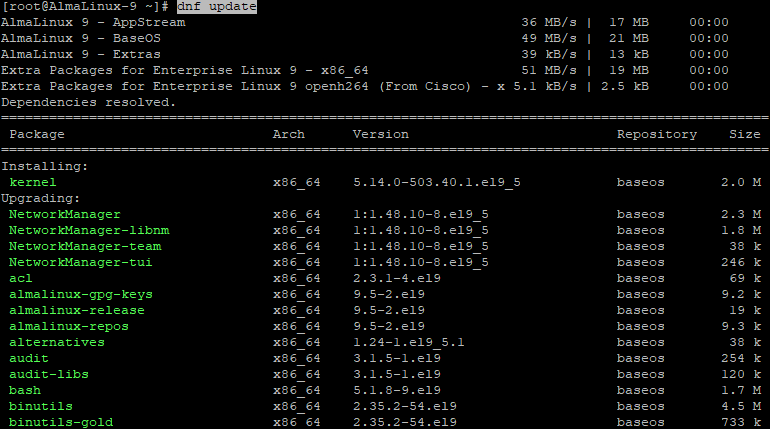
1. Update the System
dnf update
🔹 Updates system packages to the latest versions.
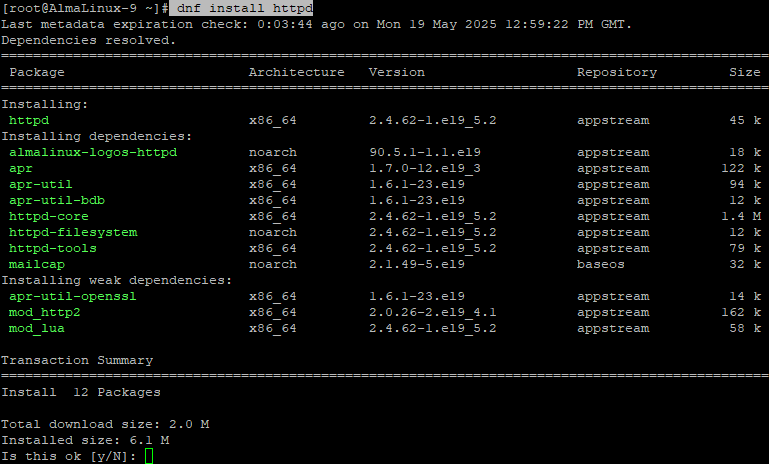
2. Install Apache Web Server
dnf install httpd
🔹 Installs the Apache HTTP server.
systemctl enable httpd
🔹 Ensures Apache starts at boot.
systemctl start httpd
🔹 Starts the Apache service now.

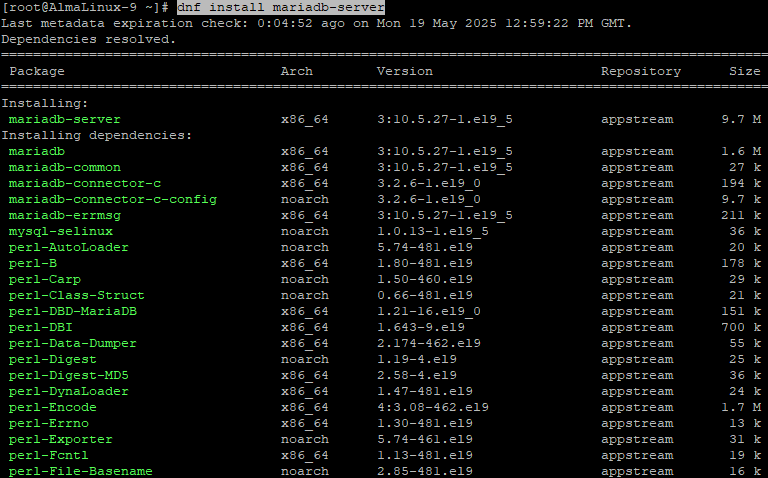
3. Install MariaDB Server
dnf install mariadb-server
🔹 Installs the MariaDB server package.
systemctl enable mariadb
🔹 Enables MariaDB to start on boot.
systemctl start mariadb
🔹 Starts the MariaDB service.

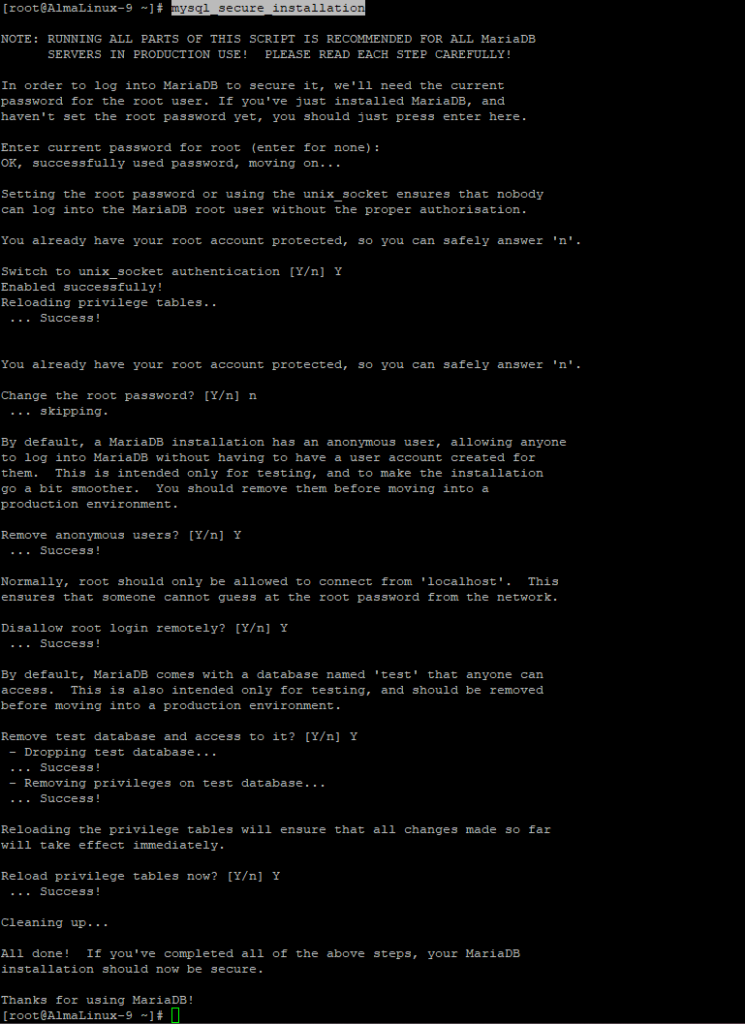
4. Secure the MariaDB Server
mysql_secure_installation
🔹 Set root password, remove anonymous users, disable remote root login, and remove test DB.
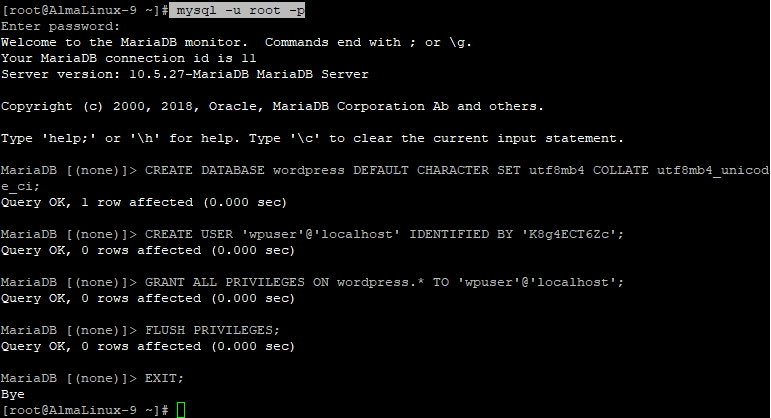
5. Create WordPress Database and User
mysql -u root -p
🔹 Logs into MariaDB with root credentials.
Inside the MariaDB shell:
CREATE DATABASE wordpress DEFAULT CHARACTER SET utf8mb4 COLLATE utf8mb4_unicode_ci;
CREATE USER 'wpuser'@'localhost' IDENTIFIED BY 'strongpassword';
GRANT ALL PRIVILEGES ON wordpress.* TO 'wpuser'@'localhost';
FLUSH PRIVILEGES;
EXIT;
🔹 Creates a dedicated database and user for WordPress.
6. Add Remi Repository for PHP 8.3
dnf install epel-release
🔹 Installs the EPEL repository.

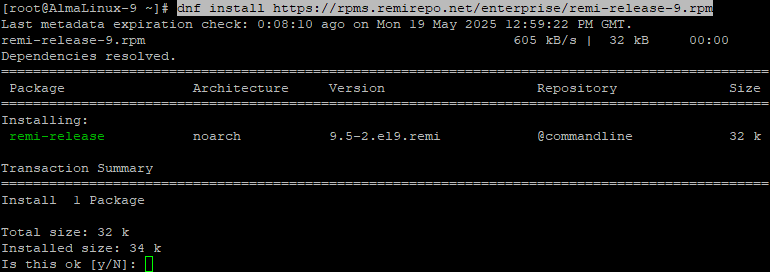
dnf install https://rpms.remirepo.net/enterprise/remi-release-9.rpm
🔹 Adds Remi’s PHP repository for RHEL 9-compatible systems.
dnf module reset php
🔹 Resets the current PHP module to allow selecting a new version.

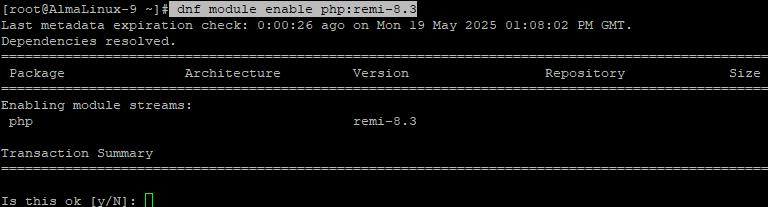
dnf module enable php:remi-8.3
🔹 Enables PHP 8.3 from Remi repo.
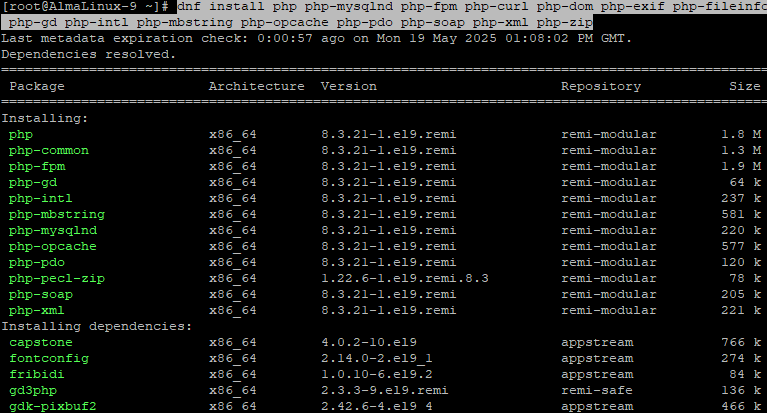
7. Install PHP 8.3 and Required Extensions
dnf install php php-mysqlnd php-fpm php-curl php-dom php-exif php-fileinfo php-gd php-intl php-mbstring php-opcache php-pdo php-soap php-xml php-zip
🔹 Installs PHP 8.3 with all necessary extensions for WordPress.
systemctl restart httpd
🔹 Reloads Apache with PHP enabled.
8. Download and Configure WordPress
cd /var/www/html
🔹 Navigate to Apache’s root directory.
rm -f index.html
🔹 Remove the default index file.
wget https://wordpress.org/latest.tar.gz
🔹 Download the latest version of WordPress.

tar -xvzf latest.tar.gz
🔹 Extract the archive.
mv wordpress/* .
🔹 Move WordPress files to the current directory.
rm -rf wordpress latest.tar.gz
🔹 Clean up unnecessary files.
9. Set Permissions
chown -R apache:apache /var/www/html
🔹 Assign ownership to Apache.
find /var/www/html -type d -exec chmod 755 {} \;
🔹 Set correct permissions for directories.
find /var/www/html -type f -exec chmod 644 {} \;
🔹 Set correct permissions for files.

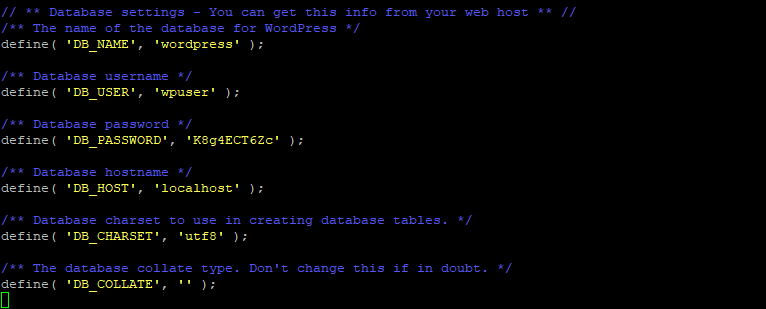
10. Configure WordPress Database Settings
cp wp-config-sample.php wp-config.php
nano wp-config.php
🔹 Edit the database settings:
define( 'DB_NAME', 'wordpress' );
define( 'DB_USER', 'wpuser' );
define( 'DB_PASSWORD', 'strongpassword' );
define( 'DB_HOST', 'localhost' );
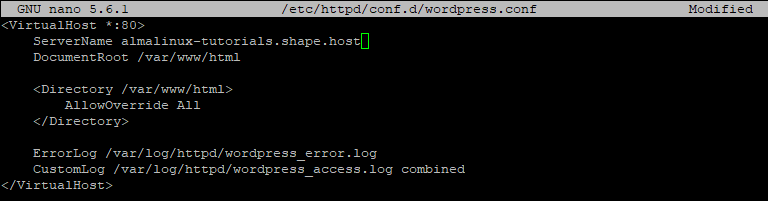
11. Create Virtual Host for WordPress
nano /etc/httpd/conf.d/wordpress.conf
Paste this config:
<VirtualHost *:80>
    ServerName example.com
    DocumentRoot /var/www/html

    <Directory /var/www/html>
        AllowOverride All
    </Directory>

    ErrorLog /var/log/httpd/wordpress_error.log
    CustomLog /var/log/httpd/wordpress_access.log combined
</VirtualHost>
12. Allow .htaccess Overrides
nano /etc/httpd/conf/httpd.conf
Locate:
<Directory "/var/www">
    AllowOverride None
Change it to:
<Directory "/var/www">
    AllowOverride All

13. Restart Apache
systemctl restart httpd
🔹 Apply the virtual host and override changes.

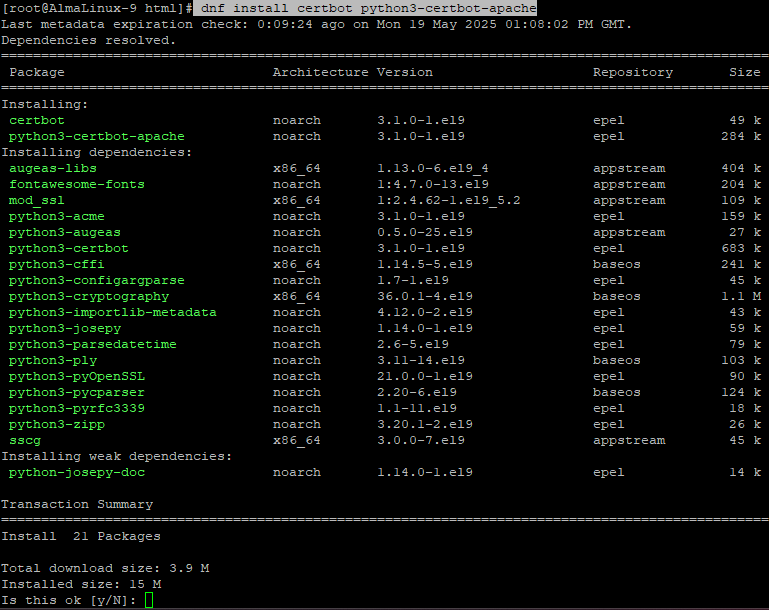
14. Enable HTTPS with Certbot
dnf install certbot python3-certbot-apache
🔹 Installs Certbot for managing SSL.
firewall-cmd --permanent --add-service=http
🔹 Opens port 80.
systemctl unmask firewalld
systemctl enable firewalld
systemctl start firewalld
🔹 Unmasks, enables, and starts the firewall service.
firewall-cmd --permanent --add-service=http
firewall-cmd --permanent --add-service=https
firewall-cmd --reload
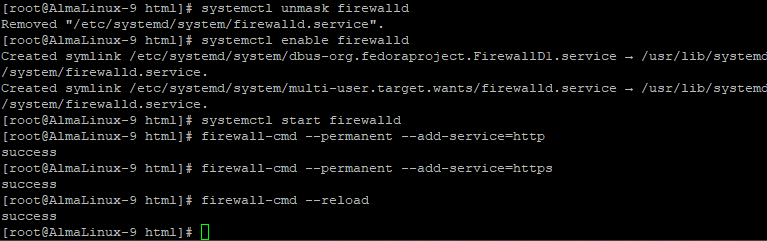
🔹 Allows HTTP and HTTPS access through the firewall.
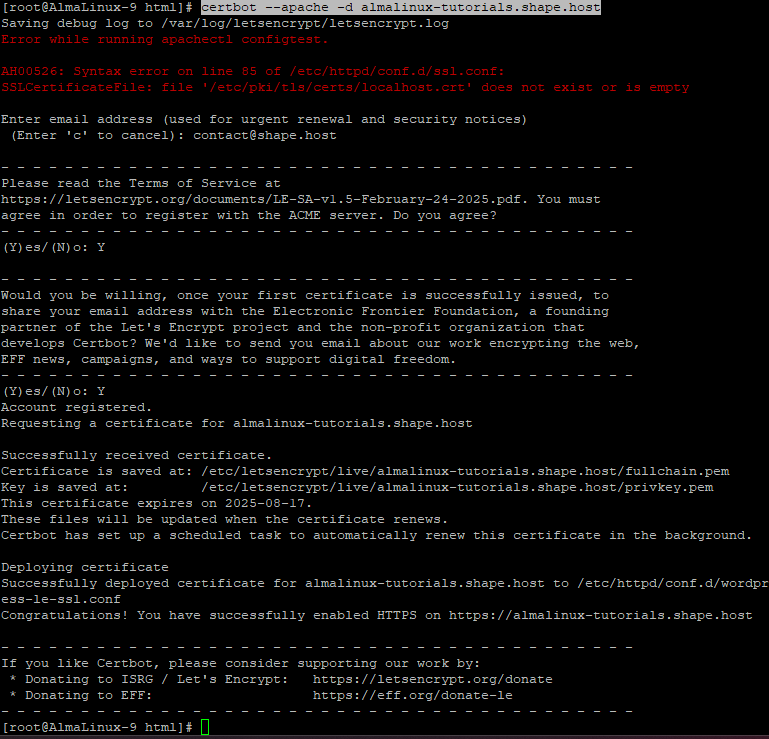
certbot --apache -d almalinux-tutorials.shape.host
🔹 Issues a free SSL certificate for your domain.
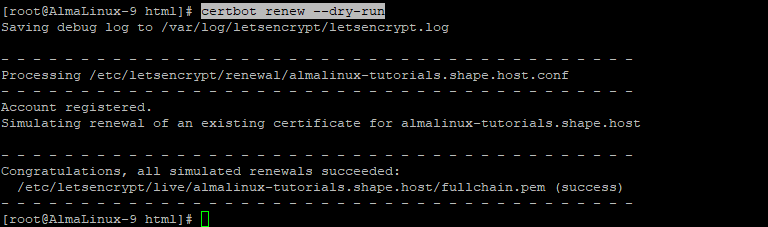
certbot renew --dry-run
🔹 Tests automatic SSL renewal.
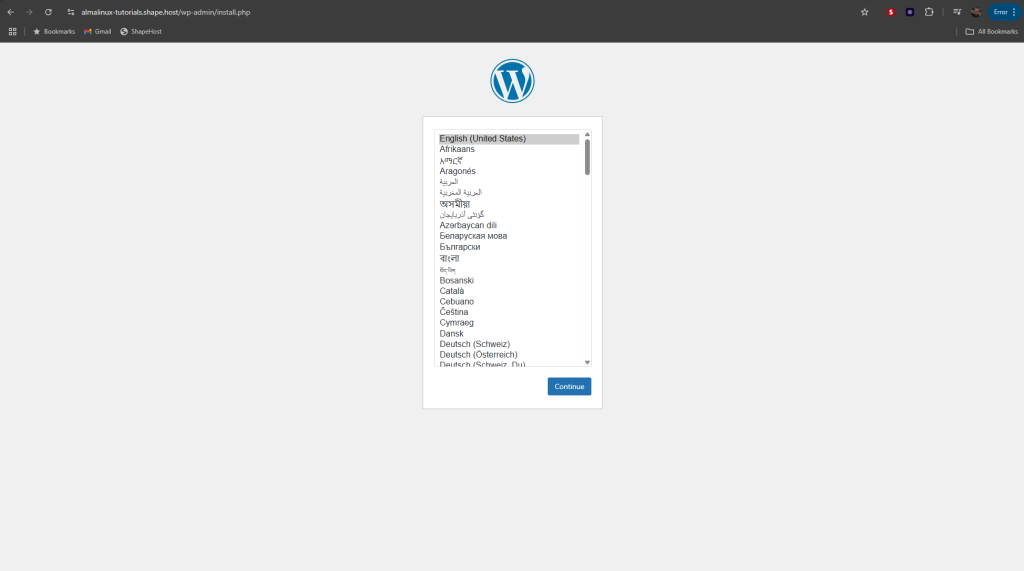
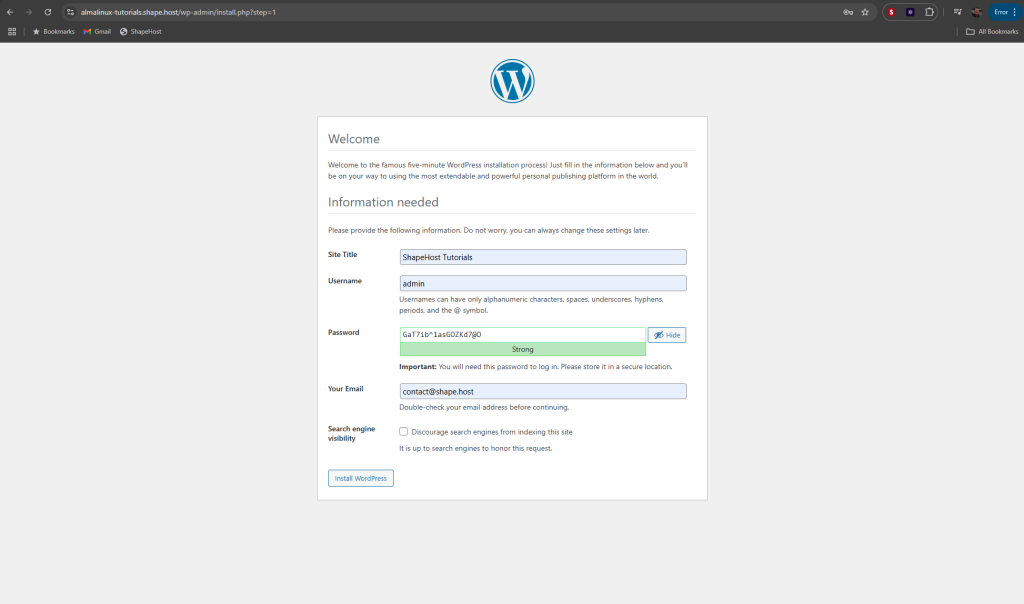
Step 4: Finish Setup in Browser
Visit:
https://your-domain.com
You’ll see the WordPress installation screen. Complete the setup by entering your site title, admin user, and password.
Create an admin account and click the Install WordPress button.
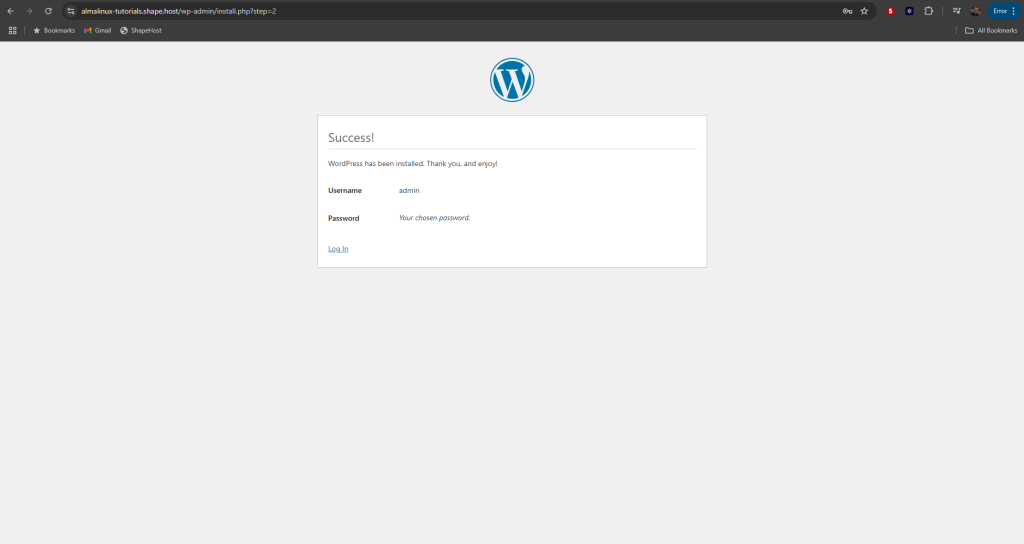
You’ve installed WordPress on AlmaLinux 9 with a full LAMP stack, PHP 8.3, and Let’s Encrypt SSL. Your site is now ready for production use, development, or client deployment.
For high-performance, secure, and scalable hosting, deploy your WordPress site on Shape.Host Linux SSD VPS — designed for modern web infrastructure.