Let’s Encrypt is a Certificate Authority (CA) that facilitates obtaining and installing free TLS/SSL certificates, thereby enabling encrypted HTTPS on web servers. It streamlines the process by providing a software client, Certbot, that attempts to automate most (if not all) of the required steps. Currently, the entire process of obtaining and installing a certificate is fully automated on both Apache and Nginx.
Step 1: Deploying a Cloud Instance on Shape.host
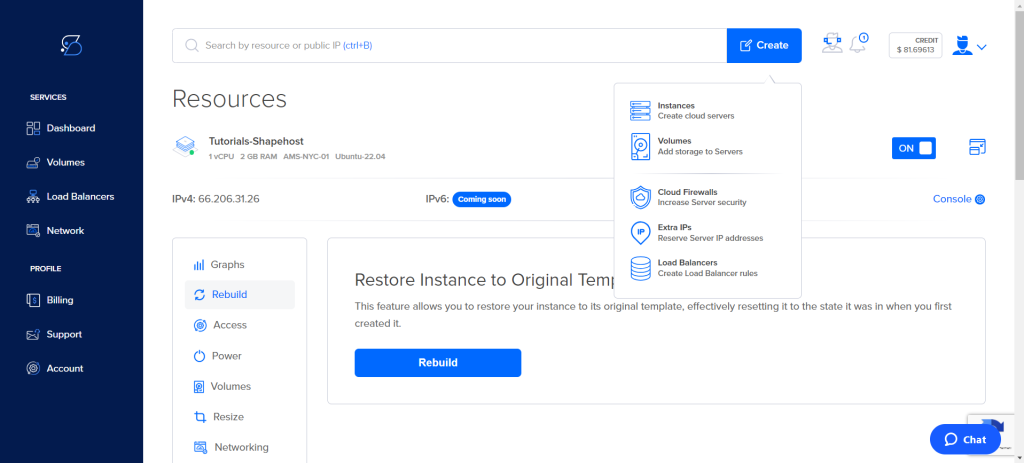
- Log in to Shape.host Dashboard:
- Navigate to the Shape.host website and log in to your account.
- Create a New Instance:
- Click on the “Create” button located at the top right corner of the dashboard.
- From the dropdown menu, select “Instances”.
- Select Instance Location:
- Choose the desired location for your server. For this tutorial, we’ll select “New York, USA”.
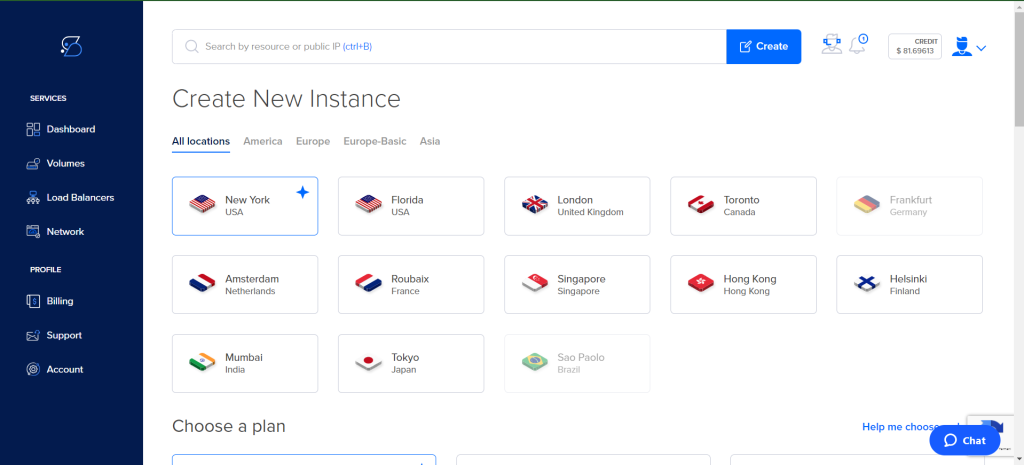
- Choose a Plan:
- Select a plan that fits your requirements. For example, you might choose a plan with 2 cores CPU, 2 GB Memory, and 50 GB SSD disk space.
- Select an Operating System:
- Scroll down to the “Choose an image” section and select “Ubuntu 22.04”.

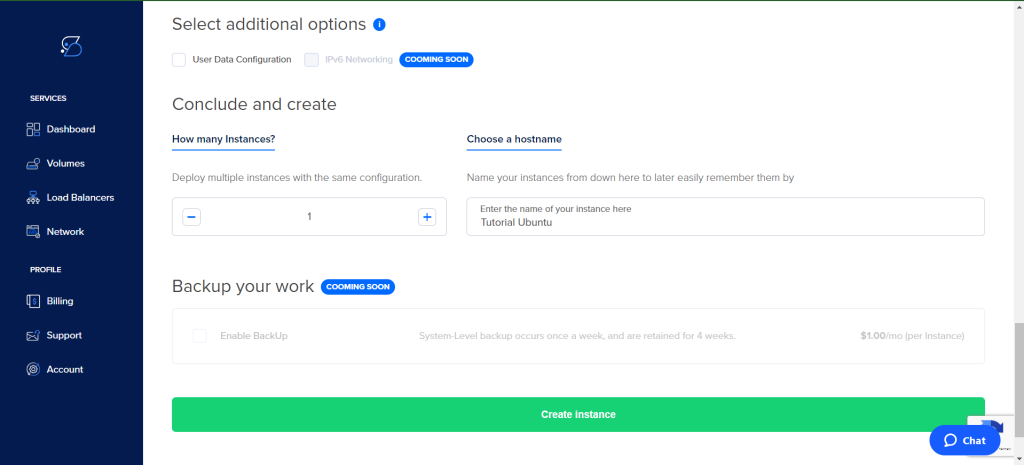
- Configure Additional Options:
- (Optional) You can configure additional options like User Data Configuration and IPv6 Networking.
- Enter a hostname for your instance, e.g., “Tutorial Ubuntu”.
- Click on the “Create instance” button to deploy the instance.
Step 2: Connecting to Your Instance
- Retrieve SSH Credentials:
- Note the IP address of your newly created instance from the Shape.host dashboard.
- Connect via SSH:
- Open a terminal on your local machine.
- Use the following command to connect to your instance:
sh ssh root@your_instance_ip - Replace
your_instance_ipwith the actual IP address of your instance.
To follow this tutorial, you will need:
- A fully registered domain name. This tutorial will use your_domain as an example throughout. You can purchase a domain name on Namecheap, get one for free on Freenom, or use the domain registrar of your choice.
- Both of the following DNS records set up for your server. You can follow this introduction to ShapeHost DNS for details on how to add them.
your_domainpointing to your server’s public IP address.www.your_domainpointing to your server’s public IP address.
- Apache installed by following How To Install Apache on Ubuntu. Be sure that you have a virtual host file for your domain. This tutorial will use
/etc/apache2/sites-available/your_domain.confas an example.
Step 3: Install Certbot
To obtain an SSL certificate with Let’s Encrypt, you need to install the Certbot software on your server. You’ll use the default Ubuntu package repositories for that.
First, update the local package index:
apt update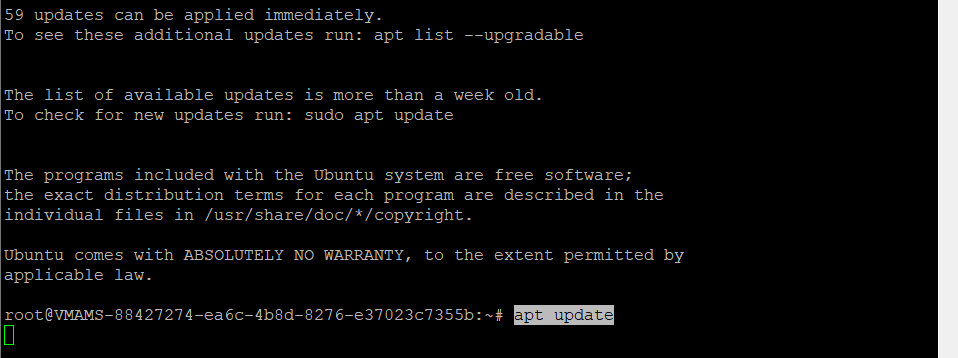
You need two packages: certbot, and python3-certbot-apache. The latter is a plugin that integrates Certbot with Apache, making it possible to automate obtaining a certificate and configuring HTTPS within your web server with a single command:
apt install certbot python3-certbot-apache
You will be prompted to confirm the installation by pressing Y, then ENTER.
Step 4: Install Apache
To activate Apache on Ubuntu 22.04, you can follow these steps. These commands will install Apache if it is not already installed, start the Apache service, enable it to start on boot, and open the necessary firewall ports.
- To Install Apache:
apt install apache2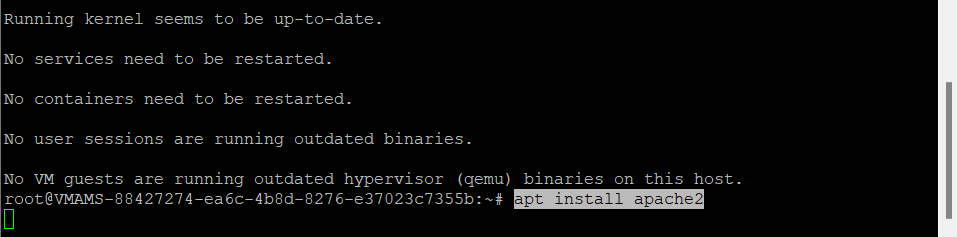
- Start the Apache service:
systemctl start apache2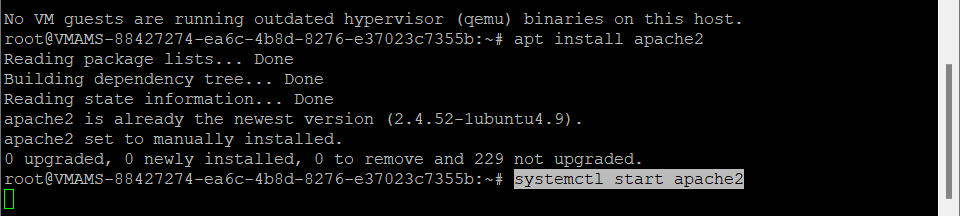
- Enable Apache to start on boot:
systemctl enable apache2
- Check the status of the Apache service:
systemctl status apache2
- Enable the firewall (if not already enabled):
ufw enable

Step 5: Verify Apache’s Configuration
Certbot needs to find the correct virtual host within your Apache configuration files. Your server domain name(s) will be retrieved from the ServerName and ServerAlias directives defined within your VirtualHost configuration block.
To confirm this is set up, open the virtual host file for your domain using nano or your preferred text editor:
nano /etc/apache2/sites-available/your_domain.conf
Find the existing ServerName and ServerAlias lines. They should be listed as follows:
...
ServerName your_domain
ServerAlias www.your_domain
...
If you already have your ServerName and ServerAlias set up like this, you can exit your text editor and move on to the next step. If your current virtual host configuration doesn’t match the example, update it accordingly. If you’re using nano, you can exit by pressing CTRL+X, then Y and ENTER to confirm your changes, if any.
Then, run the following command to validate your changes:
apache2ctl configtestYou should receive Syntax OK as a response. If you get an error, reopen the virtual host file and check for any typos or missing characters. Once your configuration file’s syntax is correct, reload Apache so that the changes take effect:

systemctl reload apache2Step 6: Allow HTTPS Through the Firewall
If you have the UFW firewall enabled, as recommended by the prerequisite guides, you’ll need to adjust the settings to allow HTTPS traffic. Upon installation, Apache registers a few different UFW application profiles. You can leverage the Apache Full profile to allow both HTTP and HTTPS traffic on your server.
To allow for HTTPS traffic, allow the “Apache Full” profile:
ufw allow 'Apache Full'
To verify what kind of traffic is currently allowed on your server, check the status:
ufw status
If you followed one of our Apache installation guides, you will have output similar to the following, meaning that only HTTP traffic on port 80 is currently allowed:
Output
Status: active
To                         Action      From
--                         ------      ----
OpenSSH                    ALLOW       Anywhere
Apache                     ALLOW       Anywhere
OpenSSH (v6)               ALLOW       Anywhere (v6)
Apache (v6)                ALLOW       Anywhere (v6)
Step 7: Obtain an SSL Certificate
You are now ready to run Certbot and obtain your certificates.
Certbot provides a variety of ways to obtain SSL certificates through plugins. The Apache plugin will take care of reconfiguring Apache and reloading the configuration whenever necessary. To use this plugin, run the following:
certbot --apache
This script will prompt you to answer a series of questions in order to configure your SSL certificate. First, it will ask you for a valid email address. This email will be used for renewal notifications and security notices:
Output
Saving debug log to /var/log/letsencrypt/letsencrypt.log
Enter email address (used for urgent renewal and security notices)
(Enter 'c' to cancel): you@your_domain
After providing a valid email address, press ENTER to proceed to the next step. You will then be prompted to confirm if you agree to Let’s Encrypt terms of service. You can confirm by pressing Y and then ENTER:
- - - - - - - - - - - - - - - - - - - - - - - - - - - - - - - - - - - - - - - - - - - - -
Please read the Terms of Service at
https://letsencrypt.org/documents/LE-SA-v1.2-November-15-2017.pdf. You must
agree in order to register with the ACME server at
https://acme-v02.api.letsencrypt.org/directory
- - - - - - - - - - - - - - - - - - - - - - - - - - - - - - - - - - - - - - - - - - - - -
(Y)es/(N)o: Y
Next, you’ll be asked if you would like to share your email with the Electronic Frontier Foundation to receive news and other information. If you do not want to subscribe to their content, write N. Otherwise, write Y then press ENTER to proceed to the next step:
- - - - - - - - - - - - - - - - - - - - - - - - - - - - - - - - - - - - - - - - - - - - -
Would you be willing to share your email address with the Electronic Frontier
Foundation, a founding partner of the Let's Encrypt project and the non-
profit organization that develops Certbot? We'd like to send you email about
our work encrypting the web, EFF news, campaigns, and ways to support digital
freedom.
- - - - - - - - - - - - - - - - - - - - - - - - - - - - - - - - - - - - - - - - - - - - -
(Y)es/(N)o: N
The next step will prompt you to inform Certbot of which domains you’d like to activate HTTPS for. The listed domain names are automatically obtained from your Apache virtual host configuration, so it’s important to make sure you have the correct ServerName and ServerAlias settings configured in your virtual host. If you’d like to enable HTTPS for all listed domain names (recommended), you can leave the prompt blank and press ENTER to proceed. Otherwise, select the domains you want to enable HTTPS for by listing each appropriate number, separated by commas and/or spaces, then press ENTER:
Which names would you like to activate HTTPS for?
- - - - - - - - - - - - - - - - - - - - - - - - - - - - - - - - - - - - - - - - - - - - - -
1: your_domain
2: www.your_domain
- - - - - - - - - - - - - - - - - - - - - - -
Certbot will then configure your SSL certificate and provide final remarks:
Successfully received certificate.
Certificate is saved at: /etc/letsencrypt/live/your_domain/fullchain.pem
Key is saved at: /etc/letsencrypt/live/your_domain/privkey.pem
This certificate expires on 2022-07-10.
These files will be updated when the certificate renews.
Certbot has set up a scheduled task to automatically renew this certificate in the background.
Deploying certificate
Successfully deployed certificate for your_domain to /etc/apache2/sites-available/your_domain-le-ssl.conf
Successfully deployed certificate for www.your_domain to /etc/apache2/sites-available/your_domain-le-ssl.conf
Congratulations! You have successfully enabled HTTPS on https://your_domain and https://www.your_domain
Your certificate is now installed and loaded into Apache’s configuration. Reload your website using https:// and notice your browser’s security indicator, typically a lock icon in the address bar.
Step 8: Verify and Test Auto-Renewal
Let’s Encrypt’s certificates are valid for ninety days, encouraging users to automate their certificate renewal process. The certbot package you installed includes a renew script managed by systemctl as a certbot.timer service. This script runs twice a day and renews any certificate within thirty days of expiration.
Check the status of this service to ensure it’s active:
systemctl status certbot.timer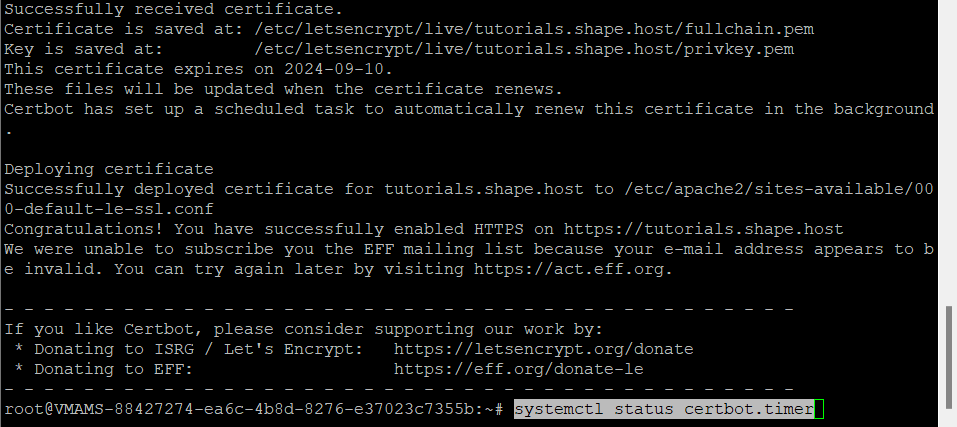
You should see output similar to:
 ● certbot.timer - Run certbot twice daily
   Loaded: loaded (/lib/systemd/system/certbot.timer; enabled; vendor preset: enabled)
   Active: active (waiting) since Mon 2022-04-11 20:52:46 UTC; 4min 3s ago
   Trigger: Tue 2022-04-12 00:56:55 UTC; 4h 0min left
To test the renewal process, perform a dry run with Certbot:
certbot renew --dry-run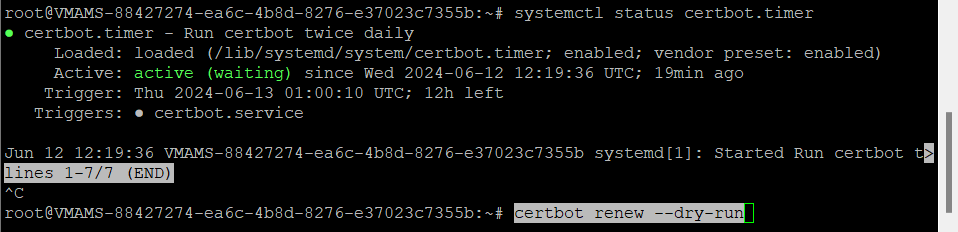

If you don’t receive any errors, Certbot will renew your certificates and reload Apache as needed. If the automated renewal process fails, Let’s Encrypt will send a warning email to the address you specified.
In this tutorial, you installed the Let’s Encrypt client certbot, configured and installed an SSL certificate for your domain, and confirmed that Certbot’s automatic renewal service is active. For further questions about using Certbot, their documentation is a good place to start.
Sign up and get started with Shape.Host today. Enjoy our reliable and scalable cloud services to power your applications and websites, including Cloud VPS solutions tailored to meet your needs.