What is Jenkins?
Jenkins is a popular open-source automation server designed to support continuous integration (CI) and continuous delivery (CD) of software projects. It allows developers to automate the building, testing, and deployment of applications across various platforms and environments.
Originally created in Java, Jenkins is highly extensible through plugins and integrates with virtually every modern DevOps tool and cloud provider.
Why Use Jenkins on Ubuntu 24.04?
Ubuntu 24.04 LTS offers a modern, stable, and secure platform for running Jenkins, especially in production CI/CD environments. Key advantages include:
- Long-term support until 2029
- Native availability of Java 17+, required by modern Jenkins versions
- Improved systemd management and updated security features
- Easy integration with Docker, Kubernetes, Git, Ansible, and system packages
- Smooth installation via official Jenkins Debian repository or containerized options
Key Features of Jenkins
| Feature | Description |
|---|---|
| CI/CD Pipeline Support | Automate software build, test, and deployment workflows |
| Web Dashboard | Manage jobs, plugins, and builds through a web-based interface |
| Plugin Ecosystem | 1,800+ plugins for SCM, build tools, cloud integrations, and UIs |
| Pipeline-as-Code | Define build logic in version-controlled Jenkinsfiles (Groovy syntax) |
| Multi-platform Support | Supports Linux, macOS, Windows, and containerized workloads |
| Integration Ready | GitHub, GitLab, Docker, Maven, Gradle, AWS, Azure, and more |
| Authentication & RBAC | LDAP, OAuth, GitHub SSO, plus role-based access controls |
Common Use Cases
- Automating code builds, unit tests, and deployment pipelines
- Managing multi-branch projects with Git-based triggers
- Deploying Docker containers or Helm charts to Kubernetes clusters
- Running scheduled scripts and integration tests
- Performing security scans or quality analysis (e.g., SonarQube, Snyk)
- Executing infrastructure automation (e.g., Terraform, Ansible)
Jenkins Architecture on Ubuntu 24.04
- Jenkins Master – Manages job scheduling, UI, and plugins
- Build Agents (Slaves) – Execute build steps (can run locally or remotely)
- Java Runtime – Required to run Jenkins (Ubuntu 24.04 supports Java 17)
- Systemd Service – Jenkins runs as a systemd service on Ubuntu for process control
- Web Access – Default port is 8080 (
http://your-ip:8080) - Data Directory –
/var/lib/jenkinsstores configuration, plugins, jobs, and credentials
Security Considerations
- Set up HTTPS via Nginx reverse proxy or using SSL certificates
- Integrate LDAP, SAML, or GitHub OAuth for secure user authentication
- Configure RBAC (Role-Based Access Control) using the “Matrix Authorization” plugin
- Keep plugins and core Jenkins updated to reduce vulnerability exposure
- Enable backup routines and store
/var/lib/jenkinssafely - Harden the Jenkins server using UFW, Fail2Ban, and AppArmor
Performance Tips on Ubuntu 24.04
- Use SSD-backed volumes for faster job execution
- Increase Java heap size for large builds
- Run agents on separate servers to distribute load
- Use pipeline parallelization to speed up CI/CD stages
- Offload artifacts and logs to external storage (e.g., S3, GCS, NAS)
Running Jenkins on Ubuntu 24.04 gives you a reliable and secure foundation for modern DevOps automation. With its plugin-driven architecture, powerful pipeline engine, and seamless Ubuntu integration, Jenkins remains a top choice for CI/CD orchestration across organizations of all sizes.
Ubuntu 24.04 enhances this setup with long-term security, performance improvements, and system compatibility with Java 17+ and container runtimes.
🔹 Create a VPS Instance on Shape.Host
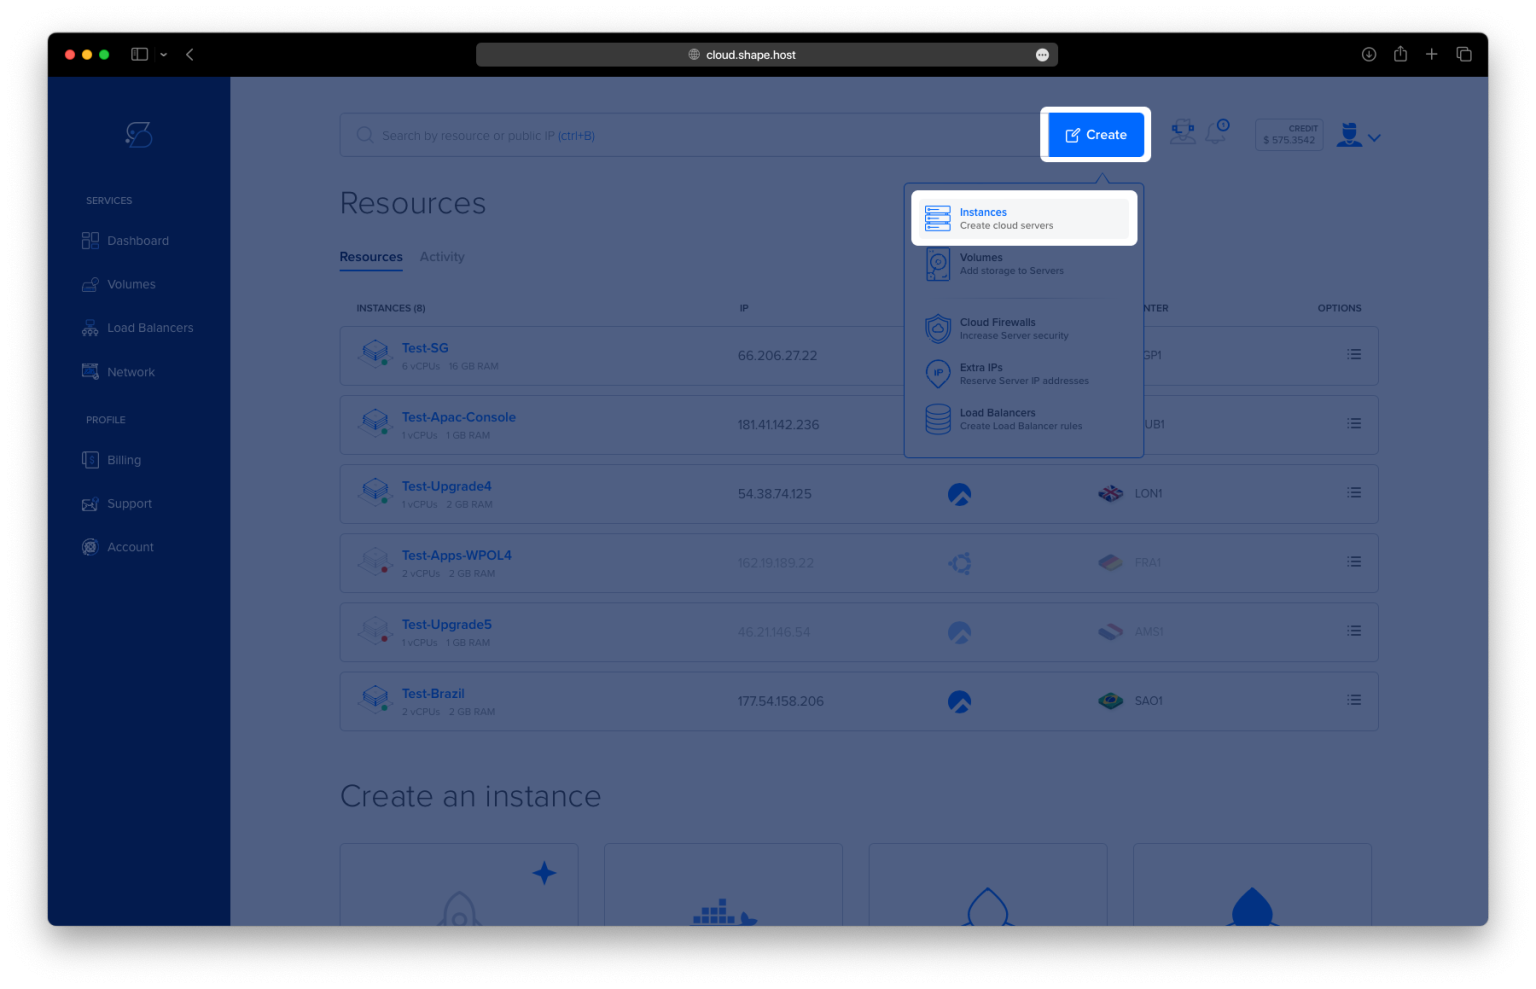
Before installing Jenkins, you need a VPS server. Follow these steps to create one on Shape.Host:
Go to https://shape.host and log in.
Click “Create”, then select “Instance”.

Set:
Location: Choose your preferred data center region.

Operating System: Select Ubuntu 24.04 (64-bit).
Resources: Pick a plan with at least 2 CPUs, 4 GB RAM, and 20 GB SSD.

Click “Create Instance”.

Wait for deployment and note your server IP address.

Now you can SSH into your new VPS and begin the Jenkins installation.
Connect to Your Server via SSH
On Linux/macOS:
ssh root@your_server_ip
On Windows:
Use PuTTY, enter the IP, and connect as root.
🔹 Step 1: Update the System
apt update && apt upgrade -y
🔹 Updates the local package index and upgrades all installed packages to their latest versions.

🔹 Step 2: Install Java (Jenkins Requirement)
Jenkins requires Java 11 or 17. We’ll use OpenJDK 17.
apt install openjdk-17-jdk -y
🔹 Installs the latest OpenJDK 17 package, which Jenkins requires to run.

Check Java version:
java -version
🔹 Verifies that Java is correctly installed.

🔹 Step 3: Add Jenkins Repository
1. Import the Jenkins GPG key:
curl -fsSL https://pkg.jenkins.io/debian-stable/jenkins.io-2023.key | tee \
  /usr/share/keyrings/jenkins-keyring.asc > /dev/null
🔹 Adds Jenkins’ trusted key to your system.
2. Add the Jenkins repository:
echo deb [signed-by=/usr/share/keyrings/jenkins-keyring.asc] \
  https://pkg.jenkins.io/debian-stable binary/ > \
  /etc/apt/sources.list.d/jenkins.list
🔹 Adds the official Jenkins APT repository to your sources list.

🔹 Step 4: Install Jenkins
apt update
apt install jenkins -y
🔹 Installs the latest stable Jenkins package from the newly added repository.

🔹 Step 5: Start and Enable Jenkins
systemctl start jenkins
🔹 Starts the Jenkins service immediately.
systemctl enable jenkins
🔹 Enables Jenkins to start automatically on system boot.
Check Jenkins status:
systemctl status jenkins
🔹 Confirms Jenkins is active and running.

🔹 Step 6: Adjust Firewall (if UFW is enabled)
Allow traffic on Jenkins port:
ufw enable
ufw allow 8080
🔹 Opens TCP port 8080 for incoming connections.

ufw allow ssh
ufw reload
🔹 Reloads the firewall with the new rules.

🔹 Step 7: Access Jenkins Web Interface
Open your browser and go to:
http://your-server-ip:8080

Or, if using a domain:
http://your-domain.com:8080
🔹 You should see the Jenkins unlock screen.
🔹 Step 8: Retrieve Initial Admin Password
Run:
cat /var/lib/jenkins/secrets/initialAdminPassword
🔹 Outputs a one-time admin password required to unlock Jenkins the first time.
Copy and paste this into the setup wizard in your browser.

🔹 Step 9: Finish Jenkins Setup
Choose “Install suggested plugins”


Create your admin user


Set Jenkins URL (IP or domain with port 8080)

You’re done! Access the Jenkins dashboard.

Want secure, fast, and scalable hosting for your Jenkins setup?
Choose Shape.Host Cloud VPS for:
- Ultra-fast SSD performance
- Global server locations
- Full root access
- Instant provisioning with Ubuntu 24.04 support
Get started with Jenkins in minutes on Shape.Host.