Joomla is a free, open-source content management system (CMS) used to build dynamic websites, blogs, and online applications. With its user-friendly interface, robust extensions, and strong security features, Joomla is one of the most popular CMS platforms, alongside WordPress and Drupal. Running Joomla on Debian 12 ensures a stable, secure, and efficient environment for website development and management.
Key Features of Joomla on Debian 12
- User-Friendly Interface
- Intuitive dashboard and admin panel for easy website management.
- Modular and Extensible
- Over 8,000 extensions available for adding features like e-commerce, SEO, and social media integration.
- Advanced User Management
- Supports multiple user roles, permissions, and access control levels (ACL).
- SEO-Friendly Structure
- Built-in search engine optimization (SEO) tools for better Google rankings.
- Multilingual Support
- Native support for over 75 languages, making it ideal for global websites.
- Template System for Custom Design
- Use pre-designed templates or create custom themes with HTML, CSS, and Bootstrap.
- Robust Security Features
- Protection against SQL injections, XSS attacks, and brute force logins.
- Integrated Media Manager
- Easily upload and manage images, videos, and other media files.
- E-commerce and Online Store Integration
- Supports VirtueMart, HikaShop, and J2Store for building e-commerce websites.
- Flexible Content Management
- Create articles, categories, blogs, and pages with drag-and-drop editors.
Advantages of Using Joomla on Debian 12
- Stable and Secure Platform: Debian 12 enhances Joomla’s security, performance, and reliability.
- Customizable and Extensible: Thousands of extensions and templates allow full customization.
- Ideal for Complex Websites: Best suited for corporate websites, government portals, educational sites, and non-profits.
- SEO-Optimized: Includes meta tags, URLs, and schema markup for better search engine visibility.
- Multilingual Ready: Create multi-language websites without third-party plugins.
- Community and Support: Large Joomla developer community ensures continuous updates and security patches.
Use Cases for Joomla on Debian 12
- Corporate and Business Websites
- Build enterprise websites with custom branding, user roles, and interactive features.
- E-commerce Stores
- Sell products using VirtueMart and other Joomla shopping cart extensions.
- Educational and Non-Profit Websites
- Create learning management systems (LMS) and membership sites with Joomla’s built-in tools.
- Government and Institutional Portals
- Secure, multi-user portals for public services, news updates, and document management.
- News and Blogging Websites
- Manage large-scale news portals, blogs, and online magazines with Joomla’s content management features.
- Community and Membership Sites
- Build forums, discussion boards, and social networks using Joomla Community Builder.
Joomla vs. Other CMS Platforms
| Feature | Joomla | WordPress | Drupal | Magento |
|---|---|---|---|---|
| Ease of Use | ✅ User-Friendly | ✅ Very Easy | ⚠️ Steeper Learning Curve | ❌ Complex for Beginners |
| Customization | ✅ Extensions & Templates | ✅ Plugins & Themes | ✅ Highly Customizable | ✅ Specialized for E-commerce |
| SEO Features | ✅ Built-in Optimization | ✅ SEO Plugins Available | ✅ Advanced SEO Features | ✅ Optimized for E-commerce |
| Security | ✅ Strong Security | ⚠️ Requires Plugins | ✅ Enterprise-Level Security | ✅ Secure Transactions |
| Multilingual Support | ✅ Native Support | ❌ Requires Plugins | ✅ Built-in Multilingual | ❌ Requires Plugins |
| Best Use Case | ✅ Business & E-commerce | ✅ Blogs & Small Websites | ✅ Government & Enterprise | ✅ Online Stores |
Why Use Joomla on Debian 12?
- Optimized Performance: Debian 12’s lightweight architecture enhances Joomla’s speed and responsiveness.
- Secure and Reliable: Debian 12 provides regular security updates, reducing risks of cyberattacks.
- Flexible Deployment: Install Joomla on dedicated servers, VPS, cloud hosting, or shared hosting.
- Enterprise-Grade CMS: Ideal for large-scale projects that require advanced user management and high security.
- Community and Long-Term Support: Continuous updates and strong open-source community support.
Joomla on Debian 12 is a powerful, flexible, and secure CMS ideal for businesses, e-commerce, educational institutions, and government websites. With its modular design, multilingual support, and strong security features, Joomla provides a reliable and scalable platform for building professional websites. Whether you’re managing a small blog or a large enterprise portal, Joomla on Debian 12 delivers performance, customization, and stability.
Step 1: Set Up a Server on Shape.Host
Before installing Joomla, you’ll need a server to host your website. Here’s how to create one on Shape.Host:
Log in to Shape.Host: Visit the Shape.Host website and log in to your account. Go to the Cloud VPS section.
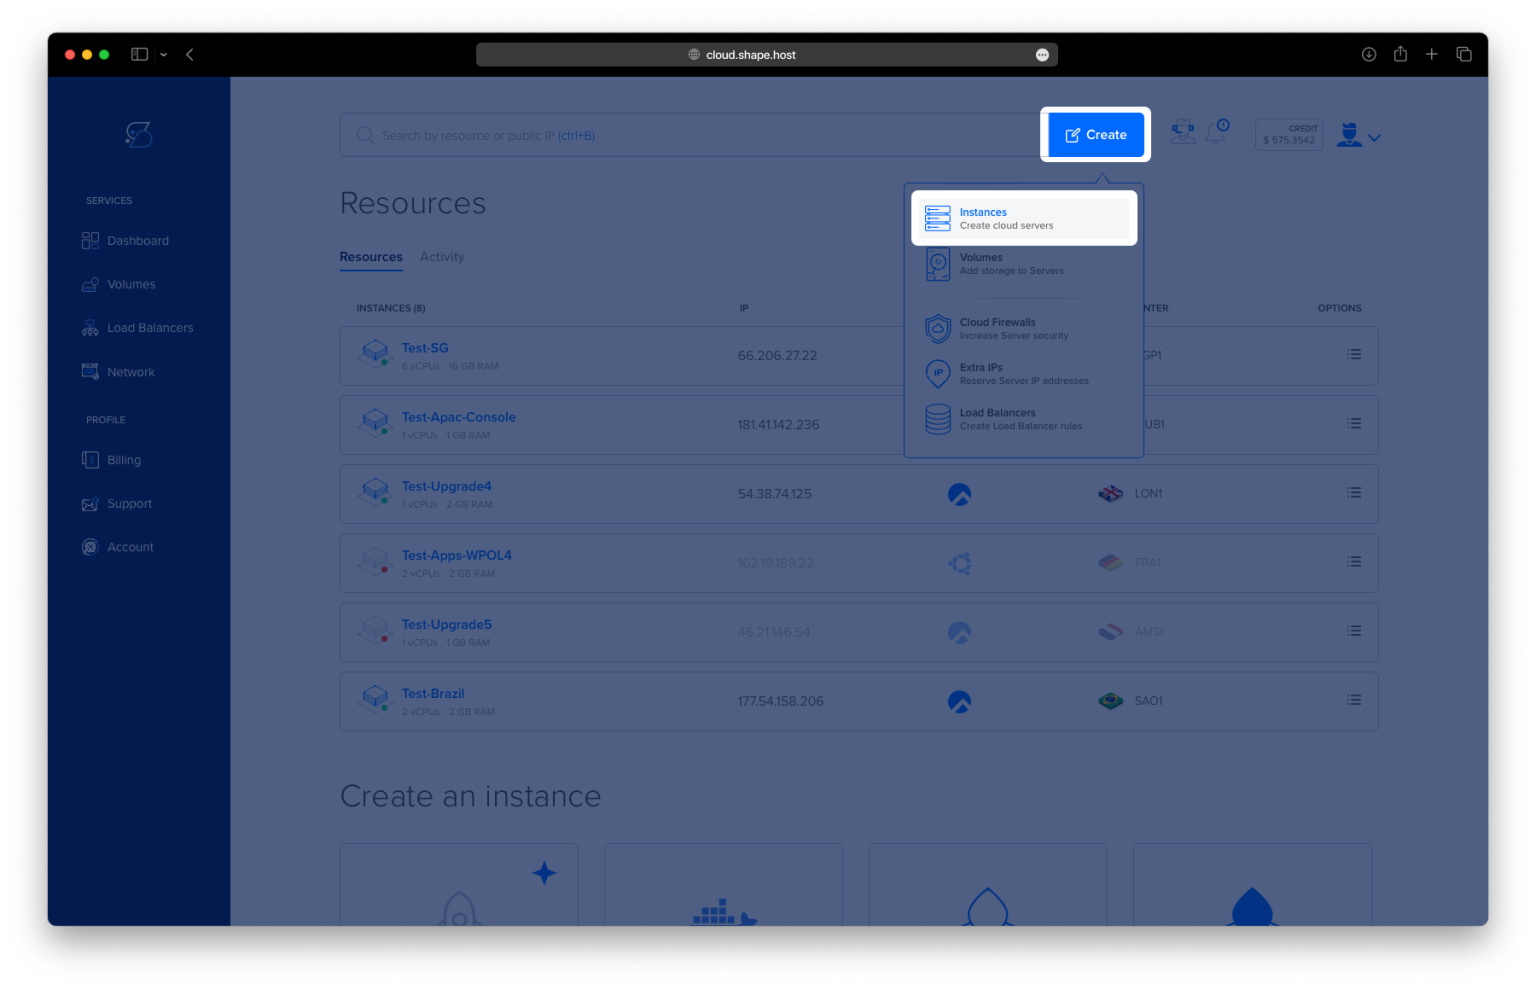
Create a New Server: Click on “Create” and choose the server type that fits your needs.
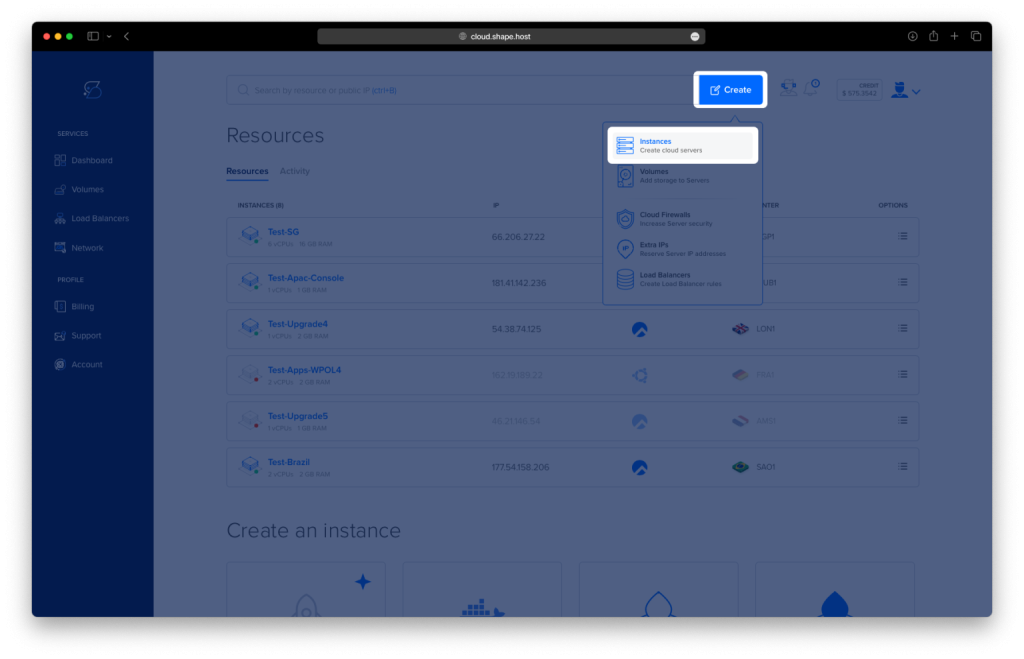
Pick a Data Center: Select a data center location close to your audience for better performance.
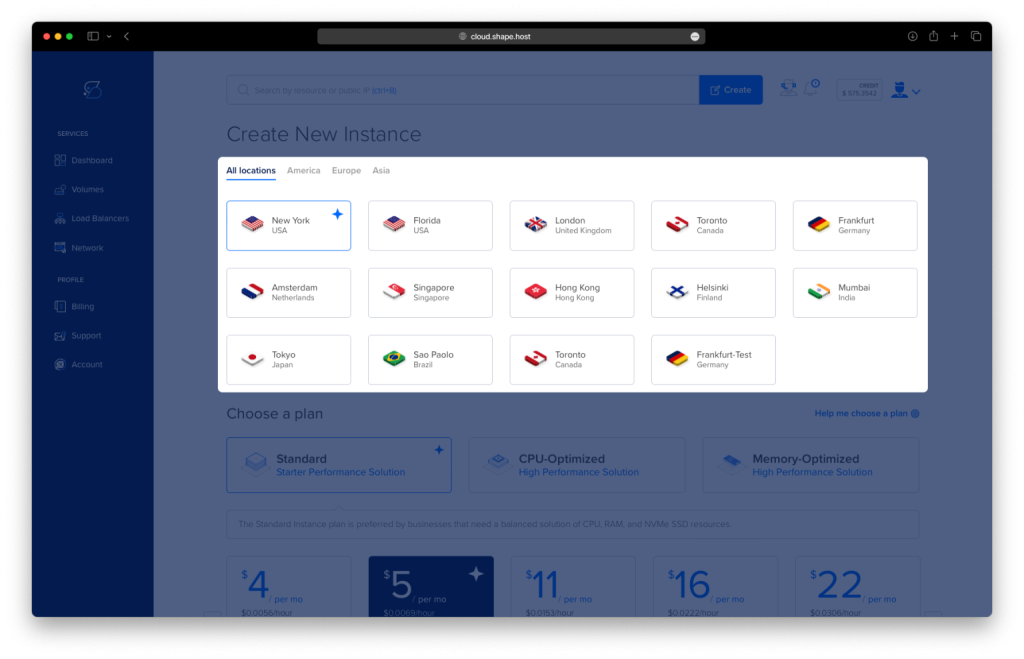
Choose a Plan: Pick a hosting plan that matches your project’s requirements and budget.
Set the OS: Choose Debian 12 as your operating system.
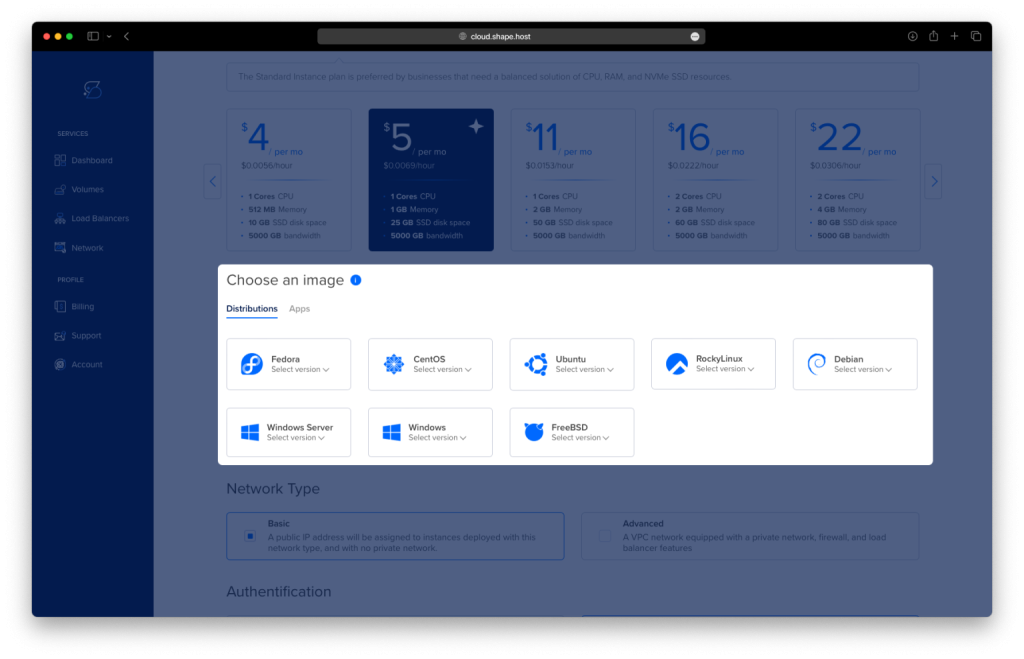
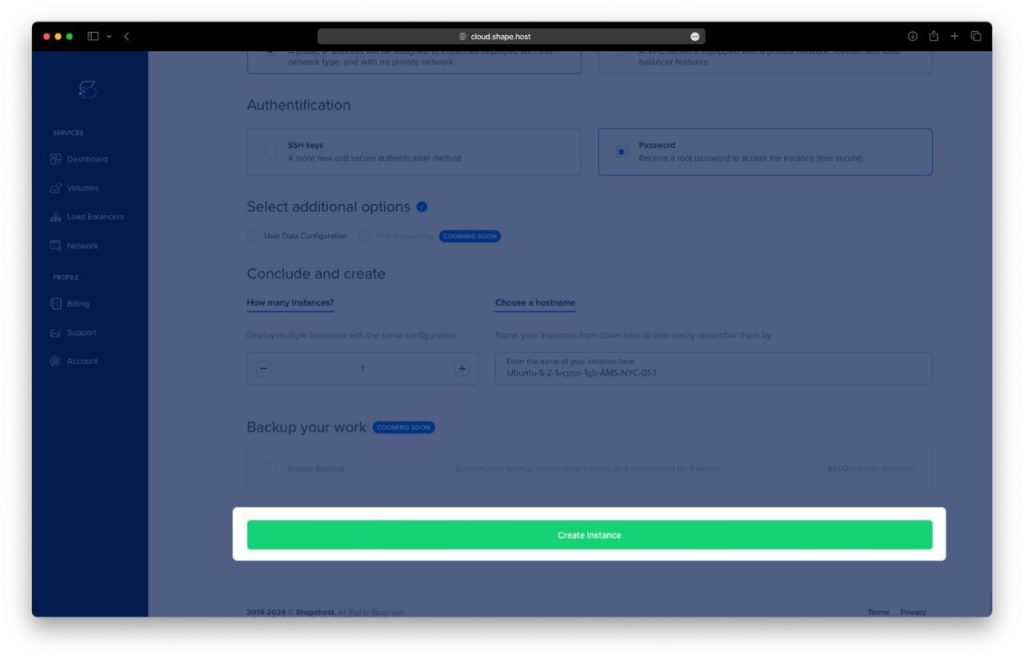
Launch the Server: Review your settings and click “Create Instance” Your server will be ready in a few minutes.
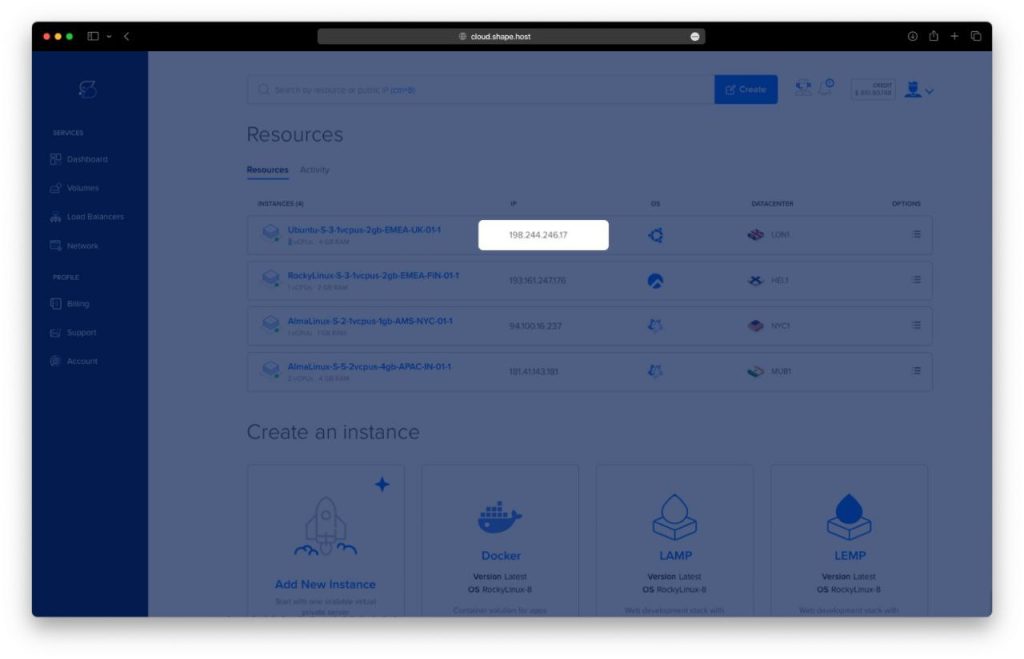
Retrieve Instance IP: Find the public IP address in your Shape.Host dashboard under Resources.
Step 2: Connect to Your Server
Once your server is ready, connect to it using SSH. Here’s how:
- Linux/macOS: Open your terminal and type:
ssh root@your_server_ipReplace your_server_ip with your server’s IP address.
- Windows: Use an SSH client like PuTTY. Enter your server’s IP address, specify the port (usually 22), and click “Open.” Log in with your username and password.
Step 3: Update Your System
Before installing any software, update your system to ensure all packages are up to date. Run the following command:
apt update && apt upgrade -y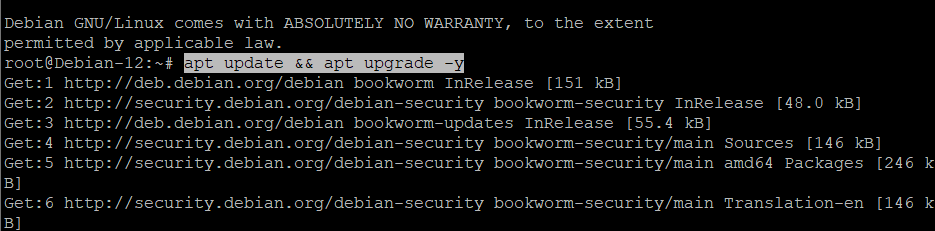
Step 4: Install Apache
Joomla requires a web server to serve content. Install Apache, a popular web server, with:
apt install apache2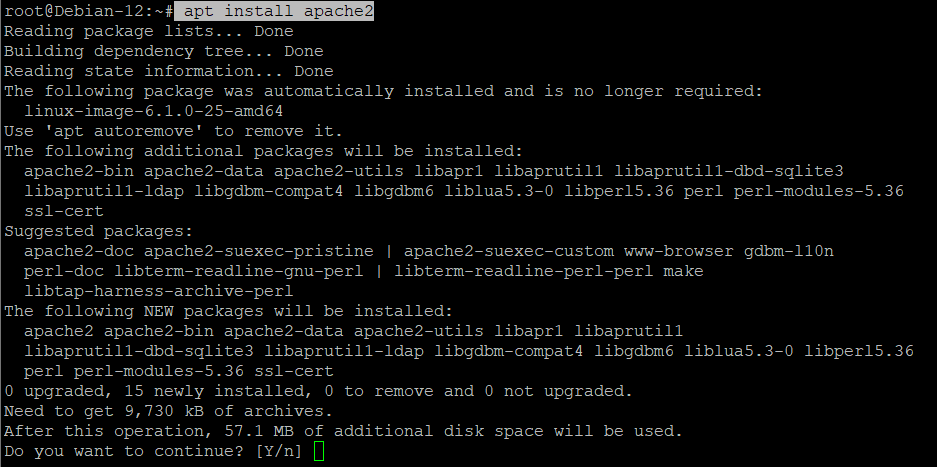
Start and enable Apache so it runs automatically when your server boots:
systemctl start apache2 && systemctl enable apache2Check the status of Apache to ensure it’s running:
systemctl status apache2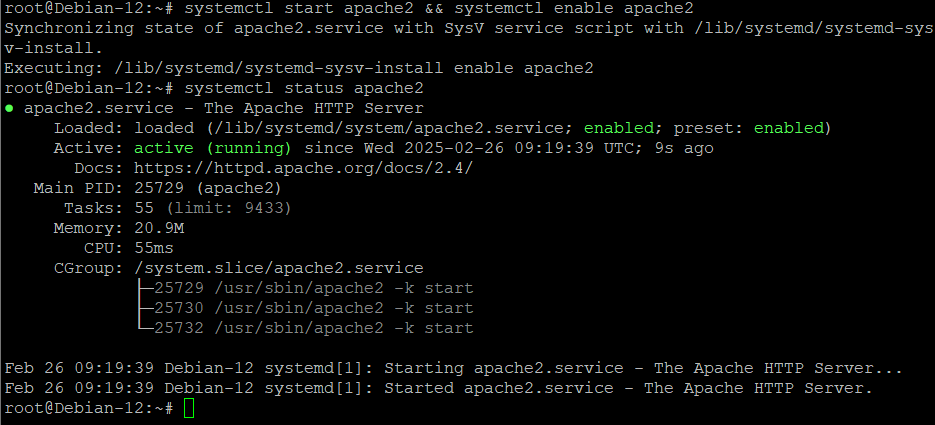
Step 5: Install PHP
Joomla is built with PHP, so you’ll need to install PHP and its required extensions. Here’s how:
- Add the PHP Repository:
   apt install -y lsb-release ca-certificates apt-transport-https software-properties-common gnupg2
   wget -qO- https://packages.sury.org/php/apt.gpg | tee /etc/apt/trusted.gpg.d/php-sury.gpg >/dev/null
   echo "deb https://packages.sury.org/php/ $(lsb_release -sc) main" | tee /etc/apt/sources.list.d/php.list
apt update- Install PHP and Extensions:
apt install -y php8.3 libapache2-mod-php8.3 php8.3-mysql php8.3-xml php8.3-mbstring php8.3-curl php8.3-zip php8.3-intl- Restart Apache:
systemctl restart apache2- Verify PHP Installation:
php -vStep 6: Install MariaDB
Joomla uses a database to store content. Install MariaDB, a popular MySQL-compatible database:
apt install -y mariadb-server mariadb-client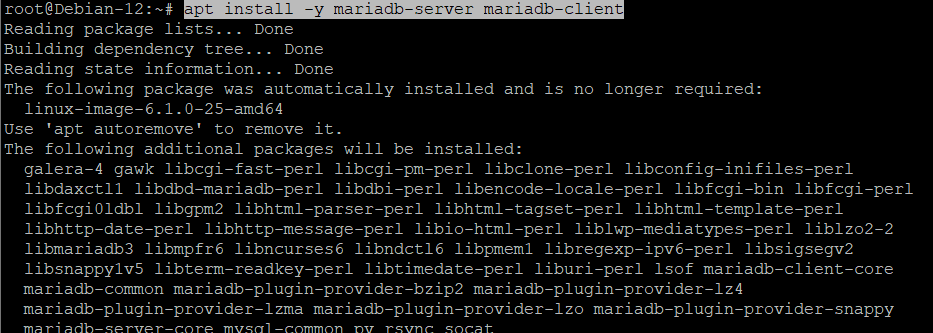
Start and enable MariaDB:
systemctl start mariadb && systemctl enable mariadbCheck the status of MariaDB:
systemctl status mariadb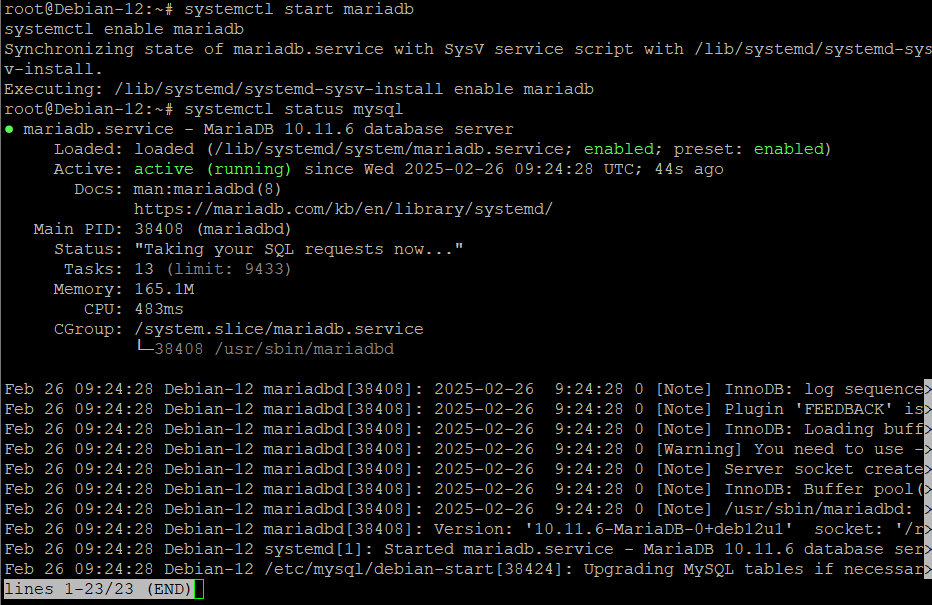
Step 7: Create a Database for Joomla
Joomla needs a database to store its data. Log in to MariaDB and create a database and user for Joomla:
mysql -u root -pRun the following SQL commands:
CREATE DATABASE joomla_db;
CREATE USER 'joomla'@'localhost' IDENTIFIED BY 'Pass@135';
GRANT ALL PRIVILEGES ON joomla_db.* TO 'joomla'@'localhost';
FLUSH PRIVILEGES;
SHOW DATABASES;
EXIT;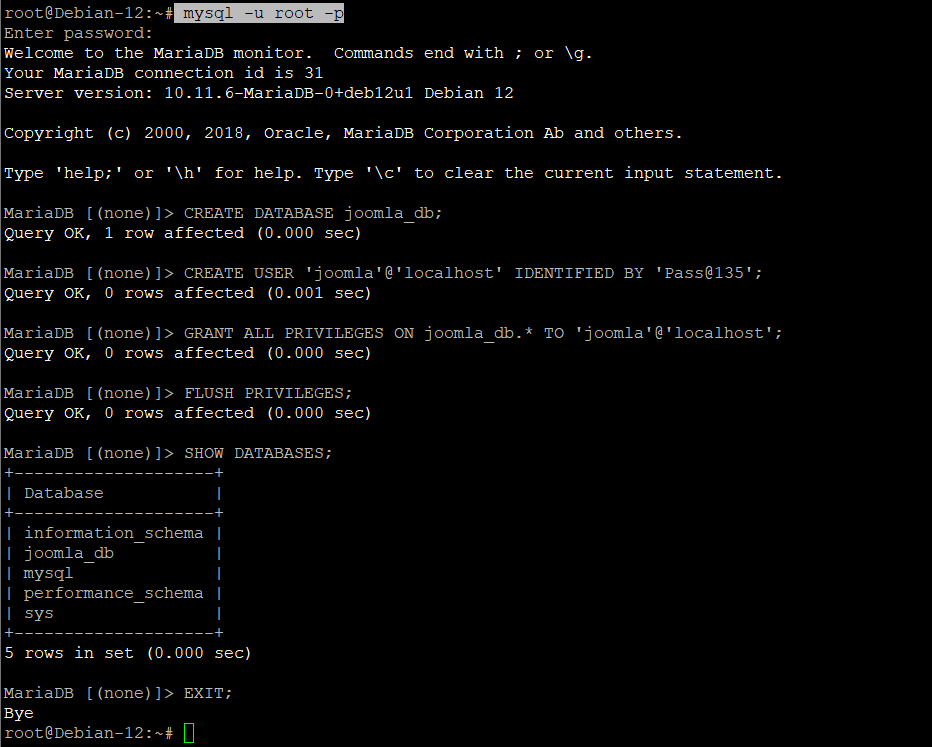
Step 8: Download and Install Joomla
Now it’s time to download and install Joomla. Follow these steps:
- Download Joomla:
wget https://downloads.joomla.org/cms/joomla5/5-1-2/Joomla_5-1-2-Stable-Full_Package.zip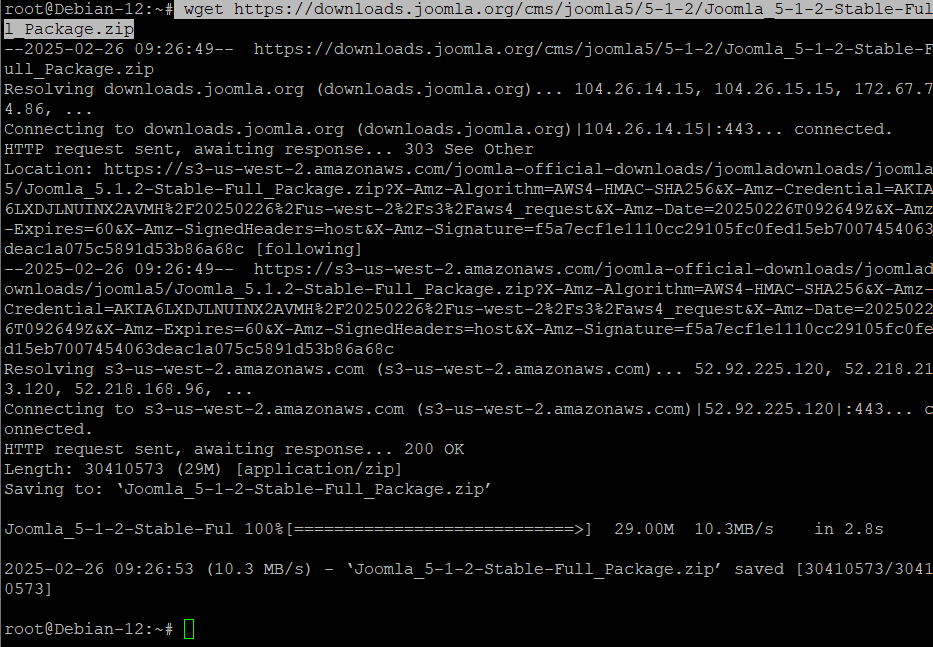
- Install
unzip:
apt install unzip- Extract Joomla:
unzip Joomla_5-1-2-Stable-Full_Package.zip -d /var/www/html/joomla- Set Permissions:
   chown -R www-data:www-data /var/www/html/joomla
   chmod -R 755 /var/www/html/joomla
Step 9: Configure Apache for Joomla
To make Joomla accessible, create a virtual host configuration for Apache:
- Create a Configuration File:
nano /etc/apache2/sites-available/joomla.conf- Add the Following Configuration:
   <VirtualHost *:80>
       ServerAdmin admin@localhost
       DocumentRoot /var/www/html/joomla
       ServerName your-domain.com

       <Directory /var/www/html/joomla>
           Options FollowSymLinks
           AllowOverride All
           Require all granted
       </Directory>

       ErrorLog ${APACHE_LOG_DIR}/joomla_error.log
       CustomLog ${APACHE_LOG_DIR}/joomla_access.log combined
   </VirtualHost>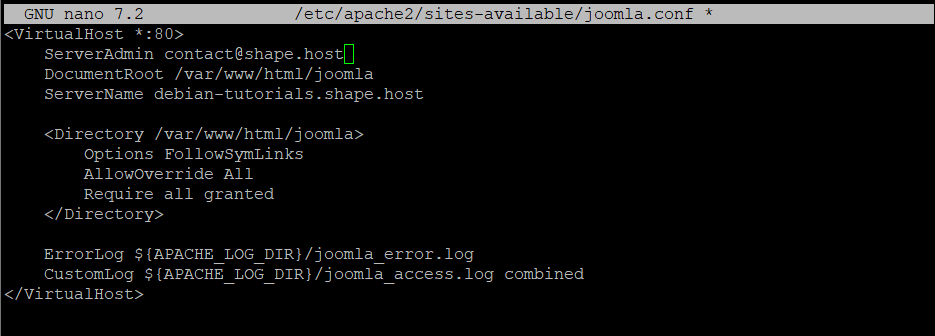
- Enable the Joomla Site:
a2ensite joomla.conf- Enable the
rewriteModule:
a2enmod rewrite- Restart Apache:
systemctl restart apache2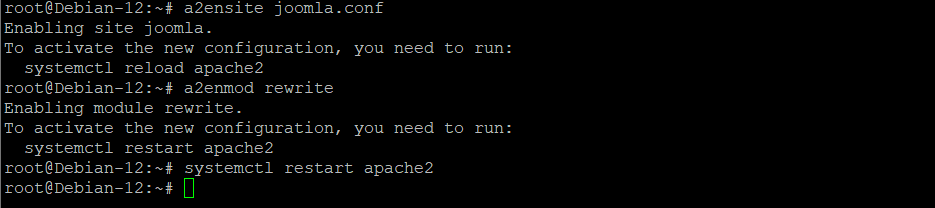
Step 10: Complete the Joomla Installation
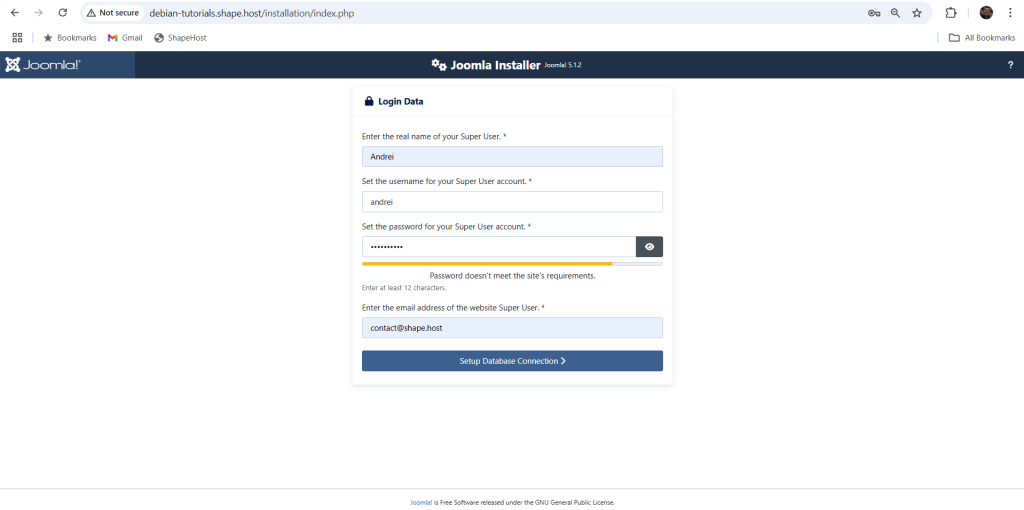
Open your browser and navigate to http://your_server_ip. You’ll see the Joomla installation page. Follow the on-screen instructions to complete the setup. You’ll need to provide the database details you created earlier (database name, username, and password).
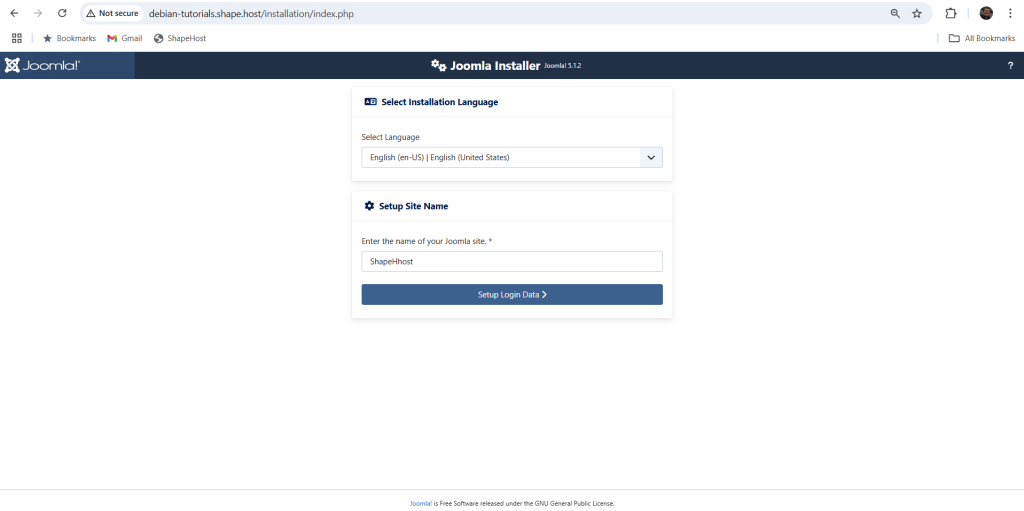
In the required fields below, enter the user data for the super user:
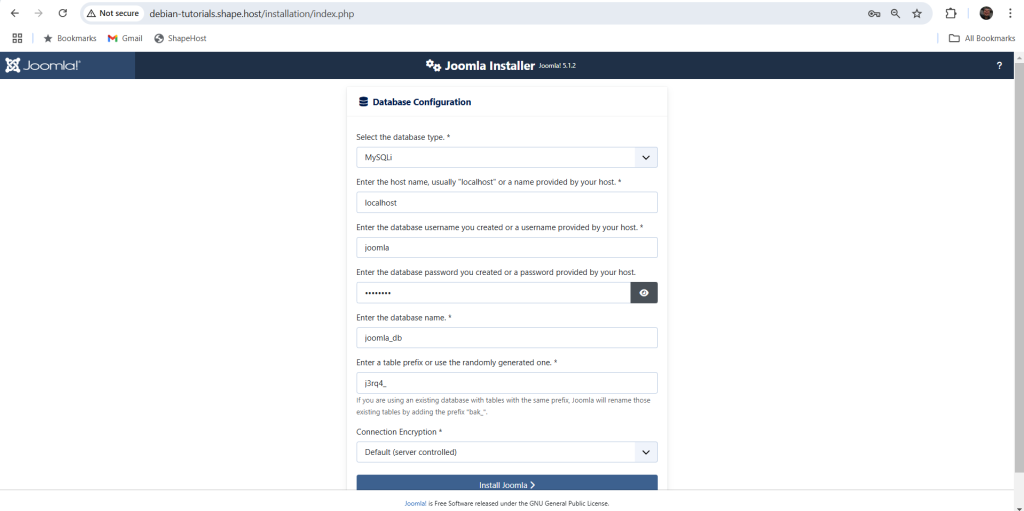
Enter the database name you created in the MySQL database server, for instance, “joomla_db”. Click on the “Install Joomla” button to complete the installation process:
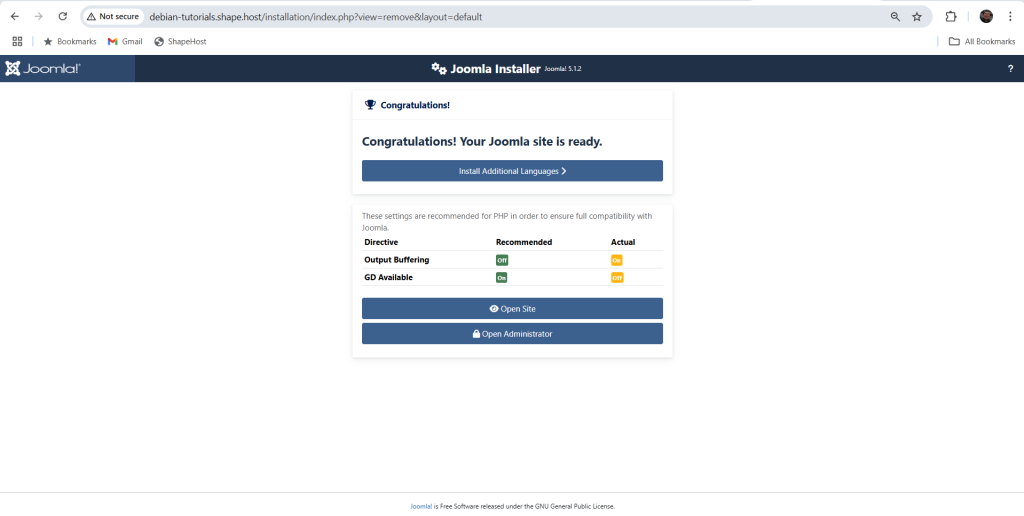
A greeting message on your screen indicates that the Joomla package has been installed on your system successfully. You can either open the site or open it as administrator from this page:
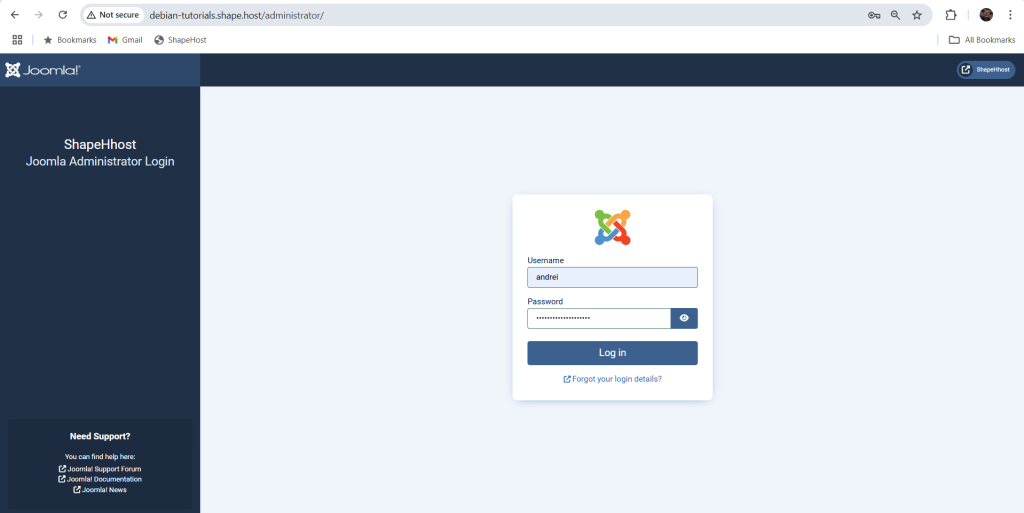
To log in as a Joomla administrator, enter your credentials:
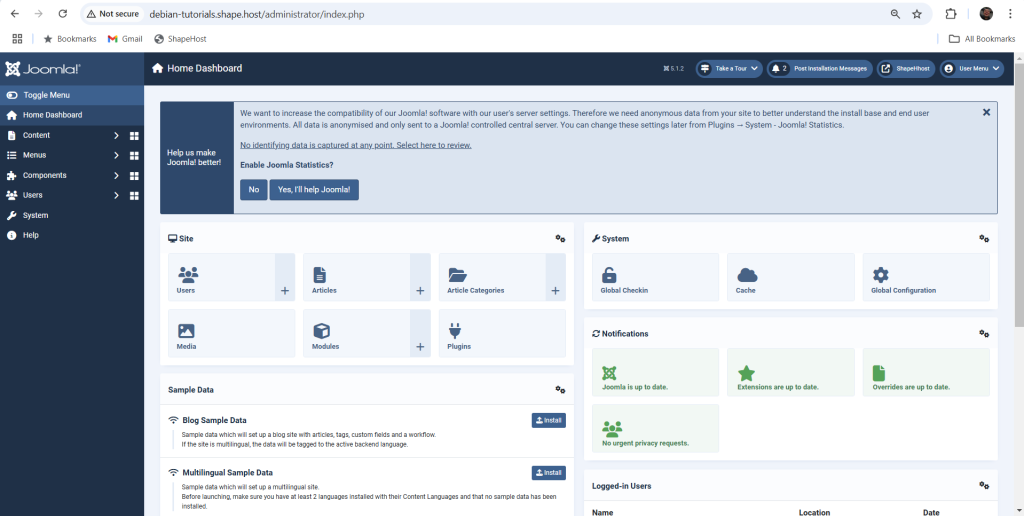
Here, you can see your Joomla Home Dashboard. You can utilize Joomla according to your needs:
If you’re looking for a reliable hosting solution for your Joomla projects, consider Shape.Host Linux SSD VPS services. With fast SSD storage, scalable resources, and excellent support, Shape.Host provides the perfect environment for running Joomla and other demanding applications. Visit Shape.Host to learn more and get started today!