Moodle on AlmaLinux 9 – Scalable E-Learning on a Secure Enterprise Linux Foundation
Moodle (Modular Object-Oriented Dynamic Learning Environment) is a powerful, open-source learning management system (LMS) used by educational institutions, corporations, and training providers worldwide. When deployed on AlmaLinux 9, Moodle benefits from an enterprise-grade operating system that offers long-term support, binary compatibility with RHEL 9, and a hardened server environment suitable for production-grade e-learning platforms.
Why Use AlmaLinux 9 for Moodle?
AlmaLinux 9 is a natural fit for Moodle in enterprise and educational settings due to:
- Binary compatibility with Red Hat Enterprise Linux (RHEL) 9, ensuring stability and supportability
- Long-term support (until 2032), ideal for academic or training environments with multi-year plans
- Linux Kernel 5.14, which supports modern hardware and virtualization
- SELinux (enforcing) and system hardening tools to enhance LMS security
- Systemd and DNF package management, streamlining service orchestration and dependency resolution
- EPEL and Remi repositories, providing up-to-date PHP and database packages required by Moodle
These features make AlmaLinux 9 highly suitable for deploying secure, performant, and scalable Moodle environments.
Moodle Architecture on AlmaLinux 9
Moodle uses a traditional web application stack (LAMP or LEMP), which maps efficiently onto AlmaLinux 9:
- Web Server: Apache HTTPD or NGINX, both available in AlmaLinux repositories
- PHP Runtime: Moodle supports PHP 8.0–8.2; Remi repository provides compatible versions with extensions
- Database Backend: PostgreSQL or MariaDB (recommended); Moodle requires transactional support
- Moodle Application: PHP-based modular framework with theming, plugins, and API capabilities
- File Storage: Local disk, NFS, or object storage (e.g., S3-compatible) for course materials and user uploads
Moodle’s modularity allows easy customization and expansion through hundreds of plugins for attendance, grading, analytics, and communication.
Key Features of Moodle on AlmaLinux 9
| Feature | Description |
|---|---|
| Course Management | Creation and organization of classes, modules, assignments, quizzes |
| User Roles & Access | Fine-grained control over student, teacher, and admin permissions |
| Mobile-Friendly | Responsive UI and support for Moodle mobile app |
| Plugin Ecosystem | Extendable with over 1,700 community-contributed plugins |
| Scalable Deployment | Supports clustered deployments and external storage/database separation |
| Multilingual Support | 100+ languages with built-in language packs |
| RESTful APIs & LTI | Integration with external systems like SIS, CRM, CMS, or external LMSs |
| Reporting and Logs | Built-in analytics, audit trails, and SCORM/xAPI tracking |
Use Cases and Industry Applications
Moodle on AlmaLinux 9 is ideal for:
- Universities and schools seeking a customizable, open-source LMS
- Corporate training departments implementing employee upskilling platforms
- Certification organizations needing secure exam and grading workflows
- Non-profits and NGOs providing global education access at low cost
- Government agencies delivering internal training and compliance programs
Moodle’s flexibility and extensive REST/webhook support also make it viable for integration into complex educational technology ecosystems.
Performance and Scalability
Moodle can be scaled vertically or horizontally, and AlmaLinux 9 supports key performance techniques:
| Optimization Area | Details |
|---|---|
| Opcode Caching | Use PHP OPcache for faster script execution |
| Database Tuning | Optimize PostgreSQL/MariaDB buffer pool, slow query log, indexes |
| Object Caching | Integrate Redis or Memcached for session and application caching |
| Static File Offloading | Serve static files via NGINX or CDN |
| Load Balancing | Use HAProxy or NGINX in front of multiple Moodle web nodes |
Rocky Linux 9’s predictable performance and compatibility with cloud-native tools allow Moodle to operate efficiently in both on-prem and hybrid deployments.
Security Considerations
AlmaLinux 9 provides a hardened base for Moodle, supporting:
| Security Feature | Relevance to Moodle |
|---|---|
| SELinux | Enforces least-privilege access control for web and PHP services |
| HTTPS | Moodle requires TLS for login and API security |
| FirewallD | Control access to HTTP(S), DB, Redis, and SMTP ports |
| Fail2Ban | Protect against brute-force login attempts |
| Auditd / OpenSCAP | Monitor file/system changes, validate against compliance profiles |
| Secure PHP settings | disable_functions, expose_php, and session.cookie_secure hardening |
With strong OS-level defenses, Moodle on AlmaLinux 9 can meet data protection requirements in education and healthcare sectors (e.g., FERPA, GDPR, HIPAA).
Comparison with Other LMS Platforms
| Feature | Moodle | Canvas LMS | Blackboard | Google Classroom |
|---|---|---|---|---|
| Open-source | ✅ Yes | Partially (core only) | ❌ Proprietary | ❌ Proprietary |
| Self-hostable | ✅ Full control | ✅ (Limited via Docker) | ❌ Hosted only | ❌ Hosted only |
| Plugin Ecosystem | 1,700+ | Limited | Limited | Very limited |
| SCORM/xAPI Compliance | ✅ Full | ❌ Partial | ✅ Yes | ❌ No |
| Mobile Support | ✅ Native apps | ✅ | ✅ | ✅ |
| Enterprise Readiness | ✅ Proven | ✅ Growing | ✅ Legacy dominant | ❌ Classroom-focused |
Moodle provides the greatest flexibility and ownership, especially for institutions that need control over data, features, and deployment models.
Running Moodle on AlmaLinux 9 delivers a secure, stable, and scalable learning management system well-suited for institutional and corporate learning. With RHEL compatibility, extended support, and integration flexibility, this stack enables complete control over content, performance, and privacy—while benefiting from a global open-source community and ecosystem.
Step 1: Set Up a Server Instance on Shape.Host
Before starting, you need a clean AlmaLinux 9 VPS. Shape.Host offers flexible cloud VPS hosting that is ideal for deploying educational platforms like Moodle.
Create a VPS:
Go to https://shape.host and log in.
Click “Create” from the dashboard.
Choose “Instance” as your resource type.
Select a server location (data center) near your audience (e.g., Germany, Netherlands, or USA).
Choose AlmaLinux 9 (64-bit) as the operating system.
Pick a plan with at least 2 CPUs, 4 GB RAM, and 20 GB SSD.
Click “Create Instance” and wait for it to provision.
Copy the IP address from the Resources section.
Connect via SSH
On Linux/macOS:
ssh root@your_server_ip
On Windows (with PuTTY):
- Download PuTTY.
- Enter your instance’s IP in the Host Name field.
- Use port
22, select SSH, then click Open and log in asroot.
Step 2: Install Apache, MariaDB, PHP, and Required Extensions
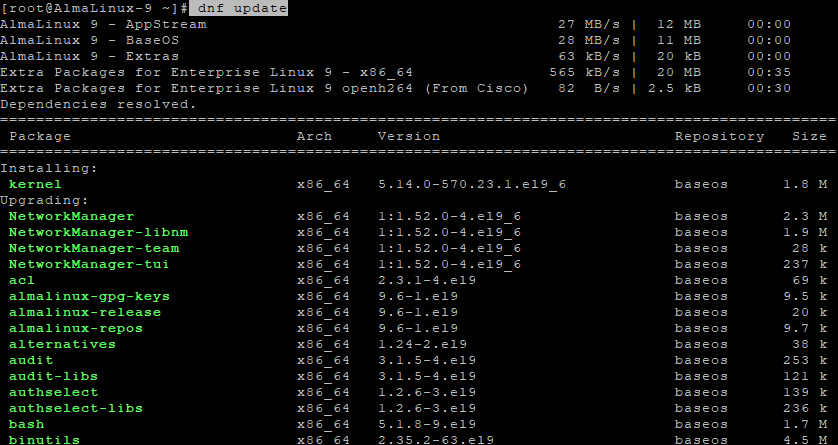
1. Update system packages:
dnf update
2. Enable EPEL repository:
dnf install epel-release

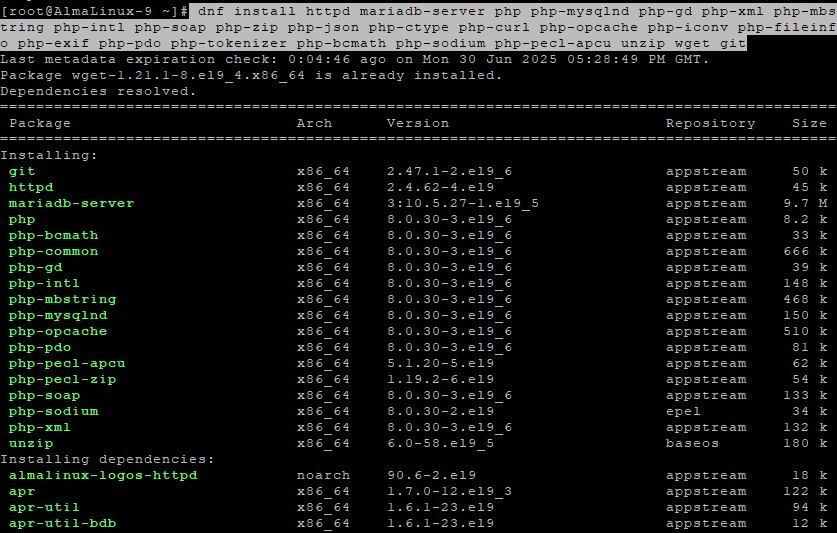
3. Install required software:
dnf install httpd mariadb-server php php-mysqlnd php-gd php-xml php-mbstring php-intl \
php-soap php-zip php-json php-ctype php-curl php-opcache php-iconv php-fileinfo \
php-exif php-pdo php-tokenizer php-bcmath php-sodium php-pecl-apcu unzip wget git
4. Enable and start Apache and MariaDB:
systemctl enable --now httpd mariadb

Step 3: Configure Firewall
1. Start and enable the firewall:
systemctl unmask firewalld
systemctl enable firewalld
systemctl start firewalld

2. Open required ports:
firewall-cmd --permanent --add-service=http
firewall-cmd --permanent --add-service=https
firewall-cmd --reload

Step 4: Configure the Database for Moodle
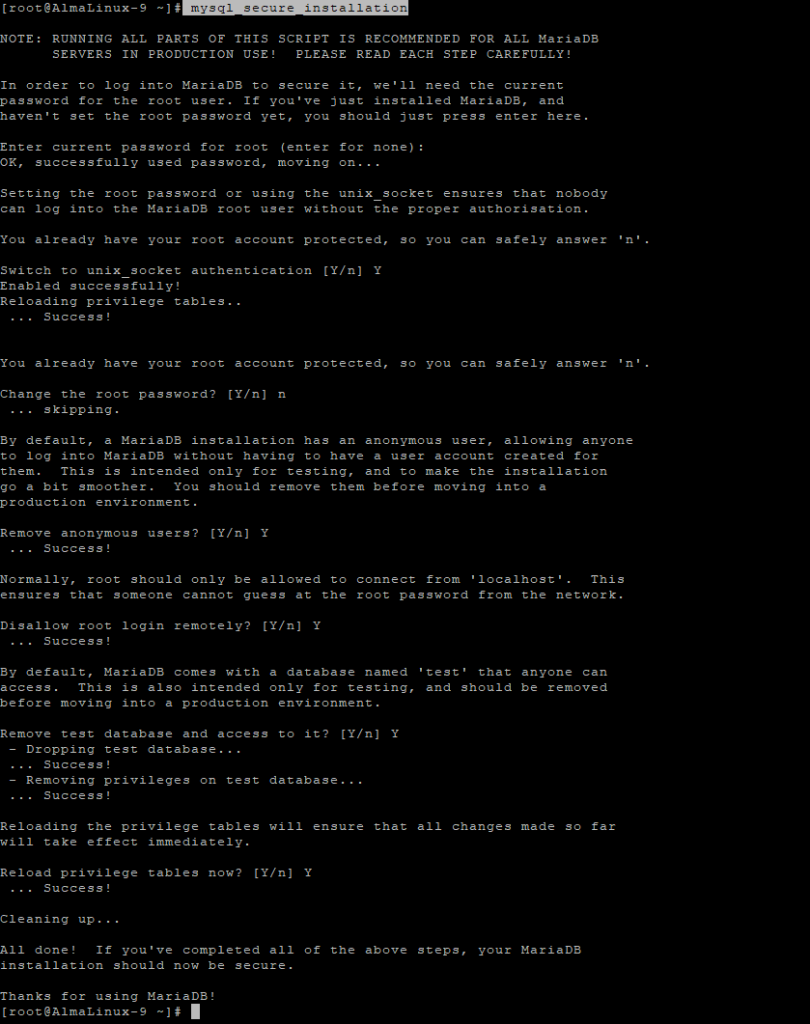
1. Secure MariaDB:
mysql_secure_installation
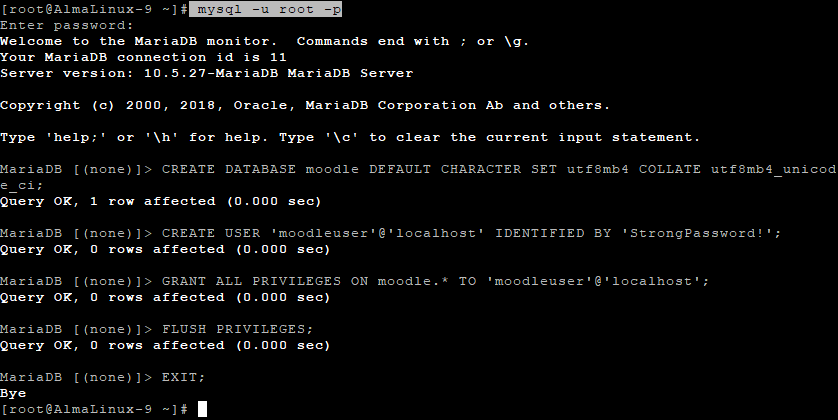
2. Log in to MariaDB:
mysql -u root -p
Inside MariaDB, create the database and user:
CREATE DATABASE moodle DEFAULT CHARACTER SET utf8mb4 COLLATE utf8mb4_unicode_ci;
CREATE USER moodleuser@localhost IDENTIFIED BY 'StrongPassword';
GRANT ALL PRIVILEGES ON moodle.* TO moodleuser@localhost;
FLUSH PRIVILEGES;
EXIT;
Step 5: Download and Set Up Moodle
1. Navigate to web root:
cd /var/www/
2. Clone the Moodle stable branch:
git clone -b MOODLE_403_STABLE git://git.moodle.org/moodle.git

3. Set permissions:
chown -R apache:apache moodle
chmod -R 755 moodle
4. Create Moodle data directory:
mkdir /var/www/moodledata
chown -R apache:apache /var/www/moodledata
chmod -R 755 /var/www/moodledata

Step 6: Create Apache Virtual Host
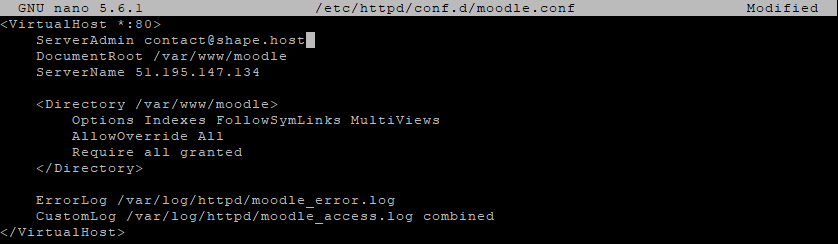
Create a config file for Moodle:
nano /etc/httpd/conf.d/moodle.conf
Paste the following:
<VirtualHost *:80>
    ServerAdmin admin@example.com
    DocumentRoot /var/www/moodle
    ServerName your-domain.com

    <Directory /var/www/moodle>
        Options Indexes FollowSymLinks MultiViews
        AllowOverride All
        Require all granted
    </Directory>

    ErrorLog /var/log/httpd/moodle_error.log
    CustomLog /var/log/httpd/moodle_access.log combined
</VirtualHost>
Step 7: Adjust PHP Settings
Edit the PHP configuration:
nano /etc/php.ini
Update these values as needed for Moodle (minimum requirement):
max_input_vars = 5000Step 8: Restart Apache
systemctl restart httpd

Step 9: Complete Moodle Installation via Web Interface
Visit:
http://your-server-ip/
Then follow the web installer:
Sure! Here’s a complete and concise guide based on all your uploaded Moodle web installation screenshots:
Moodle Web Installation Guide
This guide walks you through the full Moodle web installer, from language selection to admin dashboard access.
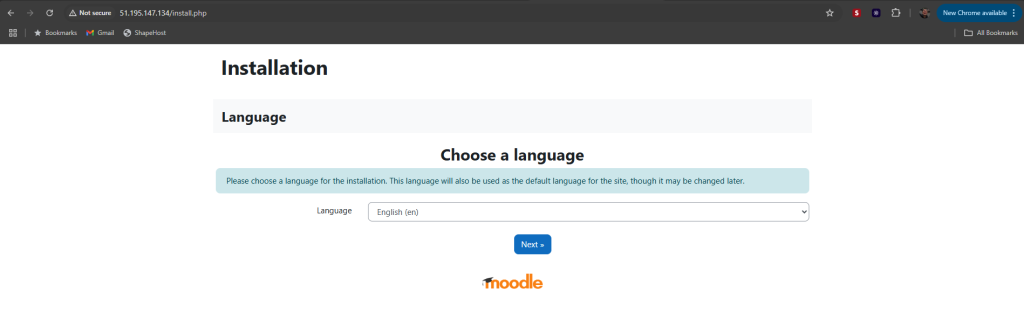
1. Choose Installation Language
Select the default language for the installation and site interface.
➡️ Click Next
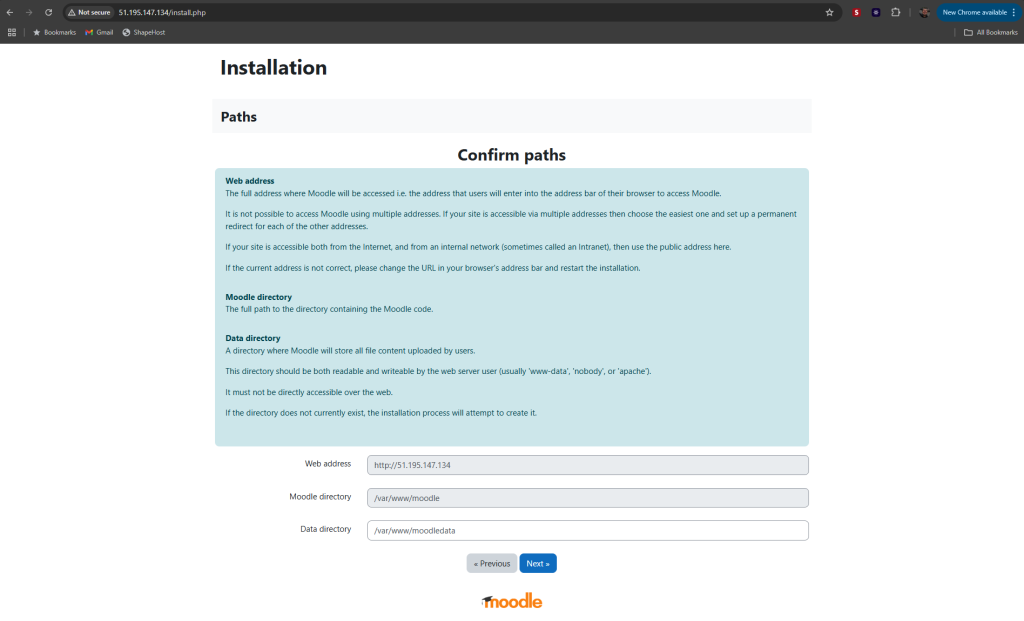
2. Confirm Paths
- Web address: Auto-filled (can be adjusted if needed)
- Moodle directory: Location of Moodle core files (e.g.
/var/www/moodle) - Data directory: Must be writable and not web-accessible (e.g.
/var/www/moodledata)
➡️ Click Next
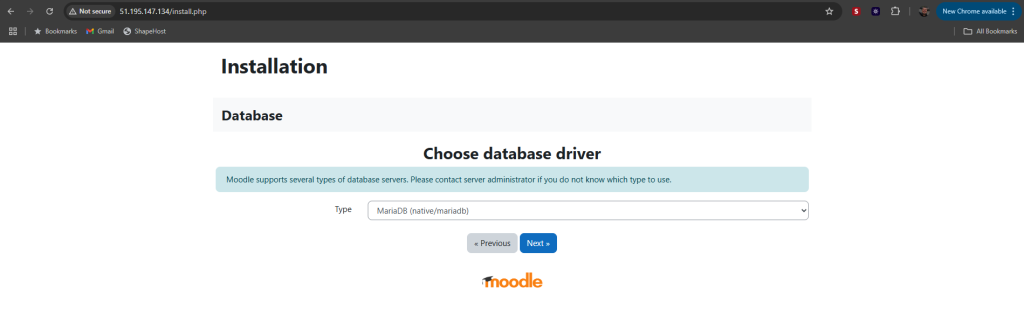
3. Select Database Driver
Choose your database type. For MariaDB or MySQL, use:
MariaDB (native/mariadb)
➡️ Click Next
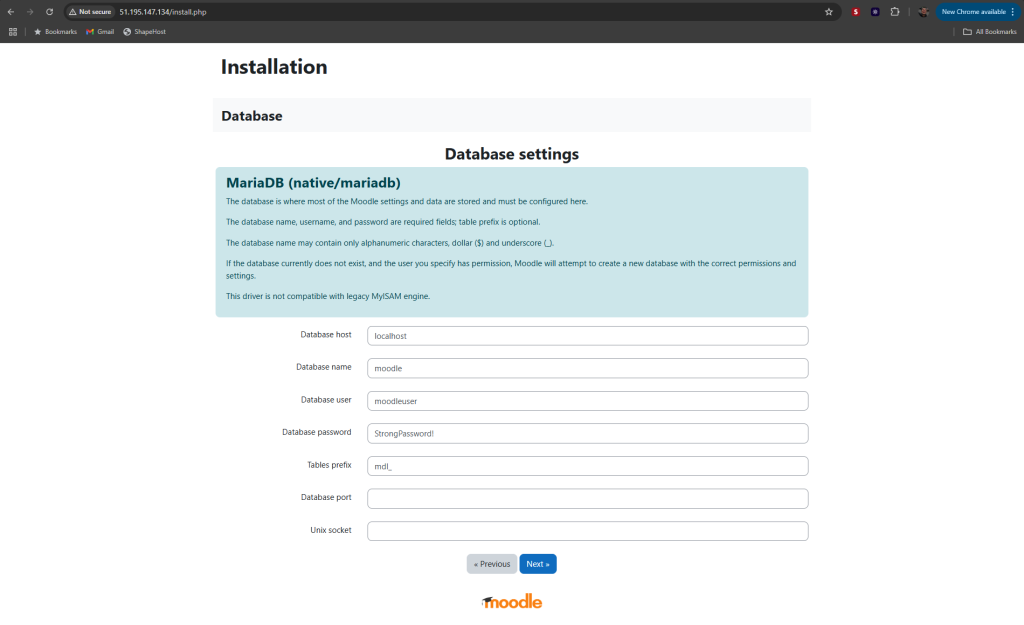
4. Database Settings
Fill in database connection details:
- Host:
localhost - Name:
moodle - User:
moodleuser - Password: your password
- Optional: table prefix (
mdl_)
➡️ Click Next
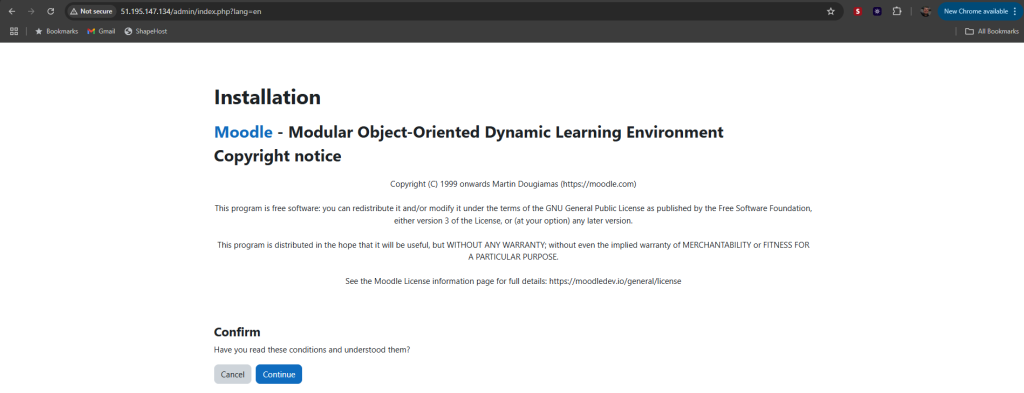
5. Accept License
Review the GNU GPL v3 license terms.
➡️ Click Continue
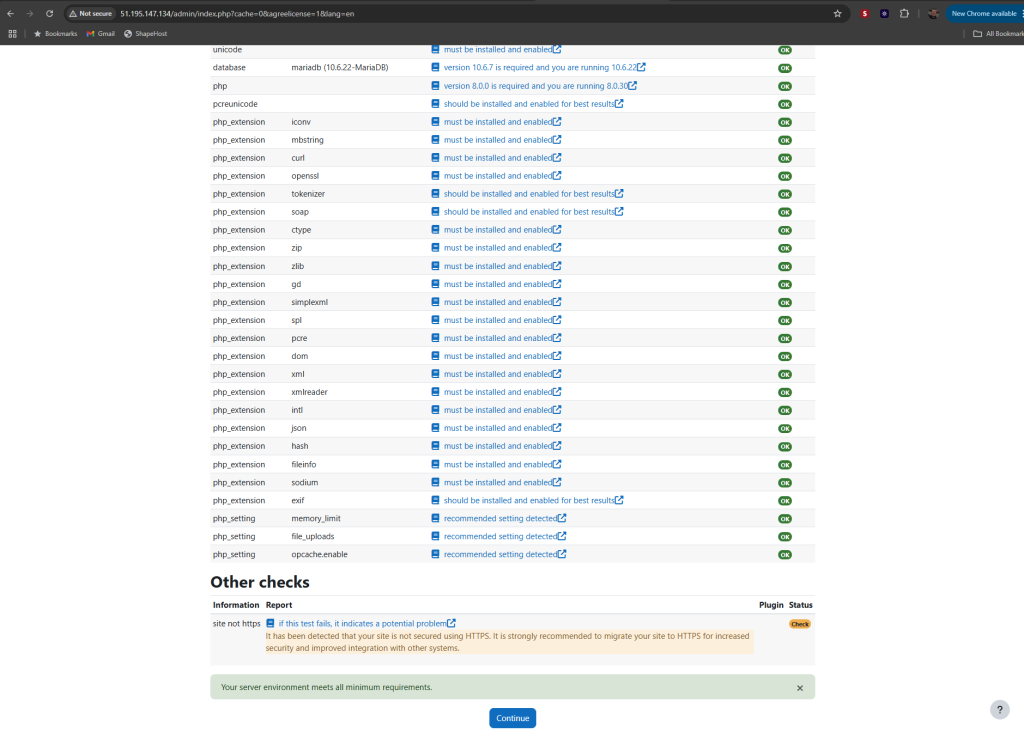
6. Server Environment Check
Moodle checks PHP version, extensions, and database.
- ✅ All requirements should be OK
- ⚠️
httpswarning is optional (you can fix later)
➡️ Click Continue
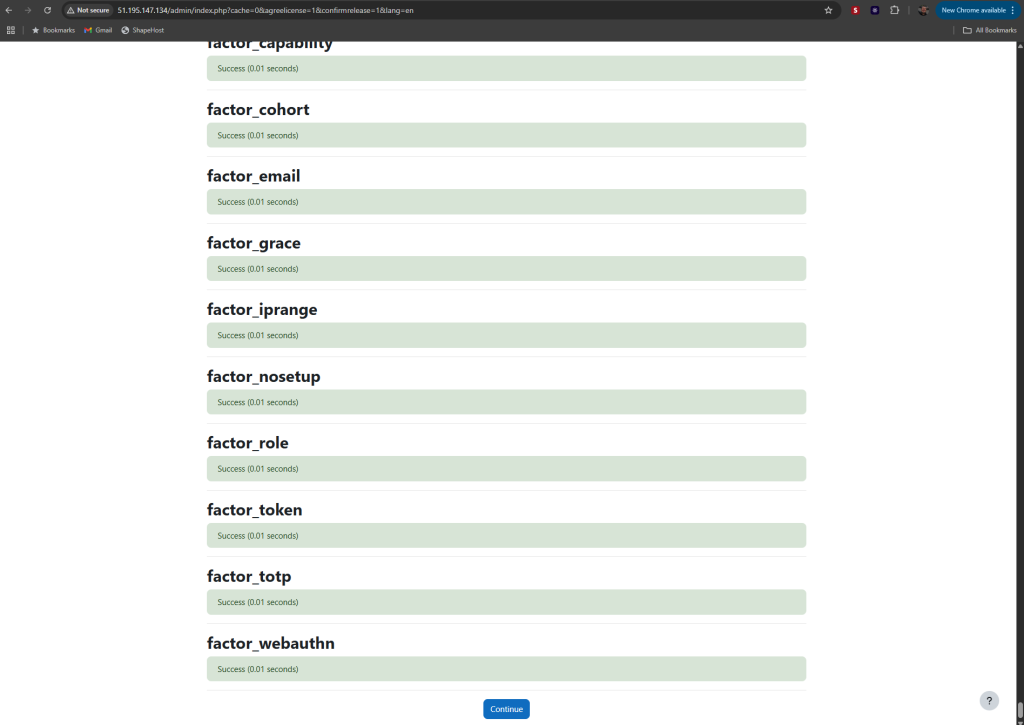
7. Install Plugins
Moodle installs core plugins, including authentication factors.
- All should complete with Success
➡️ Click Continue
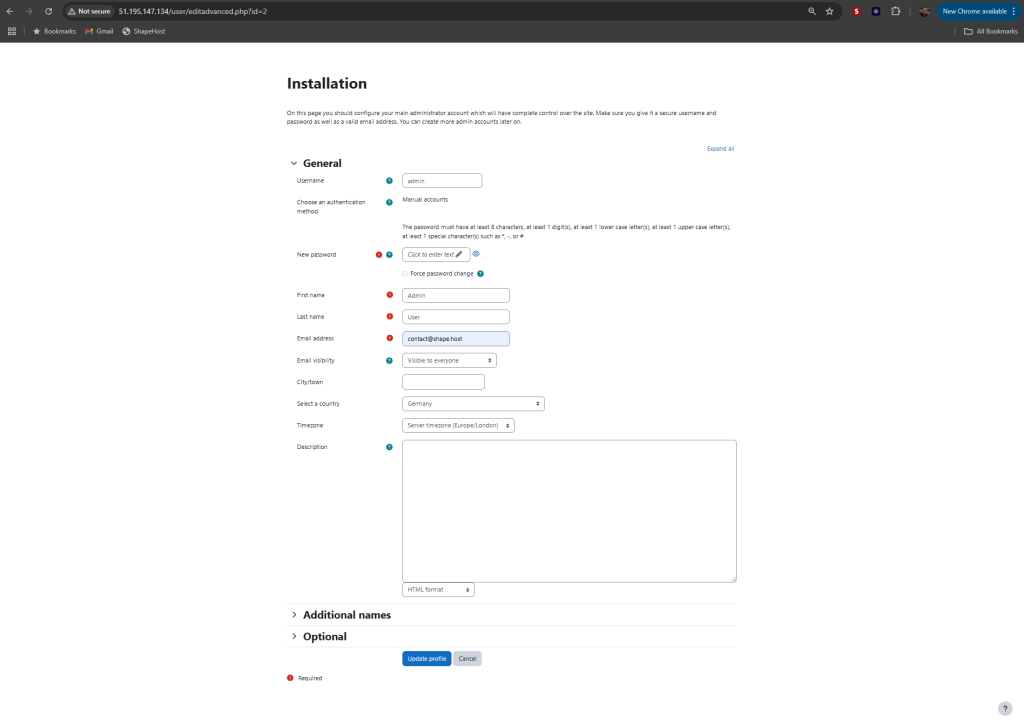
8. Create Admin Account
Set up the main administrator account:
- Username, password, name, email, timezone, etc.
- Password must be strong (uppercase, lowercase, digit, special character)
➡️ Click Update profile
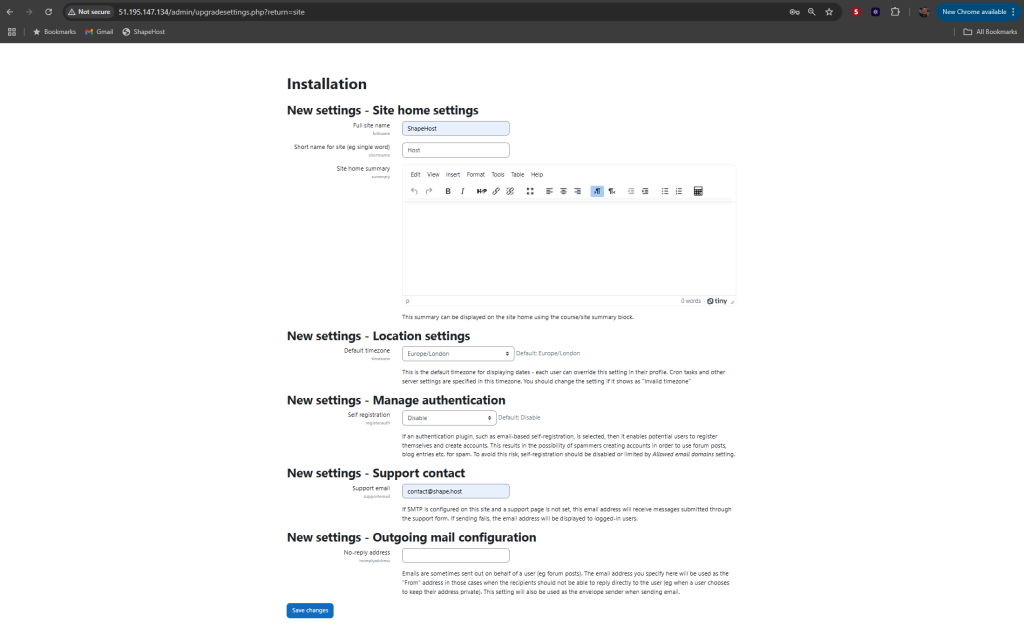
9. Site Configuration
Fill in initial site details:
- Site name & short name
- Time zone & registration options
- Support contact email
➡️ Click Save changes
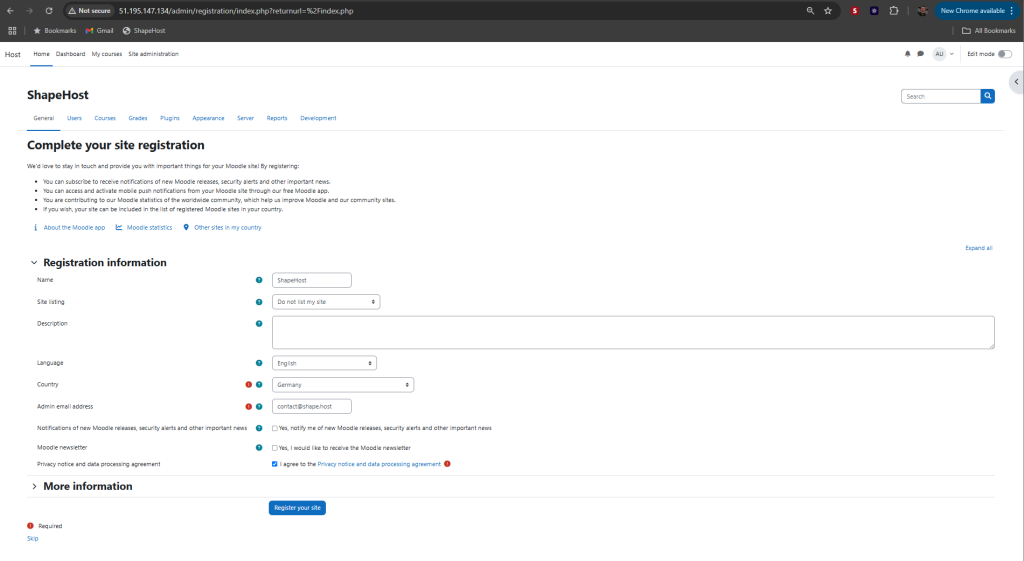
10. Site Registration (Optional)
Choose whether to register with moodle.org:
- Fill out name, language, email, and country
- Agree to the privacy terms
➡️ Click Register your site or Skip
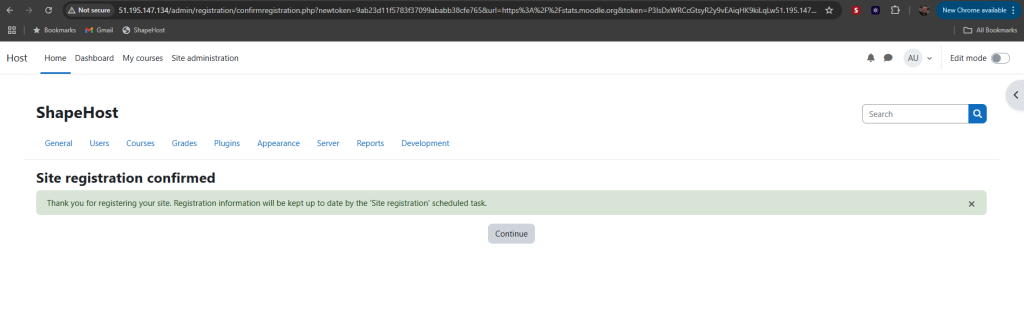
11. Registration Confirmation
You’ll see a message:
“Site registration confirmed.”
➡️ Click Continue
12. Admin Dashboard
Welcome to your Moodle dashboard!
- View your calendar, timeline, and site navigation
- Ready to create courses, manage users, and configure your platform
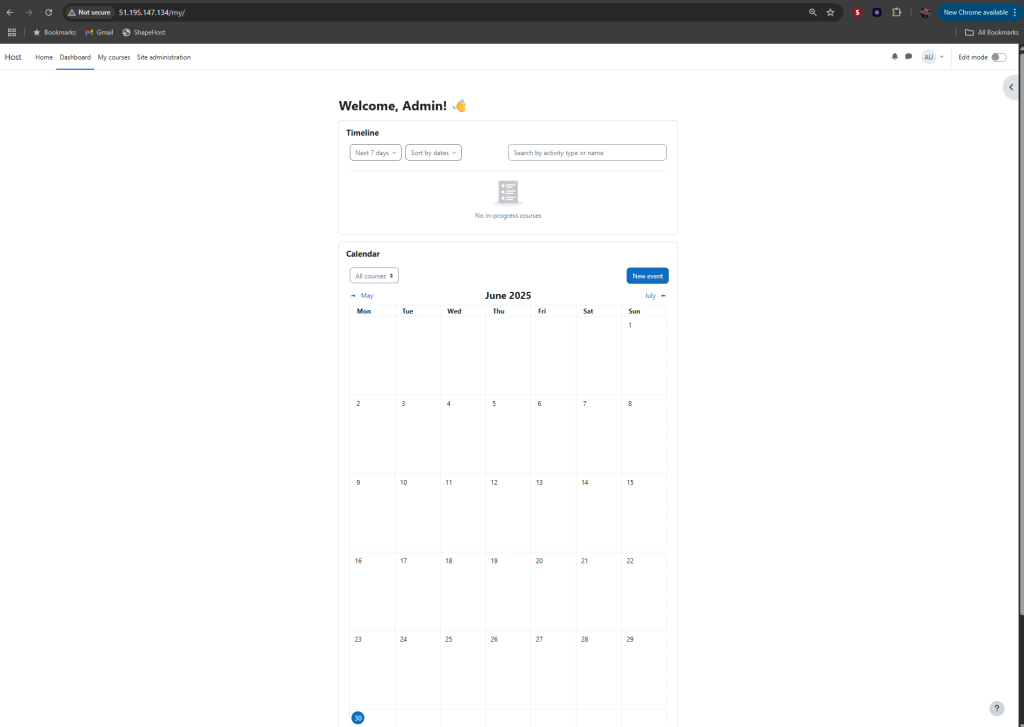
You’ve successfully installed Moodle on AlmaLinux 9, with Apache, MariaDB, and PHP. This setup provides a robust and scalable learning platform.
Deploy your e-learning solution confidently with Shape.Host Cloud VPS—performance-driven hosting built for education and enterprise.
Start now at https://shape.host.