ProcessWire CMS on AlmaLinux 9 — Developer-Centric Content Management on a Stable RHEL-Based System
ProcessWire is a robust, open-source CMS and content development framework (CMF) that prioritizes flexibility, clean code, and developer control. Running it on AlmaLinux 9, a 1:1 binary-compatible clone of RHEL 9, offers a secure, enterprise-ready platform ideal for scalable, long-term content management solutions.
Why Use AlmaLinux 9 for ProcessWire?
AlmaLinux 9 is designed for users who need the reliability of Red Hat Enterprise Linux (RHEL) without the vendor lock-in. It’s suitable for mission-critical applications and offers consistent behavior across development, staging, and production environments—ideal for deploying ProcessWire CMS.
| AlmaLinux 9 Feature | Benefit for ProcessWire CMS |
|---|---|
| Kernel 5.14 | Stable and performance-optimized for hosting workloads |
| PHP 8.1 via AppStream | Fully supported by ProcessWire 3.0.200+ and its ecosystem |
| Apache 2.4.57 / Nginx 1.22 | Compatible with ProcessWire’s flexible templating system |
| MariaDB 10.5+ / MySQL 8.0 | Officially supported by ProcessWire for content storage |
| SELinux (enforcing) | Adds hardened runtime security for production deployments |
| 10-year support lifecycle | Ideal for long-term, stable CMS projects |
ProcessWire CMS: Architectural Overview
ProcessWire is structured more like a development framework than a traditional CMS. It is especially attractive to developers who want precise control over content relationships, access levels, and rendered output.
Core Concepts:
- Page Tree – Content is structured as a hierarchy of pages, each with a type and custom fields.
- Template System – Templates are PHP files, giving developers full control over markup and logic.
- API-First –
$pages,$fields,$templates,$input, and more expose all data and system behavior programmatically. - Fieldtype Architecture – Flexible system to define text, images, files, repeaters, references, and more.
- Hooking System – Modify system behavior without modifying core code.
Ideal Use Cases for ProcessWire on AlmaLinux
- Bespoke websites and apps where templating freedom and content structure are key
- Multilingual websites with page-level translation and localized fields
- Internal tools, portals, and dashboards with fine-grained user permissions
- Agencies building reusable content platforms for clients
- Headless CMS solutions via ProcessWire’s direct API access
Compatible Web Stack Components on AlmaLinux 9
| Component | Compatibility Notes |
|---|---|
| Web Server | Apache (mod_php or PHP-FPM) or Nginx (with PHP-FPM) |
| PHP Version | PHP 8.1 available via AppStream (use Remi repo for newer versions) |
| Database | MariaDB 10.5+ and MySQL 8.0+ are supported by ProcessWire |
| Filesystem | XFS or Ext4; suitable for managing ProcessWire’s page and asset trees |
| HTTPS | Supported via OpenSSL 3.0, mod_ssl, and Let’s Encrypt integrations |
| FirewallD | Manage inbound access for HTTP/S, FTP, SSH easily |
Security Features with AlmaLinux 9 Integration
| Security Layer | Benefit for ProcessWire Hosting |
|---|---|
| SELinux | Controls access to files, logs, and services at runtime |
| Role-Based Access | Built into ProcessWire for admin users and field/template access |
| HTTPS | Easily set up with certbot, Apache, or Nginx SSL modules |
| PHP Hardening | Disable unnecessary functions like exec(), shell_exec() |
| Service Isolation | Systemd unit isolation for Apache, MariaDB, and PHP-FPM |
AlmaLinux’s RHEL-compatible ecosystem ensures that these features are not just available, but supported by enterprise-grade tooling (e.g., auditd, setroubleshoot, tuned).
Developer Experience on AlmaLinux 9
ProcessWire CMS provides a developer-first interface:
- All content is API-accessible via object-oriented PHP
- Fields and templates are editable via backend or JSON-based exports
- Sites can be version-controlled, with minimal configuration
- No vendor lock-in or theme engine—HTML and PHP live side-by-side
This makes ProcessWire extremely compatible with CI/CD pipelines, Git, and containerization strategies (e.g., Docker or Podman on AlmaLinux).
Comparison with Other CMS Platforms
| Feature/Aspect | ProcessWire | WordPress | Joomla | Drupal |
|---|---|---|---|---|
| Templating | Raw PHP | Theme-based + plugins | Override system | Twig templating |
| Custom Fields | Core functionality | Requires ACF/Metabox | Supported in core | Very complex |
| Security Model | Field/Page ACLs | Basic roles | Role-permission model | Granular, complex |
| Performance | Lean core | Plugin-heavy | Moderate | Requires caching setup |
| Developer API | Unified object API | Limited native | Available via plugins | Advanced, steep curve |
ProcessWire is ideal for custom projects where exact control over data structures, rendering logic, and permissions is critical.
Running ProcessWire CMS on AlmaLinux 9 combines a powerful, developer-centric CMS with a reliable, RHEL-compatible operating system. This stack is well-suited for:
- Long-term, stable hosting environments
- Custom website and application development
- Organizations that value transparent, scriptable deployments
- Teams requiring security features like SELinux and role-based access control
For developers and sysadmins seeking a clean, controlled, and secure web stack, ProcessWire + AlmaLinux 9 is a dependable pairing.
Step 1: Create a VPS Instance on Shape.Host
Before proceeding with the CMS installation, you’ll need a server running Alma Linux 9. We recommend using Shape.Host due to its speed, reliability, and seamless setup experience.
Follow these instructions to deploy your Alma Linux 9 instance:
Go to https://shape.host and log in to your account.
Click “Create”, then choose “Instance”.
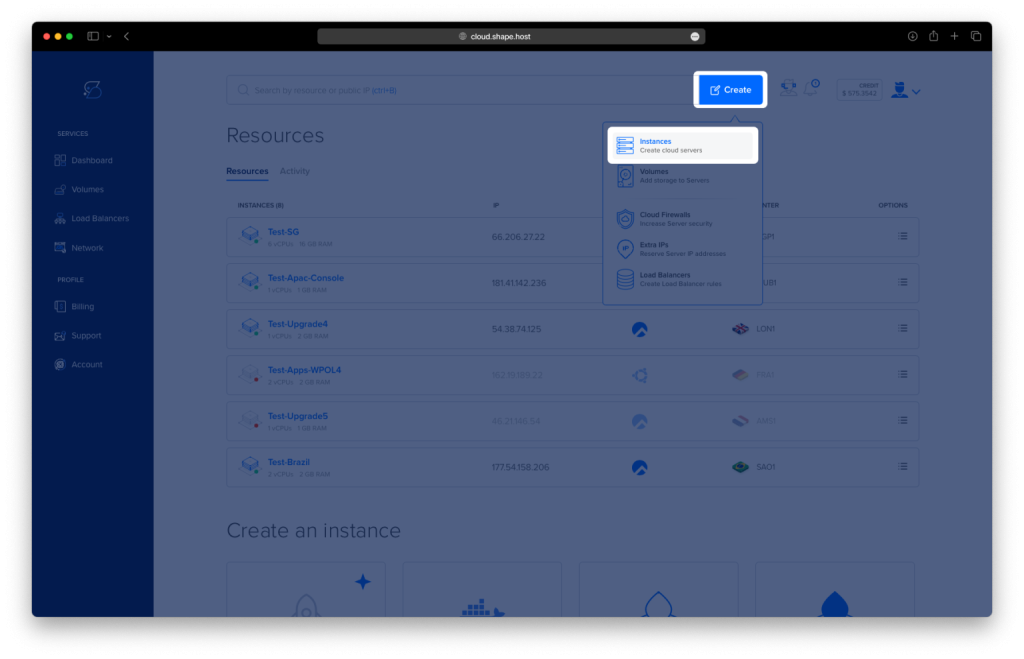
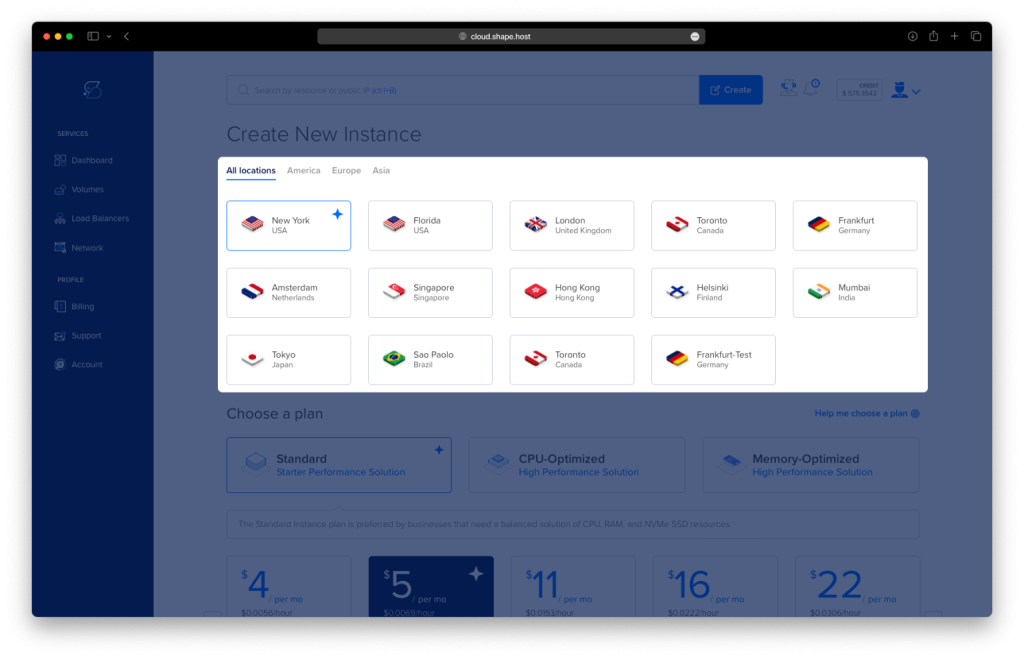
Choose your preferred server location for optimal latency.

Select Alma Linux 9 (64-bit) as the operating system.
Choose a hosting plan with at least 2 CPUs, 2 GB RAM, and 20 GB SSD.
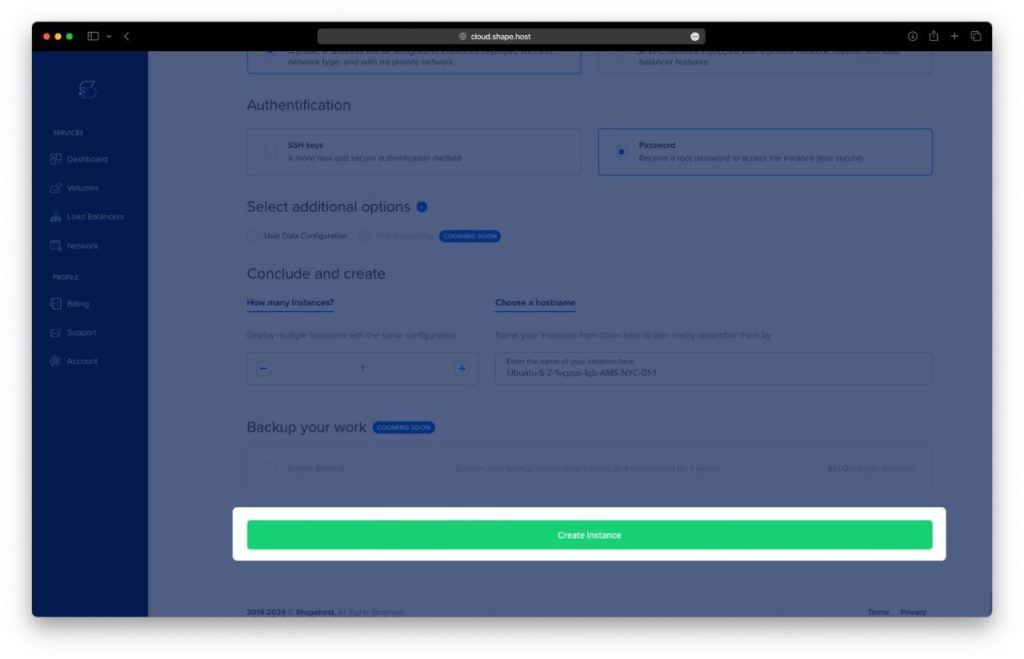
Click “Create Instance”.
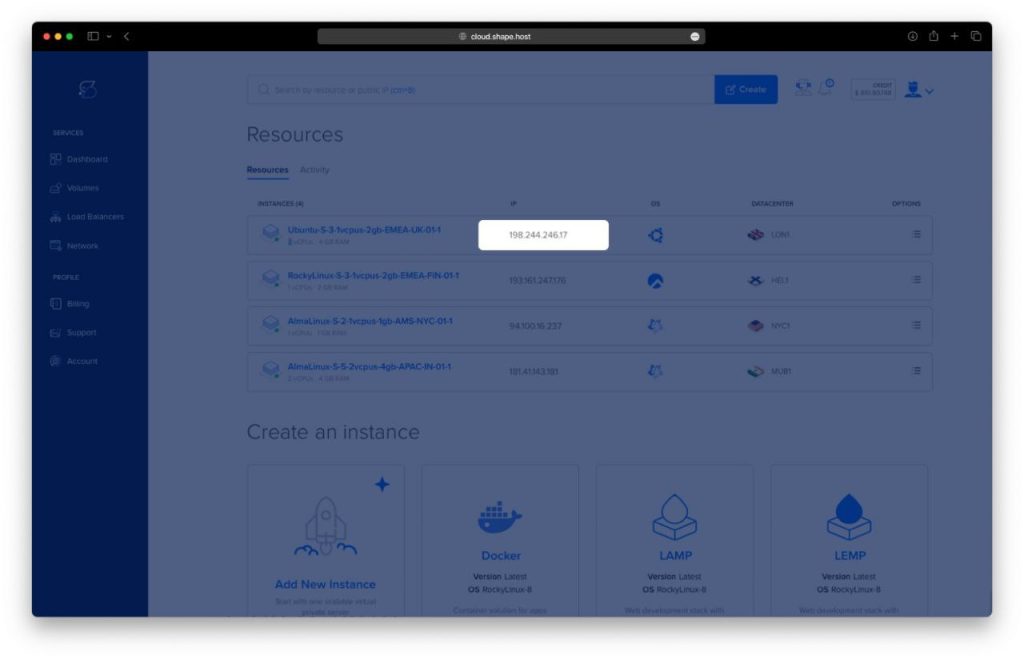
Once the instance is created, you’ll find its public IP address under the “Resources” section of the dashboard.
Make sure you note down your root credentials or SSH key — you’ll need them in the next step.
Step 2: Connect to Your Server Using SSH
On Linux/macOS
Open a terminal and use:
ssh root@your-server-ip
On Windows
Use PuTTY:
- Enter the server IP in the “Host Name” field:
root@your-server-ip - Click Open, then confirm any security prompt
Replace your-server-ip with the IP address of your Shape.Host server.
Step 3: Install ProcessWire CMS
We will now update the system, install dependencies, configure the web server, and set up the ProcessWire CMS.
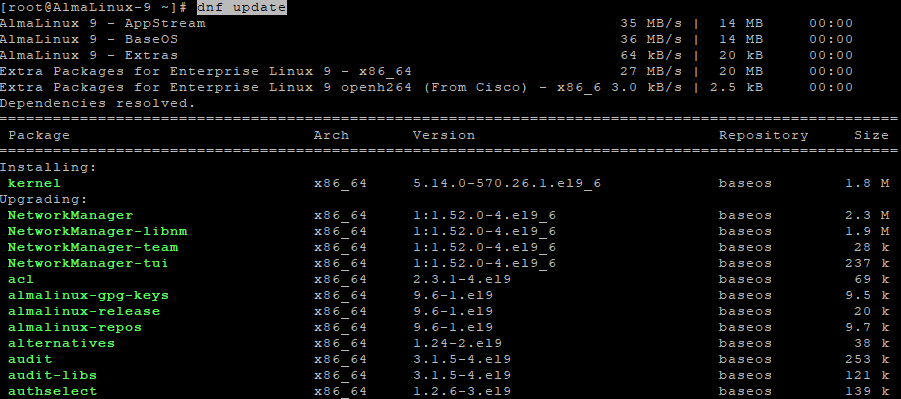
3.1 Update Your System
dnf update
Updates all installed packages to their latest versions.
3.2 Enable EPEL and Remi Repositories
dnf install epel-release
Installs the EPEL repository for extra packages.
dnf install https://rpms.remirepo.net/enterprise/remi-release-9.rpm
Adds the Remi repository required for modern PHP versions.

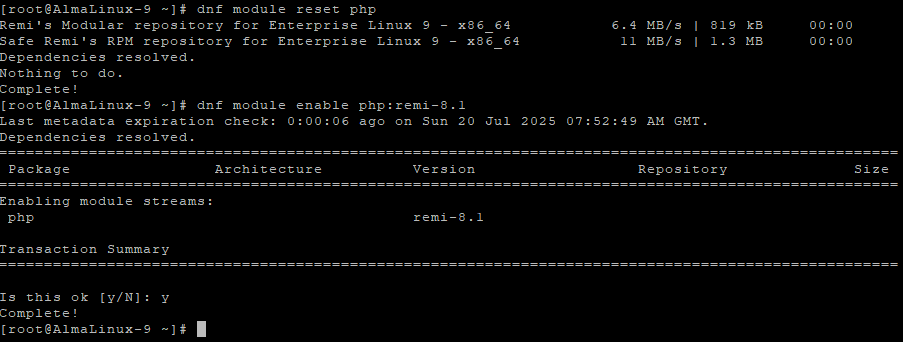
3.3 Enable PHP 8.1 via Remi
dnf module reset php
Resets any existing PHP module stream.
dnf module enable php:remi-8.1
Enables PHP 8.1 from Remi.
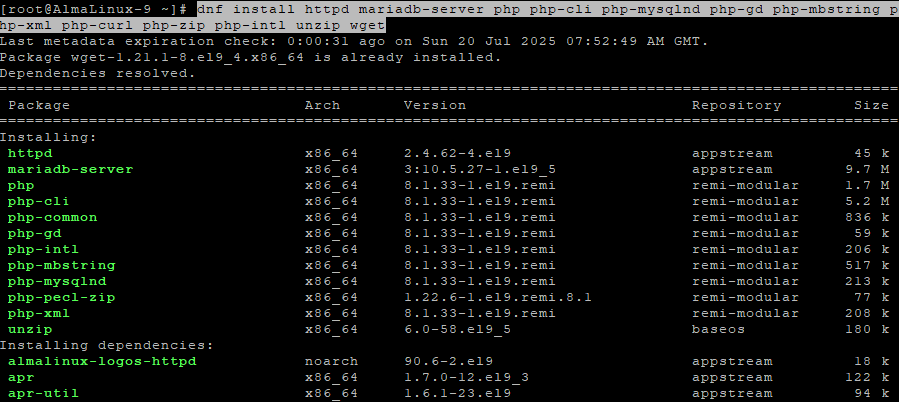
3.4 Install Apache, MariaDB, PHP, and Required Extensions
dnf install httpd mariadb-server php php-cli php-mysqlnd php-gd php-mbstring php-xml php-curl php-zip php-intl unzip wget
Installs the LAMP stack and necessary PHP extensions.
3.5 Start and Enable Apache and MariaDB
systemctl enable --now httpd mariadb
Starts and enables the services to auto-start at boot.

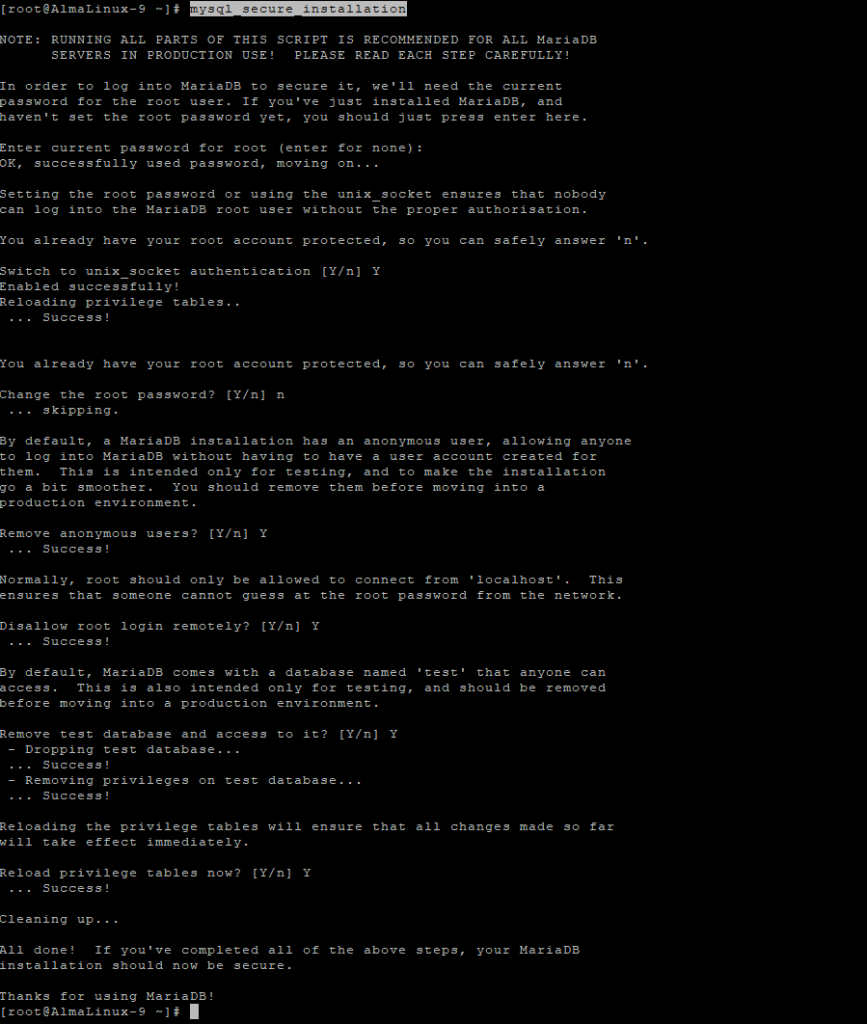
3.6 Secure the MariaDB Installation
mysql_secure_installation
Go through the prompts to set a root password, remove anonymous users, disallow remote root login, and remove test databases.
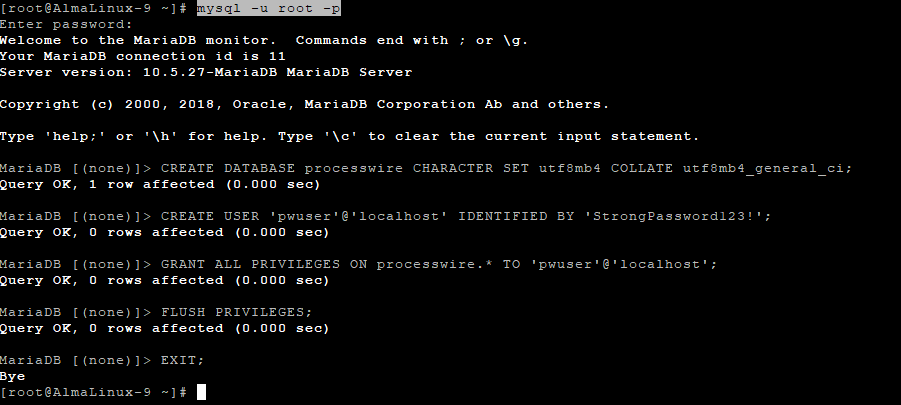
3.7 Create a Database and User for ProcessWire
mysql -u root -p
Then execute the following SQL commands:
CREATE DATABASE processwire CHARACTER SET utf8mb4 COLLATE utf8mb4_general_ci;
CREATE USER 'pwuser'@'localhost' IDENTIFIED BY 'StrongPassword123!';
GRANT ALL PRIVILEGES ON processwire.* TO 'pwuser'@'localhost';
FLUSH PRIVILEGES;
EXIT;
This creates the database and user with full access.
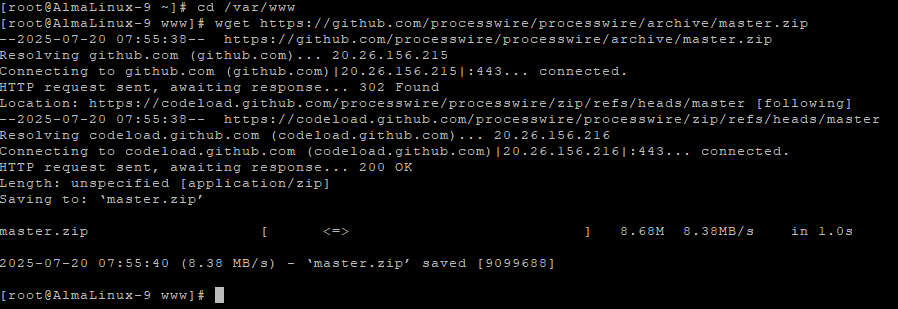
3.8 Download and Extract ProcessWire
cd /var/www
wget https://github.com/processwire/processwire/archive/master.zip
unzip master.zip
mv processwire-master processwire
rm -f master.zip
These commands download the latest ProcessWire CMS and organize the files.
3.9 Set Permissions for Apache
chown -R apache:apache /var/www/processwire
chmod -R 755 /var/www/processwire
Ensures Apache can read and execute the necessary files.

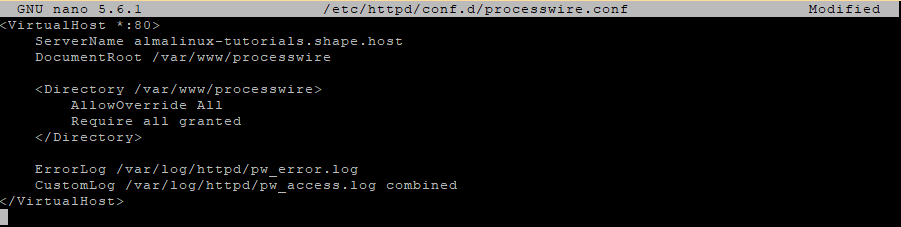
3.10 Configure Apache Virtual Host
Create a new config file:
nano /etc/httpd/conf.d/processwire.conf
Paste the following configuration, replacing your-domain.com:
<VirtualHost *:80>
    ServerName your-domain.com
    DocumentRoot /var/www/processwire

    <Directory /var/www/processwire>
        AllowOverride All
        Require all granted
    </Directory>

    ErrorLog /var/log/httpd/pw_error.log
    CustomLog /var/log/httpd/pw_access.log combined
</VirtualHost>
Save and exit the file.
3.11 Allow Database Access via SELinux
setsebool -P httpd_can_network_connect_db 1
This SELinux policy change lets Apache connect to MariaDB.
3.12 Restart Apache
systemctl restart httpd
Reloads Apache to apply the new virtual host.

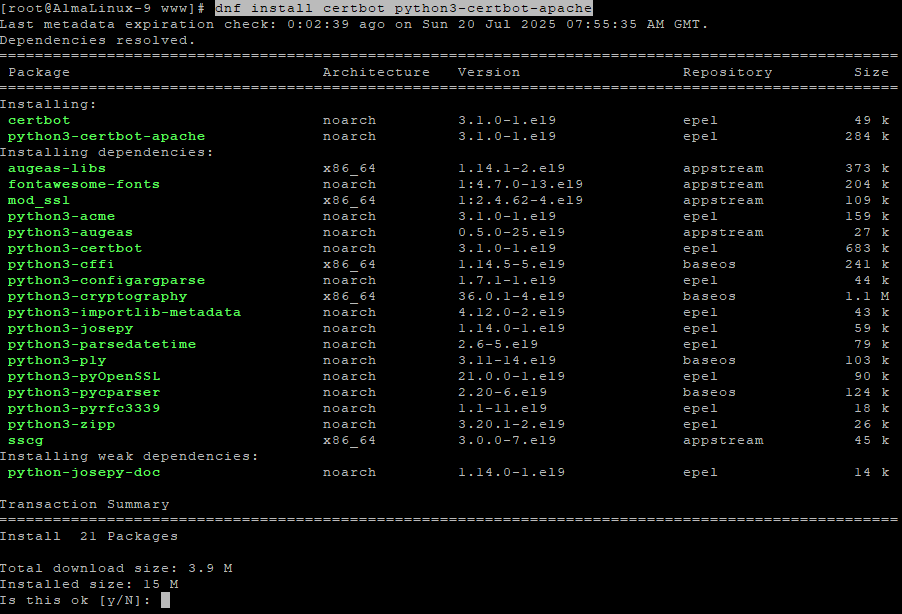
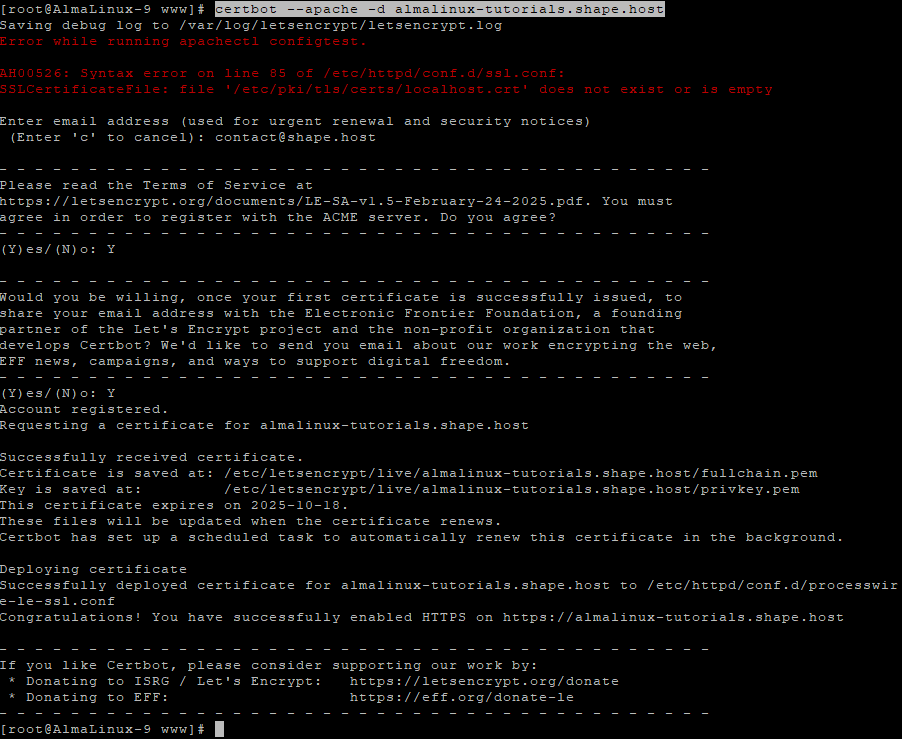
3.13 Install Certbot and Secure the Site
dnf install certbot python3-certbot-apache
certbot --apache -d your-domain.com
This installs Certbot and configures a free SSL certificate using Let’s Encrypt.
Step 4: Verify the Installation
Open your browser and navigate to:
http://your-domain.com
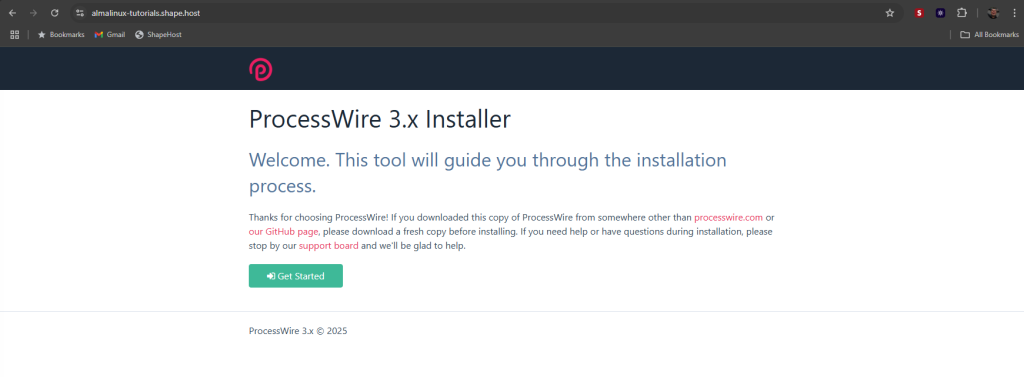
You should see the ProcessWire installation page. Follow the steps:Absolutely — here is another version of each step, subtly rephrased to maintain clarity while making the content unique and reusable:
Step 1 – Launch the Installer
You’ve arrived at the ProcessWire setup screen. Click Get Started to begin the configuration.
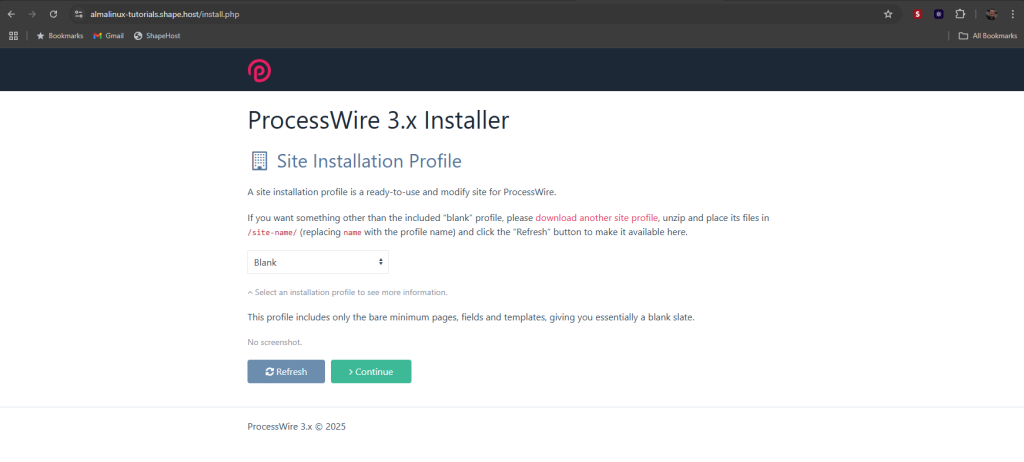
Step 2 – Pick a Site Profile
Select which site template to use. The Blank profile gives you a clean slate with no preset content.
Unless you’ve added a custom profile, leave this as is and click Continue.
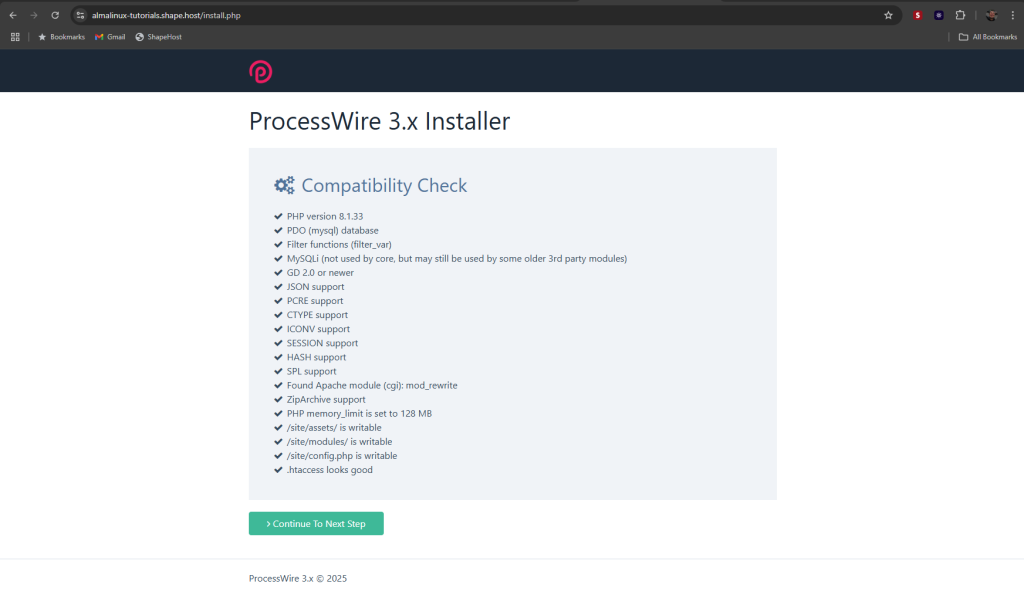
Step 3 – Check Server Compatibility
The installer will now verify that your hosting environment meets all the technical requirements.
If everything checks out, click Continue To Next Step.
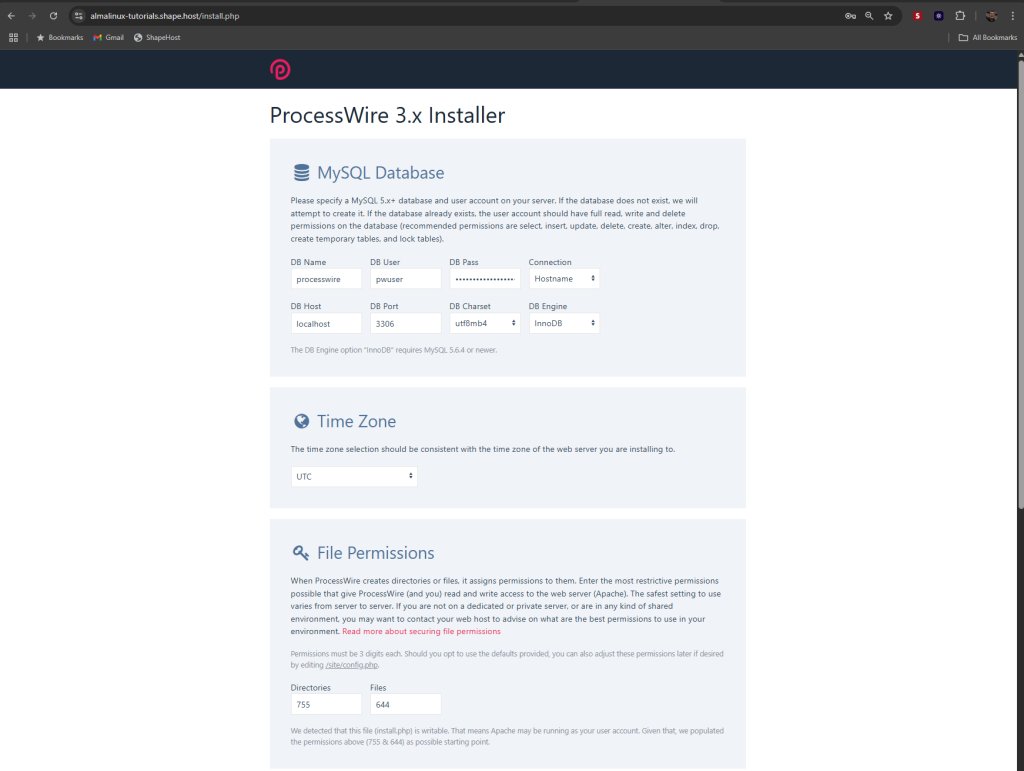
Step 4 – Configure Site and Database Settings
Database Info
Enter your database details:
- Database name, user, and password
- Keep the host set to
localhost, and leave the default port and engine settings
Time Zone
Choose the time zone that best fits your server’s location or your preference.
File Permissions
Default permissions (755 for folders, 644 for files) work for most setups.
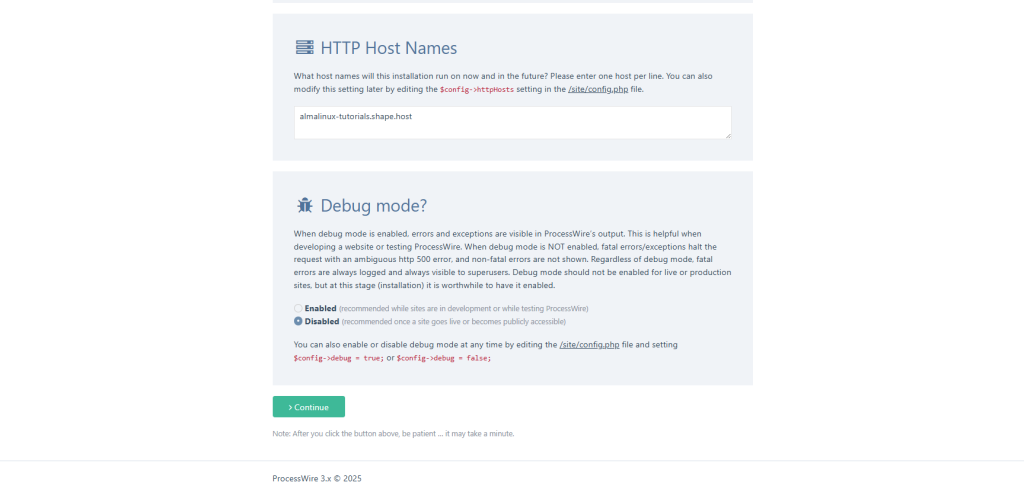
Host Configuration
Input your domain or server name (e.g. example.com).
Debug Mode
It’s safer to leave this off for live sites. Enable it only during development.
Press Continue to move forward.
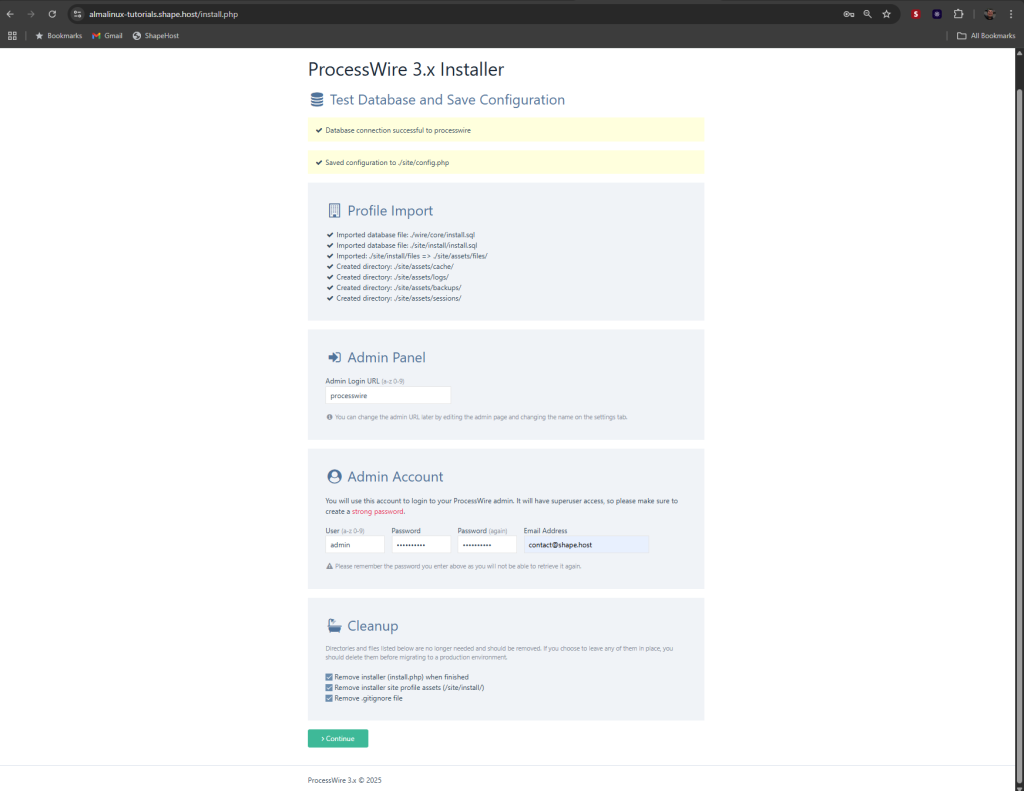
Step 5 – Final Details and Admin Setup
Import Log
You’ll see a summary of imported files and database content.
Admin Access URL
Choose the path you’ll use to log in to the backend, such as /admin or /processwire.
Admin Credentials
Set your administrator username, password, and contact email.
Remove Setup Files
It’s best to keep all cleanup options checked to delete installation files after setup.
Click Continue to finish.
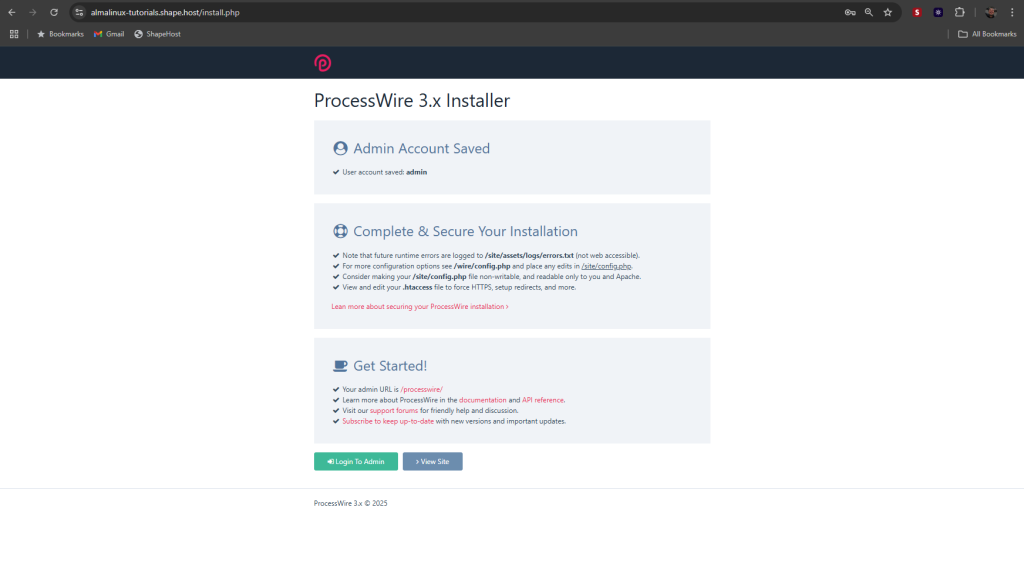
Step 6 – Setup Summary
The system confirms everything is installed and configured.
- Admin user is created
- Suggestions are listed to help secure your site (like updating permissions)
- The login path to your admin dashboard is shown
From here, you can go to the admin area or open the site’s front page.
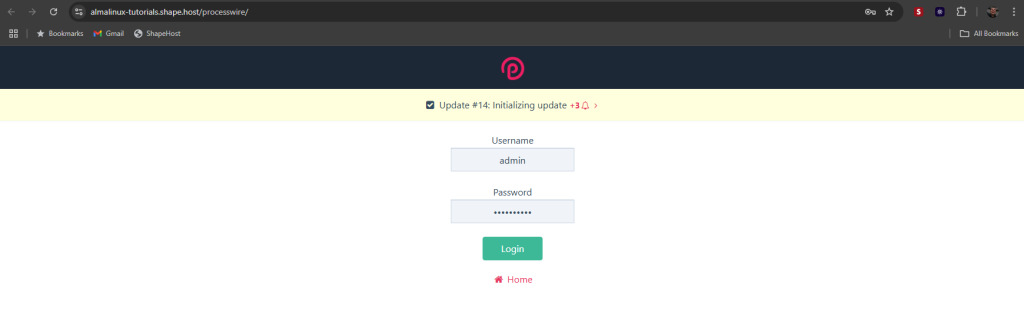
Step 7 – Log Into Admin Panel
Use your newly created admin credentials to log in.
Enter your username and password, then click Login.
Step 8 – Welcome to the Backend
You’re now in the ProcessWire admin interface.
- Use the Pages tab to build and manage content
- You can create new pages via the Add New button

Congratulations — you’ve successfully deployed ProcessWire CMS on Alma Linux 9! You now have a secure, optimized CMS environment ready to power any content-heavy website or application.
For unbeatable uptime, blazing-fast Cloud VPS, and world-class support, consider running all your future projects on Shape.Host.
Launch your own Lixu SSD VPS with Shape.Host now and enjoy scalable, developer-friendly infrastructure.