Spigot on Rocky Linux 9 – A Stable and Scalable Platform for Minecraft Server Hosting
Spigot is a highly optimized Minecraft server engine built upon CraftBukkit, offering enhanced performance and extensive plugin support. It’s widely used for running public and private Minecraft multiplayer servers and forms the backbone of many server networks thanks to its efficient memory use, configurable systems, and active development community.
Deploying Spigot on Rocky Linux 9, a CentOS replacement built for long-term support and binary compatibility with RHEL 9, gives server administrators a secure and reliable foundation for running Minecraft servers at scale.
What Is Rocky Linux 9?
Rocky Linux is a community-driven enterprise operating system that serves as a downstream rebuild of Red Hat Enterprise Linux (RHEL). It is functionally similar to AlmaLinux and was launched to fill the void left by CentOS Stream’s shift away from stable RHEL parity.
Key attributes of Rocky Linux 9:
- Built from RHEL 9 source packages
- Supported until at least 2032
- Follows a predictable release cycle and stable ABI
- Offers enterprise-level security and package consistency
Why Use Rocky Linux 9 for Spigot?
Spigot is a Java-based server application, and Rocky Linux 9 provides a clean, consistent, and long-supported environment for running Java workloads. It’s particularly suited for system administrators who need a stable platform for game hosting, with LTS support, SELinux for security, and systemd for service management.
| System Feature | Benefit for Spigot Hosting |
|---|---|
| OpenJDK 17/21 available | Compatible with modern Minecraft and Spigot builds |
| dnf module streams | Flexible management of Java, Node.js, and development tools |
| Kernel 5.14+ (RHEL base) | Proven stability and performance for network I/O and file systems |
| SELinux | Optional security enforcement for server processes |
| Firewalld | Simple firewall rules for port management (e.g., 25565) |
Spigot Server Architecture on Rocky Linux
- Java Runtime (OpenJDK): Required to run the Spigot
.jarfile - Spigot Server Core: Includes Minecraft protocol handling, world generation, and game logic
- Plugins: Installed under
/pluginsto extend server functionality - World Files: Stored in
/world,/world_nether, and/world_the_end - systemd Services: Used to auto-start the Spigot server at boot or after crash
Ideal Use Cases for Spigot on Rocky Linux 9
- Public Minecraft networks with 50–200+ players
- Plugin development environments for Java/Bukkit APIs
- Educational servers hosted on institution infrastructure
- Gaming communities that require uptime and plugin variety
- Base for Paper or Purpur forks that need reliable hosting
Benefits of Hosting Spigot on Rocky Linux 9
- ✅ Enterprise-Grade OS: Stable, tested, and supported for nearly a decade
- ✅ SELinux & Security Tools: Protect against unauthorized access and process abuse
- ✅ Lightweight & Efficient: No GUI or extra services, maximizing RAM/CPU for JVM
- ✅ EPEL support: Easy access to optional utilities and performance tools
- ✅ Docker/Podman Ready: Ideal for containerizing multiple Minecraft server instances
Optimization Tips for Spigot on Rocky Linux
- JVM Flags: Use
-Xmsand-Xmxto allocate appropriate RAM. Example:-Xms2G -Xmx4G. - Tick Rate Tuning: Adjust
spigot.yml,bukkit.yml, andpaper.yml(if using Paper) for entity and chunk control. - Firewall Rules: Open only the required Minecraft port (
25565) and restrict SSH access. - Systemd Service File: Create a
spigot.serviceto auto-start and restart the server. - Backups: Automate world backups using
cron,rsync, or snapshots.
Comparison: Rocky Linux 9 vs. Other Server OSes for Spigot
| Feature | Rocky Linux 9 | Ubuntu 24.04 | Debian 12 |
|---|---|---|---|
| Support Until | 2032 | 2029 | 2028 |
| Java Support | OpenJDK 17/21 via dnf | OpenJDK 21 via apt | OpenJDK 17/21 via apt |
| Security Framework | SELinux + Firewalld | AppArmor + UFW | AppArmor + iptables/nftables |
| Resource Overhead | Low | Moderate | Very low |
| Server Focus | Enterprise-grade | Developer/flexible | Minimalist |
Rocky Linux is ideal for long-running, production-grade servers where updates and configuration stability are critical.
Hosting Spigot on Shape.Host VPS with Rocky Linux 9
Running Spigot on a Shape.Host Cloud VPS with Rocky Linux 9 gives you:
- Full root access for JVM, firewall, and service tuning
- SSD storage for fast chunk loading and saves
- Scalable RAM and CPU plans to support larger player bases
- Secure isolated environments with full SELinux and firewall control
This setup is particularly powerful for game hosting providers or communities running multiple server types (e.g., lobby, minigame, and survival) across isolated containers or virtual machines.
Spigot on Rocky Linux 9 is a powerful and production-grade combination for Minecraft server hosting. Whether you’re running a small friends-only server or a 100-player modded network, Rocky Linux provides the security, consistency, and performance needed to keep your Spigot server online, optimized, and resilient.
Its enterprise-class lifecycle and RHEL compatibility make it especially attractive to professional server operators, hosting providers, and schools or companies running Minecraft as part of their educational or commercial infrastructure.
Step 1: Set Up a VPS Instance on Shape.Host
To host your Spigot server, start by provisioning a virtual server with Shape.Host.
Visit https://shape.host and log in.
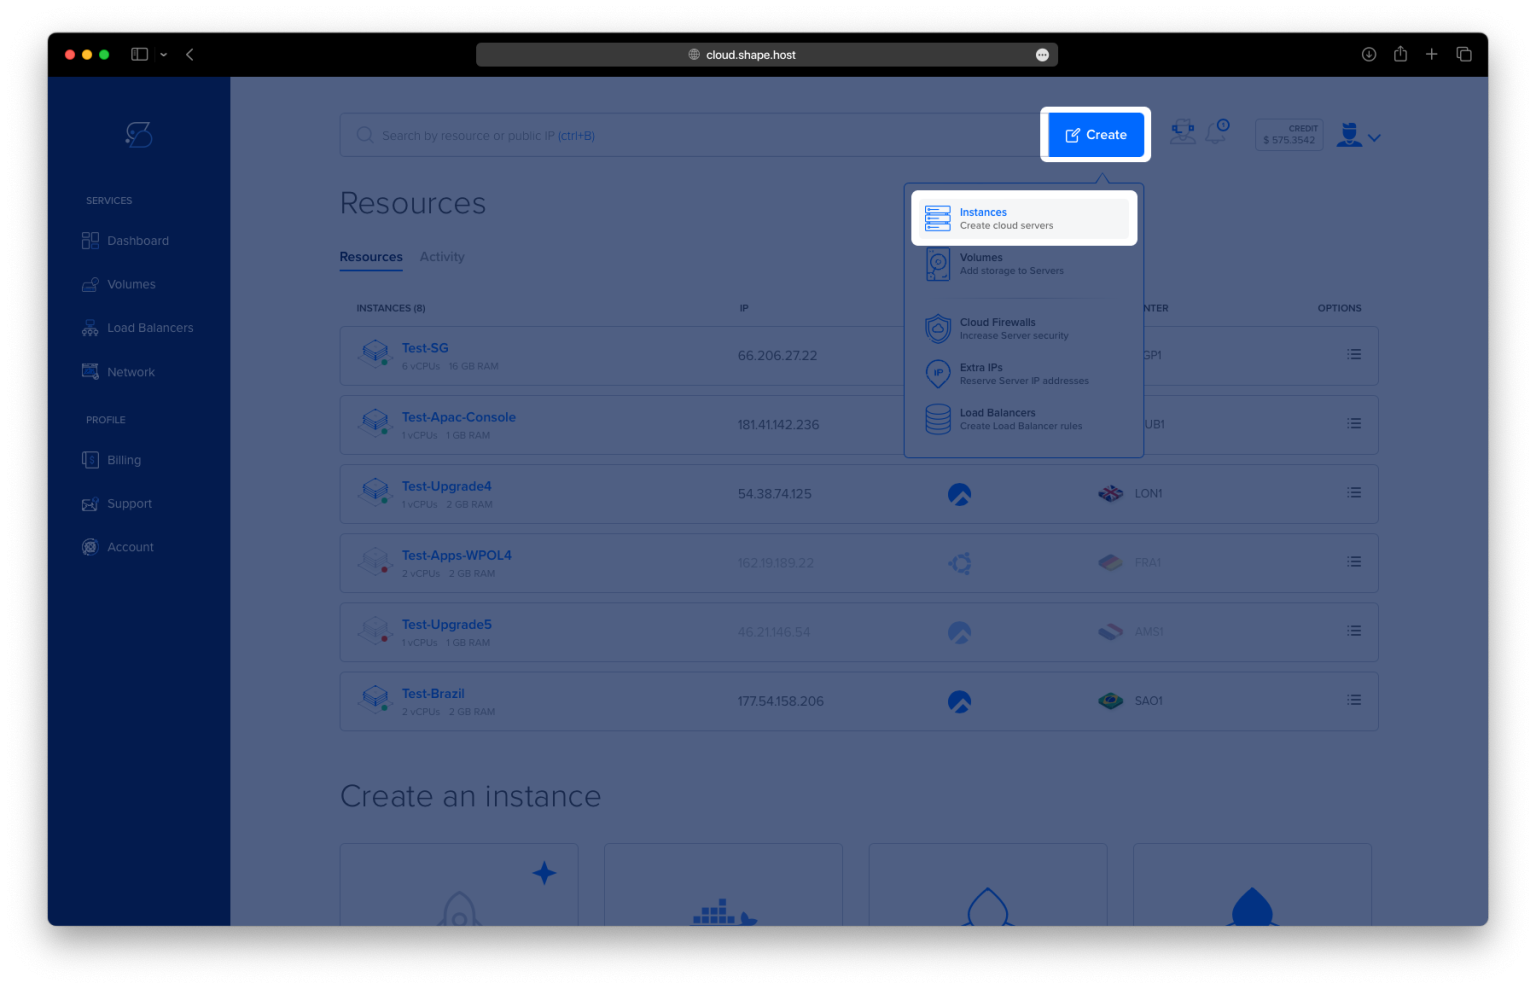
Click “Create” → “Instance.”

Use the following configuration:
Region: Closest to your player base

Operating System: Choose Rocky Linux 9 (64-bit)
Plan: Minimum 2 vCPUs, 4 GB RAM, 40 GB SSD

Click Create Instance

After deployment, copy the server’s public IP address

Step 2: Connect to Your Server
From Linux/macOS:
ssh root@your_server_ip
From Windows:
Use PuTTY, paste in your server IP, and log in as root.
Step 3: Install Required Software
Step 3.1 – Update the system
dnf update

Step 3.2 – Install Java 17, Git, and curl
dnf install git curl java-17-openjdk-devel
java-17-openjdk-devel: Needed to compile and run Spigot 1.20.4gitandcurl: Required for downloading and building the server

Step 4: Build Spigot from Source
Step 4.1 – Create a build directory
mkdir -p /opt/spigot
cd /opt/spigot
Step 4.2 – Download BuildTools.jar
curl -o BuildTools.jar https://hub.spigotmc.org/jenkins/job/BuildTools/lastSuccessfulBuild/artifact/target/BuildTools.jar

Step 4.3 – Compile Spigot
java -jar BuildTools.jar --rev 1.20.4
This step will take a few minutes. It downloads source files and builds
spigot-1.20.4.jar.


Step 5: Set Up the Spigot Server
Step 5.1 – Create the server directory
mkdir /opt/spigot-server
Step 5.2 – Move the compiled jar file
cp spigot-1.20.4.jar /opt/spigot-server/spigot.jar
cd /opt/spigot-server
Step 5.3 – Accept the EULA
echo "eula=true" > eula.txt

Step 6: Create a systemd Service
This lets you manage the server with systemctl.
Step 6.1 – Create a service unit
nano /etc/systemd/system/spigot.service
Paste:
[Unit]
Description=Spigot Minecraft Server
After=network.target

[Service]
WorkingDirectory=/opt/spigot-server
ExecStart=/usr/bin/java -Xms1G -Xmx2G -jar spigot.jar nogui
Restart=on-failure
User=root

[Install]
WantedBy=multi-user.target
🛡️ For better security, replace
User=rootwith a non-root user.

Step 7: Enable and Start the Server
Step 7.1 – Reload systemd to recognize the new service
systemctl daemon-reload
Step 7.2 – Enable Spigot to start at boot
systemctl enable spigot
Step 7.3 – Start the server
systemctl start spigot
Step 7.4 – Check the server status
systemctl status spigot
You should see output confirming that Spigot is running.

Step 8: Connect with Minecraft
Open your Minecraft client and connect using your server IP:
your_server_ip:25565
Make sure port 25565 is open in your firewall settings, if applicable.
You’ve now installed and configured Spigot on Rocky Linux 9, compiled it from source, and set it up to run as a managed system service.
Ready to build your multiplayer world?
Host it on Shape.Host Linux SSD VPS for fast, secure, and always-on gameplay.
Deploy now at https://shape.host